background image

See also

Knee-guard

Taillight assy.

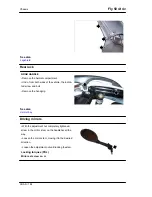
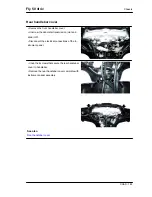
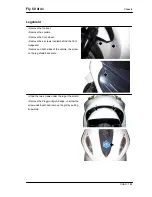
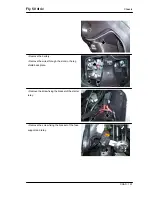
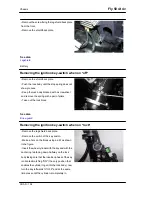
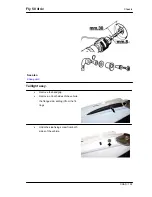
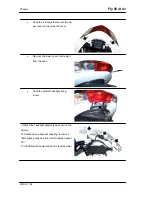
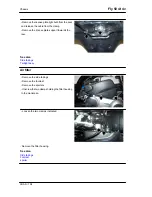
Remove the handgrip.

Remove, on both sides of the vehicle,

the flange side, sliding it from the fit-

tings.

Undo the side fixing screw from both

sides of the vehicle.

Fly 50 4t 4v

Chassis

CHAS - 193

Summary of Contents for Fly 50 4t 4v

Page 1: ...WORKSHOP MANUAL 677586 EN Fly 50 4t 4v ...

Page 2: ...and to make any changes to components parts or accessories which it considers necessary to improve the product or which are required for manufacturing or construction reasons Not all versions models shown in this publication are available in all countries The availability of each model should be checked at the official PIAGGIO sales network Copyright 2012 Piaggio C S p A All rights reserved Reprod...

Page 3: ...fer to the pages of this manual concerning specific tools and equipment and the special tools catalogue N B Provides key information to make the procedure easier to understand and carry out CAUTION Refers to specific procedures to carry out for preventing damages to the vehicle WARNING Refers to specific procedures to carry out to prevent injuries to the repairer Personal safety Failure to complet...

Page 4: ......

Page 5: ...CS CHARACTERISTICS CHAR TOOLING TOOL MAINTENANCE MAIN TROUBLESHOOTING TROUBL ELECTRICAL SYSTEM ELE SYS ENGINE FROM VEHICLE ENG VE ENGINE ENG SUSPENSIONS SUSP BRAKING SYSTEM BRAK SYS CHASSIS CHAS PRE DELIVERY PRE DE ...

Page 6: ...INDEX OF TOPICS CHARACTERISTICS CHAR ...

Page 7: ...ot breathe in the dust produced by the wear of the friction material Even though the latter contains no asbestos inhaling dust is harmful Maintenance rules Use original PIAGGIO spare parts and lubricants recommended by the Manufacturer Non original or non conforming spares may damage the vehicle Use only the appropriate tools designed for this vehicle Always use new gaskets sealing rings and split...

Page 8: ...amped on the right strut The engine prefix is stamped on the rear wall of the transmission crankcase VEHICLE IDENTIFICATION Specification Desc Quantity Chassis prefix RP8C52 Engine prefix C522M Dimensions and mass Characteristics Fly 50 4t 4v CHAR 8 ...

Page 9: ...crankcase chain driven Mesh pre filter and centrifugal filter on the crankshaft Fuel system Gravity feed with unleaded petrol with a minimum octane rat ing of 95 with carburettor Valve clearance cold engine intake 0 10 mm discharge 0 15 mm CARBURETTOR depression type KEIHIN NCV ø 20 Cooling forced air circulation OIL PUMP Specification Desc Quantity Type Trochoidal Distance between the rotors Admi...

Page 10: ...H N 3 Battery 12V 9Ah 4 Fuses 1 15A 1 10A 1 7 5A 5 Generator single phase alternating current CHECKING REMOTE CONTROLS A OPER ATING AS CIRCUIT BREAKERS 1 Check that given regular conditions there is no continuity between terminals 30 and 87 2 Apply 12V voltage to power terminals 85 and 86 of the remote control 3 With the remote control powered check that there is continuity between terminals 30 an...

Page 11: ...TURN INDICATOR SWITCH IGNITION KEY LIGHT SWITCH STARTER BUTTON Fly 50 4t 4v Characteristics CHAR 11 ...

Page 12: ...cable and ground con nection approx 170 Ohm Primary resistance 0 5 to 0 6 Ohm Resistance between primary and ground con nection infinite Resistance between primary and HV output 3 to 3 6 kOhm Shielded cap 5000 Ohm Characteristics Fly 50 4t 4v CHAR 12 ...

Page 13: ...drum brake with mechanical control activated by the handlebar left side lever Wheels and tyres WHEELS AND TYRES Specification Desc Quantity Wheel rim type Light alloy wheel rims Front wheel rim 12 x 3 00 Rear wheel rim 12 x 3 00 Front tyre Tubeless 120 70 12 Rear tyre Tubeless 120 70 12 Front tyre pressure 1 8 bar Rear tyre pressure 2 bar Rear wheel pressure rider and passenger 2 3 bar Tightening ...

Page 14: ...iven pulley shaft nut 40 to 44 Nm Hub oil drainage screw 3 5 Nm Rear hub cap screws 11 to 13 Crankcase half union screw 8 10 STEERING ASSEMBLY Name Torque in Nm Steering upper ring nut 35 to 40 Steering lower ring nut 8 10 Handlebar fixing screw 50 to 55 CHASSIS ASSEMBLY Name Torque in Nm Engine arm bolt frame arm 40 to 45 Engine swinging arm bolt 40 to 45 Frame swinging arm bolt 50 to 55 Silent b...

Page 15: ... 39 214 39 168 to 39 175 0 032 to 0 046 Piston 1st oversize D1 39 214 to 39 221 39 175 to 39 182 0 032 to 0 046 Cylinder 2nd oversize A2 39 393 to 39 400 39 354 to 39 361 0 032 to 0 046 Cylinder 2nd oversize B2 39 400 to 39 407 39 361 to 39 368 0 032 to 0 046 Piston 2nd oversize C2 39 407 to 39 414 39 368 to 39 375 0 032 to 0 046 Piston 2nd oversize D2 39 414 to 39 421 39 375 to 39 382 0 032 to 0 ...

Page 16: ...ousings Measure the coupling clearance between the sealing rings and the piston grooves using suitable sensors as shown in the diagram If the clearance is greater than that indicated in the table replace the piston N B MEASURE THE CLEARANCE BY INSERTING THE BLADE OF THE FEELER GAUGE FROM THE SECOND SEAL RING SIDE Fitting clearance Top piston ring standard coupling clearance 0 03 to 0 065 mm Top pi...

Page 17: ...ly insert the three sealing rings into the cylinder in the area where it retains its original di ameter Using the piston insert the rings perpen dicularly to the cylinder axis Measure the opening see figure of the sealing rings using a thickness gauge If any measurements are greater than specified replace the piston rings N B BEFORE REPLACING ONLY THE PISTON RINGS ENSURE THAT THE CLEARANCE BETWEEN...

Page 18: ...st Oversize 39 2 x 1 A 0 05 to 0 20 Oil scraper ring 1st Oversize 39 2 x 2 A 0 20 to 0 70 1st Compression ring 2nd Oversize 39 4 x 1 A 0 08 to 0 20 2nd Compression ring 2nd Oversize 39 4 x 1 A 0 05 to 0 20 Oil scraper ring 2nd Oversize 39 4 x 2 A 0 20 to 0 70 1st Compression ring 3rd Oversize 39 6 x 1 A 0 08 to 0 20 2nd Compression ring 3rd Oversize 39 6 x 1 A 0 05 to 0 20 Oil scraper ring 3rd Ove...

Page 19: ...nsions Initials Quantity Half shaft transmission side 14 0 0 005 A Flywheel side half shaft 16 0 0 005 B Connecting rod 14 8 0 05 0 C Spacer tool 45 00 Fits and clearan ces D 0 15 to 0 30 E Characteristic Clearance between crankshaft and connecting rod A 0 15 to 0 30 mm Fly 50 4t 4v Characteristics CHAR 19 ...

Page 20: ...bearing flywheel side 17 0 007 0 mm Check that the driving shaft cone the tab seat the oil seal capacity the toothed gear and the threaded tangs are in good working order In case of failures replace the crankshaft Specific tooling 020074Y Support base for checking crankshaft alignment Characteristics Fly 50 4t 4v CHAR 20 ...

Page 21: ...0 mm Using a bore gauge measure the connecting rod small end diameter N B IF THE CONNECTING ROD SMALL END DIAMETER EX CEEDS THE STANDARD DIAMETER EXHIBITS WEAR OR OVERHEATING PROCEED TO REPLACE THE CRANK SHAFT AS DESCRIBED IN THE CRANKCASE AND CRANKSHAFT CHAPTER Characteristic Rod small end diameter 13 0 015 0 025 mm Max diameter admitted check the small end 13 030 mm Calculate the coupling cleara...

Page 22: ... run out 0 1 mm Insert the valves into the cylinder head Alternatively check the intake and exhaust valves The test is carried out by filling the manifold with petrol and checking that the head does not ooze through the valves when these are just pressed with the fingers Measure the camshaft bearing seats and rocking lever support pins with a bore meter HEAD CHECK Specification Desc Quantity Stand...

Page 23: ...ue Characteristic Standard value 1 1 3 mm Admissible limit 1 6 mm If the width of the mark on the valve seat is larger than the prescribed limits true the seats with a 45 milling cutter and then grind In case of excessive wear or damage replace the head STANDARD VALVE LENGTH Specification Desc Quantity Inlet standard length 74 9 mm Outlet standard length 74 35 mm Fly 50 4t 4v Characteristics CHAR ...

Page 24: ...st 3 945 mm Calculate the clearance between valve and valve guide Check the concentricity of the valve head by placing a dial gauge at right angles to the valve head and rotating it on the V shaped support Characteristic Admissible limit 0 03 mm Check the deviation of the valve stem by resting it on a V shaped support and measuring the ex tent of the deformation using a dial gauge Characteristic L...

Page 25: ... the above checks you can use the same valves To obtain better sealing performance grind the valve seats Grind the valves gently with a fine grained lapping compound During the grinding keep the cylinder head with the valve axes in a horizontal position This will prevent the lapping compound residues from penetrating between the valve stem and the guide see figure CAUTION TO AVOID SCORING THE FAYI...

Page 26: ... ones N B A BALL BEARING IS FITTED ON BEARING A CONSE QUENTLY BEARING B IS THE MOST IMPORTANT AS IT WORKS DIRECTLY ON THE HEAD ALUMINIUM Characteristic Standard height Inlet 24 397 mm Standard height Outlet 23 996 mm Fitting clearance Maximum admissible axial clearance 0 5 mm Measure the outside diameter of the rocking lever pins Check the rocking lever pins do not show signs of wear or scoring Me...

Page 27: ...Synthetic fluid SAE J 1703 FMVSS 116 DOT 3 4 ISO 4925 CUNA NC 956 DOT 4 eni i Ride PG 5W 40 Synthetic based lubricant for high per formance four stroke engines JASO MA MA2 API SL ACEA A3 AGIP FILTER OIL Special product for the treatment of foam filters AGIP GREASE MU3 Yellow brown lithium base medium fi bre multipurpose grease ISO L X BCHA 3 DIN 51 825 K3K 20 AGIP GP 330 Water repellent stringy ca...

Page 28: ...INDEX OF TOPICS TOOLING TOOL ...

Page 29: ...7 mm ø bearings 001467Y029 Bell for bearings O D 38 mm 002465Y Pliers for circlips 004499Y Bearing extractor Fitted with 1 Bell 2 Sleeve 3 Screw 6 Ring 7 Half rings 27 Half rings 34 Half rings 005095Y Engine support 006029Y Punch for fitting fifth steering bearing on steering tube Fly 50 4t 4v Tooling TOOL 29 ...

Page 30: ...hafts and axles 020004Y Punch for removing fifth wheels from headstock 020055Y Wrench for steering tube ring nut 020150Y Air heater support 020151Y Air heater 020162Y Flywheel extractor 020171Y Punch for Ø 17 mm roller bearing Tooling Fly 50 4t 4v TOOL 30 ...

Page 31: ...re check gauge 020265Y Bearing fitting base 020271Y Tool for removing fitting silent bloc 020288Y Fork to assemble piston on cylinder 020291Y Valve fitting removal tool 020306Y Punch for assembling valve seal rings Fly 50 4t 4v Tooling TOOL 31 ...

Page 32: ... Description 020329Y Mity Vac vacuum operated pump 020330Y Stroboscopic light to check timing 020331Y Digital multimeter 020332Y Digital rpm indicator 020334Y Multiple battery charger Tooling Fly 50 4t 4v TOOL 32 ...

Page 33: ...de Description 020335Y Magnetic support for dial gauge 020340Y Flywheel and transmission oil seals fitting punch 020359Y 42x47 mm Adaptor 020360Y 52x55 mm Adaptor 020363Y 20 mm guide Fly 50 4t 4v Tooling TOOL 33 ...

Page 34: ...0364Y 25 mm guide 020376Y Adaptor handle 020431Y Valve oil seal extractor 020432Y Tool to fit the start up sector spring 020439Y 17 mm guide 020444Y Tool for fitting removing the driven pulley clutch Tooling Fly 50 4t 4v TOOL 34 ...

Page 35: ...ck fitting tool 020449Y Piston position check support 020450Y Camshaft fitting removal tool 020451Y Starting ring gear lock 020452Y Tube for removing and refitting the driven pulley shaft 020456Y Ø 24 mm adaptor Fly 50 4t 4v Tooling TOOL 35 ...

Page 36: ...Stores code Description 020480Y Petrol pressure check kit 020565Y Flywheel lock calliper spanner 020683Y Valve pressing member Tooling Fly 50 4t 4v TOOL 36 ...

Page 37: ...INDEX OF TOPICS MAINTENANCE MAIN ...

Page 38: ... I R I R I R Engine oil R I R I R I R I R I R I R I R I R I R I R Brake Pads Shoes I I I I I I I I I I I Tyre pressure I I I I I I I I I I I Headlight A A A A A Vehicle road test I I I I I I I I I I I Idle speed A A A A A A Odometer gear L L L L L CVT rollers I R I R I R I R I R Suspension I I I I I Steering A A A A A A Transmission L L L L L Operation time 90 10 60 10 13 0 10 60 10 18 0 10 60 10 ...

Page 39: ... slide even if it is new replace the carburettor It is advisable to replace the gaskets at every refit WARNING PETROL IS HIGHLY EXPLOSIVE ALWAYS REPLACE THE GASKETS TO AVOID PETROL LEAKS 1 Needle valve 2 Idle adjustment screw 3 Max jet 4 Accelerating pump 5 Tapered pin 6 Jet holder 7 Float 8 Reservoir 9 Starter device 10 Depression valve 11 Cover 12 Minimum jet Spark plug Position the vehicle on t...

Page 40: ... plug with another of the recommended type Fit the spark plug with the correct inclination and manually screw it all the way down then use the special spanner to tighten it Refit the cover Place the cap fully over the spark plug and tie down the cable to the bracket Carry out refit operations CAUTION THE SPARK PLUG MUST BE REMOVED WHEN THE MOTOR IS COLD THE SPARK PLUG MUST BE REPLACED EVERY 20 000...

Page 41: ...r dry it with a cloth and reinsert it screwing it in thoroughly Remove the dipstick cover and check that the oil level is between MIN and MAX If the level is below the MIN value restore the proper amount of oil in the hub Screw the oil dipstick back and check it is locked Replacement Remove the oil dipstick cover Fly 50 4t 4v Maintenance MAIN 41 ...

Page 42: ... 3 5 Nm Air filter Remove the l h s fairing Remove the air box cover after removing the 6 fixing screws shown in the figure and then extract the filtering element Cleaning Clean with water and neuter soap Dry with a clean cloth without squeezing and with light jets of air Immerge in a 50 oil petrol mixture Let it drip and then compress it with your hands without squeezing Refit all components in t...

Page 43: ...duled maintenance table The engine must be emptied by draining off the oil through the drainage plug of the mesh pre filter flywheel side further more to facilitate oil drainage loosen or remove the cap dipstick Once all the oil has drained through the drainage hole unscrew the oil car tridge filter and remove it To carry out this opera tion the complete exhaust must be removed Make sure the pre f...

Page 44: ...n flat ground Undo cap dipstick dry it off with a clean cloth and reinsert it screwing down completely Remove the cap dipstick again and check that the level is between the MIN and MAX reference marks top up if necessary The MAX level mark indicates a quantity of around 850 cc of oil in the engine If the check is carried out after the vehicle has been used and therefore with a hot engine the level...

Page 45: ...ore fitting it Change the engine oil WARNING IN ORDER TO PREVENT ABNORMAL FORMATIONS OF DIRT DUE TO THE RELEASE OF GREASE WE RECOMMEND FIRST LUBRICATING THE SEAL RING STOPS WITH A BRUSH Recommended products eni i Ride PG 5W 40 Synthetic based lubricant for high performance four stroke engines JASO MA MA2 API SL ACEA A3 Oil pressure warning light The vehicle is equipped with a telltale light on the...

Page 46: ...te direction to the normal direction of rotation using a compass span ner applied to the camshaft drive sprocket hous ing N B TIME THE TIMING SYSTEM UNIT IF IT IS NOT IN PHASE Checking the valve clearance To check valve clearance centre the reference marks of the timing system Use a feeler gauge to check that the clearance between the valve and the register corresponds with the indicated values Wh...

Page 47: ...NG IN CASE OF ACCIDENTAL CONTACT WASH WITH WATER CAUTION BRAKING CIRCUIT FLUID IS HIGHLY CORROSIVE DO NOT LET IT COME INTO CONTACT WITH PAINTED PARTS CAUTION BRAKE FLUID IS HYGROSCOPIC THAT IS IT ABSORBS MOISTURE FROM THE SURROUNDING AIR IF THE CON TENT OF MOISTURE IN THE BRAKE FLUID EXCEEDS A CERTAIN VALUE BRAKING WILL BE INEFFICIENT NEVER USE BRAKE FLUID FROM OPEN OR PARTIALLY USED CONTAINERS UN...

Page 48: ... onto the screen is not higher than 9 10 or lower than 7 10 of the dis tance between the centre of the headlight and the ground 3 If this is not the case adjust the headlight by operating the screw indicated N B THE ABOVE PROCEDURE COMPLIES WITH THE EURO PEAN STANDARDS REGARDING MAXIMUM AND MINI MUM HEIGHT OF LIGHT BEAMS REFER TO THE STATU TORY REGULATIONS IN FORCE IN EVERY COUNTRY WHERE THE VEHIC...

Page 49: ...INDEX OF TOPICS TROUBLESHOOTING TROUBL ...

Page 50: ...ry If it shows signs of sulphation replace it and bring the new battery into service by charging it for not more than ten hours at a current of 1 10 of the capacity of the battery itself Faulty spark plug Replace the spark plug Incorrect valve sealing or valve adjustment Inspect the head and or restore the correct clearance Starter motor and start up system fault Check starter motor Altered fuel c...

Page 51: ... Replace the brake pads or shoes and check for brake disk or drum wear conditions Front brake disk loose or deformed Check the brake disc screws are locked use a dial gauge and a wheel mounted on the vehicle to measure the axial shift of the disc Air bubbles inside the hydraulic braking system Carefully bleed the hydraulic braking system there must be no flexible movement of the brake lever Fluid ...

Page 52: ... check the seats in which the ball bearings rotate if they are recessed or if the balls are squashed replace them Excessive steering play EXCESSIVE STEERING CLEARANCE Possible Cause Operation Excessive steering clearance Check the tightening of the top ring nut If irregularities continue in turning the steering even after making the above adjust ments check the seats in which the ball bearings rot...

Page 53: ...Fly 50 4t 4v Troubleshooting TROUBL 53 ...

Page 54: ...INDEX OF TOPICS ELECTRICAL SYSTEM ELE SYS ...

Page 55: ...rn indicator bulbs 14 Turn indicator warning light 15 Right turn indicator bulbs 16 HV coil 17 Key switch contacts 18 Diagnostics socket 19 Fuse 20 PTC 21 Horn button 22 Horn 23 Stop buttons 24 Low fuel warning light 25 Fuel gauge 26 S I S Valve 27 Voltage regulator 28 Fuel level transmitter 29 Stop light filament 30 Starter button 31 Starter motor 32 Starter remote control switch 33 Fuse 34 Batte...

Page 56: ...Colours of the electrical cables B White Bl Blue G Yellow Mr Brown N Black Gr Grey Rs Pink R Red Vi Purple V Green Components arrangement Electrical system Fly 50 4t 4v ELE SYS 56 ...

Page 57: ...he legshield to reach it 5 Lights logic solenoid switch remove the leg shield to reach it 6 Side stand solenoid switch remove the leg shield to reach it 7 Horn remove the legshield to reach it 8 Main fuse to access open the front panel 9 Starter switch remove the legshield to reach it 10 Start up solenoid remove the legshield to reach it Fly 50 4t 4v Electrical system ELE SYS 57 ...

Page 58: ... 13 Front right turn indicator remove the legshield to reach it 14 Front headlight remove the legshield to reach it 15 Left stop switch remove the front headlight to reach it 16 Right stop switch remove the front headlight to reach it 17 Instrument panel connectors remove the front headlight to reach it Electrical system Fly 50 4t 4v ELE SYS 58 ...

Page 59: ...ont headlight to reach it 21 Engine stop switch remove the front headlight to reach it 22 Starter button remove the front headlight to reach it 23 Petrol pump remove the footrest to reach it 24 Fuel gauge remove the footrest to reach it 25 Connectors for fuel reserve indicator remove the footrest to reach it Fly 50 4t 4v Electrical system ELE SYS 59 ...

Page 60: ...ction remove the spark plug ac cess panel located under the saddle to reach it 30 Spark plug remove the spark plug access panel located under the saddle to reach it 31 Automatic starter remove the helmet compart ment to reach it 32 P T C remove the helmet compartment to reach it 33 Engine temperature sensor remove the hel met compartment to reach it Electrical system Fly 50 4t 4v ELE SYS 60 ...

Page 61: ...ve the cen tral cover to reach it 37 Taillight remove the rear light assembly to reach it 38 Rear left turn indicator remove the rear light assembly to reach it 39 Rear right turn indicator remove the rear light assembly to reach it 40 License plate light remove the helmet com partment to reach it Fly 50 4t 4v Electrical system ELE SYS 61 ...

Page 62: ...ch it There is a ground point of the voltage regulator Disassembly the helmet compartment to reach it Electrical system installation Front side 1 Right stop button 2 Left stop button 3 Front headlight connection 4 At right command group 5 At left command group 6 Battery connections Electrical system Fly 50 4t 4v ELE SYS 62 ...

Page 63: ...7 Start up solenoid 8 At the battery connections Fly 50 4t 4v Electrical system ELE SYS 63 ...

Page 64: ...9 Battery negative terminal connection 10 Positive battery pole connection 11 Main fuse 12 Diagnostics connection Electrical system Fly 50 4t 4v ELE SYS 64 ...

Page 65: ...13 Front left turn indicator 14 Front turn indicator connections 15 At the right turn indicator 16 Resistance 17 Electronic ignition device Fly 50 4t 4v Electrical system ELE SYS 65 ...

Page 66: ... switch 19 Horn 20 Lights logic and side stand solenoid switches 21 Service fuses 22 Front right turn indicator 23 Connection branches on tank engine sensors and rear part Electrical system Fly 50 4t 4v ELE SYS 66 ...

Page 67: ...24 Starter motor connection branch 25 Solenoid switches and fuses branch 26 Side stand sensor connection 27 Side stand sensor Fly 50 4t 4v Electrical system ELE SYS 67 ...

Page 68: ... 29 Fuel reserve indicator connections 30 At the engine flywheel connection 31 Sensors connection on the engine branch 32 Rear part branch 33 Starter motor connection branch Electrical system Fly 50 4t 4v ELE SYS 68 ...

Page 69: ...Back side 1 High voltage coil connection 2 Voltage regulator 3 Ambient temperature sensor connection 4 S I S valve connection Fly 50 4t 4v Electrical system ELE SYS 69 ...

Page 70: ...nection 6 Rear turn indicators connections 7 Automatic starter 8 At the P T C connection 9 At the engine temperature sensor connection 10 Engine temperature sensor connection Electrical system Fly 50 4t 4v ELE SYS 70 ...

Page 71: ...11 P T C connection Conceptual diagrams 1 External temperature sensor 2 Front and rear brake light 3 Fuel reserve sensor 4 Starter motor 5 Start up solenoid Fly 50 4t 4v Electrical system ELE SYS 71 ...

Page 72: ...lbs for turn indicator warning lights 26 Turn indicators switch 27 4 12V 10W bulbs for turn indicators 28 On Off lock 29 Engine stop switch 30 5W filament for rear daylight running light in bulb 12V 5 21W 31 License plate light bulb 12V 5W 32 1 bulb for instrument LCD back lighting 33 3 bulbs for dashboard lighting 12V 1 7W 34 2 city light bulbs 12V 5W 35 High beam warning light 12V 1 7W 36 Headli...

Page 73: ...reserve sensor 6 12v 6Ah battery 7 15a Fuse 9 Low fuel warning light 12V 1 7W 13 Fuel gauge 14 Fuel level transmitter 17 Fuse 7 5A 18 Ignition switch contacts Lights and turn indicators Fly 50 4t 4v Electrical system ELE SYS 73 ...

Page 74: ...0W bulbs for turn indicators 30 5W filament for rear daylight running light in bulb 12V 5 21W 31 License plate light bulb 12V 5W 32 1 bulb for instrument LCD back lighting 33 3 bulbs for dashboard lighting 12V 1 7W 34 2 city light bulbs 12V 5W 35 High beam warning light 12V 1 7W 36 Headlight bulb 12V 35 35W 37 Light switch 38 Light relay 41 Electronic ignition device Enabling buttons and level ind...

Page 75: ... 1 7W 13 Fuel gauge 14 Fuel level transmitter 17 Fuse 7 5A 18 Ignition switch contacts Enabling buttons and level indicators Battery recharge and start up 2 Front and rear brake light 4 Starter motor Fly 50 4t 4v Electrical system ELE SYS 75 ...

Page 76: ...on switch contacts 19 Magneto flywheel 20 Voltage regulator 23 Side stand switch 28 On Off lock 29 Engine stop switch 41 Electronic ignition device 42 Fuse 10A Devices and accessories Devices and accessories 1 External temperature sensor 6 12v 6Ah battery 7 15a Fuse 10 Instrument electronics 11 Horn 12 Horn button 17 Fuse 7 5A Electrical system Fly 50 4t 4v ELE SYS 76 ...

Page 77: ...e sensor 41 Electronic ignition device 42 Fuse 10A 43 Diagnostics socket Instruments and warning lights control board A Odometer B Speedometer C Turn indicators D High beam warning light E Headlight warning light F Immobiliser LED G Low fuel warning light H Fuel gauge L Digital clock Fly 50 4t 4v Electrical system ELE SYS 77 ...

Page 78: ...k lighting bulb 8 Digital clock 9 High beam warning light 12V 1 7W 10 Low fuel warning light 12V 1 7W Checks and inspections In case the cause of ignition failure or malfunction cannot be easily identified at sight first of all re place the control unit by another one in operating conditions Remember that the engine must be off to discon nect and replace the control unit If after replacement the v...

Page 79: ...ecification Desc Quantity 1 1 Blue and ground cable 1 Ω Ignition circuit All the control operations of the system that require the disconnection of cables checks of the connec tions and the devices making up the ignition circuit must be done with the engine off if this is not done the controls might be irretrievably damaged No spark plug Once the lack of power to the spark plug has been detected a...

Page 80: ...rminals If the values are correct repair the cable harness or reset the connections otherwise replace the HV coil Electric characteristic HV coil primary resistance 0 5 0 6 Ohm HV coil secondary check Disconnect the spark plug cap from the HV cable and measure the resistance between the HV cable terminal and the HV coil negative terminal see figure If non conforming values are measured replace the...

Page 81: ...imary during the start up test with the voltage peak adaptor and by connecting the positive ter minal to the ground lead and the negative terminal to the coil positive connector If non conforming values are measured replace the control unit THE POSITIVE TERMINAL OF THE HV COIL PRIMARY IS BLACK Electric characteristic High voltage coil voltage value High voltage coil voltage value 100 Volt Stator c...

Page 82: ...nd keep running it at idle speed Connect the tester positive probe to terminal No 1 yellow cable and the negative probe to terminal No 2 black cable check if there is voltage If there is voltage check that the light remote con trol and its excitation line coming from the elec tronic starter sky blue PIN 7 purple PIN 3 work properly Check the cable harness from the light switch to the remote contro...

Page 83: ...consequently the battery fails to recharge b Battery fails to recharge regulator interrup ted Measures a Protection fuse blows regulator in short circuit Check that the cable harness going from the pro tection fuse to the key switch is not damaged which may cause a short circuit to ground thus preventing damaging the regulator Afterwards measure the resistance between con tact 3 Orange and contact...

Page 84: ...ld voltage can be found If values other than those above are detected replace the regulator contrariwise check the cable harness and the connections Electric characteristic Voltage regulator resistance 8 MΩ Turn signals system check 4 TURN INDICATORS NOT WORKING If the turn indicators do not work do the following Remove the regulator connector and place the tester probes between the orange cable 3...

Page 85: ...EEK IMMEDIATE MEDICAL ATTENTION IN THE EVENT OF ACCIDENTAL INGESTION OF THE LIQUID IMMEDIATELY DRINK LARGE QUANTITIES OF WATER OR MILK MAGNESIUM MILK BATTERED EGG OR VEGETABLE OIL SEEK IMMEDIATE MEDICAL ATTENTION BATTERIES PRODUCE EXPLOSIVE GASES KEEP CLEAR OF NAKED FLAMES SPARKS OR CIGARETTES VENTILATE THE AREA WHEN RECHARGING INDOORS ALWAYS PROTECT YOUR EYES WHEN WORKING CLOSE TO BATTERIES KEEP ...

Page 86: ...uently and must reach the upper level Only use distilled water to restore this level If water topping is required too often check the vehicle electrical system the battery works overcharged and is subject to quick wear 2 Load status check After topping up the electrolyte level check its density using an appropriate densitometer see figure When the battery is charged you should detect a density of ...

Page 87: ...MANCE THE BATTERY MUST BE CHARGED BEFORE USE LACK OF PROPER CHARGING OF THE BATTERY BEFORE FIRST USE AT LOW ELECTROLYTE LEVEL CAN LEAD TO PREMATURE BATTERY LIFE Specific tooling 020333Y Single battery charger 020334Y Multiple battery charger Battery installation Where provided VRLA battery valve regulated lead acid battery Maintenance Free MF WARNING BATTERY ELECTROLYTE IS TOXIC AND IT MAY CAUSE S...

Page 88: ...attery Note Do not tilt the container to prevent the flow of electrolyte from pausing or stopping 4 Control the flow of electrolyte Make sure air bubbles are rising from all six filling holes Leave the container in this position for 20 minutes or more Note If there are no air bubbles coming out of the filling holes lightly tap the bottom of the container two or three times Do not remove the contai...

Page 89: ...le it must be fully charged and then must be recharged If the battery is to be installed on the vehicle prior to this pre charged one the battery will not be able to exceed 75 charge without jeop ardising its useful life on vehicle The dry charge battery MF like the completely loa ded YTX must have a no load voltage between 12 8 13 15 V Bring the battery to full charge us ing the 020648Y battery c...

Page 90: ...aken place h Disconnect the clamps from the battery and check the voltage if voltages are detected of less than 12 8 V proceed with a new recharge of the battery starting from point c of the recharge pro cedure of the new battery otherwise go to point i i The battery is now completely activated disconnect the battery charger from the fuel supply grid disconnect the clamps from the battery and proc...

Page 91: ...Up Signal Green 4 Ground lead Black 5 Solenoid valve Brown 6 NTC temperature sensor signal Yellow Red 7 Lights logic solenoid command Light Blue 8 Diagnostics socket Red Black VOLTAGE REGULATOR 1 Lighting system power alternating Yellow 2 Ground lead Black 3 Battery positive live Orange 4 Flywheel power alternating Blue 5 Turn indicator power Blue Black Fly 50 4t 4v Electrical system ELE SYS 91 ...

Page 92: ...nation bulb power alter nating Yellow Black 4 Instrument panel ground Black 5 Fuel level transmitter signal White Green 6 Battery positive live White CONNECTOR B 1 instrument LCD backlight power alternating Yellow Blue 2 High beam warning light command alternating Violet 3 Low fuel warning light command Yellow Green Electrical system Fly 50 4t 4v ELE SYS 92 ...

Page 93: ...INDEX OF TOPICS ENGINE FROM VEHICLE ENG VE ...

Page 94: ... the crank case then remove the whole exhaust Removal of the engine from the vehicle CAUTION SUPPORT THE VEHICLE ADEQUATELY Disconnect the battery Remove the helmet compartment Remove the lower cover Slide the HV wire cap off the spark plug Remove the full muffler unit Engine from vehicle Fly 50 4t 4v ENG VE 94 ...

Page 95: ...ted in the picture Disconnect the rear brake transmission by un screwing the adjuster screw Disconnect the magneto flywheel cable harness connector Remove the ground cable and the positive cable of the starter motor indicated in figure Fly 50 4t 4v Engine from vehicle ENG VE 95 ...

Page 96: ...uel supply pipe from the carburettor Remove the carburettor vacuum pipe tap from the manifold Disconnect the fuel heater connector Remove the piping from the solenoid valve Engine from vehicle Fly 50 4t 4v ENG VE 96 ...

Page 97: ...lley acting on the indicated adjust er screws Disconnect the throttle body position control ca ble PTC Undo the two fixing screws from the bracket with silent block to the frame Disconnect the return spring from the bracket Fly 50 4t 4v Engine from vehicle ENG VE 97 ...

Page 98: ...ssis side with that on the engine side Remove the pin from the opposite side Remove the engine complete with engine side swinging arm Locking torques N m Frame swinging arm bolt 64 72 Screw that se cures plate with silent block to the frame 40 Shock absorber engine pin 33 to 41 See also Lower cover Helmet bay Exhaust assy Removal Engine from vehicle Fly 50 4t 4v ENG VE 98 ...

Page 99: ...INDEX OF TOPICS ENGINE ENG ...

Page 100: ...ilter housing retain ers N B USE A MALLET ON THE APPROPRIATE COUPLINGS TO REMOVE THE COVER Kickstart To remove the start up pinion push the starter lever to facilitate extracting the pinion Remove the kick start screw and lever Remove the Seeger ring and the washer indica ted in the figure Pull out the toothed sector WARNING THE SECTOR KEEPS THE SPRING SET BE CAREFUL SO AS NOT TO CAUSE ANY ACCIDEN...

Page 101: ...shing with the same diameter as the external plate of the bearing after slightly heating the crankcase from the inside N B WHEN REFITTING ALWAYS REPLACE THE BEARING WITH A NEW ONE CAUTION WHEN REMOVING REFITTING THE BEARING TAKE CARE NOT TO DAMAGE THE COVER PAINTED SURFACE Removing the driven pulley Lock the clutch housing with the specific tool Remove the nut the clutch housing and the whole of t...

Page 102: ... clutch Equip the tool with long pins screwed into position A from the outside insert the entire driven pulley in the tool and have the central screw make con tact CAUTION THE TOOL WILL BE DEFORMED IF THE CENTRAL SCREW IS TIGHTENED UP TOO FAR Using a 34 mm socket wrench remove the clutch locking nut Loosen the central screw by undoing spring of the driven pulley unit Separate the components Specif...

Page 103: ...IBIT A CEN TRAL FAYING SURFACE AND MUST NOT BE DIFFERENT FROM ONE ANOTHER VARIOUS CONDITIONS CAN CAUSE THE CLUTCH TO TEAR CAUTION DO NOT OPEN THE MASSES USING TOOLS TO PREVENT A VARIATION IN THE RETURN SPRING LOAD Characteristic Check minimum thickness 1 mm Pin retaining collar Remove the collar with the aid of 2 screwdrivers Remove the three guide pins and the mobile half pulley Fly 50 4t 4v Engi...

Page 104: ...ans of the special tool N B PROPERLY SUPPORT THE HALF PULLEY SO AS NOT TO DEFORM THE SLIDING SURFACE OF THE DRIVE BELT Specific tooling 020376Y Adaptor handle 020363Y 20 mm guide Inspecting the driven fixed half pulley Check that there are no signs of wear on the work surface of the belt If there are replace the half pulley Make sure the bearings do not show signs of un usual wear Measure the outs...

Page 105: ...with a curved spout to lubricate the driven pulley unit with around 6 g of grease This operation must be done through one of the holes inside the bushing until grease comes out of the opposite hole This procedure is necessary to prevent the presence of grease beyond the O ring Recommended products AGIP GREASE SM 2 Gray black smooth textured lithium grease containing molybdenum di sulphide Refittin...

Page 106: ...e check the driven pulley unit N B UPON RUNNING IN THE MASSES MUST EXHIBIT A CEN TRAL CONTACT SURFACE AND MUST NOT BE DIFFER ENT FROM ONE ANOTHER VARIOUS CONDITIONS CAN CAUSE THE CLUTCH TO TEAR CAUTION DO NOT OPEN THE MASSES USING TOOLS SO AS TO PREVENT A VARIATION IN THE RETURN SPRING LOAD Characteristic Minimum thickness permitted 1 mm Refitting the clutch Preassemble the driven pulley group wit...

Page 107: ...cking clutch unit on pulley 55 60 Nm Refitting the driven pulley Refit the driven pulley assembly the clutch bell and the nut using the specific tool Specific tooling 020565Y Flywheel lock calliper spanner Locking torques N m Driven pulley shaft nut 40 to 44 Nm Drive belt Make sure the drive belt is not damaged and does not have cracks in the toothed grooves Check the width of the belt Characteris...

Page 108: ...g or deformation 2 Check the roller running tracks on the contact pulley there must not be signs of wear and check the condition of the contact surface of the belt on the half pulleys mobile and stationary 3 Check that the rollers do not show signs of marked facetting on the sliding surface and that the metallic insert does not come out of the plastic shell borders 4 Check the integrity of the sli...

Page 109: ...efit the components of the assembly roller housing assembly with bushing limiting washer stationary half pulley cooling fan belt with drive washer and nut With the specific tool tighten the lock nut to 20 Nm and then perform a final 90 locking in order to prevent the rotation of the driving pulley N B REPLACE THE NUT WITH A NEW ONE AT EVERY REFIT CAUTION UPON FITTING THE DRIVING PULLEY UNIT IT IS ...

Page 110: ...e Seeger and the Kick start lever Recommended products AGIP GREASE MU3 Yellow brown lithium base medium fibre multipurpose grease ISO L X BCHA 3 DIN 51 825 K3K 20 Insert the pinion in its seating by pushing the starter lever Fit the intake throat and tighten the 3 screws Make sure the oil sump presents centring dowels and sealing gaskets Replace the cover tightening the 12 screws to the prescribed...

Page 111: ...e Remove the intermediate gear and the complete gear wheel axle When removing the intermediate gear pay atten tion to the various shim adjustments Removing the wheel axle bearings Remove the oil seal and the Seeger ring Remove the bearing by pushing from the outside towards the inside of the gear compartment using the appropriate punch Specific tooling 020363Y 20 mm guide 020376Y Adaptor handle 02...

Page 112: ... figure Expel the driven pulley shaft with the aid of a press Specific tooling 020452Y Tube for removing and refitting the driven pulley shaft Inspecting the hub shaft Check the three shafts for wear or distortion of the toothed surfaces the bearing housings and the oil seal housings If faults are found replace the damaged compo nents Check capacity A of the transmission gear wear deformations etc...

Page 113: ...e or radial part on the bearing side N B FIT THE BALL BEARING WITH THE SHIELD FACING THE OIL SEAL Specific tooling 020151Y Air heater 020376Y Adaptor handle 020439Y 17 mm guide 020358Y 37x40 mm Adaptor Refitting the wheel axle bearing Heat the half crankcase on the transmission side using a thermal gun After lubricating its outer strip insert the bearing with the special adapter with the aid of a ...

Page 114: ... Locking torque 11 to 13 Nm Flywheel cover Cooling hood Remove the manifold and the carburettor undo ing the 2 fixing screws on the head Remove the fastening clamp of the secondary air pipe and disconnect it Remove the 4 front coupling screws 1 of them is a knob and the side fixing screw at the crankcase base Remove the 4 side screws Extract the 3 covers Remove the cover sealing gaskets on the hea...

Page 115: ...itting the fan pay attention that the screw holes in the fan and the rotor coincide then tighten screws at the specified torque Removing the stator Remove the 2 Pick Up screws and the 2 stator fixing screws indicated in the figure Remove the stator and its wiring Fly 50 4t 4v Engine ENG 115 ...

Page 116: ... TO THE FUSION TONGUE ON THE CRANKSHAFT IN SUCH A WAY AS TO AVOID BEING CRUSHED BY THE FAN COV ER ASSEMBLY Locking torques N m Pick up screws 3 4 Stator screws 3 4 Flywheel and starting Removing the starter motor Undo the screw on the power positive contact and disconnect the cable Undo the 2 screws fixing the starter motor to the crankcase and recover the power wiring Engine Fly 50 4t 4v ENG 116 ...

Page 117: ...Specific tooling 020565Y Flywheel lock calliper spanner 020162Y Flywheel extractor Inspecting the flywheel components Check that the flywheel internal magnets are in good conditions Check that the flywheel splines exhibit no loos ening Check there are no deformations that may cause rubbing on the stator and the Pick Up Check that the stator winding its ferromagnetic support and the pick up are in ...

Page 118: ... up being careful to pass the wiring through the appropriate crankcase couplings Refit the flywheel to the crankshaft being careful to respect the keying then lock rotation with the specific tool and tighten the nut to the prescribed torque N B A VARIATION OF THE AIR GAP DISTANCE CAN LEAD TO A VARIATION IN THE IGNITION ADVANCE SUCH AS TO CAUSE PINGING KNOCKING ETC Specific tooling 020565Y Flywheel...

Page 119: ...contact N B REFIT THE REMAINING PARTS AS DESCRIBED IN THE CYLINDER HEAD TIMING LUBRICATION FLYWHEEL AND TRANSMISSION CHAPTERS Locking torques N m Starter motor screws 11 13 Cylinder assy and timing system Removing the rocker arms cover Remove the cooling covers Remove the 4 retainers of the tappet cover Remove the cover and the O ring Remove the 3 screws and then remove the Blow by cover Clean the...

Page 120: ... central screw and the belleville washer indicated in the figure and lock the cam shaft crown with the specific tool N B TO FACILITATE REMOVING THE HEAD COMPONENTS SET THE CRANKSHAFT TO THE TIMING POINT TDC OF THE COMPRESSION END Specific tooling 020565Y Flywheel lock calliper spanner Remove the camshaft control pulley and the washer below Remove the pinion of the crankshaft timing control To remo...

Page 121: ...mshaft with bearing using the specific tool shown in the figure Take out the camshaft bearing with the aid of the specific tool being careful to mount a screw on the camshaft in order to protect its thread N B IF A BEARING SEPARATES FROM THE CAMSHAFT IT IS ESSENTIAL TO FIT A NEW BEAR Specific tooling 020450Y Camshaft fitting removal tool 004499Y Camshaft bearing extractor 004499Y001 Bearing extrac...

Page 122: ...NEEDED THE HEAD MAY BE REMOVED WITH THE CAMSHAFT PINS AND ROCKING LEVERS WITHOUT RE MOVING THE DRIVING PULLEY UNIT REMEMBER TO HOLD THE TIMING CHAIN WITH A PIECE OF METAL CA BLE AND TO ADJUST THE CHAIN TIGHTENER UPON RE FITTING Removing the valves Using the specific tool fitted with the part shown in the figure remove cotters caps and valve springs Remove the oil seals with the appropriate tool Sp...

Page 123: ...BE CAREFUL NOT TO DAMAGE THE PISTON RINGS DUR ING REMOVAL Inspecting the small end Measure the internal diameter of the connecting rod small end using an internal micrometer N B IF THE DIAMETER OF THE CONNECTING ROD SMALL END EXCEEDS THE MAXIMUM DIAMETER ADMISSIBLE SHOWS SIGNS OF WEAR OR OVERHEATING REPLACE THE CRANKSHAFT AS DESCRIBED IN THE CRANKCASE AND CRANKSHAFT CHAPTER Characteristic Max diam...

Page 124: ...e sensors as shown in the diagram If the clearance is greater than that indicated in the table replace the piston N B MEASURE THE CLEARANCE BY INSERTING THE BLADE OF THE FEELER GAUGE FROM THE SECOND SEAL RING SIDE Fitting clearance Top piston ring standard coupling clearance 0 03 to 0 065 mm Top piston ring maximum clear ance allowed after use 0 07 mm Middle piston ring standard coupling clearance...

Page 125: ...ly insert the three sealing rings into the cylinder in the area where it retains its original di ameter Using the piston insert the rings perpendicularly to the cylinder axis Measure the opening see figure of the sealing rings using a thickness gauge If any measurements are greater than specified replace the piston rings N B BEFORE REPLACING ONLY THE PISTON RINGS ENSURE THAT THE CLEARANCE BETWEEN ...

Page 126: ...d Oversize 39 4 x 1 A 0 08 to 0 20 2nd Compression ring 2nd Oversize 39 4 x 1 A 0 05 to 0 20 Oil scraper ring 2nd Oversize 39 4 x 2 A 0 20 to 0 70 1st Compression ring 3rd Oversize 39 6 x 1 A 0 08 to 0 20 2nd Compression ring 3rd Oversize 39 6 x 1 A 0 05 to 0 20 Oil scraper ring 3rd Oversize 39 6 x 2 A 0 20 to 0 70 Removing the piston Install piston and wrist pin onto the connecting rod aligning t...

Page 127: ...s do not superim pose Fit the two piston rings so that their gaps and that of the oil scraper ring are never aligned Fit the 2nd sealing ring with the identifying letter T facing towards the piston crown Fit the 1st sealing ring with the reference letter T facing towards the piston crown Misalign the lining openings at 120 as shown in the figure Lubricate the components with engine oil N B IN ORDE...

Page 128: ...owing the procedure below The procedure is different from that indicated in the vehicle manuals Head tightening nut only to replace stud bolts 6 7 N m 135 90 The 45 rotation reduction of the key is necessary to avoid stud bolt stretching Inspecting the cylinder head Using a trued bar check that the cylinder head surface is not worn or distorted Check that the camshaft and rocking lever pin bearing...

Page 129: ...ck that the guide slider and the tensioner slider are not worn out Ensure that the camshaft drive pulley the chain assembly and the sprocket wheel are not worn If sings of wear are found replace the parts if the chain pinion or pulley are worn replace the whole assembly Remove the central screw and the tensioner spring Check that the one way mechanism is not worn Check the condition of the tension...

Page 130: ...h a 45 milling cutter and then grind In case of excessive wear or damage replace the head Insert the valves into the cylinder head Alternatively check the intake and exhaust valves The test is carried out by filling the manifold with petrol and checking that the head does not ooze through the valves when these are just pressed with the fingers Inspecting the valves STANDARD VALVE LENGTH Specificat...

Page 131: ...xhaust 3 945 mm Calculate the clearance between valve and valve guide Check the concentricity of the valve head by placing a dial gauge at right angles to the valve head and rotating it on the V shaped support Characteristic Admissible limit 0 03 mm Check the deviation of the valve stem by resting it on a V shaped support and measuring the ex tent of the deformation using a dial gauge Characterist...

Page 132: ...e Maximum admissible diameter 4 0 022 mm After measuring the valve guide diameter and the valve stem diameter check clearance between guide and stem INTAKE Specification Desc Quantity Standard clearance 0 015 to 0 042 mm Admissible limit 0 06 mm EXHAUST Specification Desc Quantity Standard clearance 0 025 0 052 mm Admissible limit 0 07 mm Engine Fly 50 4t 4v ENG 132 ...

Page 133: ...ess the springs and insert the cotters in their seats Inspecting the cam shaft Inspect the camshaft for signs of abnormal wear on the cams Characteristic Standard diameter Bearing A Ø 12 0 002 0 010 mm Standard diameter Bearing B Ø 16 0 015 0 023 mm Minimum diameter allowed Bearing A Ø 11 98 mm Minimum diameter allowed Bearing B Ø 15 96 mm Using a gauge measure the height of the cams Check the axi...

Page 134: ... Check the rocking lever pins do not show signs of wear or scoring Measure the internal diameter of each rocker Check that the pad in contact with the cam is not worn ROCKING LEVERS AND PIN DIAMETER Specification Desc Quantity Rocking levers Inside diameter 11 015 to 11 035 mm Rocking levers Pins diameter 10 977 to 10 985 mm Refitting the head and timing system components Fix the head on a workben...

Page 135: ...Locking torques N m Rocking lever shafts screw 3 4 Finish the head tightening following the proce dure below screw the four head nuts to an initial torque at two crossed passes Afterwards tighten the nuts with 2 turns of 90 each to be done at two crossed passes Finish the tightening of the head to the crankcase with the 2 side screws N B SHOULD THE CRANKCASE OR THE CYLINDER STUD BOLTS BE REPLACED ...

Page 136: ...g the reference marks on the flywheel and the crankcase With this operation insert the chain on the cam shaft control pulley and make the reference notch coincide with the point on the head Fit the pulley onto the camshaft Fit the belleville washer so that the outer rim touches the pulley Bring the screw closer but without reaching its final locking point Push the tensioner pad lightly so as to ch...

Page 137: ...0 Nm Timing chain tensioner central screw 5 6 Ignition spark plug 10 15 Nm Refitting the rocker arms cover Carry out the removal procedure but in reverse order and tighten the four fixing screws to the specified torque N B FIT A NEW O RING ON THE TAPPET COVER Refitting the intake manifold Fit the cover sealing gaskets on the head Fit the 2 covers Fit the inlet manifold and do up the 2 screws to th...

Page 138: ...g screws Separate the crankcase halves keeping the half casing driving shaft engaged on the transmission side Remove the crankshaft CAUTION IF YOU FAIL TO DO THIS THE CRANKSHAFT MIGHT AC CIDENTALLY FALL Remove the oil guard on the flywheel side CAUTION THE CENTRIFUGAL OIL FILTER IS IN THE FLYWHEEL AXLE SHAFT DO NOT WASH WITH SOL VENTS OR BLOW COMPRESSED AIR SO THAT NO IMPURITIES LEAK OUT A CENTRIF...

Page 139: ... in the figure Characteristic Standard measure 45 mm Removing the crankshaft bearings Remove the flywheel bearing fitted on the driving shaft using the specific tool Specific tooling 004499Y Camshaft bearing extractor 004499Y001 Bearing extractor bell 004499Y002 Bearing extractor screw 004499Y006 Bearing extractor ring 004499Y034 Bearing extractor part Refitting the crankshaft bearings Support the...

Page 140: ... WASH WITH SOLVENTS OR BLOW COMPRESSED AIR SO THAT NO IMPURITIES LEAK OUT Specific tooling 020265Y Bearing fitting base 008119Y009 Tube to assemble shafts and axles Inspecting the crankshaft alignment To install the crankshaft on the support and to measure the misalignment in the 4 points indicated in figure N B IF VALUES OTHER THAN THOSE ALLOWED ARE DETEC TED TRY STRAIGHTENING THE CRANKSHAFT BY I...

Page 141: ...erably on the flywheel side half casing Insert the crankshaft on the half casing on the transmission side Fit the gasket recommended for surfaces on the half casing on the transmission side after greasing the two faying surfaces carefully Insert the flywheel half casing Fit the 10 screws and tighten them to the pre scribed torque N B WHEN FITTING THE HALF CASING AND THE CRANK SHAFT TAKE CARE NO TO...

Page 142: ...the flywheel oil seal from the crankcase being careful not to damage or score the crank case Check that the chain contrast pad is not worn Otherwise replace the pad or fit it inverted to make it work on the other side Any operation on the chain cover oil seal should be carried out placing the cover on the workbench on the covering plate side of the oil pump chain Remove the oil seal with a tube se...

Page 143: ...f the specific tools below Fit a new O ring and lubricate it with grease Install the cover on the engine crankcase insert the three screws and place the cover in its position Tighten the 3 screws to the prescribed torque Specific tooling 020376Y Adaptor handle 020358Y 37x40 mm Adaptor Locking torques N m Timing chain oil pump compartment cover screws 4 to 5 Nm Oil pump Removal Remove the chain com...

Page 144: ...the oil pump seal IT IS ADVISABLE TO MARK THE CHAIN IN ORDER TO EN SURE THAT THE INITIAL DIRECTION OF ROTATION IS MAINTAINED Inspection Remove the two screws and the oil pump cover Remove the clip retaining the innermost rotor Remove and wash the rotors thoroughly with a degreasing solvent and compressed air Reassemble the rotors in the pump body keep ing the two reference marks visible Replace th...

Page 145: ...o signs of scoring or wear on the oil pump cover If you detect non conforming measurements or scoring replace the faulty parts or the assembly Fit the cover on the pump being careful to align the holes 2 on the cover and 2 on the pump body fixing the oil pump on the crankcase Fit the oil pump on the crankcase by tightening the two screws to the prescribed torque Fit the pulley on the pump the cent...

Page 146: ...ving pulley assembly the belt the pinion and the transmission cover WHEN TESTING THE LUBRICATION SYSTEM REFER TO THE CRANKCASE AND CRANKSHAFT CHAPTER RE GARDING LUBRICATION OF THE CRANKSHAFT AND CONNECTING ROD Locking torques N m Oil sump screws 8 10 Nm Fuel supply Disconnect the fuel supply and the suction taking pipe from the carburettor Check that there are no fuel leaks between the two tubes C...

Page 147: ...20 cc Completely empty the fuel tank Remove the petrol delivery pipe and the low pressure pipe Loosen the clip and remove the cock Clean the tank and the filter of the cock with a specific solvent Refit the cock making sure that there is an O Ring Turn the cock to the direction it had before it was removed and block the clip N B THE FILTER CAN BE UNSCREWED FROM THE COCK TO FACILITATE CLEANING Remo...

Page 148: ...N THE TANK DOES NOT EMULSIFY Remove the 2 fixing screws indicated in the fig ure the vacuum chamber cover and the spring Remove the vacuum valve together with the di aphragm the pin the spring and its plastic guide WARNING DURING THE REMOVAL OF THE COVER TAKE SPECIAL CARE NOT TO RELEASE THE SPRING ACCIDENTALLY Remove the 3 fixing screws and the chamber with the gasket Remove the chamber components...

Page 149: ...ion and the diaphragm together with the pipe O Ring Remove the accelerating pump jet together with the ball spring Remove the screw indicated in the figure fixing the float pin Remove the float and the plunger Remove the maximum nozzle Remove diffuser Remove the minimum nozzle Fly 50 4t 4v Engine ENG 149 ...

Page 150: ...VE IT AS THIS WILL ONLY DAM AGE IT Remove the idle flow screw with the O ring and the spring CAUTION DO NOT ATTEMPT REMOVING PARTS EMBEDDED IN THE CARBURETTOR BODY SUCH AS FUEL SUPPLY PIPE PIN SEATING STARTER NOZZLE THROTTLE VALVE CONTROL VALVE SHAFT DO NOT REMOVE THROTTLE SHAFT CONNECTION SCREWS THE FIXING SCREWS ARE CAULKED AFTER THE ASSEMBLY AND THEIR REMOVAL DAMAGES THE SHAFT Engine Fly 50 4t ...

Page 151: ...upport hides other inaccessible inter nal calibrations Blow the intake nozzle properly The acceleration nozzle outlet is extremely small and is oriented to the throttle valve Check that the carburettor body has the closing ball for the idle circuit pipe Check that the coupling surfaces the chamber and the diaphragm are not dented Check that the depression valve housing pipe is not scratched Check ...

Page 152: ... the shock ab sorber pin and the return clamp Replace the rod if worn out Check that the float is not worn on the pin housing or on the contact plate with the rod and that there are no fuel infiltrations Replace it in case of failures Fit the float together with the pin and rod in its position and lock it with its screw N B INTRODUCE THE RETURN SPRING ON THE FLOAT PLATE ADEQUATELY Insert the ball ...

Page 153: ...y positioned Fit the rubber bellows protecting the pin in the upper part of the accelerating pump Level check Tilt the carburettor so that the needle valve at the fuel supply is closed and the float weight does not affect it Check that the diaphragm closing line and the float central line are parallel as shown in the figure Blow air in to the tank and then assembly it and its gasket on the carbure...

Page 154: ...l attention to the spring Inspecting the automatic choke device Check that the automatic starter piston is not de formed or rusty Check that the piston slides freely in its seating Check that the piston sealing O Ring is not de formed The starter must be more or less functional de pending on the ambient temperature Measure the protrusion of the piston as shown in the figure and check its correspon...

Page 155: ...e battery to power the automatic starter and check that piston protrudes as much as possible The correct warm up time depends on the ambi ent temperature If protrusion resistance or timing values are dif ferent from the ones prescribed replace the start er Characteristic Battery 12V 9Ah max protrusion 15 mm max time 15 min Fit the starter the support bracket and the pro tection with the screw indi...

Page 156: ...he idle The engine does not require frequent idle speed adjustments but it is essential to strictly follow certain rules when adjusting the idle speed Before adjusting the carburettor make sure to respect requirements on lubrication valve clearance and complying timing spark plug should be in optimum conditions air filter clean and sealed and the exhaust system tight Connect the tester thermometer...

Page 157: ...t the idle screw N B THE WASTED SPARK IGNITION SYSTEM OFFERS RE MARKABLE POWER READINGS MAY NOT BE ACCU RATE IF INADEQUATE RPM INDICATORS ARE USED Specific tooling 020332Y Digital rpm indicator Characteristic Idle speed about 1900 2000 rpm Fly 50 4t 4v Engine ENG 157 ...

Page 158: ...INDEX OF TOPICS SUSPENSIONS SUSP ...

Page 159: ...ub CAUTION DO NOT ACT ON THE FRONT BRAKE LEVER ONCE THE FRONT WHEEL IS REMOVED BY DOING SO THE CAL LIPER PISTONS COULD COME OUT FROM THEIR HOUS ING AND ALSO THE BRAKE FLUID MIGHT SPILL OUT Front wheel hub overhaul Cuscinetti a sfere sul mozzo ruota Remove the front wheel Keep the wheel level by means of two wooden wedges With the appropriate pliers and tool remove the wheel bearing on the side the...

Page 160: ...ing on the brake calliper side With an appropriate tool remove the bearing on the brake disc side Insert the spacer bushing on the brake disc side With a hot air gun heat the seat of the bearing on the side the rpm indicator detects movement Insert the internal spacer with the centring ring facing to the brake disc side as shown in the photo Use an appropriate tool to insert the bearing on the sid...

Page 161: ...isc opposite side centring the retainer on the fork leg onto the projecting parts of the odom eter drive Make the fork travel to adjust the fork legs on the wheel axle Holding the wheel axle lock the nut on the op posite side to the specified torque Tighten the two safety screw on the fork leg to the specified torque Locking torques N m Front wheel axle nut 45 50 Safety screw on fork leg 6 7 Handl...

Page 162: ... ing attention to the centring aligning the recess on the handlebar with that on the steering tube as shown in the figure Tighten the handlebar fixing screw on the steer ing tube to the specified torque Lubricate the nut with engine oil before installa tion Locking torques N m Handlebar fixing screw 50 to 55 Front fork Removal To remove the front fork remove the front and rear handlebar covers Rem...

Page 163: ...ension Remove the stem Replace the sealing rings 3 4 with new ones Insert the new sealing rings only after lubricating their grooves Refit the stem and the lower screw 1 Remove the upper screw 2 Add 30 cm 1 oil SAE 20W fork oil Refit all components Locking torques N m Fork top screw 20 25 Fork bottom screw 20 to 25 Nm Refitting To refit the fork carry out the removal operations but in reverse orde...

Page 164: ...hicle does not fall Remove the handlebar Remove the front brake calliper Free the fork from the odometer cable and the front brake calliper pipe Loosen the upper ring nut 1 and collect the shim washer 2 Specific tooling 020055Y Wrench for steering tube ring nut Locking torques N m Steering upper ring nut 35 40 Suspensions Fly 50 4t 4v SUSP 164 ...

Page 165: ...ng nut 8 10 When the specified torque of the lower ring nut is reached loosen by 90 See also Removal Removal Remove the balls retainer 7 of the lower bear ing B from the steering tube Wash carefully all the parts removed To refit carry out the removal operations but in reverse order Appropriately lubricate the bearings with recommended products Fly 50 4t 4v Suspensions SUSP 165 ...

Page 166: ...04Y Punch for removing fifth wheels from headstock Using the special tool refit the upper A and lower B bearing seats on the headstock Specific tooling 001330Y Tool for fitting steering seats LOWER BEARING SEAT REPLACEMENT ON FORK Check the condition of the lower bearing B seat 8 on the fork steering tube Replace if there are faults Support the fork properly Using the special tool remove the seat ...

Page 167: ...ering in forward position There should be no clearance forward or backward If there is clearance the steering must be adjusted ADJUSTING THE BEARING CLEARANCE Remove the handlebar Loosen the upper ring nut 1 using the specific wrench Screw in the lower ring nut 3 until the bearing clearance is totally eliminated CAUTION DO NOT EXCESSIVELY TIGHTEN THE LOWER RING NUT 3 BECAUSE THE STEERING BEARINGS ...

Page 168: ...emove the cap See also Exhaust assy Removal Pull the rear brake and keep it pulled with a clamp Unscrew the wheel fixing nut and collect the washer Take out the wheel from its housing To refit carry out the removal operations but in reverse order be careful to use a new cotter pin Locking torques N m Rear wheel axle 104 126 Swing arm Suspensions Fly 50 4t 4v SUSP 168 ...

Page 169: ...ing arm Operating on the engine side swinging arm re move the aesthetic cover and the seeger ring in dicated in the photo Remove the plate with the silent block Unscrew the nut on the right hand side of the en gine and slide the pin from the opposite side Unscrew the two clamps and remove the bracket To remove the silent block from the bracket please use the specific tool Specific tooling 020271Y ...

Page 170: ... the travel direction If there is any clearance check all the fastening elements that connect the swinging arm to the engine and chassis as well as the condition of the silent block Grease the points indicated in the drawing during the refit Locking torques N m Silent block swinging arm retaining bolts 36 to 44 Engine swinging arm bolt 40 to 45 Frame swinging arm bolt 50 to 55 Shock absorbers Susp...

Page 171: ...rques N m Shock absorber chassis nut 20 to 25 Lower shock absorber clamp 40 to 45 Refitting Before refitting check the condition of the rubber buffers if they are deformed or show obvious signs of wear and or breakage replace To refit follow the steps described for removal but in reverse order be careful to tighten to the prescribed torques Locking torques N m Shock absorber chassis nut 20 to 25 L...

Page 172: ...ide Remove the centre stand FITTING On refitting tighten the nut to the specified torque Locking torques N m Centre stand pin 40 to 45 Side stand Removal of the side stand Unhook the springs Unscrew the nut Undo and remove the screw indicated Fitting Carry out the previous operations but in reverse order Locking torques N m Side stand bolt 12 16 Suspensions Fly 50 4t 4v SUSP 172 ...

Page 173: ...INDEX OF TOPICS BRAKING SYSTEM BRAK SYS ...

Page 174: ... fork Refitting Refit the calliper on the support and tighten the screws to the specified torque Refit the tube complete with fitting with new cop per gaskets Place the tube joint in the original position and tighten it to the specified torque Bleed the air from the system Locking torques N m Brake fluid pipe calliper fitting 20 25 Calliper tightening screw 24 5 to 27 5 Oil bleeding valve 8 12 Fro...

Page 175: ...isc minimum thickness 3 5 mm Using the appropriate tool measure how much the disc protrudes when the wheel is fitted properly The protrusion measured near the external edge of the disc must be less than 0 1 mm If a value other than that prescribed is detected remove the front wheel and check how much the disc protrudes Maximum permissible out of true is 0 1 mm If the value measured is greater fit ...

Page 176: ...RS COULD GO OUT OF THEIR SEATS RESULTING IN BRAKE FLUID LEAKAGE Check the thickness of the friction material If thinner than the minimum value replace it Characteristic Minimum friction material thickness 1 5 mm In case of uneven wear replace the brake pads when the friction material thickness difference is 0 5 mm CAUTION ALWAYS REPLACE BOTH PADS AND MAKE SURE THEY ARE CORRECTLY POSITIONED INSIDE ...

Page 177: ...NCY CAUTION CONSIDERING THE DANGER POSED FOR VEHICLE AND RIDER IT IS STRICTLY NECESSARY TO BLEED THE HYDRAULIC SYSTEM AFTER REFITTING BRAKES AND CARRYING OUT REG ULAR MAINTENANCE OPERATIONS Proceed as follows Position the vehicle on a flat surface and on the stand Loosen the two screws shown in the figure and open the front brake fluid reservoir Once the bleed valve is closed fill the system with ...

Page 178: ...ITY FROM THE SURROUNDING AIR IF THE LEVEL OF HUMIDITY IN THE BRAKING FLUID EX CEEDS A GIVEN VALUE BRAKING EFFICIENCY WILL BE REDUCED THEREFORE ALWAYS USE FLUID FROM SEALED CON TAINERS UNDER NORMAL DRIVING AND CLIMATIC CONDITIONS YOU SHOULD CHANGE THIS LIQUID EVERY TWO YEARS IF THE BRAKES ARE USED INTENSELY AND OR IN HARSH CONDITIONS CHANGE THE FLUID MORE FRE QUENTLY CAUTION WHEN CARRYING OUT THE O...

Page 179: ...ing 20 25 Pump U bolt screw 8 See also Front handlebar cover Rear handlebar cover Rear drum brake Drum brake adjustment Regulate the point where the rear drum brake in tervenes using the adjustment indicated in the figure With the brake lever at rest the wheel must turn freely Drum brake removal Remove the rear wheel Hold the lower shoe and slide it out with the upper one For fitting First assembl...

Page 180: ...s retainers to the engine See also Front handlebar cover Legshield Footrest Release the transmission from the retainers on chassis and from the control lever Fit the new transmission fixing and positioning it like the one replaced Adjust the drum brake activation point Locking torques N m Rear brake adjustment nut 5 Braking system Fly 50 4t 4v BRAK SYS 180 ...

Page 181: ...Fly 50 4t 4v Braking system BRAK SYS 181 ...

Page 182: ...INDEX OF TOPICS CHASSIS CHAS ...

Page 183: ... the covering must be lifted in correspondence with the lock itself in such a way so as to be able to access the lock spring Remove the lock spring and slide the lock and the relative housing from the outside Side fairings Remove the legshield Undo the 3 fixing screws and remove the bumper ring on each side of the legshield Fly 50 4t 4v Chassis CHAS 183 ...

Page 184: ...t Remove the handgrip See also Helmet bay Driving mirrors With the adjustment nut completely tightened screw in the mirror stem on the handlebar all the way Loosen the mirror stem moving it to the desired direction Loosen the adjustment nut until locking the stem Locking torques N m Mirror set screw 24 26 Chassis Fly 50 4t 4v CHAS 184 ...

Page 185: ...n joint and slide it off Disconnect the electrical connections of the in strument panel Undo the 4 screws that secure the rear handlebar cover to handlebar Remove the rear handlebar cover complete with instrument panel assembly See also Front handlebar cover Fly 50 4t 4v Chassis CHAS 185 ...

Page 186: ...ndlebar cover Unscrew the 4 fixing screws and remove the in strument panel See also Rear handlebar cover Front handlebar cover Remove the 2 screws in the rear handlebar cover and the screw under the headlamp Chassis Fly 50 4t 4v CHAS 186 ...

Page 187: ... headlight assembly connections Headlight assy Remove the front handlebar cover Undo the 4 fixing screws to remove the headlight assembly To replace the high lowbeam headlight bulb it is necessary to remove the rubber cap and turn the supporting plate by 30 anticlockwise Fly 50 4t 4v Chassis CHAS 187 ...

Page 188: ...ve the bulb holder from the seat pull the bulb gently Front turn indicators To replace the front turn indicator bulb open the front case and remove the bulb holder from the seat lightly press the bulb rotate it about 30 and then pull it out See also Front handlebar cover Chassis Fly 50 4t 4v CHAS 188 ...

Page 189: ...s located behind the front mudguard Remove on both sides of the vehicle the screw on the leg shield back plate Undo the two screws under the lug of the shield Remove the Piaggio clip on badge unscrew the screw underneath and remove the grill by pulling it upwards Fly 50 4t 4v Chassis CHAS 189 ...

Page 190: ...side bumpers after disconnecting the electrical connections of the turn indicators and the daylight running lights See also Footrest spoiler Removing the front wheel Knee guard Remove the legshield Open the glove box and undo the 3 fixing screws indicated Chassis Fly 50 4t 4v CHAS 190 ...

Page 191: ...ry Remove the wires through the slots in the leg shield back plate Remove the screw fixing the bracket of the starter relay Remove the screw fixing the bracket of the fuse support and relay Fly 50 4t 4v Chassis CHAS 191 ...

Page 192: ...ck See also Knee guard Removing the ignition key switch when on lock Remove the leg shield back plate Remove the switch of the key switch Make a hole on the block using a drill as shown in the figure Insert the wheel cylinder with the key and with the anchoring tab facing down halfway on the lock body taking care that the insertion phase of the key is oriented matching ON the only position that en...

Page 193: ...ee guard Taillight assy Remove the handgrip Remove on both sides of the vehicle the flange side sliding it from the fit tings Undo the side fixing screw from both sides of the vehicle Fly 50 4t 4v Chassis CHAS 193 ...

Page 194: ...moving it from the seat Undo the central headlight fixing screw Detach the headlight assembly as shown in the picture The bulbs have a bayonet coupling to remove them press gently and turn it anticlockwise about 30 To refit follow the same steps but in reverse order Chassis Fly 50 4t 4v CHAS 194 ...

Page 195: ...rder Footrest Remove the side fairings Remove the 4 screws on the footrest Unscrew from both sides of the vehicle the screw under the spoiler and remove the side mud guard Unscrew from both sides of the vehicle the 2 screws that secure the footrest to the spoiler Remove the footrest Fly 50 4t 4v Chassis CHAS 195 ...

Page 196: ...nt Remove the front central cover Remove the handgrip Remove the rear headlight Undo side screw from both sides of the vehicle Undo the two upper side screws Undo from both sides of the vehicle the rear side screw Chassis Fly 50 4t 4v CHAS 196 ...

Page 197: ... of the vehicle the side fairing pushing it slightly forward See also Helmet bay Front central cover Rear rack Taillight assy License plate holder Remove the side panels Remove the rear light unit Undo the 3 screws that secure the licence plate support to the chassis Fly 50 4t 4v Chassis CHAS 197 ...

Page 198: ...owards the rear See also Side fairings Taillight assy Air filter Remove the side fairings Remove the footrest Remove the spoilers Unscrew the two clamps holding the filter housing to the crankcase Loosen the two clamps indicated Remove the filter housing See also Side fairings Footrest spoiler Chassis Fly 50 4t 4v CHAS 198 ...

Page 199: ...h also lock the air filter box to the crankcase Remove the fixing screw located on the right side Remove the mudguard making it come out on the muffler side Helmet bay Lift the saddle Remove the six fixing screws Fly 50 4t 4v Chassis CHAS 199 ...

Page 200: ... remove the screw shown in the pic ture Remove the spoiler See also Footrest Fuel tank Remove the side fairings Remove the footrest Remove the spoilers Remove the leg shield back plate Loosen the clamps and disconnect the connec tion pipes to the breather valve from the fuel tank filler Chassis Fly 50 4t 4v CHAS 200 ...

Page 201: ...ve the front wheel Unscrew the 3 fixing screws and remove them Disconnect the brake calliper pipe Unscrew the screw fastening the brake pipe on the mudguard and slide it off Remove the mudguard N B N B WHEN REFITTING MAKE SURE TO POSITION THE 2 METAL CABLE GROMMETS CORRECTLY Locking torques N m front mudguard to plate fixing screw 4 5 to 7 Front central cover Remove the lower cover Remove the helm...

Page 202: ...ndicated and remove the bat tery compartment cover Unhook the belt securing the battery Remove the battery from its housing and disconnect the connection cables from the electrical system starting with the negative pole Lower cover Undo the 2 side fixing screws indicated in the photo Remove the cover Chassis Fly 50 4t 4v CHAS 202 ...

Page 203: ...INDEX OF TOPICS PRE DELIVERY PRE DE ...

Page 204: ...rm Handlebar lock nut Lower steering ring nut Upper steering ring nut Electrical system Electrical system Main switch Headlamps high beam lights low beam lights tail and parking lights and their warning lights Adjusting the headlights according to the regulations currently in force Rear light parking light stop light Front and rear stop light switches Turn indicators and their warning lights Instr...

Page 205: ...TES AND SEEK IMMEDIATE MEDICAL ATTENTION IF IT ACCIDENTALLY SWALLOWED IMMEDIATELY DRINK LARGE QUANTITIES OF WATER OR VEGETABLE OIL SEEK IMMEDIATE MEDICAL ATTENTION BATTERIES PRODUCE EXPLOSIVE GASES KEEP THEM AWAY FROM NAKED FLAMES SPARKS AND CIGARETTES IF THE BATTERY IS CHARGED IN A CLOSED PLACE TAKE CARE TO ENSURE ADEQUATE VENTILATION ALWAYS PROTECT YOUR EYES WHEN WORKING CLOSE TO BATTERIES KEEP ...

Page 206: ...ER EXCEED THE RECOMMENDED INFLATION PRESSURES OR TYRES MAY BURST Functional inspection Functional Checks Braking system hydraulic Lever travel Braking system mechanical Lever travel Clutch Proper functioning check Engine Throttle travel check Others Check documentation Check the chassis and engine numbers Tool kit License plate fitting Check locks Check tyre pressures Installation of mirrors and a...

Page 207: ... 151 Checks 78 E Engine oil 43 F Fuel 146 200 H Headlight 48 187 Hub oil 41 I Identification 8 Instrument panel 186 M Maintenance 7 38 Mirrors 184 O Oil filter 45 R Recommended products S Shock absorbers 170 Spark plug 39 79 Stand 172 Suspension 52 T Tank 200 Transmission 9 51 100 110 Tyres 13 ...

Page 208: ...V Vehicle 8 94 169 ...

Reviews: