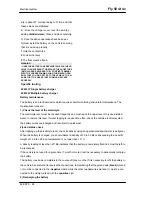
sity is about 27, corresponding to 31 Be, and that
these values are stabilised.
4) - Once the charge is over, level the acid (by
adding
distilled water
). Close and clean carefully.
5) Once the above operations have been per-
formed, install the battery on the vehicle ensuring
that it is wired up properly.
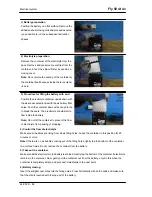
1
Hold the vertical tube
2
Look at the level
3
The float must be freed
WARNING
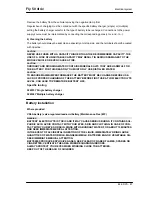
- ONCE THE BATTERY HAS BEEN INSTALLED IN THE VE-
HICLE IT IS NECESSARY TO REPLACE THE SHORT TUBE
(WITH CLOSED END) NEAR THE + POSITIVE TERMINAL
WITH THE CORRESPONDING LONG TUBE (WITH OPEN
END), THAT YOU FIND FITTED TO THE VEHICLE, TO EN-
SURE THAT THE GASES THAT FORM CAN ESCAPE
PROPERLY.
Specific tooling
020333Y
Single battery charger
020334Y
Multiple battery charger
Battery maintenance
The battery is an electrical device which requires careful monitoring and careful maintenance. The
maintenance rules are:
1) Check the level of the electrolyte
The electrolyte level must be checked frequently and must reach the upper level. Only use distilled
water, to restore this level. If water topping is required too often, check the vehicle electrical system:
the battery works overcharged and is subject to quick wear.
2)Load status check
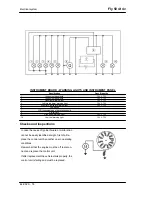
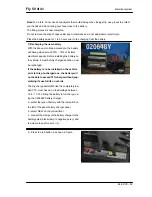
After topping-up the electrolyte level, check its density using an appropriate densitometer (see figure).
When the battery is charged, you should detect a density of 30 to 32 Bé corresponding to a specific
weight of 1.26 to 1.28 at a temperature of no lower than 15° C.
A density reading of less than 20° Bé indicates that the battery is completely flat and it must therefore
be recharged.
If the vehicle is not used for a given time (1 month or more) it will be necessary to periodically recharge
the battery.
The battery runs down completely in the course of three months. If it is necessary to refit the battery in
the vehicle, be careful not to reverse the connections, remembering that the ground wire (
black
) marked
(-) must be connected to the
-negative
clamp while the other two
red
wires marked (+) must be con-
nected to the clamp marked with the
+positive
sign.
3) Recharging the battery
Electrical system
Fly 50 4t 4v
ELE SYS - 86
Summary of Contents for Fly 50 4t 4v
Page 1: ...WORKSHOP MANUAL 677586 EN Fly 50 4t 4v ...
Page 4: ......
Page 6: ...INDEX OF TOPICS CHARACTERISTICS CHAR ...
Page 28: ...INDEX OF TOPICS TOOLING TOOL ...
Page 37: ...INDEX OF TOPICS MAINTENANCE MAIN ...
Page 49: ...INDEX OF TOPICS TROUBLESHOOTING TROUBL ...
Page 53: ...Fly 50 4t 4v Troubleshooting TROUBL 53 ...
Page 54: ...INDEX OF TOPICS ELECTRICAL SYSTEM ELE SYS ...
Page 63: ...7 Start up solenoid 8 At the battery connections Fly 50 4t 4v Electrical system ELE SYS 63 ...
Page 93: ...INDEX OF TOPICS ENGINE FROM VEHICLE ENG VE ...
Page 99: ...INDEX OF TOPICS ENGINE ENG ...
Page 158: ...INDEX OF TOPICS SUSPENSIONS SUSP ...
Page 173: ...INDEX OF TOPICS BRAKING SYSTEM BRAK SYS ...
Page 181: ...Fly 50 4t 4v Braking system BRAK SYS 181 ...
Page 182: ...INDEX OF TOPICS CHASSIS CHAS ...
Page 203: ...INDEX OF TOPICS PRE DELIVERY PRE DE ...
Page 208: ...V Vehicle 8 94 169 ...


