background image

Chapter 5: Maintenance

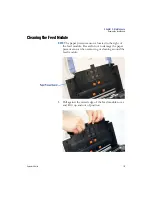
Cleaning the Feed Module

114

Scantron 

NSIGHT 20 Plus Scanner

2.

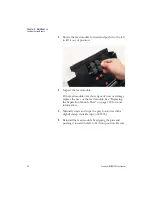
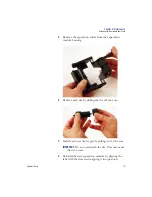
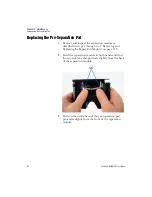
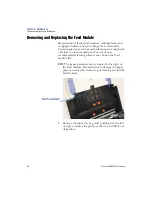
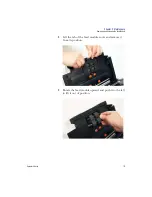
Rotate the feed module forward and push it to the left 

to lift it out of position.

3.

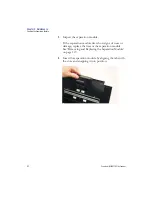
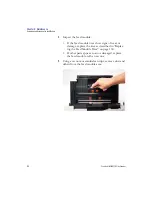
Inspect the feed module. 

If the feed module tires show signs of wear or damage, 

replace the tires or the feed module. See “Replacing 

the Separation Module Tires” on page 120 for more 

information.

4.

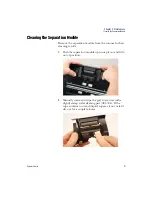
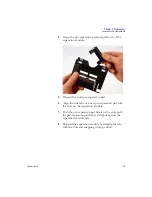
Manually rotate and wipe the gray foam tires with a 

slightly damp staticide wipe (ACL305).

5.

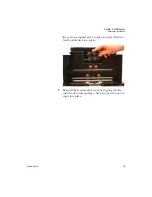
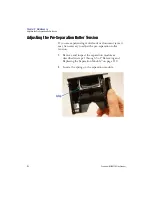
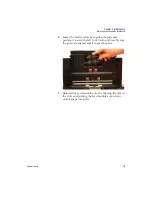
Reinstall the feed module by aligning the pins and 

pushing it toward the left to fit it into position. Be sure 

Summary of Contents for iNSIGHT 20 Plus

Page 1: ...Operator s Guide iNSIGHT tm 20 Plus ...

Page 2: ...Operator s Guide iNSIGHT tm 20 Plus ...

Page 3: ...émit pas de bruits radioélectriques dépassant les limites applicables aux appareils numériques de la classe A prescit dans le réglement sur le brouillage radioélectrique édicté par le Ministre des Communications du Canada Trademarks iNSIGHT Prosper ScanFlex PrintFlex Scantron DesignExpert ScanTools Scantron and the logo are trademarks in the U S and or other countries of Scantron Corporation or it...

Page 4: ...ent Organization This manual is organized as follows Chapter 1 iNSIGHT 20 Plus Dual Purpose Scanner provides an overview of the iNSIGHT 20 Plus scanner s features as well as safety and environmental infor mation Chapter 2 Scanner Basics describes the basics of using your scanner Chapter 3 Installation describes how to install your scanner Chapter 4 Document Imaging Basics describes how to some of ...

Page 5: ... of the following What s in This Box for the iNSIGHT 20 Plus Scanner Publication Number 277 160 xxx Quick Start for the iNSIGHT 20 Plus Scanner Publication Number 277 158 xxx Quick Tips for the iNSIGHT 20 Plus Scanner Publication Number 277 159 xxx Scantron iNSIGHT 20 Plus Scanner Operator s Guide Publication Number 277 157 xxx Scantron Scanners Elements of Data Collection Publication Number 277 2...

Page 6: ... T Preface i Chapter 1 iNSIGHT 20 Plus Dual Purpose Scanner 1 Scanner Hardware Features 3 Data Collection Features 4 Document Imaging Features 5 System Requirements 6 Safety Information 7 Material Safety Data Sheets MSDS 8 Warning Labels 9 ...

Page 7: ...Power System Connection 15 Chapter 2 Scanner Basics 17 Scanner Components 18 Front View 18 Inside View 20 Back View 21 Locking the Scanner 23 Turning the Scanner On 24 Scanner Positions 25 Tilting the Scanner Body 27 Adjusting the Output Tray 28 Position for Scanning 28 Extending the Output Tray 29 Adjusting the Input Tray Side Guides 32 Starting and Stopping the Scanner 33 ...

Page 8: ...n 43 Registering Your Scanner 43 Product Support and Services 43 Selecting a Good Location 44 Attaching the Input Tray 46 Installing the iNSIGHT Scanner Utilities Software 47 Connecting the Power Cord to the Scanner 50 Connecting the USB Cable 52 Finalizing the iNSIGHT Scanner Utilities Software Installation 54 Getting Ready to Scan 57 Step 1 Calibrating Your iNSIGHT 20 Plus 57 Step 2 Running the ...

Page 9: ...maging Basics 77 Main Software Interfaces 77 Click Scan 80 Click Scan Functionality 80 Configuration Dialog Box 82 Using Function Numbers 86 Click Scan Edit Window 88 The Main Scanner Window 91 Opening the Main Scanner Window 91 Creating Color Grayscale or Black and White Images Based on the Content of Your Documents 92 Creating Multiple Images for Each Side of a Document 96 Creating Different Set...

Page 10: ...leaning the Imaging Guides 116 Cleaning the UDDS Sensor 117 Removing and Replacing the Separation Module 119 Replacing the Separation Module Tires 120 Replacing the Pre Separation Pad 122 Adjusting the Pre Separation Roller Tension 124 Removing and Replacing the Feed Module 126 Replacing the Feed Module Tires 130 Chapter 6 Troubleshooting 135 LED Codes 136 Indicator Light and Function Window 138 L...

Page 11: ...ine Registration 146 Printed Documentation 147 The Help System 148 Training 149 Internet Resources 150 Ordering Supplies 151 Ordering Forms and Print Services 152 Standard Forms 152 Custom Form Design and Other Services 152 Requesting Support 153 Before calling 153 Services 155 Appendix A Color Options for Data Collection Forms 157 Ink Form Color Options 1 Color 158 ...

Page 12: ...Operator s Guide ix Pencil Form Color Options 1 Color 159 Pencil Form Color Combinations 2 Color 160 Pencil Form Color Combinations 3 Color 164 Index 167 ...

Page 13: ...x Scantron i NSIGHT 20 Plus Scanner ...

Page 14: ...rom printed forms e g surveys tests ballots etc and converting them to ASCII data The iNSIGHT 20 Plus scanner precisely scans the sheets for data while your data collection software for example ScanTools Plus controls the scanning process and stores the data that is read The 1 In this chapter Scanner Hardware Features page 3 Data Collection Features page 4 Document Imaging Features page 5 System R...

Page 15: ...ment imaging is the process of scanning and processing black white grayscale or color images A common use of document imaging is digitally storing documents such as student work patient records invoices photographs and more The iNSIGHT 20 Plus scanner can effectively transport sheets of multiple sizes and thicknesses in a single load The images are scanned and then processed using the included Cli...

Page 16: ...cuments stopped on the bed Dual cameras read front and back of sheet simultaneously Easy cleaning and maintenance User replaceable feed and separation modules Long life cold cathode fluorescent lamps Automatic document feeder 40 sheet 24 lb bond 90 g m2 paper autofeed input output trays Scans from 9 lb bond to 110 lb index 34 199 g m2 paper Up to 1950 sheets per hour throughput in data collection ...

Page 17: ... bit depth Handles all common spacings 166 166 48 cell 200 inline 200 offset 200 line read and 300 line read NOTE Skew marks recommended but optional for 200 and 300 line read Scans small documents such as ID cards embossed cards and insurance cards 20 lb 75 g m2 Ink and pencil mark detection Capture name and archive single and multi page image clips TIFF JPEG RTF BMP PDF and searchable PDF Softwa...

Page 18: ...t resolutions from 75 to 1200 dpi Interactive brightness contrast and color adjustment Advanced software image processing including automatically detect and straighten iThresholding ATP auto orientation background color smoothing add or remove borders auto color detect and searchable PDF output Simultaneous black and white and color or black and white and grayscale image output Save files in TIFF ...

Page 19: ...antron i NSIGHT 20 Plus Scanner System Requirements NOTE The iNSIGHT 20 Plus Scanner Utilities software supports only one scanner connected to the host computer at a time For more information about system requirements for the iNSIGHT 20 Plus scanner go to www scantron com ...

Page 20: ...y be used indoors in a dry location When placing the scanner make sure that the electrical power outlet is located within 5 feet 1 52 meters of the scanner and is easily accessible Use only the power supply that was provided with your Scantron iNSIGHT 20 Plus scanner Do not substitute another power supply model or another manufacturer s power supply ...

Page 21: ...ets MSDS Material Safety Data Sheets MSDS for chemical products are available on the Scantron Support Web site at www scantron com support When accessing the MSDSs from the Web site you will need the part number for the part or consumable See Supplies and Consumables on page 105 of this guide for a list of consumables and their part numbers ...

Page 22: ...Chapter 1 iNSIGHT 20 Plus Dual Purpose Scanner Warning Labels Operator s Guide 9 Warning Labels CAUTION Moving parts avoid contact CAUTION Hot surface avoid contact ...

Page 23: ...s or long necklaces Hair length should be kept short using a hair net if needed or tying long hair up in a bundle Remove all loose objects from the area that could be drawn into the machine Take sufficient breaks to maintain mental alertness Do not use canned compressed air for cleaning Using compressed air could blow dust into difficult to clean areas Use only the recommended cleaning supplies to...

Page 24: ...onics Industry Alliance Web site at www eiae org The product packaging is recyclable although it should be retained in case the scanner needs to be shipped for service The Scantron iNSIGHT 20 Plus Scanner is ENERGY STAR compliant and is shipped from the factory with the default shut off time set to 15 minutes The scanner changes to low power mode after 15 minutes of inactivity Waste Electrical and...

Page 25: ...determined by turning the equipment off and on the user is encouraged to try to correct the interference by one or more of the following measures Reorient or relocate the receiving antenna Increase the separation between the equipment and receiver Connect the equipment into an outlet on a circuit different from that to which the receiver is connected Consult the dealer or an experienced radio TV t...

Page 26: ...ass B product based on the standard of the Voluntary Control Council for interference by information Technology Equipment VCCI If this is used near a radio or television receiver in a domestic environment it may cause radio interference Install and use the equipment according to the instruction manual ...

Page 27: ...Emission 14 Scantron i NSIGHT 20 Plus Scanner Acoustic Emission Machine Noise Information Ordinance 3 GSGV The operator position noise emission value is 70 dB A Maschinenlärminformationsverordnung 3 GSGV Der arbeitsplatzbezogene Emissionswert beträgt 70 db A ...

Page 28: ...IT power system with phase to phase voltage 230V Netzanschluß Das Gerät ist auch für die Verwendung im norwegischen IT Stromsystem mit einer Leiterspannung von 230 V geeignet Connexion Aux Systèmes D alimentation Électrique Ce produit est également conçu pour les systèmes norvégiens d alimentation électrique informatique dont la tension par phase est de 230 V ...

Page 29: ...Chapter 1 iNSIGHT 20 Plus Dual Purpose Scanner Power System Connection 16 Scantron i NSIGHT 20 Plus Scanner NOTES ...

Page 30: ...uccessfully scan documents during setup and for production use 2 In this chapter Scanner Components page 18 Locking the Scanner page 23 Turning the Scanner On page 24 Scanner Positions page 25 Tilting the Scanner Body page 27 Adjusting the Output Tray page 28 Adjusting the Input Tray Side Guides page 32 Starting and Stopping the Scanner page 33 Document Preparation page 34 Scanning Your Documents ...

Page 31: ...Tray Holds up to 50 documents 24 lb 75 g m2 in place 3 Side Guides Can be moved in and out to accommodate the size of the documents you are scanning 4 Function Window Displays 0 through 9 These numbers correspond to a predefined function of your choice An error number will be displayed if an error is encountered indicated by a red LED indicator 5 LED Start button Illuminates or flashes indicating ...

Page 32: ...t Button Scroll Button and Function Window are used with the Click Scan functionality 7 Output Tray Collects up to 80 scanned documents When the scanner is placed in the vertical position the output tray slides underneath the scanner making the scanner compact and easy to store When the scanner is in use and tilted the output tray can be pulled out and extended to accommodate documents up to 35 56...

Page 33: ...ner cover 2 Gap Release Lever Allows you to manually adjust the space between the feed module and separation module for documents that require special handling for example documents that are torn 3 Separation Module Release Lever Push the release lever to remove the separation module for cleaning or replacement 4 UDDS Sensor Used to detect multi feeds and document edges 5 Imaging Guides The camera...

Page 34: ... the presence of documents in the input tray 8 Feed Module Assembly Provides smooth document feeding and separation of various sizes thicknesses and textures of documents 9 Background Strips These black background strips can be interchanged with the White Background Accessory which can be used if you are scanning translucent or very thin documents to reduce black background bleed through Back View...

Page 35: ...nnel Allows you to secure the USB cable and power cord to protect them when the scanner is moved 2 USB Port Connects the scanner to the PC 3 Power Port Connects the power cord to the scanner 4 Power Switch Turns the scanner on and off 5 Security Lock Port Connects a security lock to the scanner ...

Page 36: ... available if you want to secure your scanner You can purchase a standard security lock as shown above at an office supply store 1 Insert the lock into the back of the scanner and turn the key to lock the scanner in place 2 Use the looped end of the cable to secure the cable and scanner to a stationary place ...

Page 37: ...eing loaded Press and release the switch on the back of the scanner to turn the scanner on After you turn on the scanner wait for it to complete the self test When the scanner is connected to the host PC and the self test completes the green indicator light will remain on and constant and the function window will display 1 If the scanner is not connected to the host PC and the self test completes ...

Page 38: ...20 Plus scanner is equipped with a tilt feature which allows the scanner to be tilted down for scanning and upright for storage The following photos show the angles the scanner can be placed in The scanner body tilts into a 25 or 90 degree angle 25 degree position Use this position for scanning ...

Page 39: ...apter 2 Scanner Basics Scanner Positions 26 Scantron i NSIGHT 20 Plus Scanner 90 degree position This position is best for storage IMPORTANT When using the tilt feature be sure the scanner cover is closed ...

Page 40: ...Chapter 2 Scanner Basics Tilting the Scanner Body Operator s Guide 27 Tilting the Scanner Body Hold the scanner body on the sides and rotate the scanner body into the scanning position ...

Page 41: ...put Tray The output tray can be extended to accommodate different sized sheets Experiment with different positions to determine the one that best fits your needs Position for Scanning When scanning for data collection or when scanning documents the scanner should be in the 25 degree position as shown below ...

Page 42: ...t Tray The output tray extends to accommodate documents up to 14 inches 35 56 cm To extend the output tray follow the steps below Step 1 Pull out on the middle of the output tray to extend the tray for short documents You can also flip up the short document end stop Short Document End Stops ...

Page 43: ...he Output Tray 30 Scantron i NSIGHT 20 Plus Scanner Step 2 Flip over the middle section of the tray extension for larger documents Step 3 Flip the middle section of the next tray extension to accommodate documents up to 14 inches 35 56 cm ...

Page 44: ...Chapter 2 Scanner Basics Adjusting the Output Tray Operator s Guide 31 Step 4 Lift the end stops as necessary for better document stacking of long documents Long Document End Stops ...

Page 45: ...The input tray side guides can be moved in or out to accommodate different document sizes Adjust the side guides just slightly wider than the documents you are scanning When the side guides have been adjusted to the correct width you can lock the guides in place to keep the guides from shifting during scanning Input Tray Side Guide Lock ...

Page 46: ...d ready for operation which is indicated by the green indicator light being on and constant Scanning is controlled by software developed for your application To start and stop scanning refer to the documentation provided with your application software NOTE Be sure that the documents in the input tray are cen tered in the tray and in the path of the paper present sensor ...

Page 47: ...aying them flat for 24 hours in a climate controlled 60º to 80º F or 16º to 27º C and 40 60 humidity environment Align the forms so that all sheets have the same orientation Jog align by tapping on a hard surface the forms on the leading edge form ID edge and timing mark edge Ensure that the forms are placed into the input tray with the front side down because it is a bottom feed scanner Also ensu...

Page 48: ...orrection tape to cover them up If using liquid correction fluid be sure to allow it to dry thoroughly before scanning as otherwise it can get on the imaging guide and cause errors If a sheet is torn you can use tape to repair it Be sure to verify that the form is read correctly if taping over marks or the timing track NOTE Tape on a sheet may generate a multiple sheet error that will be displayed...

Page 49: ... Liquid Paper Tipp Ex Wite out and other similar correction fluids must be dry before scanning is started If not fully dry correction fluid can get on the imaging guides and cause errors Paper Weights 9 lb bond to 110 lb index 34 to 200 g m2 kg Minimum Document Size 2 5 x 2 6 4 x 5 1 cm Maximum Document Size 8 5 x 34 21 6 x 86 0 cm Damaged Documents Torn damaged or crushed pages can be transported...

Page 50: ...delines for size type quantity etc as previously described in Document Preparation on page 34 CAUTION Remove all staples and paper clips before scan ning Staples and paper clips in documents may dam age the scanner and the documents 1 Align jog the leading edges of the stacked docu ments 2 For data collection also align jog the timing mark side of the stacked documents 3 For all documents position...

Page 51: ...HT 20 Plus logo 4 Adjust the input tray side guides 5 Adjust the output tray position if necessary 6 Pull out the output tray extender if necessary 7 Start scanning Single Feeding Follow the guidelines for document size type weight and quantity Position the document face down with the leading edge centered in the automatic document feeder adjust the input tray side guides if necessary then start s...

Page 52: ...des information on the current state of the scanner Indicator Light This light indicates Flashing green scanner is powering up busy or in power saver mode Steady green scanner is ready to scan Steady red scanner error such as the scanner is not connected to the host computer or the scanner cover is open ...

Page 53: ...depending on the software that you are using See the table below NOTES The scanner changes to low power mode after 15 minutes of inactivity If you want to shut off the lamps sooner than 240 minutes after running a ScanTools Plus application simply run Click Scan with the Power Saver Device Setting set to the desired shut off time Software Warm up Shut off ScanTools Plus associated data collection ...

Page 54: ...the input tray area 2 Lift up the scanner cover release to unlatch the scanner cover 3 Pull up to open the scanner cover 4 Locate the jammed document and remove it being sure to clear any paper shreds or pieces left behind 5 Lower the scanner cover and press it down firmly so that both sides latch Scanner Cover Release ...

Page 55: ...Chapter 2 Scanner Basics Clearing Document Jams 42 Scantron i NSIGHT 20 Plus Scanner NOTES ...

Page 56: ...gistering your product see Registering Your Product on page 145 Product Support and Services If you encounter difficulties setting up or operating your scanner there are a number of places to get the needed information to resolve your difficulty For information on the support services that are available see Chapter 7 Product Support and Services 3 In this chapter Selecting a Good Location page 44 ...

Page 57: ...enheit or 15º to 27º Celsius with 40 humidity environment for 24 hours before you attempt to scan them Electrical noise Do not locate the scanner near a generator or other type of large motor such as an elevator an air conditioner or a refrigerator that produces electrical noise which might interfere with the operation of the scanner Phone access Locate the scanner close to a phone in the same roo...

Page 58: ...ing a Good Location Operator s Guide 45 Temperature Place the scanner in an environment that ranges between 60 and 85 Fahrenheit or 15º to 29º Celsius Improper temperature conditions can cause the scanner to read sheets incorrectly ...

Page 59: ...ace the pin into the hole see photo NOTE It is necessary to tilt the tray forward somewhat so that the side guides have clearance 2 Next push the input tray gently but firmly toward the other side so that the pin on the other side has clearance to fit in the hole on the other side 3 Allow the input tray to rotate down into position Pin Hole ...

Page 60: ...licks of your mouse For more information about Click Scan see Chapter 4 Document Imaging Basics Calibration Utility A software program that is used during setup to calibrate the scanner for data collection After setup this program should not be used unless the scanner has been moved to a different computer the scanner has been exchanged for a new one or you are directed to do so by Scantron Custom...

Page 61: ...ing procedure to install the software and connect the scanner 1 Insert the iNSIGHT Scanner Utilities CD into the CD ROM drive 2 Browse to your CD ROM drive then double click setup exe The Welcome dialog box opens 3 Click Next to continue The Scanner Selection dialog box opens 4 Select iNSIGHT 20 Plus from the drop down list ...

Page 62: ...ies Software Operator s Guide 49 The iNSIGHT 20 Plus appears in the dialog box 5 Click Next The Destination Folder dialog box opens 6 Accept the default or enter a program folder in the text box and click Next The Ready to Install the Program dialog box appears ...

Page 63: ...to the steps in the software installation program These steps are included here with additional information Connecting the Power Cord to the Scanner Use only the power supply that was provided with your Scantron iNSIGHT 20 Plus Scanner Do not substitute another power supply model or another manufacturer s power supply After the drivers have been installed use the following procedure to connect the...

Page 64: ...d with your scanner 2 Attach the power cord for your power type to the power supply Well Shin WS 005C R31514 2 5A 125V Taiwan WELL SHIN WS 004 E115330 10A 125V North America Well Shin WS 009 10A 250V Australia Well Shin WS 004B 6A 250V China Well Shin WS 006 2 5A 250V Europe Well Shin WS 005C 7A 125V Japan Well Shin WS 012A 5A 250V United Kingdom Ireland Hong Kong Malaysia Singapore ...

Page 65: ...ug the power cord output lead attached to the power supply into the power port on the back of the scanner 4 Plug the power cord input lead attached to the power supply into the wall outlet Connecting the USB Cable CAUTION If you have not installed the iNSIGHT Scanner Utilities software do that now before proceeding ...

Page 66: ...ied with your scanner has two different ends 1 Attach the B end of the USB cable to the scanner USB port located on the back of the scanner IMPORTANT The USB port may be covered by a sticker Remove the sticker to access the port 2 Attach the A end of the USB cable to an open high speed USB 2 0 port on your PC B A ...

Page 67: ...T 20 Plus Scanner Finalizing the iNSIGHT Scanner Utilities Software Installation When the iNSIGHT Scanner Utilities software has been properly installed and the USB cable and power connections have been made you can turn on the power to complete installation 1 Turn on the power to the scanner ...

Page 68: ...tests and the indicator LED lights up When the scanner is finished and ready to scan the indicator LED stops flashing and stays green When this occurs click Next to continue If the green LED indicator does not become a steady green within several minutes contact Scantron Cus tomer Support as described in Requesting Support on page 153 ...

Page 69: ...ner The Wizard Completed dialog box appears 2 Do one of the following To calibrate your scanner now continue to the next section Getting Ready to Scan on page 57 NOTE The iNSIGHT 20 Plus scanner must be calibrated before you can begin scanning To exit the iNSIGHT Scanner Utilities installation click Finish ...

Page 70: ...tep 1 Calibrating Your iNSIGHT 20 Plus CAUTION The Calibration Utility should only be run for the following reasons upon initial installation you move the scanner to a different computer your scanner is exchanged for a new one you are directed to by Scantron support NOTE You can run only one of the following programs at a time because they use the same driver iNSIGHT Scanner Utilities Click Scan S...

Page 71: ...tion program reads Normalization Calibration sheets part number 202 502 043 supplied with the scanner see the graphic below NOTE The part number for a box of 80 Normalization Calibration Sheets is 342 760 014 1 Close all other programs 2 On the Wizard Completed dialog box click Run Calibration ...

Page 72: ...ng system The following dialog box appears 3 Click Calibrate The Step 1 of 2 dialog box appears 4 Place a stack of Normalization Calibration Sheets part number 202 502 043 into the input tray printed side down so that the words Normalization Calibration Sheet enter the scanner first as shown in the graphic below NOTE The corner is turned in the image below to show the printed side ...

Page 73: ...he verification takes place NOTE If the input tray empties and the Input hopper empty message box appears take the sheets from the output tray tap them on a hard surface to align them and then place them back in the input tray the same way you last loaded them When you are ready click Retry 8 When the front side calibration is complete the Step 2 of 2 dialog box appears Error What To Do Jam Open s...

Page 74: ...de dialog box appears Wait while the software performs the back side calibration 12 When back side calibration is complete the Verifying calibration for the back side dialog box appears and the scanner scans additional sheets Wait while verification takes place NOTE If the input tray empties and the Input hopper empty message box appears take the sheets from the output tray tap them on a hard surf...

Page 75: ...the root drive of your computer The files are named as follows Log files serial number _20p_norm log Calibration files serial number _20p_cal lut 14 Do one of the following To run a document imaging test continue to Step 2 Running the Document Imaging Test on page 62 To exit the iNSIGHT Scanner Utilities installation click Finish Step 2 Running the Document Imaging Test NOTE You can run only one o...

Page 76: ... Wizard Completed dialog box click Run Document Imaging Test The Scan Validation Tool dialog box appears 2 Select TWAIN and Scantron iNSIGHT 20 Plus and click OK The Connecting to Scanner message box appears indicating that it may take a few minutes to connect to the scanner ...

Page 77: ...tion Getting Ready to Scan 64 Scantron i NSIGHT 20 Plus Scanner The Scan Validation Tool appears 3 Click Two image display see the graphic above 4 Click Setup see the graphic above Two image display Setup Start Scanning ...

Page 78: ...ator s Guide 65 The main Scantron iNSIGHT 20 Plus settings window opens a Under Setting Shortcuts select Color Perfect Page Document b Under Input document is make sure that Two Sided is selected c Click OK to return to the Scan Validation Tool window ...

Page 79: ...canTools Plus Software IMPORTANT Perform this step only if your scanner came bundled with ScanTools Plus data collection software CAUTION You must have the iNSIGHT Scanner Utilities installed before installing ScanTools Plus Next install ScanTools Plus data collection software See Chapter 2 of the ScanTools Plus Installation Guide included with your iNSIGHT 20 20 Plus scanner for instructions on h...

Page 80: ...from your operating system The ScanTools Plus window opens 2 Select Options Scanner Configuration from the ScanTools Plus menu The Scanner Configuration dialog box opens a Select iNSIGHT 20 20 Plus from the Scanner Model drop down list b Select Write Operations Log c Click Auto Configure ...

Page 81: ... Running the Data Collection Test IMPORTANT Perform this step only if your scanner came bundled with ScanTools Plus data collection software NOTE You can run only one of the following programs at a time because they use the same driver iNSIGHT Scanner Utilities Click Scan ScanTools Plus In this section you will use ScanTools Plus software to perform data collection 1 Open ScanTools Plus from your ...

Page 82: ...n select the application again If this does not resolve the issue contact Scantron Customer Support as described in Requesting Support on page 153 3 Select 710 Data Collection Test from the Data File drop down list 4 Load the test forms a Find the pack of 16 pre slugged answers filled in General Purpose Answer Sheets 223127 pack number 202 521 006 These sheets have been marked with sample data The...

Page 83: ...dow The sheets should scan If they do not recheck your scanner installation If you are unable to resolve the difficulty contact Scantron Customer Support as described in Requesting Support on page 153 When the scanner is done scanning a scanner error message appears indicating that the input hopper is empty 6 Click Stop Scanning to clear the dialog boxes so you can view the data file Form ID Marks...

Page 84: ...y is present for each sheet the test is complete and the scanner is ready to perform data collection tasks For more infor mation regarding how to perform data collection proj ects start to finish refer to the Elements of Data Collection included with your scanner If data appears incorrect or is missing contact Scantron Customer Support as described in Requesting Support on page 153 Installation Co...

Page 85: ...ay get an error message similar to the one below recommending that you recalibrate the scanner The possible causes of this error message are If calibration was unsuccessful If you aborted the installation procedure before calibration was completed If you moved the scanner to a new host computer If you swapped out a defective scanner for a new one If one of these conditions applies to you you will ...

Page 86: ...ams and turn off the scanner 2 Open the Control Panel and access the list of programs 3 Uninstall the software in the following order a Click Scan b Scantron iNSIGHT Scanner Utilities NOTE If you uninstalled the software in an order different from that specified above you will need to remove the empty program groups for example Document Imaging Uninstalling ScanTools Plus Software IMPORTANT This p...

Page 87: ... resident in the scanner To update the iNSIGHT Scanner Utilities software use the following procedure 1 Insert the iNSIGHT Scanner Utilities CD into the CD ROM drive of the host computer The setup program starts automatically NOTE If the CD does not start automatically browse to the CD ROM drive and double click setup exe The Welcome dialog box opens NOTE If you uninstalled the software prior to p...

Page 88: ... and click Next 3 Click Install and follow the on screen instructions NOTES You do not need to recalibrate the scanner or run the document imaging test when the update is complete If the calibration file is missing when you attempt to exit the installation you will be prompted to run the calibration program ...

Page 89: ...Chapter 3 Installation Updating the iNSIGHT Scanner Utilities Software 76 Scantron i NSIGHT 20 Plus Scanner NOTES ...

Page 90: ...as patient records student work invoices census documents photographs and more Bundled Software The iNSIGHT 20 Plus scanner comes with Click Scan software that you can use for your day to day on demand scanning Main Software Interfaces With the document imaging software that came with your scanner there are three main software interfaces We introduce them to you below 4 In this chapter Click Scan ...

Page 91: ... Window TWAIN Driver Interface The Main Scanner window gives you access to all settings that precisely define how you want to scan your images You can save and name up to 60 setting shortcuts each having unique control settings over how the images are scanned This window gives you access to the Image Advanced and Device settings that are saved with the setting shortcut Those settings are actually ...

Page 92: ...Chapter 4 Document Imaging Basics Operator sGuide 79 applications with the scanner they may also use this TWAIN interface ...

Page 93: ...are installed with the software however you can reconfigure Click Scan to handle tasks that are the most important to you You can perform any of the tasks by selecting the function from the Click Scan function listing Different scanning functions can be assigned and executed After you have installed the scanner software drivers and application software restarted your computer a Scanner icon appear...

Page 94: ...splay the Click Scan menu This list displays the currently configured functions Function listing Click one of the functions to run the assigned task Configure Select Configure to change the settings assigned to a function About Displays the version number and other information about Click Scan ...

Page 95: ...llows you to change the settings associated with each of the nine function numbers When you select Configure from the function listing the configuration dialog box appears Task shortcut Select the function 1 through 9 that you want to modify Rename Displays the Rename dialog box which allows you to enter a new name for the Task shortcut ...

Page 96: ...is set up to use Adobe Reader to read PDF files the saved file will be opened using Adobe Reader E mail Creates an electronic file from the scanned documents saves the file using the cur rent date and sequence number as the name then launches your default E mail program with the saved file included as an attachment Printer Fax Printer Sends the scanned docu ments to the printer or fax printer This...

Page 97: ...onts images graphics and layout of the source files regardless of the application and plat form used to create it TIFF Multi page Combines all the scanned images into a single TIFF file JPEG TIFF Single page If you are scanning documents with multiple pages or sides each page or side is saved as a separate JPEG or TIFF file Folder Type the folder name where you want to save the scanned images or c...

Page 98: ... of the file and the location where it will be stored The Save As dialog box appears each time the function is run Scan As Settings Setting Shortcut displays the name of the Setting Shortcut used on the Main Scanner window This is the shortcut to the collection of scanner settings being used by the scanner Display settings prior to scanning if selected the Main Scanner window appears before the do...

Page 99: ... configuration dialog box If you made changes in the configuration dialog box and you did not save your changes a message appears Cancel Closes the Confirm dialog box without saving any unapplied changes Yes Saves any changes made on the configuration dialog box No Closes the configuration dialog box without saving any changes Using Function Numbers When you have assigned the function numbers they...

Page 100: ...ion listing 2 Select the function number you want to run From the Buttons on the Front of the Scanner 1 Select the number for the function you want to run using the scroll top button on the scanner The number of the function is displayed in the function window NOTE The numbers correspond to the Click Scan icon function numbers see above ...

Page 101: ...canner 2 Push the start bottom button to perform the scan Click Scan Edit Window If the Edit images prior to sending check box in the configuration dialog box is selected the Click Scan edit window appears when documents are scanned Function Window Scroll Button Start Button ...

Page 102: ...ments and append them to the current images Stop Cancels the scanning of documents Magnifier Magnifies a portion of the image Press and hold the left mouse button inside an image to magnify it Drag the tool across the image to magnify different areas of the image Pan Allows you to move the image freely around the window Use this tool when the entire image is not visible in the display window for e...

Page 103: ...ge inside the region A confirmation dialog box appears before the image is cropped Blank Replaces the portion of the image inside the region with a white background A confirmation dialog box appears before the image is modified More Editing Tools Tools and shortcuts to get different views of the images including tools to zoom in and zoom out Normally the shortcuts or hot keys would be used for the...

Page 104: ...the Click Scan software You may also find that your other scanner applications use this same interface if they use the same TWAIN driver for example optical mark recognition software Opening the Main Scanner Window To open the Main Scanner window from the Click Scan configuration menu click the Settings icon For more information about the Main Scanner window click the help icon to access the onlin...

Page 105: ...mple we will configure a scan session that has a mix of color and black and white documents with information on both sides In addition we will configure the scanner to detect whether the page is color and then output either a color or black and white image 1 Select a Setting Shortcut from the Main Scanner window that closely describes your desired output 2 Click Settings The image settings window ...

Page 106: ...Chapter 4 Document Imaging Basics The Main Scanner Window Operator sGuide 93 3 Click the Advanced Image Setup icon The Advanced tab appears 4 Select Two Sided from the Input document is drop down list ...

Page 107: ...on the Advanced tab and contains a color image item and a black and white image item The Content Settings tab also appears For this example we will create either a color or black and white image 6 Select Color 24 bit NOTE If you want a grayscale image instead of a color image when enough color is detected in the document select Color 24 bit select the Change icon and then select Grayscale ...

Page 108: ... down list 9 Click Done to return to the image settings window 10 Select Both Black and White 1 bit from the Side drop down list 11 Adjust any other black and white image settings on the rest of the tabs in the image settings window 12 When finished click Home to return to the Main Scanner window then click Save to save your selections to the shortcut ...

Page 109: ... side of each document 1 Select the appropriate Setting Shortcut from the Main Scanner window Select a setting that closely describes the type of output you want 2 Click Settings The image settings window appears 3 Click the Advanced Image Setup icon The Advanced tab appears 4 Select Two Sided from the Input document is drop down list 5 Select Multiple from the Images per side drop down list The I...

Page 110: ...and white image If you want the black and white image to be produced and delivered first a Select Black and White 1 bit b Click Move Up to place the black and white image first in the list 8 Click Done to return to the image settings window 9 Select Front Color 24 bit from the Side drop down list 10 Select Back Black and White 1 bit from the Side drop down list 11 Adjust any other black and white ...

Page 111: ...black and white is acceptable for the back side 1 Select the appropriate Setting Shortcut from the Main Scanner window Select a setting that closely describes the type of output you want 2 Click Settings to display the image settings window 3 Click the Advanced Image Setup icon The Advanced tab appears NOTE Steps 4 and 5 are only valid for duplex scanner models 4 Select Two from the Input document...

Page 112: ...om the Scan as drop down list 10 Adjust any other front side settings on the rest of the tabs in the image settings window 11 Select Back from the Side drop down list 12 On the General tab select Black and White 1 bit from the Scan as drop down list 13 Adjust any other back side settings on the rest of the tabs in the image settings window 14 When you are finished click Home to return to the Main ...

Page 113: ...Chapter 4 Document Imaging Basics The Main Scanner Window 100 Scantron iNSIGHT 20 Plus Scanner NOTES ...

Page 114: ...requent cleaning than recommended 5 In this chapter Maintenance Schedule page 103 Supplies and Consumables page 105 Opening and Closing the Scanner Cover page 107 Running a Transport Cleaning Sheet page 109 Cleaning the Rollers and Transport page 110 Cleaning the Separation Module page 111 Cleaning the Feed Module page 113 Cleaning the Imaging Guides page 116 Cleaning the UDDS Sensor page 117 Remo...

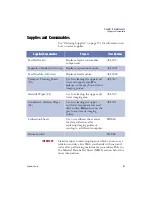
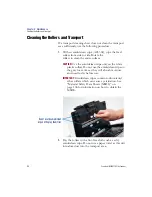
Page 115: ...if necessary When cleaning rollers use an emulsiclean wipe and allow the rollers to dry completely before scanning When cleaning tires use a slightly damp staticide wipe and allow the tires to dry completely before scanning In addition to the recommended cleaning supplies you may use a vacuum cleaner to remove debris from the scanner If a difficulty persists after performing the maintenance recomm...

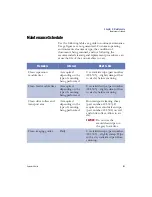
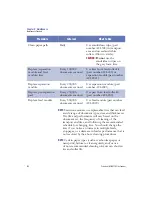
Page 116: ...rformed Use staticide wipe part number ACL305 slightly damp Allow to air dry before scanning Clean feed module tires As required depending on the type of scanning being performed Use staticide wipe part number ACL305 slightly damp Allow to air dry before scanning Clean drive rollers and transport area As required depending on the type of scanning being performed Run transport cleaning sheet part n...

Page 117: ...nt failure to clean regularly and or use of non recommended cleaning solvents can shorten tire and roller life Clean paper path Daily Use emulsiclean wipe part number ACL304 in transport area and on red and white rollers Allow to air dry CAUTION Do not use the emulsiclean wipes on the gray foam tires Replace separation module and feed module tires Every 100 000 documents scanned Use tires from fee...

Page 118: ...er consumable components ACL200 Separation Module with tires Replaces separation module ACL2021 Feed Module with tires Replaces feed module ACL2020 Transport Cleaning Sheets 50 Use for cleaning the upper and lower transport areas Do not use on the gray foam tires or imaging guides ACL303 Staticide Wipes 24 Use for cleaning the upper and lower imaging area ACL305 Emulsiclean Detailer Wipes 24 Use f...

Page 119: ...s to dry completely before using the scanner Do not use cleaners on hot surfaces Allow surfaces to cool to ambient temperature before use Material Safety Data Sheets MSDS Material Safety Data Sheets MSDS for chemical products are available on the Scantron Support Web site at www scantron com support When accessing the MSDSs from the Web site you will need the part number for the part or consumable...

Page 120: ...desired NOTE It is sometimes helpful to have the lamps on when cleaning the imaging guide areas 2 Remove any documents from the feeder area 3 Place the scanner in the 25 degree position See Tilting the Scanner Body on page 27 for information on how to do this 4 Pull up on the scanner cover release lever and the scanner cover Scanner Cover Release ...

Page 121: ...intenance Opening and Closing the Scanner Cover 108 Scantron i NSIGHT 20 Plus Scanner 5 When you finish cleaning the scanner or replacing a part press down firmly on scanner cover as shown so that both sides latch ...

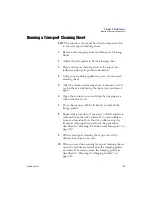
Page 122: ...side facing the input tray and scan it again 6 Open the scanner cover and wipe the imaging area with a lint free cloth 7 Close the scanner with both hands and check the image quality 8 Repeat this procedure if necessary until all residue is removed from the drive rollers If you are unable to remove all residue from the drive rollers using the transport cleaning sheet perform the procedure describe...

Page 123: ...ON Use the emulsiclean wipe only on the white plastic rollers Do not use the emulsiclean wipe on the gray foam tires as they will absorb moisture and need to dry before use IMPORTANT Emulsiclean wipes contain sodium lauryl ether sulfate which can cause eye irritation See Material Safety Data Sheets MSDS on page 106 for information on how to obtain the MSDS 2 Dry the rollers with a lint free cloth ...

Page 124: ...paration module from the scanner for best cleaning results 1 Push the separation module up to snap it out and lift it out of position 2 Manually rotate and wipe the gray foam tires with a slightly damp roller cleaning pad ACL304 If the wipe contains too much liquid squeeze it out or let it dry out for a couple minutes ...

Page 125: ...3 Inspect the separation module If the separation module tires show signs of wear or damage replace the tires or the separation module See Removing and Replacing the Separation Module on page 119 4 Insert the separation module by aligning the tabs with the slots and snapping it into position ...

Page 126: ...odule NOTE The paper present sensor is located to the right of the feed module Be careful not to damage the paper present sensor when removing or cleaning around the feed module 1 Pull against the raised edge of the feed module cover and lift it up and out of position Paper Present Sensor ...

Page 127: ...he feed module If the feed module tires show signs of wear or damage replace the tires or the feed module See Replacing the Separation Module Tires on page 120 for more information 4 Manually rotate and wipe the gray foam tires with a slightly damp staticide wipe ACL305 5 Reinstall the feed module by aligning the pins and pushing it toward the left to fit it into position Be sure ...

Page 128: ... Module Operator s Guide 115 the gears are aligned and it snaps into place Roll the feed module back into place 6 Reinstall the feed module cover by aligning the tabs with the slots and pushing it back into position until it snaps into place ...

Page 129: ...ide areas 2 Before cleaning the imaging area with staticide wipes we suggest vacuuming the inside of the scanner to remove any dust and debris CAUTION Be careful not to scratch the imaging guide areas when cleaning 3 Wipe the upper and lower imaging areas with a staticide wipe ACL305 4 Dry the upper and lower imaging guides using a dry staticide wipe Do not use a paper towel or dry emulsiclean wip...

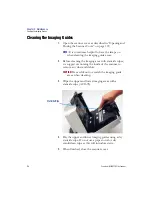
Page 130: ...ver 1 Obtain an ear syringe or nasal aspirator from a local drug store 2 Open the scanner cover as described in Opening and Closing the Scanner Cover on page 107 3 Locate the ultrasonic multi feed detector transmitter and receiver The receiver in the cover is shown below The transmitter is housed in the base of the scanner directly opposite the receiver when closed 4 Use the ear syringe or nasal a...

Page 131: ...Cleaning the UDDS Sensor 118 Scantron i NSIGHT 20 Plus Scanner 6 Test the scanner to ensure that the scanner is functioning properly If it is not call Scantron Customer Support as described in Requesting Support on page 153 ...

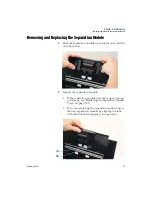
Page 132: ...ion module up to snap it out and lift it out of position 2 Inspect the separation module If the separation module tires show signs of wear or damage see Replacing the Separation Module Tires on page 120 If you are replacing the separation module insert the new separation module by aligning the tabs with the slots and snapping it into position Tab Slot ...

Page 133: ...move and inspect the separation module as described in steps 1 through 2 of Removing and Replacing the Separation Module on page 119 2 While holding onto the separation module rotate the release lever back so you can access the separation roller CAUTION The separation module is spring loaded and will snap back if you do not hold it in place ...

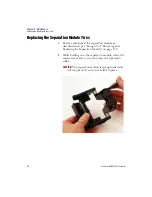
Page 134: ...m the separation module housing 4 Remove each tire by sliding the tire off the core 5 Install each new tire by gently pulling it over the core IMPORTANT Do not overstretch the tire This may cause the tire to tear 6 Reinstall the new separation module by aligning the tabs with the slots and snapping it into position ...

Page 135: ...ration module as described in steps 1 through 2 of Removing and Replacing the Separation Module on page 119 2 Hold the separation module in both hands and find the two side tabs that protrude slightly from the back of the separation module 3 Push on the side tabs until the pre separation pad protrudes slightly from the front of the separation module Tabs ...

Page 136: ...ard the worn pre separation pad 6 Align the side tabs of a new pre separation pad with the slots on the separation module 7 Push the pre separation pad firmly in the slots until the pre separation pad flap rests lightly against the separation module tires 8 Reinstall the separation module by aligning the tabs with the slots and snapping it into position ...

Page 137: ...ration Roller Tension If you are experiencing multi feeds or document jams it may be necessary to adjust the pre separation roller tension 1 Remove and inspect the separation module as described in steps 1 through 3 of Removing and Replacing the Separation Module on page 119 2 Locate the spring on the separation module Spring ...

Page 138: ...n Roller Tension Operator s Guide 125 3 Lift the spring from the holder and move it to the left or right as desired to adjust the tension 4 When finished reinsert the separation module by aligning the tabs with the slots and snapping it into position ...

Page 139: ...ch as carbonless paper or newsprint or failure to clean regularly and or use of non recommended cleaning solvents can shorten the feed module life NOTE The paper present sensor is located to the right of the feed module Be careful not to damage the paper present sensor when removing or cleaning around the feed module 1 Remove the input tray by gently pushing it to the left or right to release the ...

Page 140: ...ance Removing and Replacing the Feed Module Operator s Guide 127 2 Lift the tab of the feed module cover and remove it from its position 3 Rotate the feed module upward and push it to the left to lift it out of position ...

Page 141: ...the feed module If the feed module tires show signs of wear or damage replace the tires as described in Replac ing the Feed Module Tires on page 130 If other parts appear worn or damaged replace the feed module with a new one 5 Using a vacuum or emulsiclean wipe remove dust and debris from the feed module area ...

Page 142: ...Insert the feed module by aligning the pins and pushing it toward the left to fit it into position Be sure the gears are aligned and it snaps into place 7 Reinstall the feed module cover by aligning the tabs in the slots and pushing the feed module cover down until it snaps into place ...

Page 143: ...res NOTE The paper present sensor is located to the right of the feed module Be careful not to damage the paper present sensor when removing or cleaning around the feed module 1 Remove and inspect the feed module as described in steps 1 through 4 of Removing and Replacing the Feed Module on page 126 Paper Present Sensor ...

Page 144: ...s Guide 131 2 Remove each core assembly by lifting it up and out of position 3 Remove each tire by sliding the tire off the core assembly 4 Install each new tire by gently pulling it over the core CAUTION Do not overstretch the tire This may cause the tire to tear ...

Page 145: ...6 Repeat the replacement procedure outlined above for the other core assembly 7 Using a vacuum or emulsiclean wipe remove dust and debris from the feed module area 8 Insert the feed module by aligning the pins and pushing it toward the left to fit it into position Be sure the gears are aligned and it snaps into place 9 Reinstall the feed module cover by aligning the tabs in the slots and pushing t...

Page 146: ...Chapter 5 Maintenance Replacing the Feed Module Tires Operator s Guide 133 NOTES ...

Page 147: ...Chapter 5 Maintenance Replacing the Feed Module Tires 134 Scantron i NSIGHT 20 Plus Scanner ...

Page 148: ...ner where it may not function properly Refer to the information in this chapter to help you resolve the situation before calling Customer Support 6 In this chapter LED Codes page 136 Indicator Light and Function Window page 138 Lamps page 140 Clearing Document Jams page 141 Troubleshooting Chart page 142 ...

Page 149: ...s not securely attached Power saver mode Indicates the scanner is in power saver mode No action is required Scanning The scanner is scanning documents U5 E3 Rescan documents USB cable has been disconnected while the scanner was running U6 Clear paper path and close cover Open the scanner cover and verify that all documents are removed from the paper path Then close the scanner cover U8 Multifeed A...

Page 150: ... paper path is blocked Clear the documents from the paper path E1 E2 Turn the power off and then on again If the problem persists call Customer Support E2 E4 E7 Turn power off then on Turn the power off and then on again If the problem persists call Service Codes Message Explanation Action ...

Page 151: ...window provide information on the current state of the scanner This light and function window indicate s Red to flashing green to green scanner is powering up Steady green scanner is ready to scan or scanning Flashing green scanner initialization is in process Steady red with a 0 scanner is not connected to the host PC Steady red with a 1 5 7 or 8 call Customer Support ...

Page 152: ...en These are function numbers not error codes Used together with the Start button and Click Scan functionality the function buttons greatly improve ease of use For more information about Click Scan see Chapter 4 Document Imaging Basics Steady red with a 6 scanner cover is open Steady red with a 9 document jam This light and function window indicate s ...

Page 153: ... mode after 15 minutes of inactivity If you want to shut off the lamps sooner than 240 minutes after running a ScanTools Plus application simply run Click Scan with the Power Saver Device Setting set to the desired shut off time Software Warm up Shut off ScanTools Plus associated data collec tion diagnostic software N A 240 minutes Click Scan 10 seconds 0 to 240 minutes based on Power Saver settin...

Page 154: ...ams Operator s Guide 141 Clearing Document Jams If your scanner stops scanning due to a document jam follow the procedures below 1 Open the scanner cover 2 Remove any jammed documents from inside the scanner 3 Close the cover Scanner Cover Release ...

Page 155: ...ht and type as outlined in Scanner Hardware Features on page 3 the scanner and tires are clean the spring on the pre separation module is adjusted to the proper tension See the proce dures in Chapter 5 Maintenance the feed module and pre separation module are installed properly and securely in place See the procedures in Chapter 5 Maintenance To remove a document jam IMPORTANT Do not pull the jamm...

Page 156: ... not being cropped correctly during document imaging If the following cropping options are enabled Automatically Detect and Straighten Automatic Automatically Detect and your images are not being cropped correctly clean the imaging area as described in Cleaning the Imaging Guides starting on page 116 Roller marks or streaks appear on documents after scanning Clean the drive rollers See Chapter 5 M...

Page 157: ...s for the scanner The scanner is rated and designed to operate with USB 2 0 but will function in a USB 1 1 port If you are using a USB 1 1 connection update your connection to USB 2 0 Unable to scan using Microsoft Office Document Imaging 2007 using the WIA driver Select Scantron iNSIGHT 20 Scanner from the Scanner drop down list Problem Possible Solution ...

Page 158: ...agreement Online registration is required for Notification of downloadable updates and upgrades for drivers and utilities Downloading of the updates and upgrades for drivers and utilities Online support requests NOTE If you are entitled to updates or upgrades you may obtain them on physical media for an extra fee 7 In this chapter Registering Your Product page 145 Printed Documentation page 147 Th...

Page 159: ...e Scantron Web site at www scantron com 2 Select Training Support Product Registration The Product Registration page opens 3 Enter the appropriate information and click Submit to register your software product with Scantron Customer Support Registering your product ensures you of timely notifi cation of product updates and upgrades ...

Page 160: ...s of the following What s in This Box for the iNSIGHT 20 Plus Scanner Publication Number 277 160 xxx Quick Start for the iNSIGHT 20 Plus Scanner Publication Number 277 524 xxx Quick Tips for the iNSIGHT 20 Plus Scanner Publication Number 277 525 xxx ScanTools Plus Installation Guide Publication Number 203 583 xxx Where xxx indicates the current revision number This documentation is included only i...

Page 161: ... use with your scanner each come with a Help system that includes comprehensive information that may help you with your hardware issues Use the Index and Search features in the software Help system to find information about how your scanner and software work together If you are facing a hardware issue be sure to check the software Help system for information before calling Scantron Support within ...

Page 162: ...e products used with your scanner Training is available for ScanTools Plus software ScanFlexTM Option Scantron DesignExpertTM Software ProsperTM assessment system RealTime Character Recognition utilizing NestorReaderTM Remark Classic OMR Software Types of training available include classroom training web seminars and Quick Start orientations For more information or to sign up for training Visit ou...

Page 163: ...anner or software product with Scantron Customer Support This ensures you of timely notification of product updates and upgrades Frequently Asked Questions FAQs with answers about scanning hardware and software products Software updates including driver and utility updates for scanners that you can download if you have a current software subscription or hardware support agreement NOTE New licensee...

Page 164: ...quick easy access to supplies and user manuals for your Scantron scanner and software You can order online or by phone or fax NOTE Promotional offers are typically available for online purchases only Online Phone or Fax Scantron Online Store www scantronstore com Click Supplies Scantron Supplies Business Center 1313 Lone Oak Road Eagan MN 55121 Phone 1 800 328 6290 Fax 1 651 683 6230 ...

Page 165: ...o standard forms Scantron Print Services can also assist with custom form design Once you have an idea of what the project entails call Scantron Print Services at the numbers below to discuss the project with a Customer Service Representative CSR Scantron CSRs have the expertise needed to ensure that the job gets done right and with the value added features that you desire Other services available...

Page 166: ...xcept for Alaska and Hawaii where support is available through 7 00 P M CST Before calling 1 Know the serial number of the product you are calling about The serial number for your iNSIGHT 20 Plus can be found on the bottom of the scanner 2 Write down a description of your problem Include a sequence of the steps leading to the problem Doing this ensures that you will have all the details you need w...

Page 167: ...so that the analyst will be able to guide you through the troubleshooting process Scantron Customer Support can answer your questions about a variety of subjects including Installation and configuration Program features and operation Scanner and software troubleshooting Documentation and the Help system Fonts and graphics Software hardware errors Laser printing forms ScanFlex and PrintFlex Scantro...

Page 168: ...are available including custom data collection solutions survey research services equipment maintenance equipment installation network installation custom training solutions custom application development database support software support for custom applications and consulting services For information on any of these services contact Scantron Online www scantron com Phone 1 800 447 3269 ...

Page 169: ...Chapter 7 Product Support and Services Services 156 Scantron i NSIGHT 20 Plus Scanner NOTES ...

Page 170: ... depending on whether the respondent uses ink or pencil to fill in the forms In addition if using pencil you can use up to three colors on your forms See the tables in this appendix for listings of approved colors and color combinations for ink and pencil read forms A In this chapter Ink Form Color Options 1 Color page 158 Pencil Form Color Options 1 Color page 159 Pencil Form Color Combinations 2...

Page 171: ...tron i NSIGHT 20 Plus Scanner Ink Form Color Options 1 Color Choose a single ink dropout color for your form from the colors below NOTE There are no two or three color combinations for ink read forms Drop Out Colors Carnival Fiesta Harvest Pumpkin Raspberry Rose Spice Strawberry Tangerine ...

Page 172: ...perator s Guide 159 Pencil Form Color Options 1 Color Choose a single pencil dropout color for your form from the colors below Drop Out Colors Anchor Caribbean Carnival Cherry Fiesta Frost Harvest Jade Oak Ocean Pumpkin Raspberry Rose Rust Sky Spice Strawberry Tangerine Teal Woodland ...

Page 173: ...s Color One Color Two Anchor Carnival Anchor Cherry Anchor Fiesta Anchor Harvest Anchor Oak Anchor Pumpkin Anchor Raspberry Anchor Rose Anchor Rust Anchor Spice Anchor Strawberry Anchor Tangerine Anchor Woodland Caribbean Carnival Caribbean Cherry Caribbean Fiesta Caribbean Harvest Caribbean Oak Caribbean Pumpkin Caribbean Raspberry Caribbean Rose Caribbean Rust Caribbean Spice Caribbean Strawberr...

Page 174: ...y Carnival Teal Carnival Woodland Cherry Frost Cherry Jade Cherry Ocean Cherry Sky Cherry Teal Cherry Woodland Fiesta Frost Fiesta Jade Fiesta Ocean Fiesta Sky Fiesta Teal Fiesta Woodland Frost Harvest Frost Jade Frost Oak Frost Pumpkin Frost Raspberry Frost Rose Frost Rust Frost Sky Frost Spice Frost Strawberry Frost Tangerine Frost Woodland Color One Color Two ...

Page 175: ...vest Teal Harvest Woodland Jade Oak Jade Pumpkin Jade Raspberry Jade Rose Jade Rust Jade Spice Jade Strawberry Jade Tangerine Oak Ocean Oak Sky Oak Teal Oak Woodland Ocean Pumpkin Ocean Raspberry Ocean Rose Ocean Rust Ocean Spice Ocean Strawberry Ocean Tangerine Ocean Woodland Pumpkin Sky Pumpkin Teal Pumpkin Woodland Raspberry Sky Raspberry Teal Color One Color Two ...

Page 176: ... Color Operator s Guide 163 Raspberry Woodland Rose Sky Rose Teal Rose Woodland Rust Sky Rust Teal Rust Woodland Sky Spice Sky Strawberry Sky Tangerine Spice Teal Spice Woodland Strawberry Teal Strawberry Woodland Tangerine Teal Tangerine Woodland Teal Woodland Color One Color Two ...

Page 177: ...vest Woodland Anchor Oak Woodland Anchor Pumpkin Woodland Anchor Raspberry Woodland Anchor Rose Woodland Anchor Rust Woodland Anchor Spice Woodland Anchor Strawberry Woodland Anchor Tangerine Woodland Caribbean Carnival Woodland Caribbean Cherry Woodland Caribbean Fiesta Woodland Caribbean Harvest Woodland Caribbean Oak Woodland Caribbean Pumpkin Woodland Caribbean Raspberry Woodland Caribbean Ros...

Page 178: ...al Woodland Fiesta Frost Jade Fiesta Frost Sky Fiesta Frost Woodland Fiesta Ocean Woodland Fiesta Teal Woodland Frost Harvest Jade Frost Harvest Sky Frost Harvest Woodland Frost Jade Oak Frost Jade Pumpkin Frost Jade Raspberry Frost Jade Rose Frost Jade Rust Frost Jade Spice Frost Jade Strawberry Frost Jade Tangerine Frost Oak Sky Frost Oak Woodland Frost Pumpkin Sky Frost Pumpkin Woodland Frost R...

Page 179: ...rost Strawberry Woodland Frost Tangerine Woodland Harvest Ocean Woodland Harvest Teal Woodland Oak Ocean Woodland Oak Teal Woodland Ocean Pumpkin Woodland Ocean Raspberry Woodland Ocean Rose Woodland Ocean Rust Woodland Ocean Spice Woodland Ocean Strawberry Woodland Ocean Tangerine Woodland Pumpkin Teal Woodland Raspberry Teal Woodland Rose Teal Woodland Rust Teal Woodland Spice Teal Woodland Stra...

Page 180: ...le 103 transport area 117 schedule 103 cleaning sheets transport area 105 clearing document jams 41 141 Click Scan configuration dialog box 82 edit window 88 edit window toolbar buttons 89 function listing 81 function numbers 86 functionality 80 installing 47 software 78 80 software requirements 80 uninstalling 73 updating 74 Click Scan Software 78 collecting data 1 color options ink form 1 color ...

Page 181: ...eeding 38 paper specifications 36 paper weights 36 preparing documents for 35 scanner speed and 2 system requirements 6 test 62 document size document imaging 36 documents preparing for scanning 34 scanning 37 streaks 143 SEE ALSO forms OR paper double sided initial settings 64 drive rollers cleaning 117 maintenance schedule 103 drivers 73 74 installing 47 uninstalling 73 updating 74 E electrical ...

Page 182: ... labels warning 9 lamps SEE readheads LEDs 18 24 39 136 location 44 lower imaging guide part number 105 M main iNSIGHT 20 Plus Scanner window 78 main iNSIGHT 20 Plus scanner window 91 maintenance schedule 103 manual feeding 38 marks reading 1 material data safety sheets 8 106 MSDS SEE material data safety sheets multiple documents feeding 37 38 multiple images 96 O output tray adjusting 28 P pad p...

Page 183: ... imaging 5 rollers drive SEE drive rollers Running 62 S safety information 7 scanner 66 components 18 cover release lever 18 features 3 initial settings 64 power on 24 recalibration message 72 registration 43 selecting a location 44 starting and stopping 33 supplies and consumables 105 will not scan feed documents 142 scanner cover 18 Scanner Exerciser installing 47 scanner speed data collection m...

Page 184: ...maintenance schedule 103 top LED 24 transport area cleaning 117 cleaning sheets part number 105 maintenance schedule 103 troubleshooting 135 chart 142 TWAIN driver 78 TWAIN driver installing 47 TWAIN driver SEE ALSO drivers types paper SEE paper types U ultrasonic multi feed detection 3 unfolding forms 34 35 uninstalling 73 drivers and utilities 73 ScanTools Plus 73 updating drivers utilities 74 u...

Page 185: ...172 Scantron i NSIGHT 20 Plus Scanner NOTES ...

Page 186: ......

Page 187: ...ities and accuracy of optical mark recognition OMR Trust the Scantron family of high accuracy data collection tools with unique OMR and image capture features to streamline your current processes and provide you with a springboard to take advantage of emerging technologies Please visit us at www scantron com for a complete overview of iNSIGHT 20 Plus scanner capabilities or call us at 1 800 SCANTR...

Reviews: