background image

Copying

68

2

Other Functions

Energy Saver Mode

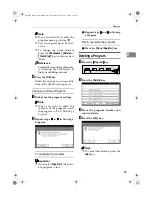
If you do not operate the machine for
a certain period after copying, or
when you press the 

{

Energy Saver

}

key, the display disappears and the
machine enters Energy Saver mode.
When you press the 

{

Energy Saver

}

key again, the machine returns to the
ready condition. In Energy Saver
mode, the machine uses less electrici-
ty.

Note

If you press the 

{

Energy Saver

}

 key

during the operation, the current
settings will be cleared.

It takes about 3 seconds to return
to the ready condition from Energy
Saver mode.

Reference

“Low Power Timer” in the Sys-

tem Settings manual.

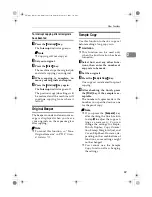
Interrupt Copy

Use this function if you wish to inter-
rupt a long copy job to make urgently
needed copies.

Limitation

You cannot use the Interrupt Copy
function when scanning fax originals.

Note

The procedure for making inter-
rupt copies depends on which
kind of operation the machine is
currently carrying out.

To interrupt an original being fed

A

Press the 

{{{{

Interrupt

}}}}

 key.

The 

Interrupt

 indicator goes on

and scanning stops.

B

Remove the originals that were
being copied and set the originals
you wish to copy.

C

Press the 

{{{{

Start

}}}}

 key.

The machine starts making your
copies.

D

When your copy job is finished,
remove your originals and copies.

E

Press the 

{{{{

Interrupt

}}}}

 key again.

The 

Interrupt

 indicator goes off.

F

When the display prompts you to,
replace the originals that were be-
ing copied before.

G

Press the 

{{{{

Start

}}}}

 key.

The previous copy job settings will
be restored and the machine will con-
tinue copying from where it left off.

AdonisC2_ENcopy122F_FM.book  Page 68  Thursday, February 15, 2001  3:23 PM

Summary of Contents for 2235

Page 1: ...ad this manual carefully before you use this product and keep it handy for future reference For safety please follow the instructions in this manual AdonisC2_ENcopy122F_FM book Page 1 Thursday February 15 2001 3 23 PM ...

Page 2: ...aired in a factory or at a location with the requisite equipment The laser subsystem is replaceable in the field by a qualified Customer Engineer The laser chassis is not repairable in the field Customer engineers are therefore directed to return all chassis and laser subsystems to the factory or service depot when replacement or the optical subsystem is re quired Warning Use of controls or adjust...

Page 3: ...ain on the line and briefly explain to the dispatcher the reason for the call before hanging up 2 Perform such activities in the off peak hours such as early morning hours or late evenings CANADA This information is for facsimile option users only The Industry Canada label identifies certified equipment This certification means that the equipment meets telecommunications network protective operati...

Page 4: ...plug not the cable if the power cable or plug becomes frayed or otherwise damaged To avoid hazardous electric shock or laser radiation exposure do not remove any covers or screws other than those specified in this man ual Turn off the power and disconnect the power plug by pulling the plug not the cable if any of the following conditions exists You spill something into the equipment You suspect th...

Page 5: ... toner used or unused and toner bottle out of the reach of children For environmental reasons do not dispose of the equipment or expended supply waste at household waste collection points Disposal can take place at an authorized dealer or at appropriate collection sites The inside of the machine could be very hot Do not touch the parts with a label indicating the hot surface Otherwise it could cau...

Page 6: ...e sure to read the instructions all of which are included in the Safety Information section WARNINGS and CAUTIONS are notes for your safety Important If this instruction is not followed paper might be misfeed originals might be damaged or data might be lost Be sure to read this Preparation This symbol indicates the prior knowledge or preparations required before op erating Note This symbol indicat...

Page 7: ... Recommended Originals 19 Sizes Detectable by the Auto Paper Select 20 Missing Image Area 21 Copy Paper 22 Recommended Paper Sizes and Types 22 Direction fixed paper or 2 sided paper 25 Non recommended Paper 26 Paper Storage 26 Toner 27 Handling Toner 27 Toner Storage 27 Used Toner 27 2 Copying Basic Procedure 29 Setting Originals 31 Setting Originals on the Exposure Glass 31 Setting Originals in ...

Page 8: ...ther Functions 68 Energy Saver Mode 68 Interrupt Copy 68 Original Beeper 69 Sample Copy 69 Changing the Number of Sets 70 Preset Reduce Enlarge 71 Create Margin mode 72 Zoom 73 Size Magnification 75 Directional Magnification 77 Directional Size Magnification Inch 79 Duplex Combine Series 81 Original Direction and Completed Copies 82 Originals and Copy Direction 82 Specifying Orientation of Bound O...

Page 9: ... Book Originals 104 Edit Image 112 Image Repeat 112 Double Copies 113 Centering 114 Positive Negative 115 Erase 116 Border Erase 117 Center Erase 118 Center Border Erase 119 Margin Adjustment 121 Stamp 123 Background Numbering 123 Preset Stamp 124 User Stamp 126 Program Delete User Stamp 128 Date Stamp 130 Page Numbering 132 Cover Slip Sheet 138 Front Cover 138 Front Back Covers 140 Designate 141 ...

Page 10: ...leting Saved Documents 166 4 Troubleshooting If Your Machine Does Not Operate as You Want 169 General 169 Document Server 171 Display 172 If You Cannot Make Clear Copies 173 If You Cannot Make Copies As You Want 175 General 175 Adjust Image 176 Stamp 177 Combine 177 Duplex 178 When Memory Is Full 179 B Loading Paper 180 Loading Paper in Tray 1or 2 180 Loading Paper in Tray 3 or 4 181 Loading Paper...

Page 11: ...xiting From the User Tools 208 User Tools Menu Copier Document Server Features 210 General Features 1 4 212 General Features 2 4 215 General Features 3 4 217 General Features 4 4 218 Reproduction Ratio 1 2 219 Reproduction Ratio 2 2 220 Edit 1 2 222 Edit 2 2 224 Stamp 227 Background Numbering 227 Preset Stamp 1 4 4 4 227 User Stamp 1 2 2 2 229 Date Stamp 230 Page Numbering 1 2 2 2 231 Input Output...

Page 12: ...8 Cleaning the Platen Cover 238 Cleaning the Document Feeder 238 7 Specification Mainframe 239 Document Feeder Option 243 1000 Sheet Finisher Option 244 2 Tray Finisher Option 245 Punch Kit Option 247 Internal tray 2 1 bin tray Option 248 Extarnal Tray Option 249 Large Capacity Tray LCT Option 250 Paper tray unit Option 251 INDEX 252 AdonisC2_ENcopy122F_FM book Page ix Thursday February 15 2001 3 ...

Page 13: ...x AdonisC2_ENcopy122F_FM book Page x Thursday February 15 2001 3 23 PM ...

Page 14: ...dels which vary by copy speed To make sure which model you have see the inside front cover Type 1 Type 2 Copy speed 35 copies minute A4K 81 2 11 K 45 copies minute A4K 81 2 11 K AdonisC2_ENcopy122F_FM book Page 1 Thursday February 15 2001 3 23 PM ...

Page 15: ...2 What You Can Do with This Machine Copy Mode Positive Negative AdonisC2_ENcopy122F_FM book Page 2 Thursday February 15 2001 3 23 PM ...

Page 16: ... Back 1 Sided Booklet 2 Sided Booklet 1 Sided Magazine 2 Sided Magazine 1 Optional 2 Tray finisher is reguired 2 Optional Bridge unit and optional finisher are reguired AdonisC2_ENcopy122F_FM book Page 3 Thursday February 15 2001 3 23 PM ...
Page 17: ...ine 2 Side P 92 21 1 Sided 16 Pages Combine 2 Side P 93 22 2 Sided 4 Pages Combine 2 Side P 97 23 2 Sided 8 Pages Combine 2 Side P 98 24 2 Sided 16 Pages Combine 2 Side P 99 25 Book 1 Sided P 101 26 Book 2 Sided P 102 27 Front Back 2 Sided P 103 28 1 Sided Booklet P 105 29 2 Sided Booklet P 106 30 1 Sided Magazine P 108 31 2 Sided Magazine P 109 32 Preset Reduce Enlarge P 71 33 Zoom P 73 34 Size M...

Page 18: ... when the main power switch is turned on and goes off when the switch is turned off 6 On indicator This indicator lights up when the opera tion switch is turned on and goes off when the switch is turned off 7 Operation switch Press this switch to turn the power on the On indicator light up To turn the power off press this switch again the On indicator goes off 8 Control panel P 9 Control Panel 9 D...

Page 19: ...ize paper 2 Right side cover Open this when a paper jam occurs 1 Ventilation hole Prevents overheating Do not obstruct the ventilation hole by placing an object near it or leaning an object against it If the machine overheats a fault might oc cur AdonisC2_ENcopy122F_FM book Page 6 Thursday February 15 2001 3 23 PM ...

Page 20: ...red To copy onto normal paper and thick paper Slide the guide in the direction of the arrow To copy onto OHP transparencies and translucent paper Insert your forefinger into the indent on the guide and slide the guide to the right To copy onto A3 11 17 paper Raise the end fence AdonisC2_ENcopy122F_FM book Page 7 Thursday February 15 2001 3 23 PM ...

Page 21: ...atically 5 Internal tray 2 1 bin tray If you selected this as the output tray copied paper is delivered here face down 6 Large Capacity Tray LCT Holds 1 500 sheets of paper 7 Paper tray unit Consists of two paper trays 8 Bridge unit Relays copies to the external tray or fin isher 9 2 Tray Finisher Sorts stacks and staples copies You can also punch copies The Punch function is optional 1 Finisher s...

Page 22: ...ess to switch to and from Energy Saver mode P 68 Energy Saver Mode 9 Interrupt key Press to make interrupt a long copy job to make copies P 68 Interrupt Copy 10 Main power indicator This indicator goes on when the main power switch is turned on and goes off when the switch is turned off 11 Operation switch Press this switch to turn the power on the On indicator goes on To turn the power off press ...

Page 23: ...ta for selected modes 17 Function keys Press the appropriate key to choose any of the following functions Copy Document Server Facsimile Printer Scanner 18 Function Status indicator These show the status of the above func tions Yellow the function is selected Green the function is active Red the function has been interrupt ed AdonisC2_ENcopy122F_FM book Page 10 Thursday February 15 2001 3 23 PM ...

Page 24: ...g as cannot be used Displays and Key Operations Note The following illustrations are examples for the machine with the optional 2 Tray finisher and large capacity tray LCT installed Initial copy display 1 Original mode Image Density and Special Original mode 2 Operational status or messages 3 You can register up to three fre quently used reduce enlarge ratios other than the fixed reduce enlarge ra...

Page 25: ... press the Re duce Enlarge key to bring up the Re duce Enlarge menu 8 A clip mark appears for a current ly selected function Function menu 1 Items you can select 2 The key highlighted with the lower line underlined indicates the tray feeding the paper Document Server initial display 1 Operational status and messages 2 Display titles 3 Operational keys 4 Documents sent by fax AdonisC2_ENcopy122F_FM...

Page 26: ...ientation Standard Orientation Auto Image Density Manual Image Density Auto Paper Select Manual Paper Select Copying from the Bypass Tray Sample Copy Job Preset Auto Reduce Enlarge Reduce Enlarge Create Margin Mode Book Duplex Combine 1 Sided 2 pages 4 pages 8 pages 1 Side 1 Sided 4 pages 8 pages 16 pages 2 Side 2 Sided 2 pages 4 pages 8 pages 1 Side 2 Sided 4 pages 8 pages 16 pages 2 Side Series ...

Page 27: ...d with the Printer unit 32 MB memory is not required Copying Book Originals Image Repeat Double Copies Centering Positive Negative Border Erase Center Erase Margin Adjustment Background Numbering 6 6 Preset Stamp 6 6 User Stamp 6 6 Date Stamp Page Numbering Cover Front Back Cover Slip Sheet Sort Shift Sort 3 3 Rotate Sort 1 2 1 2 Shift Stack 3 3 Staple 3 3 Punch 4 4 Store File Type 1 Type 2 Place ...

Page 28: ...machine has warmed up you can make copies Main power switch left side of the ma chine When the machine is not to be used for an extended period of time turn off the main power switch Turning On the Main Power A Make sure that the power cord is firmly plugged into the wall out let B Open the switch cover and turn on the main power switch make sure that the Main Power indica tor goes on Important Do...

Page 29: ...or Type 2 you can use the Auto Start func tion Turning Off the Power A Make sure that the platen cover or the document feeder is in the right position B Press the operation switch to make the On indicator goes off Note Even if you press the operation switch the indicator do not goes off and blink in the follow ing cases When the platen cover or the document feeder is open When communication is in ...

Page 30: ...switch when the indicator goes on or blink Hard Disk or Mem ory might be broken Pull out the power plug after you turn off the main power switch Hard Disk or Memory might be broken If the main power switch is turned off or the power plug is disconnected any documents stored in fax memory will be lost after approximately one hour elapses AdonisC2_ENcopy122F_FM book Page 17 Thursday February 15 2001...

Page 31: ...r or Document Server key to use that function Limitation You cannot switch modes in the following cases During interrupt copying When scanning in a fax message for transmission During immediate transmission During on hook dialing for fax transmission While scanning an original When accessing the user tools AdonisC2_ENcopy122F_FM book Page 18 Thursday February 15 2001 3 23 PM ...

Page 32: ...s of Recom mended Originals Stapled or clipped originals Perforated or torn originals Curled folded or creased originals Pasted originals Originals with any kind of coating such as thermal fax paper art paper alu minum foil carbon paper or conductive paper Originals with perforated lines Where Original Is Set Original Size Original Weight Exposure glass Up to A3 Document feeder 1 sided originals A...

Page 33: ...r the machine to detect the sizes of the following originals so se lect the paper size manually Originals with indexes tags or other projecting parts Transparent originals such as OHP transparencies or translucent paper Dark originals with many letters and drawings Originals which partially contain a solid image Originals which have solid images at their edges Size A3 L B4 L A4K L B5K L A5K L 11 1...

Page 34: ...t not be copied There are cases where the paper will be fed diagonally when a paper size of 433mm or larger is used Ensure that the paper is set in place it is fed straight The system length setting is at its maximum value when set at 1260mm 49 Horizontal size Vertical size Reference position Maximum Scanning area A3 297x420mm 11 x17 279x432mm AdonisC2_ENcopy122F_FM book Page 21 Thursday February ...

Page 35: ...he Paper Size You have to specify the pa per size with the User Tools System Set tings See Pa per Size Setting in the SystemSettings manual A3L B4L A4KL B5KL A5L 11 17 L 81 2 14 L 81 2 11 KL 8 13 L 81 2 13 L 81 4 13 L 81 4 14 L 11 14 L 71 4 101 2 L 8 101 2 KL 51 2 81 2 L Note When selecting paper sizes in parentheses set the paper size selector knob to the p mark P 194 Changing the Paper Size You ...

Page 36: ... 13 L 81 4 13 L 81 4 14 L 11 14 L 71 4 101 2 L 8 101 2 KL 51 2 81 2 L A3L B4L A4KL B5KL A5L 11 17 L 81 2 14 L 81 2 11 KL 8 13 L 81 4 13 L 81 4 14 L 11 14 L 71 4 101 2 L 8 101 2 KL 51 2 81 2 L 60 105g m2 16 28lb 500 sheet Bypass Tray 2 3 4 Standard Size A3L B4L A4L B5L A5L PostcardL 11 17 L 81 2 14 L 81 2 11 KL 51 2 81 2 L 71 4 101 2 KL 8 13 L 81 2 13 L 81 4 13 L 11 14 L 11 15 L 10 14 L 10 15 L 81 ...

Page 37: ...nd in the same direction in two or more trays the machine automatically shifts to another tray when the tray in use runs out of paper This function is called Auto Tray Switching However this only true if the Paper Type is recycled or special paper and the setting for the other trays are the same This saves interrupting a copy run to replenish pa per when making a large number of copies P 40 Select...

Page 38: ...unched paper or copied paper e g might not be printed correctly depending on how the originals and paper are set in place Set Letterhead setting of system set tings and then set the original and paper as shown below Letterhead Setting in P 233 Input Output AdonisC2_ENcopy122F_FM book Page 25 Thursday February 15 2001 3 23 PM ...

Page 39: ...its surface If you make a copy on rough grain paper the copy image might be blurred Paper Storage Note When storing paper the following precautions should always be followed Do not store paper where it will be exposed to direct sunlight Avoid storing paper in humid areas humidity 70 or less Store on a flat surface Keep open reams of papers in the package and store as you would unopened paper Under...

Page 40: ... flat surface Used Toner Note Used toner cannot be re used Do not incinerate used toner or toner containers Toner dust might ig nite when exposed to an open flame Dispose of used toner containers in accordance with local regulations for plastics Keep toner used or unused and toner containers out of reach of children Our products are engineered to meet high standards of quality and function ality a...

Page 41: ...Basics 28 1 AdonisC2_ENcopy122F_FM book Page 28 Thursday February 15 2001 3 23 PM ...

Page 42: ...your desired settings F Enter the number of copies re quired with the number keys Note The maximum copy quantity can be set between 1 and 999 default 999 To change the number entered press the Clear Stop key and enter the new number G Press the Start key The machine starts copying Note When you set originals on the exposure glass press the key after all originals are scanned Copies are delivered f...

Page 43: ...he following When the warning massage is displayed When the service call massage is displayed When the paper is jammed When the cover is open When Adding Toner message is displayed When the toner is being replen ished When the User Tools Counter screen is displayed When fixed warm up is in progress When the facsimile printer or other functions are operating When operations have been suspended duri...

Page 44: ... P 19 Originals Setting Originals on the Exposure Glass A Lift the platen cover or the docu ment feeder Important Do not open the document feed er with a force Otherwise the cover of the document feeder might open or be damaged Note Be sure to open the document feeder by more than 30 Other wise the original size might not be detected correctly B Set the original face down on the exposure glass The...

Page 45: ... the docu ment feeder To avoid a multi sheet feed shuffle the originals before set ting them in the document feed er Original Orientation You can set the original orientation separately in the following ways This function is useful for copying torn originals or large originals Standard Orientation Select this function when the origi nal direction is the same as the copy paper direction 90 Turn Thi...

Page 46: ... Auto Paper Selector Preset Reduce Enlarge function A Press the key C Press the OK key Setting Special Originals Use this function when you want to use Batch Mixed Sizes or when you select the original orientation Batch mode Up to 80 standard originals can be set in the document feeder at a time Important When setting special originals such as translucent paper set them one by one Note The Batch k...

Page 47: ...ent sizes on the document feeder and making copies without using Mixed Sizes mode parts of the original image might not be cop ied or paper might be jammed The weight of originals that can be set with this function is 52 81g m2 14 20 lb The original sizes that can be set with this function are as follows For smaller originals the copy im age might be slanted since the orig inals might not be corre...

Page 48: ...he document feeder G Press the Start key Setting Custom Size Originals When setting custom size originals in the document feeder specify the size of the originals Limitation The paper size that can be set with this function is vertical 128 297mm 5 11 horizontal 128 1 260mm 5 49 A Press the Special Original key B Press the Custm Size Origi key C Enter the horizontal size of the original with the Nu...

Page 49: ...lear Stop key and then enter the value again D Enter the vertical size of the origi nal with the Number keys then press the key E Press the OK key F Set your originals then press the Start key AdonisC2_ENcopy122F_FM book Page 36 Thursday February 15 2001 3 23 PM ...

Page 50: ...set can be stapled to gether Punch The optional Bridge unit and the optional 2 Tray finisher are re quired for this function This function is used to make punch holes in copies Note You can select functions to be acti vated when System Reset is turned on when Energy Saver is turned off or after the machine is pow ered on You can change default settings for basic functions Settings You Can Change w...

Page 51: ...to Image Density key to cancel it B Press the Lighter or Darker key to adjust the image density Note If you do not wish to set any other functions press the Start key to start copying Combined Auto and Manual Image Density A Make sure that the Auto Image Den sity key is selected B Press the Lighter or Darker key to adjust the density Note If you do not wish to set any other functions press the Sta...

Page 52: ...ill be clearly copied Generation Copy If your originals are copies gener ation copies the copy image can be reproduced sharply and clearly Note You can directly display the Origi nal Mode key on the copy original display You can adjust the quality level for each original type A Press the appropriate key to select the original type Note If Yes has been selected in Original Mode Display of the User ...

Page 53: ...e See the following table for possible copy paper sizes and directions with Auto Paper Select when copying at a ratio of 100 Metric version Inch version For some originals the original size might not be detected correctly P 20 Sizes difficult to detect When you set special paper such as recycled paper in the paper tray you can have the paper type shown on the display Special Paper Indication in th...

Page 54: ...e Start key to start copying If Yes has been selected in Original Mode Display of the User Tools press the Auto Paper Select key The tray with the key mark will not be automatically selected Manual Paper Select A Select the paper tray bypass tray or large capacity tray LCT Note If you do not wish to set any other functions press the Start key to start copying AdonisC2_ENcopy122F_FM book Page 41 Th...

Page 55: ...opy function when enlarging onto B4 or A3 size paper In this case set your original in the landscape direction You cannot use the Rotated Copy function when Top Slant Left 2 or Saddle Stitch is selected for stapling or if the Punch function is selected when using the 2 Tray finisher P 50 Staple and P 56 Punch You cannot use the Rotate Copy function if the Staple function is selected when using the...

Page 56: ...to detect You can set originals of different sizes in the document feeder at a time P 34 Mixed Size mode You cannot use the Rotate function when enlarging B4 or A3 originals When enlarging on to B4 or A3 size copy paper set the original in the L direction A Press the Auto Reduce Enlarge key B Select the paper tray Note If you do not wish to set any other functions press the Start key to start copy...

Page 57: ...e Sort and Stack with A5 L is 100 sheets Note When the number of copies ex ceeds the tray capacity remove copies from the tray The maximum tray capacity is as follows Metric version Internal tray B4L or larger 250 sheets 80g m2 A4K or smaller 500 sheets 80g m2 Internal tray 2 1 bin tray 125 sheets 80g m2 Extar nal tray 125 sheets 80g m2 1000 Sheet Finisher B4L or larger 500 sheets 80g m2 A4K or sm...

Page 58: ...L or larger 250 sheets 20 lb 81 2 11K or smaller 500 sheets 20 lb Internal tray 2 1 bin tray 125 sheets 20 lb Extar nal tray 125 sheets 20 lb 1000 Sheet Finisher 81 2 14 L or larger 500 sheets 20 lb 81 2 11 K or smaller 1 000 sheets 20 lb 2 Tray Finisher Finisher Shift Tray 1 11 17 L 81 2 14 L 250 sheets 20 lb 81 2 11 KL 500sheets 20 lb 51 2 81 2 KL 100sheets 20 lb Finisher Shift Tray 2 11 17 L 81...

Page 59: ...time the copies of one set or those of each job are delivered causing the next copy to shift when delivered so that you can differentiate each set or job Note The paper sizes that can be used in the Sort function are as fol lows A Press the Sort or Rotate Sort key When the finisher is not installed When the 1000 Sheet Finisher is installed Metric version A4KL B5KL Inch version 81 2 11 KL 2 1 3 3 2...

Page 60: ...he Start key Note The last page should be on the bottom If an original is misfed dur ing sorted copying reset your originals in the docu ment feeder according to the instructions on the display The display will indicate the number of scanned originals When setting an original on the exposure glass or in the document feeder using Batch mode Reference P 33 Batch mode A Set the original then press th...

Page 61: ...th the number keys Note To change the entered number press the Clear Stop key C Set your originals then press the Start key When setting a stack of originals in the document feeder A Set a stack of originals in the document feeder then press the Start key Note The last page should be on the bottom When setting an original on the exposure glass or in the document feeder using Batch mode Reference P...

Page 62: ...49 2 B Set the next original When it is placed on the exposure glass press the Start key Note Set the original in the same direction as the first one AdonisC2_ENcopy122F_FM book Page 49 Thursday February 15 2001 3 23 PM ...

Page 63: ... the copies from the shift tray and then resume copying Metric version 1 Depending on the number of sheets to be stapled and whether sheets have punched holes or not the maximum tray capacity might be reduced With 1000 Sheet Finisher With 2 Tray Finisher Paper size A3L B4L A4KL B5K A3L B4L A4KL B5KL Stapler capacity A4 or smaller 30 sheets 80g m2 B4 or larger 20 sheets 80g m2 A4 or smaller 50 shee...

Page 64: ...he originals in a direction in which they can be read They will automat ically be rotate copied When there is copy paper that is identical in size and di rection as your original the staple positions are as follows When using 1 Sided 2 Pages Combine 1 Side 1 Sided 4 Pages Combine 2 Sided for double copies in Combine mode select K original for L copy L original for K copy When using Top Slant Left ...

Page 65: ... not rotated 2 Tray Finisher Original setting Stapling position Exposure glass Document Feeder Top Slant K L Original setting Stapling position Exposure glass Document Feeder Top K L Top Slant K L Bottom K L STAPLEBE STAPLEAE STAPLEBE STAPLECE STAPLE25 STAPLE26 STAPLE27 STAPLE28 STAPLE29 STAPLE30 AdonisC2_ENcopy122F_FM book Page 52 Thursday February 15 2001 3 23 PM ...

Page 66: ...t will appear Check orientation message is displayed In this case change the paper orientation The maximum original image size that can be rotated is as follows A Select one of the stapling positions 1000 Sheet Finisher Left 2 K 1 L Top 2 K 1 L Metric version A4 Inch version 81 2 11 Original setting Stapling position Exposure glass Document Feeder STAPLEDE STAPLE31 STAPLE32 STAPLE33 STAPLEEE Adoni...

Page 67: ...et a stack of originals in the document feeder then press the Start key Note The last page should be on the bottom When setting an original on the exposure glass or in the document feeder using Batch mode Reference P 33 Batch mode A Set the original then press the Start key Note Start with the first page to be copied B Set the next original When it is placed on the exposure glass press the Start k...

Page 68: ... stop when memory reaches 0 during sorted copying However you can change this set ting so that all the scanned pages are copied and delivered to the tray first then the machine auto matically continues scanning the remaining originals Memory Full Auto Scan Restart in P 233 Input Output A Press the Start key The scanned pages are delivered to the tray Then the image data in memory is cleared B Remo...

Page 69: ...optional 2 tray finisher and the bridge unit are required to use this function This function is used to make punch holes in copies 2 holes 3 holes 4 holes AdonisC2_ENcopy122F_FM book Page 56 Thursday February 15 2001 3 23 PM ...

Page 70: ... occurs change the orientation of the copy paper The relationship between the direction in which you set the original and the punch hole positions is as follows Punch hole positions Direction in which Original is Set Punch Hole Positions Exposure glass Document feeder Standard 2 holes K L 3 holes K L 4 holes K L 90º Turn 2 holes K L 3 holes K L AdonisC2_ENcopy122F_FM book Page 57 Thursday February...

Page 71: ...lect a stapling position P 50 Staple 90º Turn 4 holes K L With 2 Tray Finisher Punch kit type 2 4 holes type 2 holes L A3 A5 11 17 51 2 81 2 K A4 A5 81 2 11 51 2 81 2 4 holes L A3 B4 11 17 K A4 B5 81 2 11 4 holes type 4 holes L A3 A5 11 17 51 2 81 2 K A4 A5 81 2 11 51 2 81 2 2 3 holes type 2 holes L A3 A5 11 17 51 2 81 2 K A4 A5 81 2 11 51 2 81 2 3 holes L A3 B4 11 17 K A4 B5 81 2 11 Direction in ...

Page 72: ...h the number keys Note To change the entered number press the Clear Stop key If you wish to use the Sort function press the Sort key C Set your originals then press the Start key AdonisC2_ENcopy122F_FM book Page 59 Thursday February 15 2001 3 23 PM ...

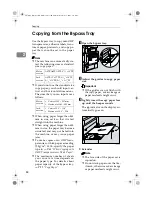
Page 73: ...lb specify the paper type in P 63 When Copying onto OHP Transparencies or Thick Paper The maximum number of sheets you can set at a time depends on the paper type For details about paper capacity of the bypass tray P 22 Copy Paper A Open the bypass tray B Adjust the guides to copy paper size Important If the guides are not flush with the copy paper a skew image or paper misfeeds might occur C Ligh...

Page 74: ...led or warped When copying onto standard size paper Thick Paper Thin paper Transparent Paper or OHP transparecies A Press the key B Press the Select Size key C Select the paper size Note The copy paper sizes that can be selected are as follows A3L A4KL A5KL A6L B4L B5KL B6L 11 17L 81 2 14L 81 2 11KL 51 2 81 2L 71 4 101 2L 8 13L 81 2 13L 81 4 13K 11 14L 11 15K 10 14L 10 15L 81 4 14L 8 101 2KL 8 10K...

Page 75: ...er en tered press the Clear or Clear Stop key and enter the new number E To register the custom size en tered press the Store key and then press the Cancel key Note If you do not register the cus tom size go to step F Only one custom size can be stored To recall the custom size stored press the Recall key If you do not register the cus tom size the size you set is deleted when modes are cleared F ...

Page 76: ...ranspar encies or thick paper face down until the beeper sounds The k indicator on the display au tomatically goes on Important When you set an OHP transpar ency make sure that its front and back faces are properly po sitioned To avoid paper misfeeds fan the paper before setting it in the tray C Press the key D Select OHP Sheet or Thick Paper E Press the OK key F Set your originals and press the S...

Page 77: ...an one paper tray of the same size the paper tray prioritized with the User Tools System Set tings will be selected first Refer to the System Settings manual Programs are not cleared by turn ing the power off or by pressing the Clear Modes key They are canceled only when you delete or overwrite them with another pro gram Storing a Program A Edit the copy settings so that all functions you want to ...

Page 78: ...re the program settings Note When you want to check the contents of the program recall the program P 66 Recalling a Program B Repeat steps A A A A to D D D D in Storing a Program To overwrite the program Important If you select Register the previ ous program is lost A Repeat steps E E E E and F F F F in Storing a Program Not to overwrite the program A Press the Do not Register key Deleting a Progr...

Page 79: ...Press the Recall key C Press the program number you want to recall The stored settings are displayed Note Only programs with m contain a program D Set your originals then press the Start key AdonisC2_ENcopy122F_FM book Page 66 Thursday February 15 2001 3 23 PM ...

Page 80: ... up the next copy job Note To cancel this job press the Cancel key C Set the originals in the document feeder and press the Start key All originals are scanned D Press the To Printing key After the current copy job the next job starts automatically Note You can switch the display to the current copy job by pressing the To Printing key You can switch the display to the preset job by pressing the To...

Page 81: ...needed copies Limitation You cannot use the Interrupt Copy function when scanning fax originals Note The procedure for making inter rupt copies depends on which kind of operation the machine is currently carrying out To interrupt an original being fed A Press the Interrupt key The Interrupt indicator goes on and scanning stops B Remove the originals that were being copied and set the originals you...

Page 82: ...se this function to check a copy set before making a long copy run Limitation This function can be used only when the Sort function has been turned on A Select Sort and any other func tions then enter the number of copy sets to be made B Set the originals C Press the Sample Copy key One copy set is delivered for proof copying D After checking the finish press the Print key if the sample is ac cept...

Page 83: ...lear Stop key when Copying is displayed B Press the Change Quantity key C Enter the number of copy sets with the number keys then press the key Note The number of sets you can en ter differs depending on the timing of pressing the Clear Stop key To change the entered number press the Clear Stop key D Press the Continue key AdonisC2_ENcopy122F_FM book Page 70 Thursday February 15 2001 3 23 PM ...

Page 84: ...r Mag Ratio is to be giv en priority and displayed when the Reduce Enlarge key is pressed You can select a ratio regardless of the size of an original or copy pa per With some ratios parts of the image might not be copied or mar gins will appear on copies Copies can be reduced or enlarged as follows Metric version Inch version Ratio Original Copy paper size 400 enlarge area by 16 200 enlarge area ...

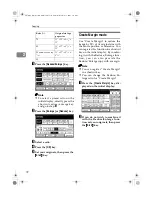
Page 85: ...unction in a shortcut key on the initial display By combin ing it with the Reduce Enlarge func tion you can also provide the Reduce Enlarge copy with a margin Note You can register Create Margin in a shortcut key You can change the Reduce En large ratio for Create Margin A Press the Create Margin key dis played on the initial display B If you do not wish to combine it with the Reduce Enlarge func ...

Page 86: ...ar the desired ratio then ad just the ratio with the n or o key A Press the Reduce Enlarge key B Enter the ratio To select the ratio with the n and o keys A Select a preset ratio which is close to the desired ratio by us ing Reduce or Enlarge B Adjust the ratios with the n n n n or o o o o key Note To change the ratio in 1 steps just press the n or o key To change the ratio in 10 steps press and h...

Page 87: ...mber keys Note To change the ratio entered press the Clear or Clear Stop key and enter the new ratio C Press the key D Press the OK key C Set your originals then press the Start key AdonisC2_ENcopy122F_FM book Page 74 Thursday February 15 2001 3 23 PM ...

Page 88: ... parts of the image might not be copied or blank margins will appear on copies Note A ratio is selected in the range of 25 to 400 A Press the Reduce Enlarge key B Press the Specifid Ratio key C Make sure that the Specifid Ratio key is highlighted D Enter the length of the original with the number keys and press the key Note You can enter sizes within the following ranges To change the length enter...

Page 89: ...red press the Clear or Clear Stop key and enter the new length To change the length after pressing the key select Orig inal or Copy and enter the de sired length F Press the OK key G Press the OK key H Set your original then press the Start key AdonisC2_ENcopy122F_FM book Page 76 Thursday February 15 2001 3 23 PM ...

Reviews: