14 ACU-280
SATEL
the same name will be given to the other zones. If the device is to be assigned to
outputs, the outputs will be given the same name.
6.3. For some devices you can select if the device is to occupy one or two positions on
the list of devices.
7. Click on the “OK” button.
8. The “New device” window will close.
9. The new device will be displayed on the list of devices.
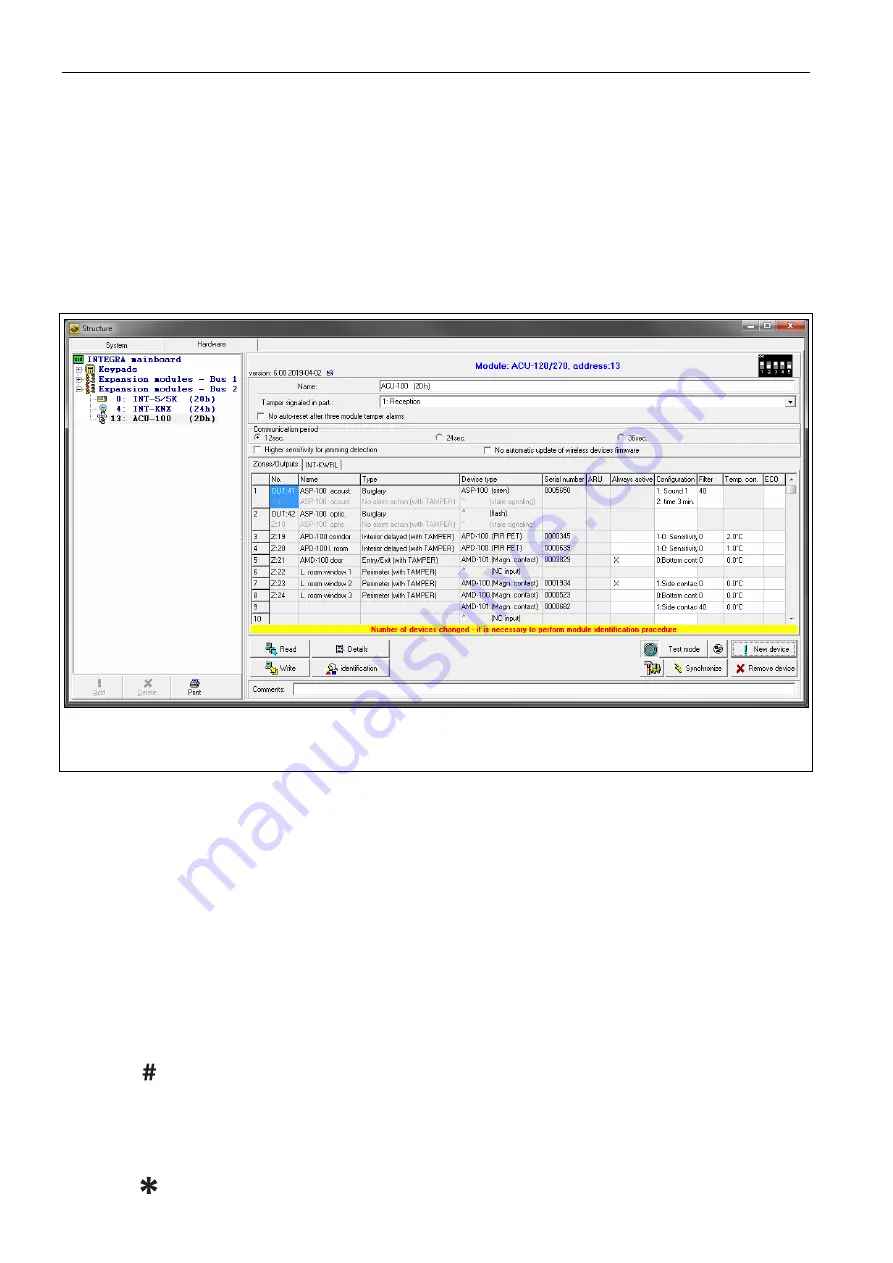
10. Click on the “identification” button (see Fig. 9). The new wireless zones / outputs will not
be available in the alarm system until the procedure of expander identification is finished.
Fig. 9. DLOADX program: information displayed after registration of a new device to the
controller connected to the INTEGRA / INTEGRA Plus control panel.
LCD keypad
You can add wireless devices in service mode, using the “New device” function (
“Structure”
“Hardware”
“Expanders”
“Settings”
[controller name]
“New device”).
When adding a device you can select the alarm system zone to which you want to assign the
device. It can be one of the unoccupied zones from the pool reserved for the controller. If the
device takes up more than one position on the list of devices, additional zones will be
assigned to the device automatically (these will be the zones following the selected one). To
the outputs, the device is assigned automatically (to the first unoccupied outputs from the
pool reserved for the controller).
1. Start the “New device” function.
2. When the “Device serial number:” is displayed, enter the serial number of the device
being added.
3. Press .
4. When the “Open device tamper” command is displayed, power on the device (insert the
battery into the device, turn on the device power, etc.).
5. Type and serial number of the device will be displayed (if a message is displayed instead
to inform you that the entered serial number is invalid or the device is already registered,
press to quit the function).


