background image

80

Summary of Contents for GPC65-CW

Page 1: ...ABC Tare Tare 1 2 3 4 5 6 8 9 F CAL CF Setup 0 7 Operating Instructions Sartorius Pipette Calibration Balance Model GPC65 CW 98648 015 87 ...

Page 2: ...ding capability for printouts Password protected menu lock Display of maintenance service intervals when due The weigh cell meets the highest requirements placed on the accuracy and reliability of weighing results through the following features Efficient filtering out of vibration Stable and repeatable results Excellent readability under any lighting conditions Rugged design and durable weighing s...

Page 3: ...pened only by authorized service technicians who have been trained by Sartorius and who follow Sartorius standard operating procedures for maintenance and repair work Connect only Sartorius accessories and options as these are optimally designed for use with your weigh cell When cleaning your weigh cell make sure that no liquid enters the equipment housing use only a slightly moistened cloth to cl...

Page 4: ...for connecting the weigh cell 10 Serial printer port PRINTER 11 Electronics module Pos Designation 12 Socket for connecting an optional display and control unit 13 DC jack 14 Connection cable for optional display and control unit 15 Display and control unit 16 Evaporation trap complete 17 Shield disk exterior 18 Shield disk interior 19 Reduction fitting 20 Pan 21 Reduction fitting for beaker 21 ml...

Page 5: ...rograms 11 On off key 12 Key for alphabetic input 13 Display and control unit Equipment supplied Weigh cell Electronics module Operating instructions this document Display and control unit with 0 5m cable YCP01WZA pipette calibration set Thermal protective covers Special accessories if ordered as listed on the bill of delivery or in accordance with specific arrangement ABC Tare Tare 1 2 3 4 5 6 8 ...

Page 6: ...s designed to protect the weigh cell Always replace the protective cap trans port locking device before transporting the weigh cell Following transport be sure to calibrate the weigh cell prior to performing any measurements Avoid exposing the equipment to the effects of extremely high temperatures for example caused by other electronic components heaters or direct sunlight Protect the equipment f...

Page 7: ...to the specifications for classifica tion of electrically operated equipment in EN 61010 1 Safety Precautions The power supply must be rated to safety extra low voltage SELV or grounded earthed safety extra low voltage SELV E An AC adapter rated to Class 2 can be plugged into any wall outlet with no additional safety precautions required The ground terminal is con nected to the weigh cell housing ...

Page 8: ...ghing System Leveling Feet Purpose To compensate for uneven areas at the place of installation To ensure that the weigh cell is placed in a perfectly horizontal position for consistently reproducible weighing results Always level the weigh cell again any time after it has been moved to a different location Leveling feet are included in the equipment supplied The following leveling feet are availab...

Page 9: ...h cell has been allowed to warm up sufficiently For information on calibrating the weigh cell refer to the chapter entitled Calibration and Adjustment Installing the Evaporation Trap Important note Be sure to wear gloves see the Accessories section before installing the evaporation trap Otherwise moisture oil and warmth from your hands can be transferred to the individual parts of the evaporation ...

Page 10: ...lled allow the weighing system to rest for a moment so that the compo nents can acclimatize to the ambient conditions Pull the thermal protective coverings included in the equipment supplied over the weigh cell and the evaporation trap You may now begin pipetting Use the pipette for filling procedures 10 ABC Tare Tare 1 2 3 4 5 6 8 9 F CAL CF Setup 0 7 ABC Tare Tare 1 2 3 4 5 6 8 9 F CAL CF Setup ...

Page 11: ...ft keys are used to access Info Menu and Input functions CF Setup Setup CF CAL F Setup Display The display is divided into six sections Line for metrological data Metrological specifications of the weighing platform Max g d g Display during use as a legal measuring instrument Max g Min g e g d g Bar graph Display in percent of the weight on the balance relative to the maximum capacity and for over...

Page 12: ...printouts generated auto matically or by pressing p depend ent on or independent of the stability or time parameters with or without IDs and as standard or ISO GLP compliant printouts ISO International Organization for Standardization GLP Good Laboratory Practice See the section on Data Output Func tions in the chapter entitled Opera tion for a detailed description of data output options Interface...

Page 13: ...n displayed Program version number for the display and control unit Program version for the weighing cell Balance model Serial number of the weighing cell Display Balance Information G Select the Setup menu Press H G Select information Press the info soft q key Readout in measured value line Version number of the display and control unit see also Data Output Functions in the chapter entitled Opera...

Page 14: ...can use the General Password see Appendix to access these menus Preparation Display existing user data G Select the Setup program Press M The soft keys Info Menu and Input are displayed in the text line G Select the user data input function Press the Input softkey v The password prompt is displayed k If access is blocked by a password enter the password using the alphanu meric input keys G Display...

Page 15: ...f the balance a 13th through 20th digits of ID displayed workstation ID 3 Set the letter W y repeatedly until the W is in the middle 4 Enter the next letter of the balance a workstation ID 5 Select the letter o Y repeatedly 6 Repeat steps 4 and 5 with a x X the appropriate letters display longer values see Data Output Functions on page 54 7 Store balance workstation ID ID soft key X 8 Display the ...

Page 16: ...splayed In this example 09 10 96 ABC1 10 Display 5th through x 12th digits of lot no 11 Display other user data xyYX Weight set no Exact calibration weight Password 12 Print user data example p ID WORKSTATION 234 L ID 09 10 96 ABC1 W ID A 123 456 XY C Cal wt 2000 02 13 Exit Setup Input M 16 ...

Page 17: ...he Setup menu Press M The Info Menu and Input soft keys are displayed in the text line G Select the parameter menu Menu soft key w Password prompt is displayed G Enter password using the alphanumeric input keys G Confirm password entered enter passw soft key v Measured value line 1 1st menu level Text line Balance functions k Select the next group Press Y k Select the next submenu within a group 2...

Page 18: ...de Menu Menu soft key w 3 Select the Application Prog group Y 4 Confirm Application Program X 2nd menu level 5 Confirm App Selection X 3rd menu level shows current setting in this case weighing 6 Select the Counting program Y Y 7 Confirm selection of Counting program X 8 Set other parameters if desired x y Y X 9 Save settings and exit menu M info menu input ...

Page 19: ...19 Setup Parameters Overview o Factory setting User setting setting not applicable in balances verified for use in legal metrology Menu ...

Page 20: ...20 setting not applicable in balances verified for use in legal metrology ...

Page 21: ...21 setting not applicable in balances verified for use in legal metrology Tabelle fehlt ...

Page 22: ...tability parameter weighing automatic 6 1 2 o Manual with stability parameter 6 1 4 Auto print without stability parameter 6 1 5 Auto print at stability 6 1 6 Auto print after weight change 6 2 Stop auto print 6 2 1 Use key 6 2 2 o Not possible 6 3 Time dependent 6 3 1 1 display update auto print 6 3 2 2 display updates 6 3 4 10 display updates 6 3 7 100 display updates 6 4 Print 6 4 1 o Off autot...

Page 23: ...23 ...

Page 24: ... electricity only very slowly The result is a force action between the charge on the sample and the perma nently installed parts of the weigh cell This causes the readout to fluctuate constantly Ionization can be applied to make the air around the sample conductive This allows the charge to be compensated through the air or discharged through the ground grounded Aside from purely mechanical soluti...

Page 25: ...arameter 7 2 2 See the chapter entitled Configuration on the CD ROM G Exit the Setup menu Press M Additional Functions In addition to the functions alphanumeric input taring not during alphanumeric input printing you can also access the fol lowing functions from the weighing application calibration not during alphanumeric input setup turning off the balance Calibration G Press q See the section on...

Page 26: ...struction Display Output Initial status balance unloaded ID can also be entered while balance is loaded 1 Enter the letter A a 2 Select and enter the letter B a Softkey B Key Y 3 Select and enter the letter C a Softkey Key Y Y 4 Enter the numbers 1 2 and 3 1 2 3 5 Store the ID Press the SP ID soft key v max 20 characters The next printout will include this ID ...

Page 27: ...ight value 1 9 3 Adjustment can be performed automatically following calibration 1 10 1 or if desired the adjustment operation can be started manually after calibration 1 10 2 You can also configure whether the calibration mode will be activated according to the specific setting by setting 1 9 1 1 9 3 or 1 9 4 or can be selected by the user after pressing the q key 1 9 12 You can have the balance ...

Page 28: ...the balance e 2 Select the Setup menu M 3 Select the Balance Functions menu menu soft key w 4 Set parameters for Calibration key function 1 9 Calibration adjustment sequence 1 10 isoCAL self calibrating and adjustment function 1 15 See the chapter entitled Configuration x y Y X 5 Exit the Setup menu H info menu input ...

Page 29: ...the display shows the difference between the weight readout and the actual weight value This is displayed after adjustment 5 Unload the balance Remove weight s Selecting the Calibration Adjustment Parameter The setting 1 9 12 must be selected in the Setup menu You can configure the balance so that after selecting a calibration procedure by pressing the q key you can choose among the following cali...

Page 30: ...e balance has a factory set weight value see Specifications To reset a user defined calibration adjust ment weight to the original factory setting enter the factory set weight value manual ly see Specifications or set menu code 1 9 1 in the Setup menu 30 Define the Calibration Weight Step Key or instruction Display Output 1 Select the Setup menu H 2 Access the Input Mode Input soft key v 3 Select ...

Page 31: ...st be select ed in the Setup menu The isoCAL display automatically begins flashing if the ambient tempera ture has changed in relation to the tem perature at the time of the last calibra tion adjustment or after a defined time interval has elapsed The balance is telling you that it wants to self cali brate and adjust This adjustment prompt is activated when The change in temperature or the elapsed...

Page 32: ... The results are displayed with the balance s accuracy Preparation G Turn on the balance Press e All display segments light up briefly G Select reproTEST in the Setup menu Press M G Select Menu Press w menu softkey G Select either 1 9 11 reproTEST or 1 9 12 selection mode See Configuring the Balance G Exit the Setup menu Press M 32 Check the Reproducibility of the Balance Step Key or instruction D...

Page 33: ... the configuration mode Press w menu soft key G Set the parameter 2 1 2 See the chapter entitled Configuration G Exit the Setup menu Press M Setting Weight Unit 1 Access the Setup menu select Menu G Set the parameter for weight unit 1 1 7 2 through 1 7 20 See Configuration G Set display accuracy 1 1 8 1 through 1 8 5 See Configuration Setting Weight Unit 2 k Access Setup select Menu G Set the para...

Page 34: ...n Adjustment G Press q See Calibration Adjustment for further instructions Setup setting parameters G Press M See Configuration for further instructions Turning Off the Balance G Press e The balance shuts off The display goes blank Practical Example Toggle the Display From Grams g 1st Unit to Troy Ounces ozt 2nd Unit Step Key or instruction Display Output R1 weight unit 1 1 Toggle to Troy ounces o...

Page 35: ... of three ways The last reference sample quantity entered is loaded and displayed when you turn on the balance Place the same number of parts on the balance and initialize the counting program With automatic initialization switched on the balance goes into the counting mode when you turn it on and loads the last average piece weight and corre sponding reference sample quantity that were entered or...

Page 36: ... displayed number on the balance example 10 pcs of parts in the container each weighing 2 148 g 5 Initialize the balance start soft key v the number of digits following the decimal point depends on the balance model 6 If necessary increase Place parts in container number of parts and update updat soft key v the reference sample here 7 more pieces 7 Weigh uncounted parts Place parts to be counted i...

Page 37: ...cimal places 3 6 3 Printout application parameters auto matic output of application parame ters off 7 1 1 Preparation To calculate a value in percent the ref erence percentage must be known This value can be entered into the weighing in percent program in one of three ways The last reference percentage entered is loaded and displayed when you turn on the balance Place the corresponding weight on t...

Page 38: ...y container on the balance 3 Tare the balance t 4 Place the reference weight Place weight equal on the balance to reference weight in here 1821 48 g 100 the container 5 Initialize the balance start soft key v 6 Unload the balance Remove reference weight from the container 7 Determine the percentage Place sample to of an unknown weight be measured in the container 8 If desired print percentage p he...

Page 39: ...on application in the Setup menu 2 Prepare a container for the parts Place the empty container on the balance 3 Tare the balance t 4 Enter the reference weight using 1 2 0 the numeric keys here 120 g 5 Store the reference weight W100 soft key q 6 Determine the percentage Place sample to of an unknown weight be measured in the container in this case 114 78 g W100 pref s id ...

Page 40: ...GLP compliant printout of the total of the individual compo nent weights Tot cp Factory Settings Automatic printout when component value stored print net total 7 3 1 Preparation G Turn on the balance All display segments light up briefly G Select the Net Total application in the Setup menu Press M G Select menu Press the menu soft key w G Set parameter 2 1 6 See Configuration G Exit the Setup menu...

Page 41: ...Prepare a container for the Place the empty container components on the balance 3 Tare the balance t 4 Add first component Place the first component in the container 5 Store component value 1 comp soft key v 6 Add next component Place next component in the container 7 Store component value 2 comp soft key v 8 If desired add further Repeat steps 6 and 7 components as needed 9 Display total weight w...

Page 42: ...is below the stop threshold Factory Settings Auto start application automatic initialization with automatic start of animal weighing off 3 10 2 Animal activity 3 subweights lie within a preset range i e animal is calm normal or active normal 3 7 2 Start animal weighing automatic 3 8 2 Automatic printout of number of weighing operations used in averaging and of the calculation factors off 7 1 1 Pri...

Page 43: ... Set the following animal weighing parameters in the Setup menu Animal activity Active Setting 3 7 3 in Setup menu Start animal weighing Automatic Setting 3 8 2 in Setup menu Printout On anim wt fact Setting 3 9 3 in Setup menu Print All parameters Setting 7 1 2 in Setup menu 3 Prepare a container cage Place empty cage on the balance 4 Tare the balance t 5 Enter number of subweighing 2 0 operation...

Page 44: ...efined for an active animal After 20 subweighing operations mdef no of subweighs Mul Calculation factor xnet arithm average net value 8 Unload the balance Remove animal from cage 9 If desired weigh next animal Place animal in cage Next weighing series begins automatically M x20xxxxxxx xxx19 xxx18 xxxx xxxx1 mDef 20 Mul 1 x Net 69 72 g x Res 69 72 o mdef x20 auto M x20xxxxxxx xxx19 xxx18 xxxx xxxx1...

Page 45: ...tability is reached within the control range deleted only when you exit this application Optional configuration in the Setup menu for activation of control lines in dependent of weight value weight within control range stability reached Toggling the display between weight readout and control checkweighing display by pressing v If the weight value exceeds tolerances the measured value line shows th...

Page 46: ...at stability activated at stability within the control range This makes it possible for example to connect a simple indicator for the weighing results e g three different colors one each for the weighing results too light O K too heavy Response of Control Lines During Checkweighing Configurations always on activated at stability Configurations activated within control range activated at stability ...

Page 47: ...ue is within limits and balance at stability 4 2 auto print Control lines on 4 3 ctrl ports on Automatic output of initialization values to interface port 7 1 Print app param Signal direction for data output port lines 8 8 1 input or 8 8 2 output See Configuration G Exit the Setup menu Press M Additional Functions In addition to functions for alphanumeric input not during initialization taring not...

Page 48: ...lication in Setup 2 Set the following checkweighing See Configuration parameters in the Setup menu Auto print On values in tol Print app param All parameters 3 Prepare a container for the sample Place empty container on the balance 4 Tare the balance t 5 Enter initialization values start soft key v 6 Store target value here 170 g Place ideal sample in container 7 Store target value and setp soft k...

Page 49: ...key v 12 Weigh sample Place sample in container in this case 169 48 g If the weight had been too low the display would have shown the following 13 In this case switch to net value net soft key v display in this case 163 28 g 14 Weigh next sample if any Place sample in container Setp 170 00 g Min 165 00 g Max 180 00 g N 169 48 g ...

Page 50: ... After the amounts of the components already weighed have been corrected weighing continues according to the adjusted formulation amount The readout is recalculated updated according to the divisor You can repeat the over pour correction procedure as often as necessary in case other components are over poured After follow on corrective filling the total amount differs from that given for the formu...

Page 51: ...empty container components on the balance on the balance 3 Tare t 4 Add the first component Weigh the first component into the container 5 Store component Press the comp 1 soft key v 6 Add the second component Weigh the second component into the container 7 Start recalculation because recal soft key q 12 42 g were poured rather than 12 30 g 8 Either press the minus minus soft key repeatedly key to...

Page 52: ...e net value is displayed for 2 seconds 11 Weigh in further components Repeat steps 4 and 5 if called for in the formulation as needed 12 Toggle to the additive mode add soft key w if required 13 Add further components Add components to container as required here e g up to the total weight of the formulation 1 000 g comp sp id Comp1 27 08 g Comp2 12 42 g R div 1 00975 store comp 2 r div 1 00975 com...

Page 53: ... procedure c Total weight is printed Total weight is displayed Component memory is cleared Comp1 27 08 g Comp2 12 42 g R div 1 00975 RCom1 27 34 g Comp3 18 39 g Comp4 31 49 g Comp5 107 50 g Comp6 812 61 g actual net Comp 6 recal comp add 7 Comp1 27 08 g Comp2 12 42 g R div 1 00975 RCom1 27 34 g Comp3 18 39 g Comp4 31 49 g Comp5 107 50 g Comp6 812 61 g Tot cp 1009 75 g recal comp 1 ...

Page 54: ...10 g Verification scale interval of the balance irrelevant if the balance is not used in legal metrology e g 0 1 g Readability Indicates the actual scale interval display increment of the balance e g 0 01 g Bar Graph In the bar graph weighing results are displayed either as a percentage of the maximum balance capacity or in relation to a target value with tolerance limits indicated Measured Value ...

Page 55: ... above Display of Longer Values You can enter values up to 20 characters in length e g identification numbers These are displayed in the measured value line this line however can only show up to 8 characters at a time When a 20 character value is displayed for example the last 8 characters 13 through 20 are displayed first in this example the ID number is Shelf 5 carton 4020 The text line displays...

Page 56: ... Print animal weights For an automatic printout of animal weight or of animal weight plus calculated weight after averaging Auto print for automatic printout of a weight when it lies within preset limits at stability Factory Settings Print manually automatically Printout generated manually by pressing p or automatically depending on stability parameter Manual after stability 6 1 2 Line format A da...

Page 57: ...H L ID ABC123DEF456GH W ID ABC123DEF456GH N 1530 000 g Qnt 253 pcs Prc 88 23 Nom 2000 00 g S ID ABC123DEF456GH ABC123DEF456GHI789JK NUM 12345678 nRef 10 pcs wRef 1 23456 g pRef 80 Wxx 1200 00 g mDef 10 Mul 0 00347 Setp 1000 035 g Min 981 054 g Max 1020 063 g N1 278 11 g T2 1821 48 g Comp7 278 11 g Tot cp 2117 56 g Weight in grams Weight in Troy ounces Piece count Percentage Calculated value Identi...

Page 58: ...he weight and the calculated result printed Auto Print With the over under checkweighing application you can have the result printed automatically if it lies within a defined range acceptable value Data Output Functions Printing a Data Record Print for use in legal for trade applica tions You can configure the scale operating menu to generate a printout that conforms to the regulations for use in ...

Page 59: ...n of workstation operator Documentation includes balance specific data Note The time indicated on the printout consists of only hours and minutes For ISO GLP compliant documentation with a computer you will need special software Contact Sartorius for a detailed description for creating this software 28 06 1997 16 12 SARTORIUS Mod GPC65 Ser Nr 60419914 Vers Nr 01 30 09 ID 12345678901234 C ID 123456...

Page 60: ...6 Failure to do so may damage or even completely ruin your balance and or peripheral device Features Type of interface Serial interface Operating mode Full duplex Standard RS 232 Transmission rates 150 300 600 1 200 2 400 4 800 9 600 19 200 baud Parity Space odd even Character format 1 start bit 7 bit ASCII parity 1 or 2 stop bits Handshake 2 wire interface via software XON XOFF 4 wire interface v...

Page 61: ...decimal point are output without a decimal point The following characters can be output depending on the characters displayed on the balance Normal Operation Position 1 2 3 4 5 6 7 8 9 10 11 12 13 14 15 16 D D D D D D D D U U U CR LF or or or 0 0 0 0 0 0 Space D Digit or letter U Unit symbol CR Carriage return LF Line feed Special Codes Position 1 2 3 4 5 6 7 8 9 10 11 12 13 14 15 16 CR LF or H H ...

Page 62: ...final stable readout checkweighing H Overload C Calibration adjustment H H Overload during checkweighing Error codes 1 2 3 4 5 6 7 8 9 10 11 12 13 14 15 16 17 18 19 20 21 22 S t a t E r r CR LF Space Error code number Unit symbol U1 No stability parameter g Grams k g Kilograms c t Carats l b Pounds o z Ounces o z t Troy ounces t l h Hong Kong taels t l s Singapore taels t l t Taiwanese taels G N G...

Page 63: ... via the interface port is cut off rather than rejected as for a key input See the chapter entitled Overview for the ASCII character table Format 1 Meaning K Weighing mode 1 L Weighing mode 2 M Weighing mode 3 N Weighing mode 4 O Block keys P Print R Unblock keys S Restart T Tare t Z Internal calibration adjustment Format 2 Meaning f0 Function key w f1 Function key q f2 Function key v f3 Zero sepa...

Page 64: ... byte byte byte Transmitting Device Once XOFF has been received it pre vents further transmission of characters When XON in received it re enables the transmitting device to send data Receiving Device XOFF is transmitted after the 26th character has been stored To prevent too many control commands from being received at one time XON is not transmitted until the buffer has transmitted all but 14 ch...

Page 65: ...return TxD RxD Pin 5 Clear to send CTS Pin 6 Internally connected Pin 7 Internal ground Pin 8 Internal ground Pin 9 Reset _ In Pin 10 12 V Pin 11 12 V Pin 12 Reset _ Out Pin 13 5 V Pin 14 Internal ground Pin 15 Pin 16 Pin 17 Pin 18 Pin 19 Pin 20 Data terminal ready DTR Pin 21 Supply voltage ground COM Pin 22 Not connected Pin 23 Not connected Pin 24 Supply voltage input 15 to 25 V Pin 25 5 V See A...

Page 66: ...nt peripheral device to the balance using the RS 232 V24 standard and cables up to 15 m 50 ft long Balance Peripheral device PC Type of cable AWG 24 specification 66 ABC Tare Tare 1 2 3 4 5 6 8 9 F CAL CF Setup 0 7 V24 PC 25 pin or 9 pin 2 3 20 4 3 2 5 8 6 6 7 5 ...

Page 67: ...sted below In the Setup menu you can configure which function is to be controlled via remote switch Printing Print key funct 8 4 1 Taring Tare key function 8 4 2 Calibration CAL key function 8 4 3 Function key F key function 8 4 4 Delete cancel CF key function 8 4 5 Toggling Toggle key funct 8 4 6 Display Backlighting You can have the display backlighted for improved readability of displayed value...

Page 68: ...Reset Function There is a factory setting for each parameter In the Setup menu you can configure whether menu factory settings will be restored after exiting Setup Restore 9 1 1 or menu factory settings will not be resto red after exiting Setup Do not restore 9 1 2 68 Pin Assignments for the Female Interface Connector Pin Input Function 8 8 1 Output Function 8 8 2 15 p key Remove universal switch ...

Page 69: ...special settings for MP8 functions Program selection MP8 3 1 1 Program index 2 1 Ind 2 1 Preparation G Turn on the balance Press e All display segments light up briefly Switch to the MP8 interface G Press M G Select balance operating menu Menu soft key press the w key G Select and confirm the balance menu press the y and then the X key G Confirm factory setting X key G Select and confirm MP8 mode ...

Page 70: ...rrupt be completed within a certain time and repeat the adjustment process err 06 Built in calibration weight Contact your local int wt defective is defective Sartorius Service Center err 07 Function not allowed in balances Contact your local Sartorius Service Center function blocked verified for use in legal metrology for information on having the settings changed err 08 The load on the balance i...

Page 71: ...ments displayed continuously Either M was pressed when you turned on the balance or this key is stuck err 340 Operating parameter EEPROM is wrong Contact your local Sartorius Service Center No WP Weighing cell platform defective Contact your local Sartorius Service Center blocked Function blocked None The special code J remains displayed None of the keys has been pressed Press a key since the bala...

Page 72: ...on of the balance with the AC adapter is no longer warranted G Turn off the power and disconnect the equipment from AC power immediately Lock the equipment in a secure place to ensure that it cannot be used for the time being Safe operation of the balance with the AC adapter is no longer ensured when there is visible damage to the AC adapter the AC adapter no longer functions properly The AC adapt...

Page 73: ...y Toggle This key toggles the display readout between a weight and a calculated value counting readout in percent calculated result v Key Start an Application Further instructions on running the applications when this key is pressed are contained in the chapter entitled Oper ating the Balance refer to the section pertaining to the particular program x y Y X Keys For moving around within the parame...

Page 74: ...art application 4 x x Parameter 4 2 x Auto print 4 3 x control ports on 5 x x Interface 5 1 x Baud rate 5 2 x Parity 5 3 x Number of stop bits 5 4 x Handshake mode 5 5 x Communication mode 5 6 x Network address 6 x x Print for weighing 6 1 x Print manual automatic 6 2 x Abbruch Autoprint 6 3 x Autoprint zeitabhängig 6 4 x Tara nach Einzelprint 7 x x Print for application 7 1 x Print application pa...

Page 75: ...n weight g 50 E2 of at least accuracy class Material Weigh cell Stainless steel load receptor chemically nickel plated aluminum Electronics module Aluminum paint Net weight approx kg 7 2 AC power source power supply V Via AC adapter 230 VAC or 115 VAC line voltage 15 to 20 IP protection IP20 power consumption max 35 VA Frequency Hz 48 60 Alternatively Supply voltage VDc max 12 25 from customer s s...

Page 76: ...Overview Dimensions Scale Drawings Electronics module for model GPC65 CW All dimensions are given in millimeters 76 ...

Page 77: ...Weigh cell model GPC65 CW All dimensions are given in millimeters 77 1 9 1 M3 0 9 3 3 3 10 8 16 1 3 2 429 23 ø 3 2 19 8 2 8 ...

Page 78: ... Data interface cable for PC connection 25 pin 7357312 for PC connection 9 pin 7357314 Pipette calibration trap with adapter YCP01WZA Draft shield and 50 ml stainless steel container YDS01WZA Carrying case YDB01WZA Cotton gloves 1 pair YAW21 Other data interfaces for example RS 485 etc upon request AC adapter IP40 protection in accordance with DIN VDE 0470 529 Europe 6971966 6900900 cable US 69714...

Page 79: ...ity EMC Acceptable European Standards Limitation of emissions EN 50081 1 Residential commercial and light industry EN 50081 2 Industrial environment Defined immunity to interference EN 50082 1 Residential commercial and light industry EN 50082 2 Industrial environment Important Note The operator shall be responsible for any modifications to Sartorius equipment and for any connections of cables or ...

Page 80: ...80 ...

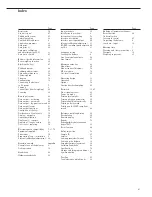
Page 81: ...Input user data 15 Installation instructions 6 Instructions for recycling 72 Interface description 60 Interface port input output 60 Internal calibration adjustment 31 ISO GLP compliant printout record 59 isoCAL 31 Language setting 14 Leveling the balance 8 Line for metrological data 54 Line format 57 Measured value line 54 Menu items 20 Menu structure diagram 74 MP8 interface 74 Net total formula...

Page 82: ... The last 8 digits of a workstation ID balance ID no if available are displayed in the measured value line G Select password setting Press y If a password exists it is now displayed in the measured value line Entering the General Password G New password Enter the letters num bers for the new password 8 characters max G To delete the password enter a decimal point using the key and confirm G Confir...

Page 83: ...ny means without the prior written permission of Sartorius AG The status of the information specifications and illustrations in this manual is indicated by the date given below Sartorius AG reserves the right to make changes to the technology features specifications and design of the equipment without notice Status August 2007 Sartorius AG Goettingen Germany Printed in Germany on paper that has be...

Page 84: ...ny means without the prior written permission of Sartorius AG The status of the information specifications and illustrations in this manual is indicated by the date given below Sartorius AG reserves the right to make changes to the technology features specifications and design of the equipment without notice Status August 2007 Sartorius AG Goettingen Germany Printed in Germany on paper that has be...

Reviews: