background image


13

6.

6.

6.

6.    

Quality Control

Quality Control

Quality Control

Quality Control


6.1

6.1

6.1

6.1    

Inspecting weld quality

Inspecting weld quality

Inspecting weld quality

Inspecting weld quality    

The BioWelder® is designed to make reproducible and reliable connections, 
however it is still critical to inspect the weld prior to use. 
 

Important:

Important:

Important:

Important:    

Allow the weld to cool down for 2-3 minutes before inspection to achieve optimal 
strength. 


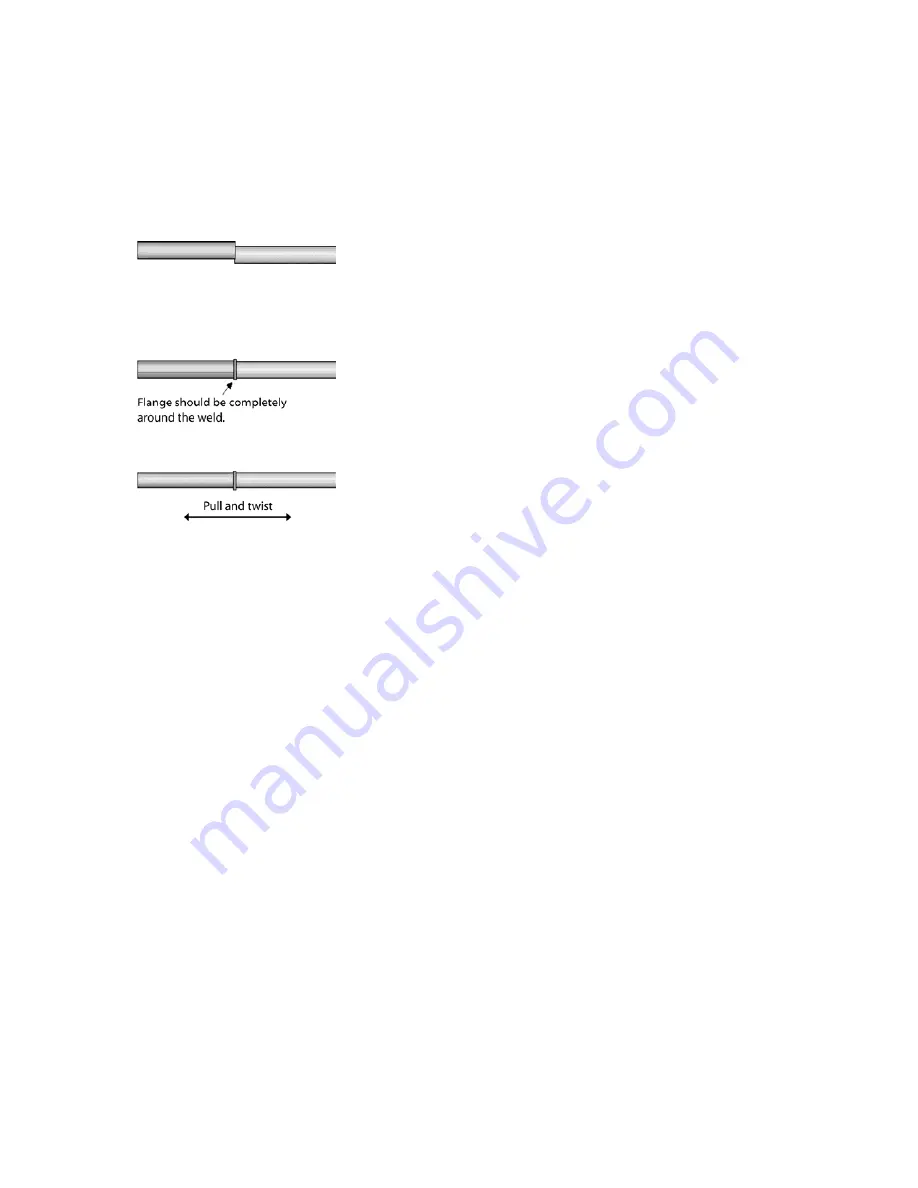
1.  Axial alignment 

Check that the tubing is axially aligned. If the tubing is offset, the weld will  
be weaker on one side. Do not use such welds. Contact your Service  
Representative to realign the unit. 


2.  Uniform weld 

Check that you see a flange all around the weld. This indicates that the weld is  
uniform in the radial direction. If you do not see a flange around the weld, discard 
the weld. Make sure that you are using the correct tubing. If you are unable to get  
a uniform flange contact your Service Representative for help. 


3.  Good tensile strength 

Pull GENTLY at the weld. It should not come apart or start to crack 


6.2

6.2

6.2

6.2    

Using different

Using different

Using different

Using different    types of hoses

types of hoses

types of hoses

types of hoses    

It is possible to weld thermoplastic tubings like C-Flex®, Raumedic® FluiSoft

TM

Pharmed® and Sanipure®.  
It is not possible to weld non-thermoplastic formulations such as PTFE, silicone,  
or natural rubber. A list of compatible tubing is provided in the Appendix 2. 
Different tube formulations have varying melt points. Most tubes can be joined  
satisfactorily using the default settings. 

Your machine is set to the tubes types 

Your machine is set to the tubes types 

Your machine is set to the tubes types 

Your machine is set to the tubes types     

you selected on your order.

you selected on your order.

you selected on your order.

you selected on your order.


6.3

6.3

6.3

6.3    

Welding different parameters

Welding different parameters

Welding different parameters

Welding different parameters    

The BioWelder® is capable of joining tubes of various outer diameters. A set of 
tubes holders specific to each tubing outer diameter must be purchased. These 
holders are available for a minimum tubing outer diameter (OD) of 1/4 inch to a 
maximum tubing OD of 3/4 inch. 
 
Each holder set consists out of two blue (left) and two red (right) tube holders.  
All four holders must be changed as a set. Holders can simply be snapped in and  
out. The machine reads the coded holders and runs the appropriate stored 
program. 


Summary of Contents for BioWelder

Page 1: ...Operation Manual Operation Manual Operation Manual Operation Manual BioWelder 85030 531 87...

Page 2: ...dix 4 Short form of the manual for the calibration holder 21 1 1 1 1 Manual Manual Manual Manual Please read this manual carefully It includes important information for the safe and successful use of...

Page 3: ...e of the equipment should not be done by children without adult supervision The blade reaches over 400 C during the welding cycle To avoid possible C burns DO NOT open the access door unless it is rel...

Page 4: ...mains sterile Once the tubing has been cut the machine slides the cut tubing pieces into alignment The blade is then extracted while the tubing is pushed together The tubing pieces remain at all times...

Page 5: ...blade Step 2 Blade heats up sterilization and then cuts through both tubing pieces Step 3 Tubing holders slide the cut tubing into alignment Hot blade is held against the cut tubing to ensure sterilit...

Page 6: ...upper and lower tubes are sealed on both sides Step 2 Blade heats up sterilization and then cuts through four tubing pieces Step 3 Tubing holders slide the cut tubing into alignment Hot blade is held...

Page 7: ...anguage Choose the language Choose the language Choose the language You can choose the language of your unit German or English To open this menu press MODE and the right arrow Enter the password 264 U...

Page 8: ...s you want to connect with a suitable disinfectant Place the hoses carefully in the tube holders The hose ends have to extend beyond the tube holders Attention Attention Attention Attention Check that...

Page 9: ...old the middle of the blade between two fingers Insert the blade into the blade holder and check that the blade locks in correct position and the point shown in the left picture shows to the temperatu...

Page 10: ...s The tubing holders can be quickly changed to connect different diameter tubing The holders must be changed as a set Left and Right holders Removing the holders 1 Open the cover and both tube holders...

Page 11: ...ot take care about the following explanations there is the risk of a damaged hose which can cause a leackage Step 1 Press the hose on the back side down to the bottom with both tumbs Check the hose po...

Page 12: ...rect position and has to be reinserted Check again the correct position of both hoses Step 5 Press both clamps sufficently down to grip the tubes Step 6 Finally close the blue clamp If both hoses are...

Page 13: ...erent types of hoses types of hoses types of hoses types of hoses It is possible to weld thermoplastic tubings like C Flex Raumedic FluiSoftTM Pharmed and Sanipure It is not possible to weld non therm...

Page 14: ...nation temperature welding temperature welding time and the date and time 7 3 7 3 7 3 7 3 Printing of last 10 welding protocols Printing of last 10 welding protocols Printing of last 10 welding protoc...

Page 15: ...installed Check that the surface of contact plate blue holder and the contact pins in the BioWelder are clean Depyrogenation temperature can not be reached Has the blade been changed in the right cyc...

Page 16: ...e limitation heater Blade is not able to reach the depyrogenation temperature in between the programmed 90 sec Legend Z axis corresponds to the stroke X axis corresponds to the red holder Y axis corre...

Page 17: ...irs must be done by a factory service representative Exception is the cover which can be exchanged by the client itself 9 3 9 3 9 3 9 3 Calibrat Calibrat Calibrat Calibration ion ion ion The unit has...

Page 18: ...are available as standards Other sizes can be provided upon The maximum tubing O D is determined by the cutting blade width This is currently restricted to 3 4 inch O D max OD OD OD OD ID ID ID ID Wa...

Page 19: ...ing Some of the tubing brands that have been tested are listed below The unit cannot be used to join silicone tubing or PTFE Pharmed Ideal very high purity tubing Can be autoclaved or SIP Long life in...

Page 20: ...down arrow English and German 6 As soon as you have chosen the language press MODE 7 The BioWelder is now ready for welding Set date and time Set date and time Set date and time Set date and time 1 P...

Page 21: ...t form of the manual for the calibration holder Short form of the manual for the calibration holder Clean the Infrared sensor with a cotton stick and alcohol Choose the program Temp validating in the...

Page 22: ...re indicated in the display Insert a new blade in the way displayed Insert the Calibration Holder very carefully do not touch the thermocouple and close the holder afterwards Measuring instrument has...

Page 23: ...t of range is where you can see a high temperature decrease During this phase you don t see big temperature jumps Afterwards the unit cools down the blade sufficiently to a safe temperature for the op...

Page 24: ...the prior written permission of Sartorius Stedim Biotech GmbH The status of the information specifications and illustrations in this manual is indicated by the date given below Sartorius Stedim Biote...

Reviews: