Version 1.0.16
106
A: Force your NIC to 10Mbps or half duplex mode, and turn off the "Auto-negotiate"
feature of your NIC as a temporary measure. (Please look at the Network Control
Panel, in your Ethernet Adapter's Advanced Properties tab.)
3.
Q: Why can't I connect to the Web Configuration?
A: you can remove the proxy server settings in your web browser.
7.5
N+ Broadband Router Setup
1.
Q: Why does N+ Broadband Router’s setup page shut down unexpectedly?
A: If one of the pages appears incompletely in N+ Broadband Router’s setup pages,
please click on Logout item on the Main Menu before shutting it down. Don’t keep it
working. Then, close Internet browser and open it again for going back to the
previous page.
2.
Q: Why can’t my USB devices and LAN ports work properly after setting the
DHCP?
A: There are two rules over here.
Rule1: After connecting USB devices, please reboot your Router.
Rule2: Before finishing the DHCP setup, please don’t connect any computer to LAN
ports, because the conflict of having the same IP may occur and cause some
computers a lot of trouble.
※
※
※
※
Notice: Make sure that you always click on the Apply button after configuring
each setting. And in order to let other LAN ports work properly, please reboot
your PC.
3.
Q: I don’t know how to configure DHCP.
A: DHCP is commonly used in the large local network. It allows you to manage and
distribute IP addresses from 2 to 254 throughout your local network via N+
Broadband Router. Without DHCP, you would have to configure each computer
separately. It’s very troublesome. Please Open Internet browser > Input
192.168.1.1 in the website blank field > Select DHCP Server under the IP Config
Menu. For more information, please refer to 3.3.2 (Router Mode) or 4.3.1 (AP Mode).
4.
Q: How do I upgrade the firmware of N+ Broadband Router?
A: Periodically, a new Flash Code is available for N+ Broadband Router on your product
supplier’s website. Ideally, you should update N+ Broadband Router’s Flash Code
Summary of Contents for RB-1232
Page 1: ...Version 1 0 16 1 ...
Page 12: ...Version 1 0 16 12 Step 2 Click on Properties Step 3 Double click on Internet Protocol TCP IP ...
Page 16: ...Version 1 0 16 16 If it can t work it will show Request timed out ...
Page 30: ...Version 1 0 16 30 Click on Next button to go on next setting page ...
Page 34: ...Version 1 0 16 34 Click on Next button to go on next setting page ...
Page 48: ...Version 1 0 16 48 ...
Page 51: ...Version 1 0 16 51 ...
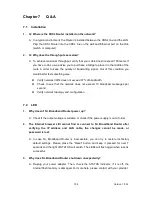
Page 103: ...Version 1 0 16 103 Step 9 Your hostname has been created when you see the following page ...


