1
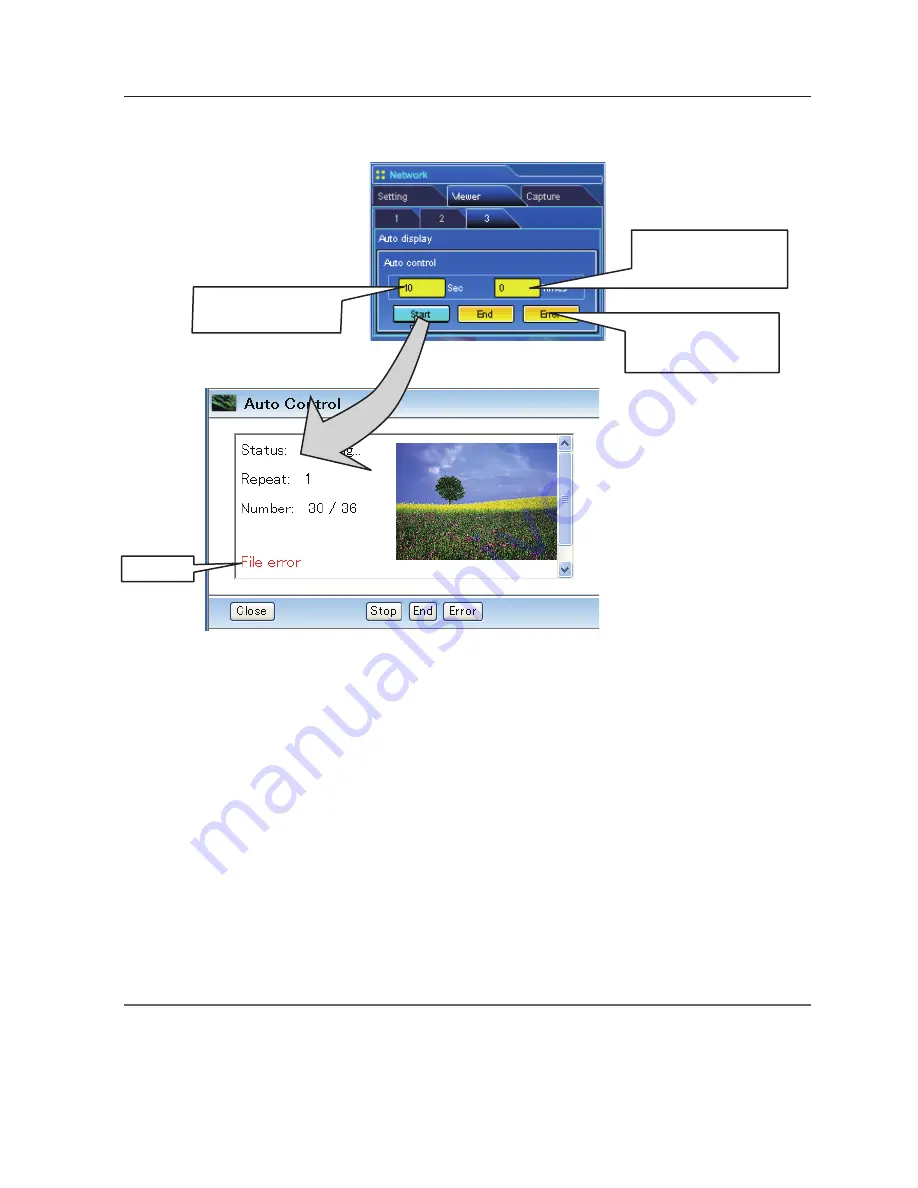
1. Click
Start
button to start the auto-display. The image in the selected folder or program is
displayed on the projector's screen. The web browser opens another window and displays the
preview images on the Auto Control window sequentially.
2. Click
Stop
button to stop the auto-display.
• Restart the auto-display, click
Restart
button.
* When the auto-display stops, it enables you to display the images manually by using
[<<]
or
[>>]
button.
3. Click
End
button to end the auto-display.
• When the
Error
button is pressed, the further information of the file error is displayed.
For further error information, refer to the next page.
Display time*
1
of the
image (3 to 240 sec.)
Repeat times
(0 to 255 times)
* 0 means endless play
Click here to check the
further information of
the file error
4
Auto Display setting and control page []
Error info.
*1 When the program file for auto-display is selected, the display time of each image gives preference to the setting
specified by the program file over the setting specified by the auto-display function above. The images for which
the display time is not set shows the display time specified by the auto-display function above.
✐
The display time is greatly affected by the network environment or the operation of multi control, so the image may
not be displayed as the specified display time.
✐
The timing to switch images is not the same on the screen and on the web browser.
✐
The preview image will not
appear when the option is set
"Display OFF".(
+
p.121)
Using the network viewer function
Summary of Contents for WXU700 - WXGA LCD Projector
Page 16: ...16 Chapter 1 About LAN functions ...
Page 64: ...64 Chapter 6 Basic setting and operation ...
Page 112: ...112 Chapter 8 Network capture functions ...
Page 132: ...132 Chapter 9 Network Viewer functions ...
Page 136: ...136 Chapter 10 Network Projector Windows Vista ...
Page 154: ...SO WIN KY7AC NETWORK OWNER S MANUAL FOR WINDOWS SANYO Electric Co Ltd ...


