Bedienungsanleitung/ User manual HEL-IR65D / HEL-IR75D
_________________________________________________________________________________
- 21 -
Installation
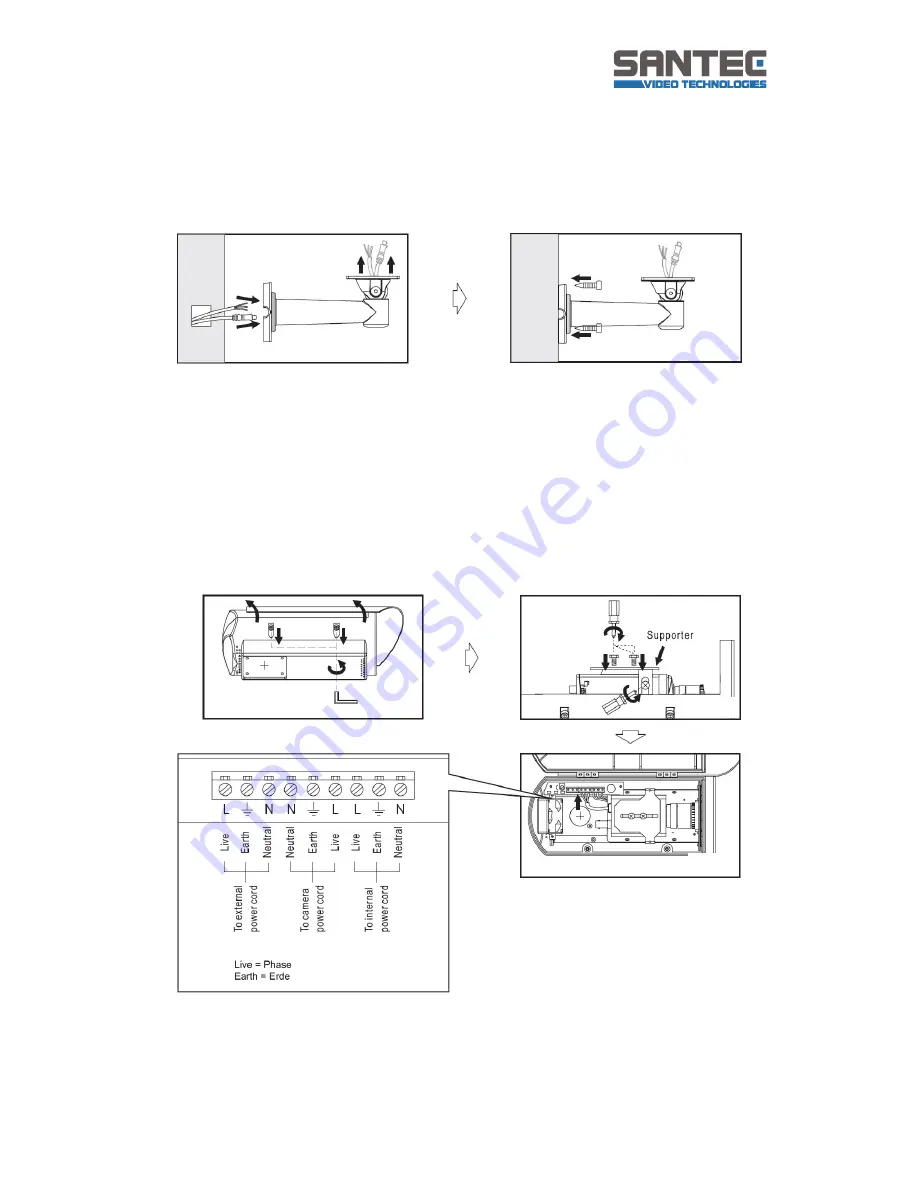
1. Take out the bracket from the box first. Put the power cable and video cable through
the bracket and then fit it to the wall (fig.1 and fig. 2).
2. Secondly, take out the housing and open the top cover with a hexagon screw driver
(fig. 3).
Loosen the screws on both sides of the camera supporter. Use a ¼” screw to mount
the camera onto the supporter which should be installed into the housing (fig. 4). Plug
and fix the power cable of the camera to the terminal (fig. 5).
Note
: In order to adjust the camera position forward or backward later on, please do
not fix the camera too tightly.
Note:
When using a two-cord power cable, please connect it to „live“ and „neutral“.
Please respect the security regulations!
Fig. 1
Fig. 2
Fig. 3
Fig. 4
Fig. 5


