13
with vacuum motor OFF. Scrub floor again, picking up the
solution.
WARNING
- If foam or liquid is leaking, turn
the machine off immediately and empty the
recovery tank. Leaking liquid could be
hazardous due to its temperature, or
chemical
content.
• To STOP the machine, release solution feed levers,
switch off brush motor then vacuum motor.
IMPORTANT!
If it is necessary to replace the
brush or pad during cleaning please follow
instructions in section 2.4.
5 Machine error codes
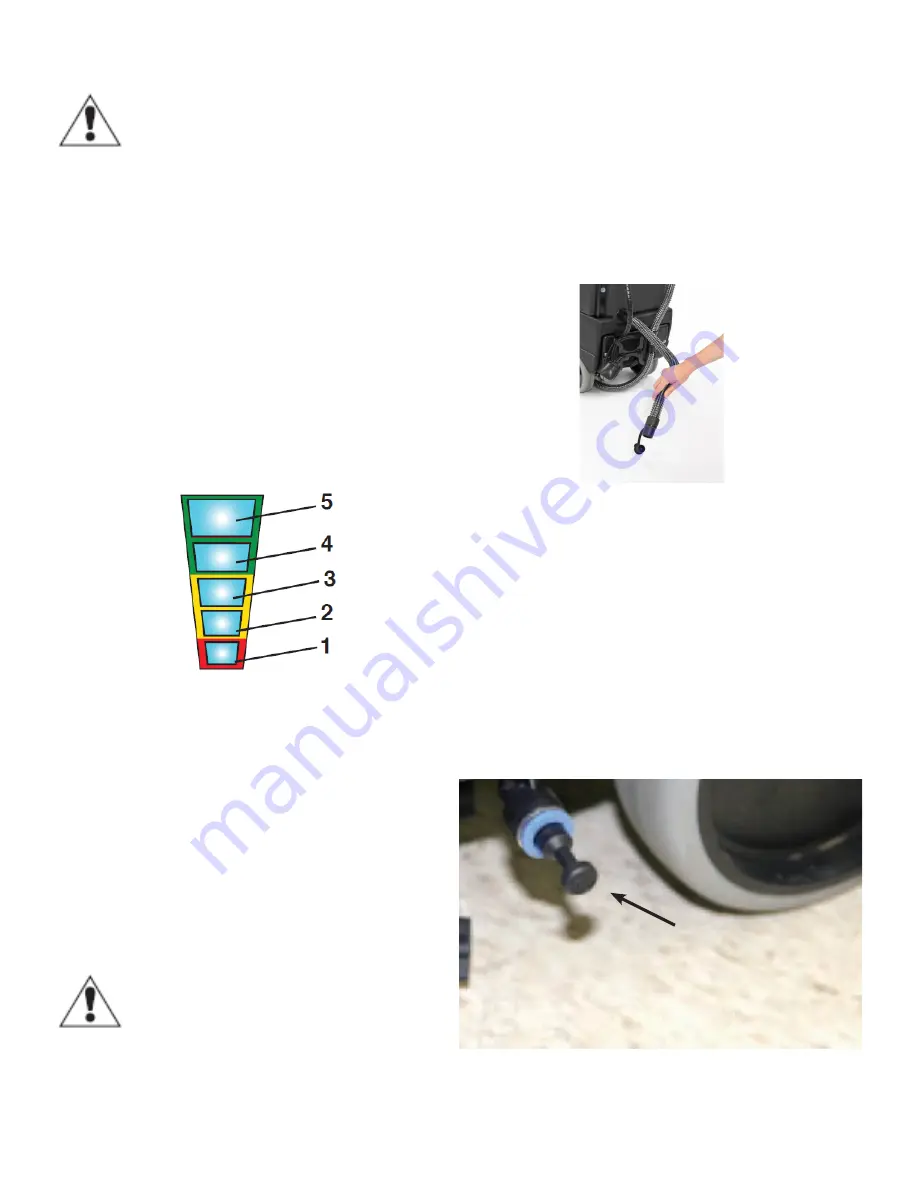
• While using the machine, errors are indicated by flashing
and lit LEDs
• LED 1 is flashing and LED 2 is constantly lit – Suction
unit outlet overcurrent.
• LED 1 is flashing and LED 3 is constantly lit – Brush
unit outlet overcurrent.
• LED 1 is flashing and LED 4 is constantly lit – Suction
unit outlet open circuit.
• LED 1 is flashing and LED 5 is constantly lit – Brush
unit outlet open circuit.
NOTE
: When any of the above mentioned error signals
are displayed, it is necessary to turn off the machine and
then turn the machine back on again in order to clear the
error and re-set the machine back to normal functioning.
5.1 When cleaning is finished
• Before turning off the machine, stop the dispensing of
solution and the rotation of brush by releasing levers.
Continue with the vacuum ON to remove all of the
liquid present on the floor. Then turn off the vacuum by
pressing button 2. (Fig 9)
• Raise the squeegee by pulling the squeegee lifting
lever and releasing it. The lever remains in an upper
position keeping the squeegee blades in the raised
position.
WARNING
– always lift up the squeegee at
the end of the cleaning in order to prevent
the deformation of the rubber blades.
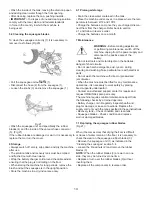
• Remove brush or pad from machine and wash in warm
soapy water.
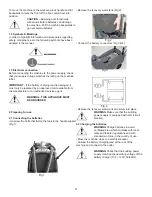
Fig 17
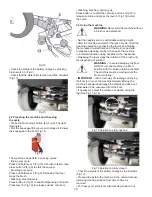
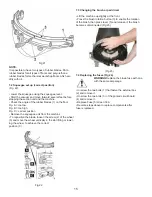
5.2 Draining and cleaning the recovery tank
At the end of the cleaning cycle or when the recovery
tank is full, it is necessary to empty the tank by proceeding
as follows:
•
IMPORTANT
– To dispose of the solution in the recovery
tank, comply with the local, state, and federal
standards in force in the country in which the machine
is being used.
• Position the machine near a drain outlet.
• Disconnect the hose from the support on the back of
the machine.
• Remove the cap from the hose and drain all water
from the tank (Fig 18).
WARNING
! After each use, it is necessary to clean the
recovery tank to prevent deposits or scaling and the growth
of bacteria, odors or mold.
• Remove the cover, and clean the inside of the cover
and the vacuum safety float with running water.
• Leaving the hose lowered and the cap off, run water
though the upper opening, cleaning the inside of the
tank until clean water comes out of the drain hose.
• Replace all components in reverse order.
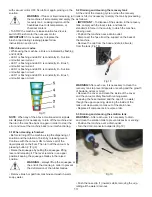
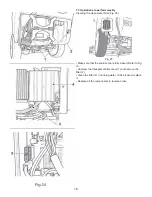
5.3 Draining and cleaning the solution tank
WARNING
! – After each use, it is necessary to drain
and clean the solution tank to prevent deposits or scaling.
• Position the machine over a drain outlet.
• Turn the drain connector outwards (Fig 19).
• Push the hose clip (1) inwards while removing the cap,
letting all the water drain out.
Fig 18
Fig 19
1


