background image

9

Display options - FM

Your radio has a range of display options for FM mode:

The Radio Data System (RDS) is a system in which inaudible digital information is transmitted in 

addition to the normal FM radio programme.

RDS offers several useful features. The following are available on your radio.

All display options except the text display will revert to the clock display after about 10 seconds.

1. Press and release the Info button to cycle through the various options.
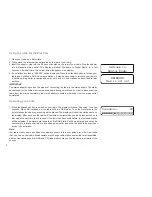
a. Scrolling text

Displays scrolling text messages such as artist/track name, phone 
in number, etc.

b. Programme type 

Displays type of station being listened to e.g. Pop, Classic, News, 
etc.

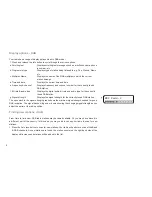
c. Multiplex name

Displays the name of the FM multiplex to which the current 
stations belongs. 

d. Audio type

Displays the audio type for the currently tuned FM station.

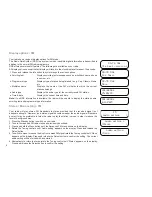
e. Time & date

Displays the current time and date.

Note: 

If no RDS information is available, the radio will be unable to display the station name, 

scrolling text and programme type information.

Stereo / Mono setting - FM 

Your radio will play stereo FM broadcasts in stereo provided that the received signal is of 

adequate strength. However, as a stereo signal becomes weaker the audio signal will become 

poorer. It may be preferable to force the radio to play the station in mono in order to reduce the 

level of background hiss.

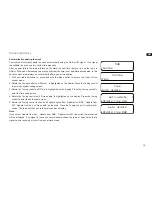
1. Press the Standby button to switch on your radio.

2. Tune to the required FM radio station as previously described.

3. Press and hold the Menu button until the Advanced FM menu shows on the display.

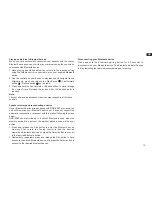
4.   Rotate the Tuning controls until ‘Audio setting’ appears on the display. Press and release the 

Select button.

5.  To switch to mono to reduce the hiss from a weak FM signal rotate the Tuning control until ‘Mono’ 

appears on the display. Press and release the Select button to confirm the setting. The current 

audio setting will be marked with an asterisk.

6.  Alternatively to return to stereo rotate the Tuning control until ‘Stereo’ appears on the display. 

Press and release the Select button to confirm the setting. 

99.70 MHz

The best variery of

99.70 MHz
Pop Music

99.70 MHz
Mono

104.60MHz
15:09:29

104.60MHz
6-11-2015

FM

<Audio setting     >

Audio setting *

<Stereo           >

Audio setting

<Mono            >

Summary of Contents for DDR-60BT

Page 1: ...GB DDR 60BT Version 1...

Page 2: ...button 10 Remote control sensor 11 Speaker 12 Volume control EQ 13 Dimmer button 14 Bluetooth pairing button 15 Alarm button 16 Menu Info button 17 Auto tune button 18 Tuning control Select button 19...

Page 3: ...w the buttons on the radio The buttons on the remote control can be used if you prefer Note The operations described below for the panel are the same as the operations for the remote control 1 Rotate...

Page 4: ...mains adaptor should be removed from the mains outlet completely Operating your radio 1 Press the Standby button to switch on your radio The display will show Scanning for a few seconds When first sw...

Page 5: ...er selecting a station the station is not found it may be necessary to relocate your radio to a position giving better reception Secondary services DAB 1 Certain radio stations have one or more second...

Page 6: ...dio type for the currently tuned DAB station g Signal strength Displays the signal strength for the currently tuned DAB station The open block in the signal strength graph shows the minimum signal str...

Page 7: ...ton The open block in the signal strength graph shows the minimum signal strength needed for good DAB reception The signal blocks will go up and down showing the changing signal strength as you adjust...

Page 8: ...op broadcasting or may change location and then not be able to receive a station In order to remove such stations from the DAB station list the Prune stations function will delete the DAB stations fro...

Page 9: ...he required setting 8 To switch off your radio press the Standby button Note If you find that FM reception is poor try repositioning the aerial If you find that an FM broadcast has a lot of background...

Page 10: ...ion Stereo Mono setting FM Your radio will play stereo FM broadcasts in stereo provided that the received signal is of adequate strength However as a stereo signal becomes weaker the audio signal will...

Page 11: ...setting stations DAB and FM You may store your preferred DAB and FM radio stations to the preset station memories There are 20 memory presets in your radio 10 for DAB and 10 for FM Presets are remembe...

Page 12: ...evices However if one device links with this unit first then the other Bluetooth device won t find it on the list 2 If you take your source device out of range the connection will be temporarily disco...

Page 13: ...f your Bluetooth device already paired with DDR 60BT previously the unit will memorize your Bluetooth device but it does not support the automatic reconnection reconnect with this product following th...

Page 14: ...h indicator will light in solid blue Important Please make sure the screen of your playing device is on and unlocked to allow NFC to work Note 1 NFC connectivity performance may vary depending on the...

Page 15: ...to enter the system settings menu 3 Rotate the Tuning control until Time is highlighted on the display Press the Tuning control to enter the time setting menu 4 Rotate the Tuning control until Auto up...

Page 16: ...firm your choice of clock format The display will then revert to the previous menu If the 12 hour clock format is chosen the radio will then use the 12 hour clock for the setting of alarms and will di...

Page 17: ...ash on the display Rotate the Tuning control to set the desired minute If the radio has been set to use a 12 hour format there will be an option here for setting AM or PM for the clock time 8 Press an...

Page 18: ...will also be an option here for setting AM or PM for the alarm time 4 Rotate the Tuning control to choose the desired minute for the alarm and then press the Select button The alarm duration will fla...

Page 19: ...Alarm Saved and will exit the alarm setting procedure Note 1 Active alarms are indicated in the display by the alarm A symbol If the radio cannot connect to the radio station the buzzer alarm will be...

Page 20: ...nd 90 minutes Ensure your radio is switched on 1 To set the desired sleep time press and hold the Menu button to enter the Advanced menu of the current mode 2 Rotate the Tuning control until System is...

Page 21: ...iking you may set up a custom treble and bass as following 1 Follow step1 3 in the EQ function section in order to enter EQ menu 2 Rotate the Tuning control until My EQ is highlighted on the display P...

Page 22: ...tch on your radio 2 Press and hold the Menu button until the Advanced menu shows on the display 3 Rotate the Tuning control until System appears on the display Press and release the Select button 4 Ro...

Page 23: ...contrast level indication on the screen will change at the same time When you find the setting that gives the best legibility for the location in which the radio is used press the Select button to sav...

Page 24: ...the USB socket in the rear of the unit 2 Press and hold the Menu button to enter the Advanced menu of the current mode 3 Rotate the Tuning control until System appears on the display Press and releas...

Page 25: ...highlighted press and release the Select button A full reset will be performed The station list and presets will be erased Alarms will be cancelled and sleep timer settings will be set to their defaul...

Page 26: ...o audio source for example iPod MP3 or CD player to the Auxiliary input socket marked Aux In 2 Press the Standby button to switch on your radio 3 Press the Mode button to select Aux in mode The displa...

Page 27: ...peaker Headphone socket 3 5 mm diameter stereo Aux In socket 3 5mm diameter stereo Subwoofer Line Out socket 3 5mm diameter subwoofer Aerial System DAB Telescopic aerial FM Telescopic aerial If at any...

Reviews: