background image

Section 11: Tools

139

To Do List

Sect

ion 11

6.

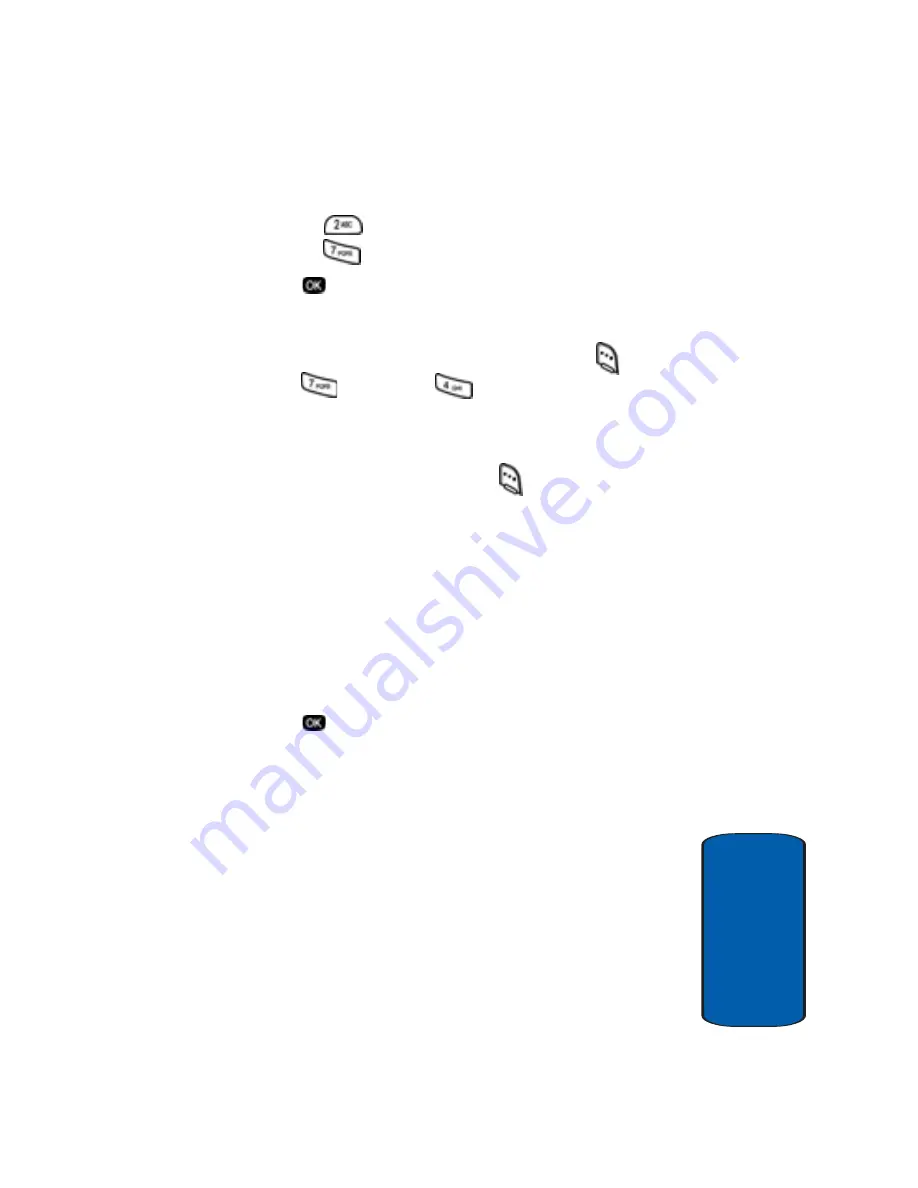
Enter a time and date for the task using the keypad. 

Press 

 for A.M. when 

P

 is highlighted. 

Press 

 for P.M. when 

A

 is highlighted. 

7.

Press 

 to save the task. 

Add, Edit, or Erase Tasks

1.

In idle mode, press the 

Menu

 (left) soft key (

), then 

press  

(

Tools

) and 

 for 

To Do List

2.

Use the navigation keys to browse tasks in your 

To Do 

List

. Events are presented in order of priority. 

3.

Press the 

Option

 (left) soft key (

) while viewing your 

To Do List

. A pop-up menu containing the following 

options appears in the display: 

Add new

—Add a new task to the 

To Do List

Edit

—Edit the task currently appearing in the display. 

Erase

—Erase the task currently appearing in the display. 

Erase All

—Erase all tasks from your 

To Do List

4.

Use the navigation key to highlight an option.

5.

Press 

 to select the option.

Summary of Contents for SCH-n330 Series

Page 1: ...YH09 05_CB_N330_092605_F1 SCH n330 Series A l l D i g i t a l M O B I L E P H O N E User Guide Please read this manual before operating your phone and keep it for future reference ...

Page 2: ... you will not and will not attempt to modify prepare derivative works of reverse engineer decompile disassemble orotherwiseattempttocreatesourcecodefromthesoftware No title to or ownership in the Intellectual Property is transferred to you All applicable rights of the Intellectual Property shall remain with SAMSUNG and its suppliers Samsung Telecommunications America STA Inc Headquarters Customer ...

Page 3: ...AR PURPOSE OR USE THE DESIGN CONDITION OR QUALITY OF THE PRODUCT THE PERFORMANCE OF THE PRODUCT THE WORKMANSHIP OF THE PRODUCT OR THE COMPONENTS CONTAINED THEREIN OR COMPLIANCE OF THE PRODUCT WITH THE REQUIREMENTS OF ANY LAW RULE SPECIFICATION OR CONTRACT PERTAINING THERETO NOTHING CONTAINED IN THE INSTRUCTION MANUAL SHALL BE CONSTRUED TO CREATE AN EXPRESS OR IMPLIED WARRANTY OF ANY KIND WHATSOEVE...

Page 4: ......

Page 5: ...d Retracting the Pop up Display 19 Internal Antenna 20 Command Keys 21 Understanding the Display Screen 24 Battery 28 Section 3 Call Functions 31 Making a Call 32 International Calls 32 Receiving a Call 33 Adjusting the Call Volume 34 Call Logs 34 Phone Modes 39 Roaming 42 Voice Dialing 44 Section 4 Menu Navigation 51 Menu Navigation 52 Menu Outline 55 Section 5 Entering Text 63 Changing the Text ...

Page 6: ...ling 91 Memory 94 Section 7 Messages 95 Send Text Messages 96 Retrieving New Messages 99 Voice Mail 100 Message Folders 101 Messages Settings 106 Erase Messages 107 Section 8 Axcess 109 Axcess Catalog 110 Settings 111 Help 112 Section 9 Mobile Web 115 Mobile Web Operations 116 Launch Mobile Web 116 Exit Mobile Web 116 Navigate the Web 117 Mobile Web Soft Keys 117 Using links 117 How Mobile Web Key...

Page 7: ...136 Jump To Date 137 To Do List 138 Memo Pad 140 Alarm Clock 142 Count Down 144 World Time 146 Calculator 147 Voice Kit 147 Section 12 Settings 157 Location 158 Network 159 Data 161 Security 163 Others 171 Section 13 Phone Info 177 Version 178 Phone Number 178 Section 14 Health and Safety Information 179 Health and Safety Information 180 Consumer Information on Wireless Phones 182 Road Safety 192 ...

Page 8: ...ments 198 Emergency Calls 199 FCC Notice and Cautions 200 Other Important Safety Information 201 Product Performance 202 Availability of Various Features Ring Tones 203 Battery Standby and Talk Time 204 Battery Precautions 204 Care and Maintenance 205 Section 15 Warranty Information 207 Standard Limited Warranty 208 Index 215 ...

Page 9: ... Activating your phone Setting Up Voice Mail Understanding this User Manual This section allows you to start using your phone by activating your service and phone setting up your voice mail contacting customer support or getting an understanding of how this manual is put together ...

Page 10: ... up display on your phone as shown by simultaneously pressing both pop up display buttons located on each side of the phone 2 Press and hold for two or more seconds 3 The phone begins searching for a network signal Note As with any other radio transmitting device do not touch the antenna area top rear of your phone as that affects receive signal strength and call quality and may cause the phone to...

Page 11: ...of the display Turn your phone off 1 Open the pop up display on your phone by simultaneously pressing both pop up display buttons located on each side of the phone 2 Press and hold for two or more seconds Your phone powers off Note If your phone is on and you press for less than a second the phone will not power off This prevents your phone from being turned off accidentally ...

Page 12: ...In idle mode press and hold the Down key press and hold the key or dial your own mobile number to dial voice mail 2 Press to interrupt the greeting 3 Follow the prompts in the new user tutorial to setup your mail box Listen to voice mail 1 In idle mode press and hold the Down key press and hold the key or dial your own mobile number to dial voice mail After connecting you will hear your voice gree...

Page 13: ...ughoutthisguideareiconsandtextthataresetapart from the rest These are intended to point out important information quick methods for activating features to define terms and more The definitions for these methods are as follows Notes Explain alternative options within the current feature menu or sub menu Tips Provide quick or innovative methods for performing functions related to the subject at hand...

Page 14: ...14 Section 1 ...

Page 15: ...splay Internal Antenna Command Keys Understanding the Display Screen Battery This section outlines some key features of your phone Your phone s display and the icons that will appear on it when in use are also described Note Some network based features described in this user manual may not be available in all coverage areas For more information contact your wireless service provider ...

Page 16: ...g service available on participating networks High speed data CDMA 2000 1x Technology Global Positioning GPS Technology 128 x 160 pixel color Liquid Crystal display PIM functions Scheduler To Do List etc TXT Messaging Voice Dial Speaker phone 32 Polyphonic Ring tones VibeTonz Technology ...

Page 17: ...ion 2 Understanding Your Phone 17 Front View of Your Phone Section 2 Front View of Your Phone SCH n330 closed view Service LED Speaker Charger Accessory Connector Pop up Display Button Pop up Display Button ...

Page 18: ...Display Button Pop up Display Button Service LED Left Soft Key Right Soft Key Speaker Phone Button Volume Up Down Keys Speaker Microphone Messages Send Key Headset Connector End Key Key OK Key Down Key CLR Clear Key Space Silent Mode Key Get In Web Left Key Axcess Right Key ...

Page 19: ...tend the pop up display to turn the SCH n330 on or off With the phone on and the pop up display retracted all incoming call incoming message alert and alarm rings or tones can still sound Tip You can setup the SCH n330 to allow you to answer incoming calls by simply extending the pop up display See Call Answer on page 172 TouseyournewSCH n330phone followthestepslisted below 1 Hold your phone in an...

Page 20: ...it your needs 4 To retract the display gently push the top of the display down until it locks in place Internal Antenna Avoidtouchingtheinternalantennaareaattheupperrear of your phone while it is powered up Contact with the internal antenna area affects the quality of your calls and may cause the phone to operate at a higher power level than necessary ...

Page 21: ...t key to open the menu list When the left soft key function is Option press the Option left soft key to view options in some features When the left soft key function is Edit press the Edit left soft key to edit a Contacts entry or Profile setting Right soft key Some functions of the right soft key are as follows When the right soft key function is Back press the Back right soft key to return to th...

Page 22: ...nd delete the character 2 To erase the previous word in a sentence press and hold 3 To back up one menu level briefly press 4 To return to idle mode from any menu press and hold until you return to idle mode Volume key The volume key is located on the left side of your phone You can use the volume key to set the call ringer volume in idle mode or earpiece volume while in a call You can also use th...

Page 23: ...issed 1 Press once to answer calls 2 Enter a number and briefly press to make a call 3 Briefly press in idle mode to display a list of recent calls to and from your phone 4 Press twice in idle mode to call the most recently dialed number 5 Press to pick up a waiting call Press again to switch back to the other call Navigation key Use the directional keys on the navigation key to browse menus sub m...

Page 24: ...an open area to find a signal This indicator always appears when you first turn on your phone and disappears once service is located Roaming indicator Your phone is outside your home area While roaming another wireless provider may be handling your call The service rate for the call may be higher than those made from within your home area Please refer to Alltel for roaming rates In Use Indicates a...

Page 25: ...u re also notified by a visual audible and VibeTonz alert according to your assigned preferences 1X Protocol Indicates your phone is using the 1X protocol The 1X protocol is capable of high speed data 3G Note 1X protocol is available only in the Alltel network VibeTonz mode Your phone vibrates and or sounds a tone according to your VibeTonz selection upon receiving a call Speakerphone on Your phon...

Page 26: ... Service GPS for 911 is set to On for emergency calls only GPS United States Only Global Positioning Service is set to On for location and 911 calls Silent mode The ringer is silenced for all alerts incoming calls and incoming messages The phone alerts you to these by vibration and a flashing service LED ...

Page 27: ...ofstatus or warn of situations such as low memory Dialogue boxes and their definitions are outlined below ICON MESSAGETYPE EXAMPLE Choice Save message draft Reconfirm Delete all received messages Performing Sending Connecting Completed Message sent successfully Information New Message Error System Error Warning Battery Low Memory Full ...

Page 28: ...battery must be fully charged before first use otherwise you could damage the battery 1 Place the battery so it rests in the slot in your phone just below the battery release latch 2 Gently slide the battery up until it snaps into place Remove the battery 1 Press and hold to turn off the phone if on 2 Press down the battery release latch 1 and hold 3 Slide the battery 2 down and lift it away from ...

Page 29: ...ay cause damage Use the travel adapter The travel adapter is a convenient light weight charger that rapidly charges your phone from any 120 220 VAC outlet 1 Plug the large end of the travel adapter into a standard 120 or 220 VAC wall outlet 2 Insert the smaller end of the adapter into the charger accessory connector at the bottom end of the phone Your phone begins charging and the battery image ap...

Page 30: ...s battery power level Three bars indicateafullcharge whileanemptyicon indicates an almost empty battery Two to three minutes before the battery becomes too low tooperate ablinkingemptybatteryicon appearsin the display and a tone sounds If you continue to operate the phone without charging it shuts down ...

Page 31: ...s Covered Making a Call International Calls Receiving a Call Adjusting the Call Volume Call Logs Phone Modes Roaming Voice Dialing This section allows you to make or answer a call It also includes the features and functionality associated with making or answering a call ...

Page 32: ...e an emergency call International Calls Call another country from the U S 1 In idle mode enter the three digit exit code 011 for the United States 2 Enter the country code for the country that you are calling 3 Enter the number that you wish to call then press Notes 1 Puerto Rico and Canada are on the North American dialing plan Making calls to Puerto Rico and Canada is similar to making calls wit...

Page 33: ...f the following events occur You press to answer the call The calling party ends the call The call is sent to voicemail Receive calls while using a feature If you receive a call while browsing menus and sub menus or while using a feature the caller s number or name ifit sinyourContactslist appearsinthedisplayas well as the options Silent and Ignore Press the Ignore left soft key to send the call d...

Page 34: ...s to view separate lists of all Outgoing Incoming and Missed calls for your phone You can use either Recent Calls or Calls to view Call Timers and to erase your call history Note Functionality of Recent Calls and Calls is dependent upon availability with the service provider s network and whether or not Caller ID is enabled View Recent Calls 1 In idle mode press A list of recently dialed and recei...

Page 35: ...ppears in the display 3 Use the navigation keys to select a particular call 4 Press to view the selected call or press to dial the selected number Calls and Recent Calls menu options While viewing Calls or Recent Calls you have options such as saving recent call numbers to your Contacts list sending messages to logged call numbers and prepending editing numbers before saving 1 In idle mode press f...

Page 36: ...ress the Option left soft key A pop up menu appears in the display containing the following options Talk Dial the number Save Save the number as a new entry or save the number to an existing entry in your Contacts list Prepend Display the number with the cursor before the first digit Useful for entering a 1 or area code ahead of the displayed phone number Erase Delete the number from your Calls li...

Page 37: ...alls and press Erase Logs 2 Use the navigation keys to highlight the call log type that you wish to delete then press for Outgoing for Incoming for Missed for All Calls You re prompted to confirm the erasure 3 Use the navigation keys to highlight Yes to erase the selected call log or to highlight No to return to the Erase Logs sub menu 4 Press to perform your selected function ...

Page 38: ...ss the Menu left soft key then press Calls Call Timer The following menu items appear in the display Last Call View the duration of your last call Total View the duration of total outgoing and incoming calls Lifetime View the duration of all calls on your phone since activation Life Time timers cannot be erased Erase Total Erase the Last Call and Total timers 2 Use the navigation keys to highlight...

Page 39: ...d sub menus 1 While in idle mode enter a phone number then press to place a call 2 Press to return to idle mode Text entry mode Enter content using any of the four text entry modes 1 At any text entry screen press the Option left soft key A pop up menu appears in the display with T9 WORD highlighted 2 Use the navigation keys to display the optional text entry modes of T9 WORD ABC Symbol and 123 3 ...

Page 40: ...In idle mode press and hold Exit Silent Mode briefly appears in the display and your phone returns to idle mode VibeTonz mode In idle mode repeatedly press the volume key down until VibeTonz appears in the display or press the volume key up until Vib Ring or Vib Ring appears in the display The volume key is on the left side of phone next to the SEND key Note The VibeTonz icon appears in the displa...

Page 41: ...n message and the speaker on icon appear in the display Note You must be involved in an active call on your phone before you attempt to enter Speaker Mode If you press and hold from Idle Mode the Cannot Enter Speaker mode message appears in the display Exit Speaker Mode While you are in a call and in Speaker Mode press and hold The Speaker Phone Off message appears in the display and the speaker o...

Page 42: ...quent charging Roaming Options RoamOptionsetsroamingpreferencesifyoumoveoutof your home network The following roaming options are available Home only Your phone is available for normal operation only within your designated coverage area Automatic A The Preferred Roaming List PRL is used to acquire service If no preferred systems are found any digital A system is acquired Automatic B The PRL is use...

Page 43: ...our Roaming option follow these steps 1 In idle mode press the Menu left soft key then press Settings Network Roam Option 2 Use the navigation key to highlight your roam option preference then press Your settings are saved Note This feature is only available on the Alltel network ...

Page 44: ...e Dialing menu which you can activate by pressing and holding the key contains the following commands Digit Dial Dials any seven or ten digit North American phone number Name Dial Dials a name if stored in your Contacts list Voice Memo Lets you record a voice memo Contacts Displays your Contacts entries if any exist My phone Displays your phone number assigned by Alltel To access the Voice Dialing...

Page 45: ...number speak at a normal speed saying each digit clearly There is no need to pause between digits Digit Dial recognizes the digits one two three four five six seven eight nine zero and oh zero Your phone does not recognize numbers such as one eight hundred for 1 800 Instead say one eight zero zero or one eight oh oh Digit Dial recognizes only valid seven or ten digit North American phone numbers o...

Page 46: ...If the phone asks Did you say followed by any incorrect numbers say No If there are other choices the phone prompts you with them next 4 Use the navigation keys to highlight a number from the list then press the SEND left soft key or press to dial that number Note If Digit Dial frequently does not recognize your speech you may want to adapt or train Digit Dial to better respond to your voice After...

Page 47: ...s Say a command followed by a single beep 2 Say Name Dial The command Name Dial appears on the display and the phone prompts Name please followed by a beep 3 Say the name of the person you wish to call exactly as it is entered in your Contacts list If Name Dial doesn t recognize the name your phone prompts you to repeat the name If Name Dial cannot find a match your phone displays and announces So...

Page 48: ...ord a voice memo 1 In idle mode press and hold the key The Voice Dialing command menu appears in the display and the phone prompts Say a command followed by a single beep 2 Say Voice Memo Recording appears on the display and the phone prompts Please record after the beep followed by a beep 3 Wait for the beep then start speaking As it is recording the phone displays the elapsed time 4 Press the St...

Page 49: ...display and the phone prompts Say a command followed by a single beep 2 Say Contacts Contacts appears on the display and the phone prompts Name Please followed by a beep 3 Say the name of the Contacts list entry you want to view exactly as it is entered in your Contacts list If your phone doesn t recognize the name it prompts you to repeat the name If your phone cannot find a match it displays and...

Page 50: ...aying a voice command Display your phone number 1 In idle mode press and hold the key The Voice Dialing command menu appears in the display and the phone prompts Say a command followed by a single beep 2 Say My phone number The phone displays and announces your phone number 3 Press to exit ...

Page 51: ...u Navigation 51 Section 4 Menu Navigation Topics Covered Menu Navigation Menu Outline This section explains the menu navigation for your phone It also includes an outline of all the available menus associated with your phone ...

Page 52: ...e Back right soft key to return to the previous menu 2 If Back does not appear in the display press to return to the previous menu Navigate Using Shortcuts You can also access menus and sub menus using menu numbers This method is often called a shortcut To shortcuttoamenuorsubmenu presstheMenu left soft key then enter the menu and or sub menu number s forthefeatureinquestion Use MenuOutline on pag...

Page 53: ...and the phone eventually returns to idle mode 1 While in a call press the Menu left soft key The following In Use menu items appear in the display Calls Displays your recent incoming outgoing and missed calls Contacts Opens the Contacts list and lets you view contacts Silent Quit Silences or restores keypad tones Send Tel Sends your cell phone number as DTMF tones Useful for dealing with automated...

Page 54: ... mail messages Inbox Lets you view information about and review your received text messages Outbox Lets you view sent text messages Draft Lets you view and send previously composed messages that are not yet sent Saved Lets you view messages in the Save folder Wap Push Lets you view messages received through the WAP browser Msg Setting Lets you change the message settings on your phone Erase Msg Le...

Page 55: ...ure Forexample to jump to the Outbox sub menu press the Menu left softkey thenpress Messages Outbox 1 Messages 1 1 Send New Msg 1 2 Voice Mail 1 3 Inbox 1 4 Outbox 1 5 Draft 1 6 Saved 1 7 Wap Push 1 8 Msg Setting 1 8 1 Send Setting 1 8 1 1 SaveInOutbox 1 8 1 2 Callback 1 8 1 3 Entry Mode 1 8 1 4 Insert Sign 1 8 1 5 Delivery Ack 1 8 2 Msg Alert 1 8 2 1 Vol VibeTonz 1 8 2 2 Type 1 8 2 2 1 Voice Mail...

Page 56: ...2 No 1 8 7 3 Call me 1 8 7 4 Need directions 1 8 7 5 Where are you 1 8 7 6 Will call later 1 8 7 7 Busy 1 8 7 8 On my way 1 8 7 9 Will arrive 15 minutes 1 8 7 10 Thank you 1 8 7 11 Love you 1 8 8 Signature 1 8 9 Voice Mail 1 9 Erase Msg 1 9 1 Voice 1 9 2 Inbox 1 9 3 Outbox 1 9 4 Draft 1 9 5 Saved 1 9 6 All Messages 2 Axcess 2 1 Axcess ...

Page 57: ...ts 4 1 Find 4 2 Add 4 2 1 Number 4 2 2 E Mail 4 3 Rename Group 4 3 1 Friend 4 3 2 Family 4 3 3 Colleague 4 3 4 VIP 4 3 5 No Name 4 4 Memory 5 Calls 5 1 Outgoing 5 2 Incoming 5 3 Missed 5 4 Erase Logs 5 4 1 Outgoing 5 4 2 Incoming 5 4 3 Missed 5 4 4 All Calls 5 5 Call Timer 5 5 1 Last Call ...

Page 58: ... 6 4 Erase Total 6 Gallery 6 1 Menu Style 6 2 Animation 6 2 1 Opening 6 2 1 1 Proloaded 6 2 1 2 My Image 6 2 2 Closing 6 2 2 1 Preloaded 6 2 2 2 My Image 6 2 3 Wallpaper 6 2 3 1 Preloaded 6 2 3 2 My Image 6 3 Banner 6 4 Vol VibeTonz 6 4 1 Calls 6 4 2 Alarm 6 5 Ringer Type 6 5 1 Calls 6 5 1 1 Preloaded 6 5 1 2 My Melody ...

Page 59: ...oaded 6 5 3 2 My Melody 6 5 4 Planner 6 5 4 1 Preloaded 6 5 4 2 My Melody 6 6 Key Beep 6 6 1 Volume 6 6 2 Tone Length 6 6 3 VibeTonz 6 7 Alerts 6 7 1 Minute Beep 6 7 2 Service 6 7 3 Connect 6 7 4 Disconnect 6 7 5 Fade 6 7 6 Roam 6 7 7 Privacy 6 8 Power On Off 6 9 Roam Ringer 7 Tools 7 1 Today 7 2 Scheduler 7 3 Jump To Date ...

Page 60: ...o 7 10 1 1 Record 7 10 1 2 Review 7 10 1 3 Erase All 7 10 2 Voice Setup 7 10 2 1 Set Active 7 10 2 2 Set Digits 7 10 2 2 1 Adapt Digits 7 10 2 2 2 Reset Digits 8 Settings 8 1 Location 8 2 Network 8 2 1 Set NAM 8 2 2 Roam Option 8 3 Data 8 3 1 Auto Detect 8 3 2 Baud Rate 8 4 Security 8 4 1 Lock Phone 8 4 2 Change Lock 8 4 3 Emergency ...

Page 61: ...going 8 4 5 2 Incoming 8 4 5 3 Contacts 8 4 6 Erase Memory 8 4 7 Reset Phone 8 5 Others 8 5 1 Shortcut 8 5 2 Call Answer 8 5 3 Call End 8 5 4 Auto Retry 8 5 5 Language 8 5 6 Clock Set 8 5 7 Backlight 8 5 7 1 LCD 8 5 7 2 Keypad 8 5 7 3 Power save 8 5 8 Contrast 8 5 9 Auto Hyphen 8 5 10 Service LED 9 Phone Info 9 1 Version 9 2 Phone Number ...

Page 62: ...Section 4 62 ...

Page 63: ...tering Symbols Entering Numbers This section outlines how to select the desired text input mode when entering characters into your phone for example contact names and e mail addresses text messages and memos This section also describes how to use the T9 predictive text entry system to reduce the number of key strokes associated with entering text ...

Page 64: ...phabetical text entry mode Options are ABC All capital letters Abc Initial capital letters abc All lower case letters Symbol Symbol entry mode Enter symbols into your message by pressing the corresponding number that appears above each symbol in the display 123 Number entry mode Enter numbers by pressing the corresponding key on the keypad T9 Word Predictive text mode Press each key only once to e...

Page 65: ...Use the left or right navigation key to choose display the text entry mode you want to use 3 Press The mode is changed Enter upper and lower case text 1 While composing a text message press and hold the key to change to successive Text Entry modes until ABC appears or Press the Option left soft key to display a pop up menu containing the following options T9 WORD ABC Symbol 123 Text Format Add Med...

Page 66: ...s you are typing based on a built in dictionary Asyoupressadditionalkeys thephoneenters lettersandthewordchangesbasedonthekeysyoupress Note ABC mode is the factory set default text entry mode for messages You can reset this default value to T9 mode if you want See Messages Settings on page 106 for more information Text entry in T9 Word mode 1 When you are in T9 Word mode start entering a word usin...

Page 67: ...enter a word using T9 predictive text follow these steps 1 In idle mode press the Menu left soft key then press Messages and Send New Msg to compose a new text message 2 Enter the phone number of the recipient then press The Messages text entry screen appears in the display 3 If the text entry mode lower right hand corner is not T9 Word then press the Option left soft key A pop up menu containing ...

Page 68: ...withtheletteryouwantprintedonit suchasthe key for the letter H Press a key once to enter the first letter printed on that key such as press the key once to enter the letter G Press the key repeatedly until the desired character appears in the display such as press the key twice to enter the letter H Pause briefly and the displayed character is accepted and inserted into your message Press the key ...

Page 69: ...options appears in the display T9 WORD ABC Symbol 123 Text Format Add Media Quick Text T9 WORD or ABC is highlighted 4 Use the left and right navigation keys to display Symbol then press The first of four screens of symbols appear in the display 5 Use the left and right navigation keys to page through the other symbols if necessary 6 Press the key that corresponds to the symbol that you want to en...

Page 70: ... To screen appears in the display 2 Enter the phone number of the recipient then press The Messages text entry screen appears in the display 3 Press the Option left soft key A pop up menu containing the following options appears in the display T9 WORD ABC Symbol 123 Text Format Add Media Quick Text T9 WORD or ABC is highlighted 4 Use the left and right navigation keys to display 123 then press The...

Page 71: ...op up menu containing the following options appears in the display T9 WORD ABC Symbol 123 Text Format Add Media Quick Text 2 T9 WORD or ABC is highlighted 3 Use the left and right navigation keys to display T9 WORD or ABC then press The text entry mode shown in the lower right hand corner changes to T9 WORD or ABC ...

Page 72: ...72 Section 5 ...

Page 73: ...t Entry Finding a Contacts List Entry Editing an Existing Contacts List Entry Deleting a Contacts List Entry Speed Dialing Memory This section provides explanations and procedures for managingyourdailycontactsbystoringtheirnamesand numbers in your Contacts list You can sort and search through your Contacts list entries by entry name entry type or group name ...

Page 74: ...ing allow you to call numbers stored in your Contacts list faster See page 92 Open Your Contacts List 1 In idle mode press the Menu left soft key then press for Contacts The following Contacts sub menus and options appear in the display Find Find a phone number By Name By Entry or By Group Add Add a number or e mail to your Contacts Rename Group Rename one of your five groups Memory View available...

Page 75: ...enu attheendofacall byDirectEntry and by using the Call Logs Contacts Menu Method 1 In idle mode press the Menu left soft key then press for Contacts and for Add A pop up menu with the following Add options appears in the display Number E mail 2 Use the navigation keys to highlight the desired option and press The Enter Number or Enter E mail screen appears in the display 3 Enter the phone number ...

Page 76: ... The Contact information screen appears in the display with the Name field highlighted 6 Enter a name to associate with the new entry using the keypad see Section 5 Entering Text on page 63 for more information then press to save the entry Note You can enter or select additional numbers and other information for each Contact See Editing an Existing Contacts List Entry on page 84 for more informati...

Page 77: ...appear in the display 2 Press the Save right soft key You re prompted to confirm this as a New Entry or to Find a name in your Contacts with which to associate the number 3 Follow the instructions in the upcoming sections depending on whether the number is a new entry or is one you want to add to an existing Contact Add a New Contact Entry 1 With the New Entry option highlighted press The followin...

Page 78: ...2 Use the navigation keys to select the search method that you want to use By Name By Entry or By Group 3 Enter information to find the entry or use the navigation keys to scroll the list and highlight the desired entry then press The following number types appear in the display 4 Use the navigation keys to highlight the number type that matches the number you are adding then press The Contacts sc...

Page 79: ...historylogentriestocreateContactsorto add numbers to existing Contacts 1 In idle mode press the Menu left soft key then press for Calls The Calls menu appears in the display 2 From the Calls menu press the corresponding number on the keypad to view call logs for the following call types for Outgoing for Incoming for Missed The selected list of logged calls appears in the display 3 Use the navigati...

Page 80: ... the following options Talk Save Prepend Erase 5 Use the navigation keys to highlight the Save option then press 6 Add the number as a New Entry see Add a New Contact Entry on page 77 or use Find to add the number to a existing Contact see Add to an Existing Contact Entry on page 78 ...

Page 81: ...the following methods to find the entry By Name Search the Contacts alphabetically by name By Entry Search the Contacts by entry number By Group Search the Contacts by selecting from one of the five available groups Find by Name Use this option to find a stored Contact by entry name 1 In the Find screen use the left and right navigation keys to select By Name 2 Enter the Contact name as it appears...

Page 82: ...or your Contact As you enter numbers the entry numbers and names of the closest matches appear in the display 3 Use the navigation keys to highlight the entry you want 4 To dial the number associated with the selected Contact press the key 5 To view the information for the selected Contact press Find by Group This option lets you to find a Contact within a selected group 1 In the Find screen use t...

Page 83: ...gation keys to view the group that you want As each group is selected Contacts assigned to the group appear in your phone s screen 4 Use the navigation keys to highlight the desired entry 5 To dial the number associated with the selected Contact press the key 6 To view the information for the selected Contact press ...

Page 84: ...ntacts alphabetically by name By Entry Search the Contacts by entry number By Group Search the Contacts by selecting from one of the five available groups 3 Use the left and right navigation keys to display the search method that you want to use By Name By Entry or By Group 4 Enter information to find the Contact entry or use the navigation keys to highlight the entry containing the number that yo...

Page 85: ...are saved and a confirmation message appears in the display Add Pauses to Contact Numbers When you call automated systems like banking services you are often required to enter a password or account number Instead of manually entering the numbers each time you can store the numbers in your Contacts list along with special characters called pauses P pause A hard pause stops the calling sequence unti...

Page 86: ... pause menu options appear in the display P pause a hard pause awaits input from you T pause a two second pause P pause is highlighted 3 Use the navigation keys to highlight the pause option of your choice 4 Press to add insert the highlighted pause into your number sequence 5 When you re finished entering the number and pauses press the Save right soft key to store the number in your Contacts lis...

Page 87: ...ard number bank account number and so on 3 Press to dial the remaining part of the saved number Rename Groups Use this option to rename a group in your Contacts list 1 In idle mode press the Menu left soft key then press for Contacts and for Rename Group 2 Use the navigation keys to highlight the group that you want to rename then press The Rename Group screen appears in the display containing the...

Page 88: ... your Contact entries sorted alphabetically and the top entry highlighted 2 Use the left and right navigation keys to select one of the following methods to find the entry By Name Search the Contacts alphabetically by name By Entry Search the Contacts by entry number By Group Search the Contacts by selecting from one of the five available groups 3 Use the left and right navigation keys to display ...

Page 89: ... to edit 8 Use the keypad to edit the e mail address 9 Press the key twice to insert the symbol 10 To add a domain type press the Option left soft key A pop up menu containing the following options appears in the display 123 T9 WORD ABC Symbol with 123 highlighted com edu net with com showing 11 Use the up and down navigation keys to highlight com 12 Use the left and right navigation keys to highl...

Page 90: ...entry number By Group Search the Contacts by selecting from one of the five available groups 3 Use the left and right navigation keys to display the search method that you want to use By Name By Entry or By Group 4 Enter information to find the Contact entry or use the navigation keys to highlight the entry that you want to delete 5 Press the Option left soft key to display a pop up menu containin...

Page 91: ...10 Since a contact can have up to 5 different phone numbers stored in it you must select whatphonenumberisdialedwhenspeeddialingisused Selecting SpeedDial Phone Number Unlessyouchangeit thefirstphonenumberyouenteror select when creating a Contact is used for speed dialing Tochangethephonenumberdialedwhenyouusespeed dialing follow these steps 1 In idle mode press the Contacts right soft key The Fin...

Page 92: ...edDial and press the Edit left soft key 6 Use the navigation keys to select the icon associated with the number you want dialed when SpeedDial is used 7 Press to save your changes Speed Dialing Options Once you have stored phone numbers in your Contacts list you can dial the numbers quickly by using one of the SpeedDial options One touch Dialing Contacts memory locations 001 through 009 are specia...

Page 93: ... 013 briefly press then press and hold down until the associated Contact name and number appear in the display and the number is dialed Three touch Dialing Contacts memory locations 100 through 500 are special Three Touch dialing locations You can call the phone numbers stored in memory locations 100 through 500 by pressing the first and second keys and then pressing and holding the third key Fore...

Page 94: ...the amount of memoryyouhaveusedtostoreContactentries aswellas the memory remaining to store more Contact entries In idle mode press the Menu left soft key then press for Contacts and for Memory The amount of memory used and remaining for Contacts is displayed ...

Page 95: ...Text Messages Retrieving New Messages Voice Mail Message Folders Messages Settings Erase Messages This section explains how to use your phone to send or receive different types of messages This section also describes the features and functionality associated with messaging ...

Page 96: ...w text message do the following 1 In idle mode press the Menu left soft key then press Messages and Send New Msg The Send To screen appears in the display 2 Enter the phone number of the recipient then press The Messages text entry screen appears in the display 3 Enter the text for your message using the keypad To change your current text entry mode and or add some previously saved text to your me...

Page 97: ...nput options and the option to add Quick Text to your message Send Options Choose the Priority Privacy whether you want to have a Delivery Acknowledgement and insert a Signature and or Call Back See the following section Message send options for more information on these settings Save in Draft Save the message to your Draft folder Save Text Save the text in your message as a Quick Text file Quick ...

Page 98: ...very Ack Request that the message recipient acknowledge that your message is received Insert Sign Insert your pre composed signature into the message Callback Insert a number into your message for the recipient to call you back Def Delivery Schedule message delivery for a particular date and time 3 Use the navigation keys to display the various Send Options for each menu item 4 When the send optio...

Page 99: ...ey to open the message Press the Reply right soft key to open the Messages message composer screen and respond to the message OR Press the Option left soft key to Forward Erase Save Text Save Msg Save Contact or Block Sender Receive messages during a call When your phone receives a message during a call New Message appears in the display along with the closed envelope icon You can view the message...

Page 100: ...Phone on page 164 for more information about your phone s Lock Mode Voice Mail All unanswered calls to your phone are sent to the voice mail system even if your phone is turned off When your phone is in idle mode and you receive a voice message New Message appears in the display along with the closed envelope and headset icon Your service provider has assigned your voice mail number to the key Che...

Page 101: ...ength Voice mail folder Messages in your Voice Mail box are logged in the Voice Mail folder of the Messages menu Open the Voice Mail folder to view the Callback if available and other details of the voice mail message 1 In idle mode press the Menu left soft key then press Messages 2 Use the navigation keys to highlight Voice Mail then press Details of your most recent voice mail message appear in ...

Page 102: ...4 While viewing your message press the Option left soft key The following options appear in the display Forward Forward the message to another recipient Erase Delete the message and its contents Save Text Save only the text in the message Save Msg Save the message to the Saved message folder Save Contact Save the number of the sender to your Contacts list as a new entry or add to an existing entry...

Page 103: ... 97 for more information on delivery acknowledgements Review messages in the Outbox 1 In idle mode press the Menu left soft key then press and to open the Outbox folder Any outgoing messages appear in the display 2 Use the navigation keys to highlight the message you want to review then press 3 Press the Option left soft key The following options appear in the display Re send Re send the message S...

Page 104: ... keys to highlight Save in Draft then press A confirmation message appears in the display and your message is saved to the Draft folder View and edit Draft messages 1 In idle mode press the Menu left soft key then press and A list of your draft messages appears in the display 2 Use the navigation keys to highlight the message that you want to view and press 3 Press the Option left soft key A pop u...

Page 105: ...ave in Draft Save the message to your Draft folder Save Text Save the text in your message as a Quick Text file Quick Text files contain pre composed text that can be inserted into any message you choose 5 Use the navigation keys to highlight the option you want then press to select the option Saved folder Saved messages are sent to the Saved folder 1 In idle mode press the Menu left soft key then...

Page 106: ... folder allows you to define numerous message settings such as ringer types and save options 1 In idle mode press the Menu left soft key then press and The following Msg Setting options appear in the display Send Setting Options to Save in Outbox change the Callback change the Entry Mode Insert a Signature and request a Delivery Acknowledgement Msg Alert Set Ringer types and Reminders for when you...

Page 107: ...ages in a particular folder or use the All Messages option to erase the contents of all of your message folders at once Note Erase Msg erases all of the messages in the selected folder To delete a single message press the Option left soft key and select Erase while viewing the content of a message 1 In idle mode press the Menu left soft key then press and The Erase Msg menu appears in the display ...

Page 108: ...108 Section 7 ...

Page 109: ...alog Settings Help This section provides explanations of how you can use Axcess on your phone to do the following Download full featured applications over the air including games personalized ring tones pictures and more and Browse the web to catch up on all the latest news ...

Page 110: ...pears in the display then the Axcess Catalog menu containing the following options appears in the display New Arrivals Featured Apps pics tones games info SPANISH search 3 Use the navigation keys to highlight the category you want then press 4 Select the application you want to download and follow the online directions Axcess Open Axcess catalog Settings View and change Axcess settings Help View A...

Page 111: ... Order Apps Download applications over the network Move Apps Move previously downloaded applications between available folders Manage Apps View used and available memory Main Menu View Selectwhether you wanttoview themain Axcess menu in a list or icon format Screen Savers View downloaded screensavers View Log View the Axcess log which displays information about recent activity using Axcess 3 Use t...

Page 112: ...igation keys to highlight the Help icon then press The Help subjects listed in the following sections appear in the display Buying New Apps To buy new and exciting applications apps visit the Axcess Shop This feature provides you with a variety of applications you can choose from What do I pay Ifyoubuyanappyouwillbechargedforthepurchasecost of the application app and the network connections to dow...

Page 113: ...el a subscription to an application choose Settings then choose Manage Apps Select the application subscription you want to cancel Demo Apps A Demo app is free and is designed to demonstrate the app s main features It usually expires after a certain period of time or number of uses and often has limited functions Removing Apps Note When you remove an app you cannot use it unless you purchase it ag...

Page 114: ... is full by partially removing disabling apps you haven t used recently Note When you need to use a disabled app you can restore it at no additional purchase cost Restoring Apps Disabled apps can be quickly restored at no additional purchase cost To restore an app run the application you want to restore from the Main Menu You will be guided through the restoration process Expired Apps An Expired A...

Page 115: ...Web Topics Covered Mobile Web Operations Launch Mobile Web Exit Mobile Web Navigate the Web Mobile Web Soft Keys Using Links How Mobile Web Keys Work This section explains how you can use Mobile Web 2 0 on your SCH n330 phone to conveniently surf the web ...

Page 116: ...n the last session the phone automatically re connects to the Internet Launch Mobile Web Note The first time you use Mobile Web you are prompted to go through a setup process that takes approximately three to five minutes 1 In idle mode press the left navigation key If this is the initial launch of Mobile Web you re prompted to enable security before proceeding 2 Press the Yes left soft key to pro...

Page 117: ... by using the soft keys Mobile Web Soft Keys At the bottom of the Mobile Web display is a bar that containsbrowser commands Theleft andright soft keys on the keypad are used to execute the commands that appear above them in the display These are called soft keys because their function changes depending on the application Using links Links have several purposes such as jumping to a differentpage to...

Page 118: ... hold to completely clear the display Asterisk ShiftKey Press before entering text to enable upper case characters in Abc mode 0 Next Key Press to enter a zero 0 or to display another word in the dictionary when in T9 Word entry mode Pound Space Key Press to insert a space when entering text Numbers 1 through 9 Use the number keys to select items in a menu if they are numbered End Key Press to exi...

Page 119: ...ection 9 Mobile Web 119 How Mobile Web Keys Work Section 9 Right Soft Key Press to activate the command that appears above it in the display Send Key Press to dial a highlighted number Key Name Function ...

Page 120: ...120 Section 9 ...

Page 121: ...y Topics Covered Gallery Menu Menu Style Animation Banner Volume VibeTonz Ringer Type Key Beep Alerts Power On Off Roam Ringer This section explains how you can set menu style idle modeanimation customizebacklightsettings andmore using the Display menu ...

Page 122: ...ibration for Calls ringer and alarms Ringer Type Choose a preloaded or downloaded sound to be played for Calls ringer alarms data calls and tools alerts Key Beep Choose volume and tone length for the key beep and choose whether to use VibeTonz vibration with the key beep Alerts Choose whether individual alerts sound the alerts tone Power On Off Choose whether a sound file plays and or a VibeTonz v...

Page 123: ...ption Animation Animationallowsyoutochoosethegraphicimagesyour phonedisplayswhenitisturnedonoroff orwhileitisin idle mode wallpaper 1 In idle mode press the Menu left soft key then press Gallery and for Animation The following options appear in the display Opening Choose the animation that appears in the display when you turn on your phone Closing Choose the animation that appears in the display w...

Page 124: ... navigation keys to display the image or wallpaper you want then press to select it Banner Compose your own personalized text greeting that appears in the display while your phone is in idle mode 1 In idle mode press the Menu left soft key then press Gallery and for Banner 2 Press and hold to erase an existing banner if necessary 3 Enter a word or short phrase that will appear in the display while...

Page 125: ...synchronized to the music making them more fun and more identifiable UsetheVol VibeTonzmenutosetthedefaultvolumefor incoming calls and alarms or to set your phone to a VibeTonz mode 1 In idle mode press the Menu left soft key then press Gallery and for the Vol VibeTonz sub menu 2 Use the navigation keys to highlight Calls or Alarm then press 3 Use the up and down volume keys to select the volume l...

Page 126: ...ey then press Gallery and for the Ringer Type sub menu The following ringer types appear in the display Calls Alarm Data Planner 2 Use the navigation key to highlight a ringer type then press A pop up menu containing the following options appears in the display Preloaded Preview sounds included with your phone My Melody Preview sounds you have downloaded and saved A list of bells and melodies appe...

Page 127: ...the Menu left soft key then press Gallery and for Key Beep The following Key Beep menu items appear in the display Volume Tone Length VibeTonz Volume is highlighted 2 Press 3 Use the volume keys or the navigation keys to set the volume level for keypad tones A tone sounds as you increase or decrease the volume setting 4 Press when the key beep volume setting you want displays You re returned to th...

Page 128: ...Alerts You can set your phone to sound an alert whenever you enter or leave your service area connect or disconnect a call as well as other options 1 In idle mode press the Menu left soft key then press Gallery and for Alerts The following Alerts menu items appear in the display Minute Beep Sound an alert ten seconds before each elapsed minute of a call Service Sound an alert when you enter or lea...

Page 129: ... change then press A prompt containing On and Off options appears in the display 2 Use the navigation keys to highlight Off or On 3 Press to save your selection Power On Off Set your phone to play a sound and or VibeTonz touch sensation whenever you turn the phone on or off 1 In idle mode press the Menu left soft key then press Gallery and for Power On Off The following options appear in the displ...

Page 130: ...side your home service area Note By default this feature is set to On 1 In idle mode press the Menu left soft key then press Gallery and for Roam Ringer A prompt containing On and Off options appears in the display 2 Use the navigation keys to highlight Off or On 3 Press to save your selection ...

Page 131: ... Jump To Date To Do List Memo Pad Alarm Clock Count Down World Time Calculator Voice Memo Voice Setup This details how you can keep a schedule of events set reminders create a to do list perform calculations and more with the digital assistant functionality included in your phone ...

Page 132: ...he Menu left soft key then press Tools and for Today If there are no events entered for the current date the New Event screen appears in the display If there are events entered for the current date information about the earliest event appears in the display Press the Option left soft key A pop up menu containing the following options appears in the display Add new Edit Erase Erase All Add new is h...

Page 133: ...ation keys to select the amount of time before the event occurs that you want to be notified by an alert 7 Press to store the event in your calendar An alert will notify you prior to the event if you set the Notification alert Edit an Event 1 In idle mode press the Menu left soft key then press Tools and for Today The Event screen containing information about the earliest event entered or schedule...

Page 134: ...hen you re finished editing the event details press The Time Setup screen appears in the display 7 Enter the new time and date for the event using the keypad Press for A M when P is highlighted Press for P M when A is highlighted 8 When you re finished entering the new time and date use the navigation keys to highlight the Notification field 9 Use the left and right navigation keys to select the a...

Page 135: ... to erase 3 Press the Option left soft key A pop up menu containing the following options appears in the display Add new Edit Erase Erase All Add new is highlighted 4 Use the navigation keys to highlight Erase then press You are prompted to confirm erasing the event 5 Use the navigation keys to highlight Yes to erase the selected event or No to cancel 6 Press to confirm your selection If you selec...

Page 136: ...o move around in the calendar Press the volume up key to view previous months Press the volume down key to view future months 3 Press to open a date that is highlighted 4 Press the Option left soft key while viewing the calendar to display the following options View View events for the selected date Add new Add a new event for the selected date View is highlighted 5 Press If one or more events are...

Page 137: ...ntry screen 1 In idle mode press the Menu left soft key then press Tools and for Jump To Date The Jump to Date entry screen appears in the display with the current month highlighted 2 Enter the desired jump to date and press The calendar month for the date that you specified appears in the display with the jump to date highlighted ...

Page 138: ...lay Press the Option left soft key A pop up menu containing the following options appears in the display Add new Edit Erase Erase All Add new is highlighted Press The Add To Do screen appears in the display 2 Enter details of the task using the keypad For details on entering text using the keypad see Section 5 Entering Text on page 63 As needed press the Option left soft key to change text entry m...

Page 139: ... the navigation keys to browse tasks in your To Do List Events are presented in order of priority 3 Press the Option left soft key while viewing your To Do List A pop up menu containing the following options appears in the display Add new Add a new task to the To Do List Edit Edit the task currently appearing in the display Erase Erase the task currently appearing in the display Erase All Erase al...

Page 140: ...mo Pad the Memo screen appears in the display letting you add a new memo 2 Enter memo details using the keypad For details on entering text using the keypad see Section 5 Entering Text on page 63 As needed press the Option left soft key to change text entry mode 3 When you re finished entering details for the memo press The memo is stored Review Add Edit or Erase Memos 1 In idle mode press the Men...

Page 141: ...ions appears in the display Add new Add a new memo to Memo Pad Edit Edit the memo currently highlighted or appearing in the display Erase Erase the memo currently highlighted or appearing in the display Erase All Erase all memos from Memo Pad 5 Use the navigation keys to highlight the option you want 6 Press to select the option ...

Page 142: ...ng day 1 In idle mode press the Menu left soft key then press Tools and for Alarm Clock The Alarm Set screen containing the following options appears in the display Once Daily Off Off is highlighted 2 Use the navigation keys to highlight the frequency that you want the alarm to occur then press The Alarm Time screen appears in the display 3 Enter the time for the alarm using the keypad Press for A...

Page 143: ... remains in the top of the display If the alarm was set as a Once only alarm the alarm icon is removed from the top of the display Turn Off the Alarm Clock 1 In idle mode press the Menu left soft key then press Tools and for Alarm Clock The Alarm Set screen containing the following options appears in the display Once Daily Off Off is highlighted 2 Press The alarm icon if present is removed from th...

Page 144: ... Count Down events 3 Enter details for the Count Down event using the keypad For details on entering text using the keypad see Section 5 Entering Text on page 63 As needed press the Option left soft key to change text entry mode 4 Once you ve finished entering details for the Count Down event press You re prompted to enter a time and date for the scheduled event 5 Enter the time and date using the...

Page 145: ...led event occurs also displays The day date and time of the scheduled event appear at the bottom of the display 2 Use the navigation keys to browse your Count Down events 3 Press the Option left soft key while viewing your memos A pop up menu containing the following options appears in the display Add new Add a new event to Count Down Edit Edit the event currently appearing in the display Erase Er...

Page 146: ... World Time A world map appears in the display 2 Use the navigation keys to display the city and time that you want to view The following cities are supported New York Caracas Brasilia Mid Atlantic Cape Verde London Paris Berlin Athens Helsinki Moscow Abu Dhabi Tashkent Alma ata Bangkok Jakarta Hong Kong Beijing Seoul Tokyo Guam Sydney Okhotsk Wellington Samoa Midway Honolulu Hawaii Alaska San Fra...

Page 147: ...uation using the keypad numbers can be up to nine digits long Press to enter a decimal point Press to change the sign for a number to a negative 4 Use the navigation keys to select the type of calculation you want to perform 5 Press to perform the calculation and view the result Voice Kit Voice Memo You can use the Voice Memo menu to record a memo for later playback Note The maximum number of voic...

Page 148: ... To resume recording press the Resume left soft key 5 When you re finished recording press the Stop right soft key A pop up menu containing the following options appears in the display Save Save the memo in the Review folder under the Voice Memo menu See Review a Voice Memo on page 149 for more information on reviewing voice memos Review Listen to your memo Re record Record the memo again Quit Can...

Page 149: ...ghlighted 2 Use the navigation keys to highlight Review then press The Review menu containing a list of your voice memos appears in the display 3 Use the navigation keys to highlight the memo you want to review 4 Press to play the memo or press the Option left soft key A pop up menu containing the following options appears in the display Re record Record over the selected memo Erase Erase the memo...

Page 150: ...hlight Review then press The Review menu containing a list of your voice memos appears in the display 3 Use the navigation keys to highlight the memo you want to review 4 Press to play the memo or press the Option left soft key A pop up menu containing the following options appears in the display Re record Erase Edit Caption Information 5 Use the navigation keys to highlight Erase then press You a...

Page 151: ...igation keys to highlight Erase All then press Erase All Voice Memos appears in the display 3 Use the navigation key to highlight Yes to erase all your voice memos or No to cancel and keep the memos 4 Press to confirm your selection Voice Setup You can use Voice Setup to select how to launch your phone s Voice Dialing function Set Active To set the key or action that launches your Voice Dialing fo...

Page 152: ...nly is highlighted 3 Use the navigation keys to highlight the option you want then press to save and exit Note Your phone is initially set to Only so that when you press and hold the key the Voice Dialing commands are activated If you select one of the other options that is Slide Up or EarMic your phone will launch the Voice Dialing commands when you extend the pop up display or when you attach th...

Page 153: ...e sure you wait for the beep before starting to speak Speak clearly and say each digit distinctly If you make a mistake while recording a sequence of digits or if there is an unexpected noise that spoils the recording re record that sequence Set Digits Adapt Digit Dial to Your Voice 1 In idle mode press the Menu left soft key then press Tools Voice Kit and for Voice Setup The Voice Setup menu cont...

Page 154: ...nce the digits again Wait for the beep and then say the digits Repeat this step until you re satisfied with the recording 5 After confirming that the recording sounds ok continue the recording process with the next set of digits 6 After six sets of digits the phone asks whether you want to do more adaptation Answer Yes 7 Repeat steps 4 and 5 for another six sets of digits After the second group of...

Page 155: ... keys to highlight Set Digits then press The Setup Digit menu containing the following options appears in the display Adapt Digits Reset Digits 3 Use the navigation keys to highlight Reset Digits then press The phone prompts you to confirm digit rest 4 Use the navigation keys to select Yes to reset your digit adaptation or No to cancel 5 Press to save and exit ...

Page 156: ...156 Section 11 ...

Page 157: ...on 12 Settings Topics Covered Location Network Data Security Others This section explains how to customize many of your phone soptionstosuityourpreferences UsingtheSetup menu you can set or change security features shortcuts language and more ...

Page 158: ...services are available 1 In idle mode press the Menu left soft key then press Settings and for Location The following GPS Setting menu options appear in the display Location On GPS location setting is on wherever the feature is available 911 Only GPS location setting is on only when you dial 911 2 Use the navigation keys to highlight the option you want 3 Press to select the desired Location setti...

Page 159: ...rk The following Network menu items appear in the display Set NAM Roam Option 2 Use the navigation keys to highlight Set NAM then press The following Set NAM options appear in the display NAM 1 Your service contract has one phone line NAM 2 Your service contract has two phone lines 3 Use the navigation keys and to highlight NAM 1 or NAM 2 the press The idle screen appears in the display Roam Optio...

Page 160: ...signated coverage area Automatic A The Preferred Roaming List PRL is used to acquire service If no preferred systems are found any digital A system is acquired Automatic B The PRL is used to acquire service If no preferred systems are found any digital B system is acquired 3 Use the navigation keys and to highlight Home only Automatic A or Automatic B the press The Network menu appears in the disp...

Page 161: ... Use the navigation keys to highlight Auto Detect then press The following options appear in the display Data off No incoming data calls accepted Data for next call Wait for data call for next 10 minutes Data until powered off Data calls only no voice calls accepted 3 Use the navigation keys to highlight the Auto Detect option you want then press The Data menu appears in the display Baud Rate Set ...

Page 162: ...highlight Baud Rate then press The following Data Baud Rate options appear in the display Auto 19200 38400 57600 115200 230400 3 Use the navigation keys to highlight the desired Data Baud Rate option the press The Data menu appears in the display ...

Page 163: ...in the display 2 Enter the four digit lock code using the keypad Note The default lock code for your phone is the last four digits of your phone number The Lock prompt disappears and the Security menu containing the following items appears in the display Lock Phone Lock code required to place calls or access features Change Lock Enter new lock code to access Security menu outgoing calls phone feat...

Page 164: ...using the keypad Note The default lock code for your phone is the last four digits of your phone number The Lock prompt disappears and the Security menu appears in the display Lock Phone is highlighted 3 Press for Lock Phone The following Set Lock options appear in the display Never The phone remains unlocked On Power Up The phone locks automatically the next time your phone is powered on and stay...

Page 165: ...t appears in the display 2 Enter the four digit lock code using the keypad The Lock prompt disappears and the Security menu appears in the display 3 Press for Change Lock You re prompted to enter the new lock code 4 Enter the new lock code You re prompted to re enter the new lock code for verification 5 Enter the new lock code again Your changes are stored Note Your phone does not allow you to vie...

Page 166: ...l Important Because of various transmission methods network parameters and user settings necessary to complete a call from your wireless phone a connection cannot always be guaranteed Therefore emergency calling may not be available on all wireless networks at all times Important DO NOT depend on this phone as a primary method of calling 911 or for any other essential or emergency communications R...

Page 167: ...in length 7 Press to save the number that you entered Call Emergency Numbers in Lock Mode 1 In idle mode enter the emergency number using your keypad 2 Press to place the call Voice Privacy Voice Privacy allows you to prevent those you call from seeing yournumberintheir display when receiving your call Voice privacy options are Standard and Enhanced 1 In idle mode press the Menu left soft key then...

Page 168: ...In idle mode press the Menu left soft key then press Settings and for Security The Lock prompt appears in the display 2 Enter the four digit lock code using the keypad Note The default lock code for your phone is the last four digits of your phone number The Lock prompt disappears and the Security menu appears in the display 3 Press for Restriction The Restriction menu containing the following ite...

Page 169: ...nnot be undone after you confirm memory erase 1 In idle mode press the Menu left soft key then press Settings and for Security The Lock prompt appears in the display 2 Enter the four digit lock code using the keypad Note The default lock code for your phone is the last four digits of your phone number The Lock prompt disappears and the Security menu appears in the display 3 Press for Erase Memory ...

Page 170: ...press Settings and for Security The Lock prompt appears in the display 2 Enter the four digit lock code using the keypad Note The default lock code for your phone is the last four digits of your phone number The Lock prompt disappears and the Security menu appears in the display 3 Press for Reset Phone A prompt appears in the display asking if you want to restore default settings except for the Co...

Page 171: ...hat you want the up navigation key to launch 1 In idle mode press the Menu left soft key then press Settings and For Others The Others menu appears in the display with Shortcut highlighted 2 Press for Shortcut The following applications and functions appear in the display Scheduler Voice Memo Animation Ringer Type Alarm Calculator Memo Pad 3 Use the navigation keys to highlight the function you wa...

Page 172: ...g call Slide Up Extend the pop up display to answer an incoming call Any Key Press any key except to answer an incoming call 3 Use the navigation keys to highlight the Call Answer option you want to use then press Call End Call End lets you set how you will end a call 1 In idle mode press the Menu left soft key then press Settings and For Others The Others menu appears in the display 2 Press for C...

Page 173: ...try The following Auto Retry options appear in the display Off Every 10 sec Every 30 sec Every 60 sec 3 Use the navigation keys to highlight the setting you want then press Language The Language option on your phone changes the language used in voice prompts menus and text input 1 In idle mode press the Menu left soft key then press Settings and For Others The Others menu appears in the display 2 ...

Page 174: ...rent time and date using your keypad The hour minute month and day must be entered using two digits each You must enter the hour in 12 hour format and press for AM or press for PM The year must be entered with all four digits 4 Press to save the time and date Backlight You can set the backlight for your display or keypad to remain on for a specified period of time or remain on as long as the slide...

Page 175: ...urns off With Power save enabled the backlight for the LCD is always dim After approximately one minute of inactivity Power save turns the backlight off 2 Use the navigation keys to highlight the menu you want then press to select it Contrast Set the display contrast to your preference 1 In idle mode press the Menu left soft key then press Settings Others and for Contrast 2 Use the left and right ...

Page 176: ...dicate an incoming call or message Lights briefly when you power the phone on Flashes red when the phone battery needs to be recharged Lights continuously while the phone battery is being recharged Turn the Service LED off on 1 In idle mode press the Menu left soft key then press Settings Others and for Service LED The following options appear in the display Off On 2 Use the navigation key to high...

Page 177: ...nfo 177 Section 13 Section 13 Phone Info Topics Covered Version Phone Number This section explains how to identify the hardware and software versions of your phone and to identify the phone number assigned to your phone ...

Page 178: ... Menu left soft key then press Phone Info and for Version Your phone s hardware and software information appears in the display 2 Press to return to the Phone Info menu Phone Number My Phone displays the ten digit number assigned to your phone by Alltel In idle mode press the Menu left soft key then press Phone Info and for Phone Number The phone number assigned by Alltel appears in the display ...

Page 179: ...9 Section 14 Section 14 Health and Safety Information Topics Covered Health and Safety Information This section outlines the safety precautions associated with using your phone These safety precautions should be followed to safely use your phone ...

Page 180: ...EE In both cases the recommendations were developed by scientific and engineering experts drawn from industry government and academia after extensive reviews of the scientific literature related to the biological effects of RF energy The exposure limit set by the FCC for wireless mobile phones employs a unit of measurement known as the Specific Absorption Rate SAR The SAR is a measure of the rate ...

Page 181: ...n general the closeryouaretoawirelessbasestationantenna thelower the power output Before a new model phone is available for sale to the public it must be tested and certified to the FCC that it does not exceed the exposure limit established by the FCC Tests for each model phone are performed in positions and locations e g at the ear and worn on the body asrequiredbytheFCC Body wornoperationsare re...

Page 182: ...FCC ID number which is usually printed somewhere on the case of the phone Sometimes it may benecessary toremove the battery pack to find the number Once you have the FCC ID number for a particular phone follow the instructions on the website anditshouldprovidevaluesfortypicalormaximumSAR for a particular phone Additional product specific SAR information can also be obtained at www fcc gov cgb sar ...

Page 183: ...decreases rapidly with increasing distance from the source The so called cordless phones which have a base unit connected to the telephone wiring in a house typically operate at far lowerpower levels andthusproduceRFexposureswell within the FCC s compliance limits Do wireless phones pose a health hazard The available scientific evidence does not show that any health problems are associated with us...

Page 184: ...ethemanufacturers ofwirelessphonestonotifyusersofthehealthhazardand torepair replaceorrecallthephonessothatthehazardno longer exists Although the existing scientific data do not justify FDA regulatory actions FDA has urged the wireless phone industry to take a number of steps including the following Support needed research into possible biological effects of RF of the type emitted by wireless phon...

Page 185: ...in the United States must comply with FCC safety guidelines that limit RF exposure FCC relies on FDA and other health agencies for safety questions about wireless phones FCC also regulates the base stations that the wireless phone networks rely upon While these base stations operate at higher power than do the wireless phones themselves the RF exposures that people get from these basestations are ...

Page 186: ...ults of such studies mean for human health Three large epidemiology studies have been published since December 2000 Between them the studies investigated any possible association between the use of wireless phones and primary brain cancer glioma meningioma oracousticneuroma tumorsofthebrainor salivary gland leukemia or other cancers None of the studiesdemonstratedtheexistenceofanyharmfulhealth eff...

Page 187: ...easurement such as the angle at which the phone is held or which model of phone is used What is FDA doing to find out more about the possible health effects of wireless phone RF FDA is working with the U S National Toxicology Program and with groups of investigators around the world to ensure that high priority animal studies are conducted to address important questions about the effects of exposu...

Page 188: ...ere is it is probably very small But if you are concerned about avoiding even potential risks you can take a few simple steps to minimize your exposure to radio frequency energy RF Since time is a key factor in how much exposure a person receives reducingtheamountoftimespentusingawirelessphone will reduce RF exposure If you must conduct extended conversations by wireless phone every day you could ...

Page 189: ...ining such a recommendation in December 2000 They noted that no evidence exists that using a wireless phone causes brain tumorsorotherilleffects Theirrecommendationtolimit wireless phone use by children was strictly precautionary it was not based on scientific evidence that any health hazard exists Do hands free kits for wireless phones reduce risks from exposure to RF emissions Since there are no...

Page 190: ...tachedtothephone Studieshaveshownthat these products generally do not work as advertised Unlike hand free kits these so called shields may interfere with proper operation of the phone The phone may be forced to boost its power to compensate leading to an increase in RF absorption In February 2002 the FederaltradeCommission FTC chargedtwocompanies that sold devices that claimed to protect wireless ...

Page 191: ...eers IEEE This standard specifiestestmethodsandperformancerequirementsfor hearing aids and wireless phones so that no interference occurs when a person uses a compatible phone and a compatible hearing aid at the same time This standard was approved by the IEEE in 2000 FDA continues to monitor the use of wireless phones for possibleinteractionswithothermedicaldevices Should harmfulinterferencebefou...

Page 192: ... almostanywhere anytime Butan important responsibility accompanies the benefits of wireless phones one that every user must uphold When driving a car driving is your first responsibility When using your wireless phone behind the wheel of a car practice good common sense and remember the following tips 1 Get to know your wireless phone and its features such as speed dial and redial If available the...

Page 193: ...gh your address book takes attention away from your primary responsibility driving safely 6 Dial sensibly and assess the traffic if possible place calls when you are not moving or before pulling into traffic Try to plan calls when your car will be stationary If you need to make a call while moving dial only a few numbers check the road and your mirrors then continue 7 Do not engage in stressful or...

Page 194: ...mergency wireless assistance number when necessary If you see a broken down vehicle posing no serious hazard a broken traffic signal a minor traffic accident where no one appears injured or a vehicle you know to be stolen call roadside assistance or other special non emergency number The wireless industry reminds you to use your phone safely when driving Formoreinformation pleasecall1 888 901 SAFE...

Page 195: ...fety of personnel it is recommendedthattheequipmentshouldonlybeusedin the normal operating position held to your ear with the antenna pointing over your shoulder Using Your Phone Near Other Electronic Devices Most modern electronic equipment is shielded from radiofrequency RF signals However certainelectronic equipment may not be shielded against the RF signals from your wireless phone Consult the...

Page 196: ...ise Some hearing devices are more immune than others to this interference noise and phones also vary in the amount of interference they generate The wireless telephone industry has developed ratings for some of their mobile phones to assist hearing device users in finding phones that may be compatible with their hearing devices Not all phones have been rated Phones that are rated have the rating o...

Page 197: ...hem Hearing devices may also be measured for immunity to this type of interference Your hearing device manufacturer or hearing health professional may help you find results for your hearing device The more immune your hearing aid is the less likely you are to experience interference noise from mobile phones Other Medical Devices Ifyouuseanyotherpersonalmedicaldevices consultthe manufacturer of you...

Page 198: ... an explosion or fire resulting in bodily injury or even death Users are advised to switch the phone off while at a refueling point service station Users are reminded of the need to observe restrictions on the use of radio equipment in fuel depots fuel storage and distribution areas chemical plants or where blasting operations are in progress Areas with a potentially explosive atmosphere are often...

Page 199: ...or when certain network services and or phone features are in use Check with local service providers To make an emergency call 1 If the phone is not on switch it on 2 Key in the emergency number for your present location for example 911 or other official emergency number Emergency numbers vary by location 3 Press the key If certain features are in use call barring for example you may first need to...

Page 200: ...mustcomplywiththeNationalFireProtection Standard NFPA 58 For a copy of this standard contact the National Fire Protection Association One Batterymarch Park Quincy MA 02269 Attn Publication Sales Division Cautions Any changes or modifications to your phone not expressly approved in this document could void your warranty for this equipment and void your authority to operate this equipment Only use a...

Page 201: ...rials in the same compartment as the phone its parts or accessories For vehicles equipped with an air bag remember that an air bag inflates with great force Do not place objects including both installed or portable wireless equipment in the area over the air bag or in the air bag deployment area If wireless equipment is improperly installed and the air bag inflates serious injury could result Swit...

Page 202: ...ableto finda signal after 15 minutes of searching a Power Save feature is automatically activated If your phone is active it periodically rechecks service availability or you can check it yourself by pressing any key Anytime the Power Save feature is activated a message displays on the screen When a signal is found your phone returns to idle mode Understanding How Your Phone Operates Your phone is...

Page 203: ...nd or twist the phone s antenna Don t use the phone if the antenna is damaged Speak directly into the phone s receiver Avoid exposing your phone and accessories to rain or liquid spills If your phone does get wet immediately turn the power off and remove the battery If it is inoperable call Customer Care for service Availability of Various Features Ring Tones Many services and features are network...

Page 204: ...ork and the parameters set by the network operator Battery charging time depends on the remaining battery charge and the type of battery and charger used The battery can be charged and discharged hundreds of times but it will gradually wear out When the operation time talk time and standby time is noticeably shorter than normal it is time to buy a new battery If left unused a fully charged battery...

Page 205: ...he battery or the object causing the short circuiting Dispose of used batteries in accordance with local regulations In some areas the disposal of batteries in household or business trash may be prohibited For safe disposal options for Li Ion batteries contact your nearest Samsung authorized service center Always recycle Do not dispose of batteries in a fire Care and Maintenance Your phone is a pr...

Page 206: ...tergents to clean the phone Wipe it with a soft cloth slightly dampened in a mild soap and water solution Do not paint the phone Paint can clog the device s moving parts and prevent proper operation Do not put the phone in or on heating devices such as a microwave oven a stove or a radiator The phone may explode when overheated Use only the supplied or an approved replacement antenna Unauthorized ...

Page 207: ...Section 15 Warranty Information 207 Section 15 Section 15 Warranty Information Topics Covered Standard Limited Warranty ...

Page 208: ...Leather Case Pouch 90 Days Holster 90 Days Other Phone Accessories 1 Year WhatisNotCovered ThisLimitedWarrantyisconditioned upon proper use of Product by Purchaser This Limited Warranty does not cover a defects or damage resulting from accident misuse abuse neglect unusual physical electrical or electromechanical stress or modification of any part of Product including antenna or cosmetic damage b ...

Page 209: ... has been used in equipment other than the SAMSUNG phone for which it is specified What are SAMSUNG s Obligations During the applicable warranty period SAMSUNG will repair or replace at SAMSUNG s sole option without charge to Purchaser any defective component part of Product To obtain service under this Limited Warranty Purchaser must return Product to an authorized phone service facility in an ad...

Page 210: ...urnofsuch Product WHAT ARE THE LIMITS ON SAMSUNG S WARRANTY LIABILITY EXCEPTASSETFORTHINTHEEXPRESSWARRANTY CONTAINED HEREIN PURCHASER TAKES THE PRODUCT AS IS AND SAMSUNG MAKES NO WARRANTY OR REPRESENTATION AND THERE ARE NO CONDITIONS EXPRESS OR IMPLIED STATUTORY OR OTHERWISE OF ANY KIND WHATSOEVER WITH RESPECT TO THE PRODUCT INCLUDING BUT NOT LIMITED TO THE MERCHANTABILITY OF THE PRODUCT OR ITS FI...

Page 211: ...WARRANTYLASTS SO THE ABOVE LIMITATION MAY NOT APPLY TO YOU IN ADDITION SAMSUNG SHALL NOT BE LIABLE FOR ANY DAMAGES OF ANY KIND RESULTINGFROMTHEPURCHASE USE ORMISUSE OF OR INABILITY TO USE THE PRODUCT OR ARISINGDIRECTLYORINDIRECTLYFROMTHEUSE OR LOSS OF USE OF THE PRODUCT OR FROM THE BREACHOFTHEEXPRESSWARRANTY INCLUDING INCIDENTAL SPECIAL CONSEQUENTIAL OR SIMILAR DAMAGES OR LOSS OF ANTICIPATED PROFI...

Page 212: ...E REMAINDER OF THIS LIMITED WARRANTY WHICH PURCHASER ACKNOWLEDGES IS AND WILL ALWAYS BE CONSTRUED TO BE LIMITED BY ITS TERMS OR AS LIMITED AS THE LAW PERMITS THE PARTIES UNDERSTAND THAT THE PURCHASERMAYUSETHIRD PARTYSOFTWAREOR EQUIPMENT IN CONJUNCTION WITH THE PRODUCT SAMSUNG MAKES NO WARRANTIES OR REPRESENTATIONS AND THERE ARE NO CONDITIONS EXPRESS OR IMPLIED STATUTORY OR OTHERWISE AS TO THE QUAL...

Page 213: ...anty The agents employees distributors and dealers of SAMSUNG are not authorized to make modifications to this Limited Warranty or make additional warranties binding on SAMSUNG Accordingly additional statements such as dealer advertising or presentation whether oral or written do not constitute warranties by SAMSUNG and should not be relied upon Samsung Telecommunications America L P 1301 East Loo...

Page 214: ...214 Section 15 ...

Page 215: ...29 indicator 30 removing 28 strength icon 25 C Calculator 147 Call another country from U S 32 Call Answer 172 Call End 172 Call Functions Call Logs 34 Making a Call 32 Phone Modes 39 Roaming 42 Call logs erasing 37 Call timers 38 Calls menu options 35 viewing 35 CDMA only features call another country from U S 32 Charger travel adapter 29 Clear key 22 Clock Set 174 Contacts List 73 74 Add pauses ...

Page 216: ...s 24 E End key 23 Entering Text 63 ABC Mode 68 Entering Numbers 70 Entering Symbols 69 Using T9 Mode 66 G Gallery 121 Alerts 128 Animation 123 Banner 124 Gallery menu 122 Key Beep 127 Menu Style 123 Power On Off 129 Ringer Type 126 Roam Ringer 130 VibeTonz 125 Volume VibeTonz 125 Getting Started 9 Activating Your Phone 10 Understanding this User Manual 13 Voicemail 12 GPS icons 26 H Health and Saf...

Page 217: ... Retrieving New Messag es 99 Send Text Messages 96 Mobile Web 115 Launch Mobile Web 116 Mobile Web Operations 116 N Navigation key 23 Navigation key shortcuts 53 New message icon 24 No service indicator 24 Notes and tips 13 P Phone Info Phone Number 178 Version 178 Phone Mode Idle 39 Silent 40 Speaker 41 Text entry 39 VibeTonz 40 Phone Modes 39 Phone Number 178 Power On Off tone 129 Powering off 1...

Page 218: ...mode 40 Silent mode icon 26 Speaker Mode 41 Standard Limited Warran ty 208 Standby mode 39 T Text Entry mode 39 To Do List 138 Tools 131 Alarm Clock 142 Calculator 147 Count Down 144 Jump To Date 137 Memo Pad 140 Scheduler 136 To Do List 138 Today 132 Voice Kit 147 Voice Setup 151 World Time 146 Travel adapter 29 Turn your phone off 11 Turn your phone on 10 U Understanding Your Con tacts List 73 U...

Page 219: ...44 commands 44 contacts 49 digit dial 45 my phone 50 voice memo 48 Voice Kit 44 147 Voice mail listening to 12 Voice Memo Erase 150 Erase All 151 Record 147 Review 149 Voice Setup 151 Set Active 151 Set Digits Adapt Digits 152 Voicemail icon 25 W Warranty Information 207 World Time 146 ...

Page 220: ...220 ...

Reviews: