background image

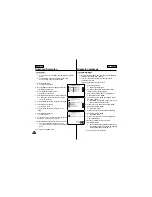
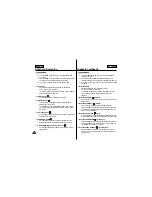
PILOTO DE TESTIGO DE GRABACIÓN

La función de piloto de grabación (REC LAMP) opera sólo en
la modalidad CAMERA.

El piloto de grabación permite saber si la videocámara está
grabando y además sirve para indicar la cuenta atrás cuando
se usa el temporizador.

El indicador de GRABACIÓN  se puede activar o desactivar
durante la grabación.

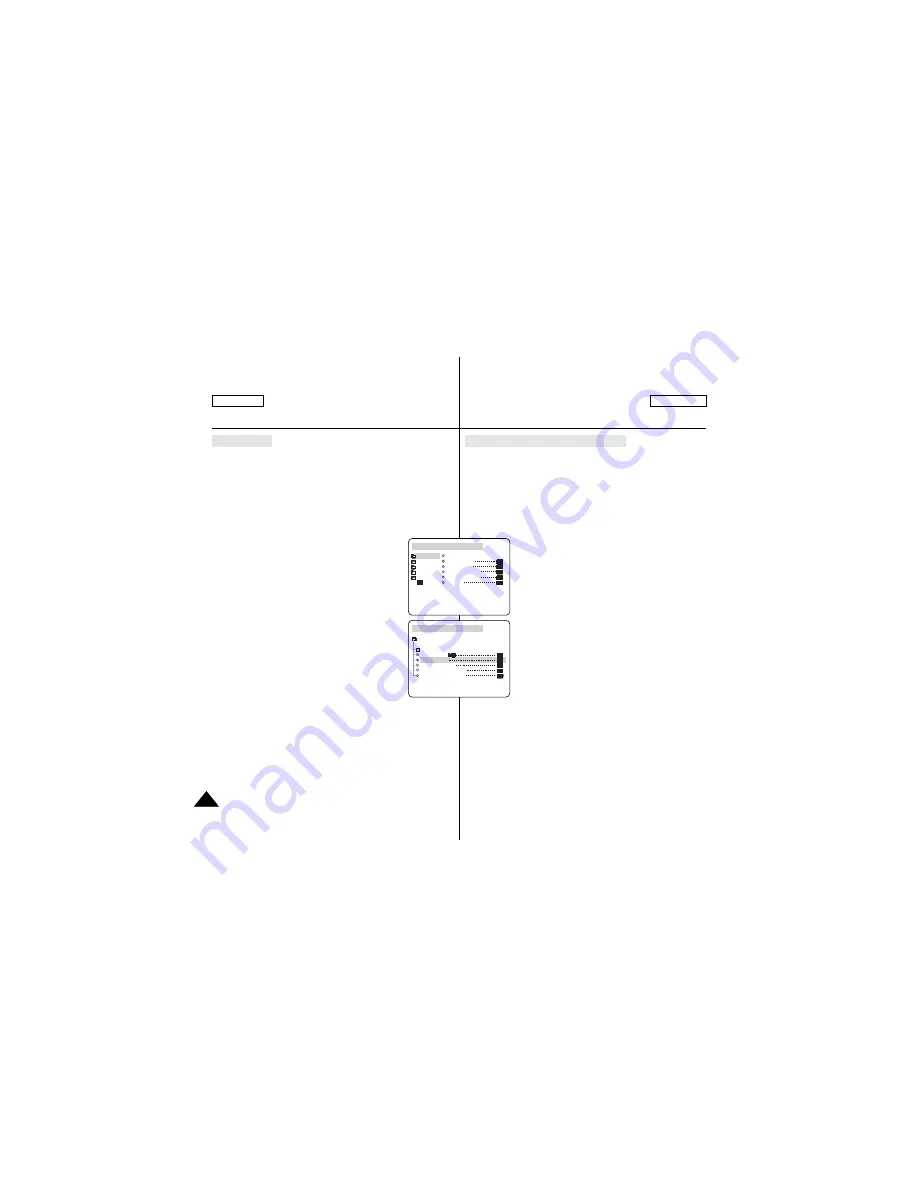
1. Pulse el botón MENÚ.

Aparece la lista del menú.

2. Desplace el SELECTOR MENÚ hasta resaltar

INITIAL (inicial) y después púlselo.

3. Elija la opción REC LAMP en el submenú por

medio del SELECTOR MENÚ.

4. Pulse el SELECTOR MENÚ para activar o para

desactivar la función REC LAMP.

El menú REC LAMP cambia alternativamente
entre activado/desactivado (ON/OFF).

Si desea apagar el indicador, desactive la
opción REC LAMP (OFF).

5. Para salir, pulse el botón MENÚ.

38

38

ENGLISH

ESPAÑOL

Advanced Recording

Grabación avanzada

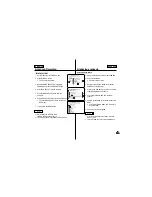
REC LAMP

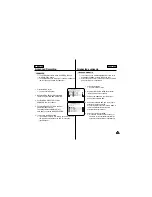
The REC LAMP function works in CAMERA mode only.

The REC LAMP lets you know that the camcorder is
recording or counting down for the self-timer.

You can turn the REC indicator on or off during recording.

1. Press the MENU button.

The menu list will appear.

2. Move the MENU SELECTOR to highlight 

INITIAL and push the MENU SELECTOR.

3. Use the MENU SELECTOR to select 

REC LAMP from the submenu.

4. To turn the REC indicator ON or OFF during

recording, push the MENU SELECTOR.

The REC LAMP menu is changed to ON or
OFF respectively.

If you want to turn off the indicator, set the
REC LAMP to OFF.

5. To exit, press the MENU button.

CAM  MODE

INITIAL

CLOCK  SET
REMOCON
REC LAMP
BEEP SOUND

CAMERA
A/V
MEMORY
VIEWER

SHUT.SOUND
DEMO

CAM  MODE

INITIAL SET

CLOCK  SET
REMOCON
REC LAMP
BEEP SOUND
SHUTTER SOUND
DEMONSTRATION

Summary of Contents for SC-D590

Page 1: ...rence Manual de instrucciones Antes de emplear la cámara lea detenidamente este manual de instrucciones y consérvelo para consultas posteriores AF Auto Focus CCD Charge Coupled Device LCD Liquid Crystal Display AF Autofoco CCD Dispositivo acoplado por carga LCD Visualización en cristal líquido SCD530 D590 SCD530T D590T ELECTRONICS Videocámara digital SCD530 D590 SCD530T D590T ...

Page 2: ...mara 11 Preparación 19 Grabación BÁSICA 27 Notas referentes a la rotación de la pantalla LCD 6 Notas referentes a la condensación de humedad 7 Notas referentes a la videocámara 7 Notas referentes a la batería 8 Notas referentes a la limpieza de los cabezales de vídeo 8 Notas referentes al OBJETIVO 9 Notas referentes al visor 9 Notas referentes a la grabación o a la reproducción usando la LCD 9 Not...

Page 3: ...abación empleando la pantalla LCD 29 Grabación empleando el visor 29 Ajuste de la LCD 30 Uso del visor 31 Ajuste del foco 31 Reproducción en la LCD de una cinta grabada 32 Ajuste de la LCD durante la REPRODUCCIÓN 33 Control de sonido desde el altavoz 33 Uso de las distintas funciones 34 Ajustes del menú 34 Ajuste de la videocámara en la modalidad CAMERA cámara o en la PLAYER reproducción y en la m...

Page 4: ...ondo BLC 64 Aparición y desaparición gradual de la imagen Fundido 65 Comienzo de la grabación 65 Detención de la grabación usando FADE IN FADE OUT 65 Mezcla de audio 66 Grabación de sonido adicional 66 Reproducción de una cinta con audio mezclado 67 Grabación de imágenes fotográficas 68 Búsqueda de una fotografía 68 GRABACIÓN NOCTURNA 69 Ajuste del temporizador 70 Técnicas diversas de grabación 71...

Page 5: ... inteligente 102 Problemas y soluciones 104 Especificaciones técnicas 107 ÍNDICE ALFABÉTICO 108 Introducción y extracción del Memory Stick 87 Introducción del Memory Stick 87 Extracción del Memory Stick 87 Estructura de carpetas y archivos del Memory Stick 88 Formato de la imagen 88 Selección de la calidad de la imagen 89 Selección de la calidad de la imagen 89 Número de imágenes del Memory Stick ...

Page 6: ...Grabación con la LCD cerrada ENGLISH ESPAÑOL Notes and Safety Instructions Notas e instrucciones de seguridad 6 6 Notes regarding the rotation of the LCD screen Please rotate the LCD screen carefully as illustrated Over rotation may cause damage to the inside of the hinge that connects the LCD screen to the Camcorder 1 LCD screen closed 2 Standard recording using the LCD screen 3 Recording when lo...

Page 7: ...garding COPYRIGHT Es probable que los programas de televisión las cintas de vídeo los DVD las películas y otros materiales audiovisuales estén tengan registrados los derechos de reproducción La copia no autorizada de material protegido por dichos derechos puede quebrantar la ley 1 Una subida repentina de la temperatura puede producir condensación en el interior de la videocámara Por ejemplo Cuando...

Page 8: ...ieza de tipo húmedo pues los cabezales se podrían estropear Notas referentes a la batería Notas referentes a la limpieza de los cabezales de vídeo ENGLISH ESPAÑOL Notes and Safety Instructions Notas e instrucciones de seguridad 8 8 Make sure that the battery pack is fully charged before starting to record To preserve battery power keep your camcorder turned off when you are not operating it If you...

Page 9: ...referentes al visor Notas referentes a la grabación o a la reproducción usando la LCD Notas referentes a la empuñadura Notes and Safety Instructions ESPAÑOL Notas e instrucciones de seguridad ENGLISH 9 9 Do not film with the camera lens pointing directly at the sun Direct sunlight can damage the CCD Charge Coupled Device 1 Do not position the camcorder such that the viewfinder is pointing towards ...

Page 10: ...lent type Precautions regarding the Lithium battery 1 La pila de litio incorporada de la videocámara mantiene en funcionamiento el reloj y los ajustes programados aun cuando se haya quitado la batería o el adaptador de CA 2 La pila de litio de la videocámara dura aproximadamente una semana bajo condiciones normales de funcionamiento 3 Cuando la pila de litio esté descargada al activar la función F...

Page 11: ...a digital de datos mediante el IEEE1394 Con la incorporación del puerto de transferencia de datos a alta velocidad IEEE1394 i LINK el i LINK es un sistema de protocolo de transferencia de datos en serie e intercomunicación empleado para transmitir datos DV se pueden transferir imágenes de vídeo o fijas al ordenador De este modo es posible producir o editar imágenes Interfaz USB para la transferenc...

Page 12: ...ries are supplied with your digital video camera Basic Accessories 1 Lithium Ion Battery pack 2 AC Power Adapter 3 AC Cord 4 Multi AV cable AUDIO VIDEO S VIDEO 5 Instruction Book 6 Lithium battery for Remote Control TYPE CR2025 1 EA 7 Remote Control 8 Remocon Strap 9 Hand Grip 10 Ring Hood 11 Neck Strap 12 USB cable 13 Software CD SCD530 D530T DVC Media 3 0 SCD590 D590T DVC Media 4 0 14 USB Audio ...

Page 13: ...l y lateral izquierda Getting to Know Your Camcorder ESPAÑOL Introducción a la videocámara ENGLISH 13 13 1 Lens 2 Lens Cover 3 Remote Sensor 4 Hand grip see page 24 5 LCD monitor 6 Battery Pack see page 20 7 REC Lamp see page 38 8 Charging Indicator 9 Earphone Jack 10 Multi AV Jack see page 72 11 DC Jack see page 19 12 Infrared light see page 69 1 Lens 3 Remote Sensor 12 Infrared light 7 REC Lamp ...

Page 14: ... ESPAÑOL Getting to Know Your Camcorder Introducción a la videocámara 14 14 1 SPEAKER 2 External MIC in 3 Custom Q button see page 62 4 Easy Q button see page 61 5 Photo button see page 68 6 Zoom lever see page 45 7 NITE PIX switch see page 69 8 Internal MIC 9 Smart Shoe see page 102 10 MEMORY STICK TAPE select switch SCD590 D590T only 11 Memory Stick slot SCD590 D590T only 12 DV in out see pages ...

Page 15: ... RESET 1 LCD open 8 Power indicator 9 Viewfinder 7 Power switch 6 START STOP button 5 Function Buttons 4 Battery Release button 11 TAPE Eject Switch 1 LCD abierta 2 Botón MENÚ ver pág 34 3 Selector del MENÚ SELECC MENÚ VOLUMEN ver pág 34 4 Botón de liberar la batería ver pág 99 5 Botones de las funciones 6 Botón START STOP inicio parada 7 Interruptor ver pág 27 8 Indicador de potencia 9 Visor ver ...

Page 16: ...MERA mode F ADV PLAYER mode 11 Zoom WIDE CAMERA mode F ADV PLAYER mode 10 ZERO MEMORY 9 FF FPS 8 SELF TIMER CAMERA mode SLOW PLAYER mode Remote control Mando a distancia 1 START STOP inicio parada 2 PHOTO Fotografía 3 STILL imagen fija 4 REW RPS rebobinado 5 PLAY reproducción 6 AUDIO DUBBING mezcla de audio ver pág 66 7 STOP parada 8 SELF TIMER temporizador modalidad CAMERA ver pág 70 SLOW cámara ...

Page 17: ...antalla en las modalidades CAMERA y PLAYER Getting to Know Your Camcorder ESPAÑOL Introducción a la videocámara ENGLISH 1 Battery level see page 22 2 Custom or Easy mode see pages 61 62 3 DSE Digital Special Effects mode see page 48 4 Program AE see page 42 5 BLC Back Light Compensation see page 64 6 White Balance mode see page 44 7 Manual focus see page 63 8 Shutter speed and EXPOSURE see page 60...

Page 18: ...modalidad CAMERA M REC OSD Presentación en pantalla en las modalidades M REC y M PLAY ENGLISH ESPAÑOL Getting to Know Your Camcorder Introducción a la videocámara 18 18 These items are available on model SCD590 D590T only 30 Folder number file number see page 88 31 Image counter Current still image Total number of recordable still images 32 MEMORY STICK indicator 33 Image recording and loading ind...

Page 19: ...fica digital DSC ajuste el interruptor de modalidad en la posición MEMORY STICK Conexión a una fuente de energía There are two types of power source that can be connected to your camcorder The AC Power Adapter and AC cord used for indoor recording The Battery Pack used for outdoor recording To use the AC Power adapter and DC Cable 1 Connect the AC Power adapter to the AC cord 2 Connect the AC cord...

Page 20: ... the Zoom function is used It is recommended that you have several batteries available Charging the Lithium Ion Battery Pack 1 Attach the battery pack to the camcorder 2 Connect the AC Power adapter to an AC cord and connect the AC cord to a wall socket 3 Connect the DC cable to the DC jack socket on the camcorder 4 Turn the Camera power switch to off and the charging indicator will start to flash...

Page 21: ...ery Pack ESPAÑOL Preparation Preparación ENGLISH 21 21 Tabla de tiempo de grabación según el modelo y el tipo de batería Si cierra la pantalla LCD ésta se apaga y el visor en color CVF se enciende automáticamente Los tiempos de grabación continuada que se dan en la tabla que aparece más abajo son aproximados El tiempo real de grabación depende del uso de la videocámara Notas La batería debe recarg...

Page 22: ...empo restante de carga de la batería puede diferir de los tiempos aproximados que se dan en este manual ENGLISH ESPAÑOL Preparation Preparación 22 22 Battery level display The battery level display indicates the amount of power remaining in the battery pack a Fully charged b 20 40 used c 40 80 used d 80 95 used e Completely used flickers The camcorder will turn off soon change the battery as soon ...

Page 23: ...polvo c Guarde las cintas en posición vertical y manténgalas alejadas de la acción directa del sol d No permita que las cintas se golpeen o se caigan al suelo Introducción y expulsión del casete When inserting a tape or closing a cassette holder do not apply excessive force This may cause a malfunction Do not use any tapes other than Mini DV CASSETTES 1 Connect a power source and slide the TAPE EJ...

Page 24: ...ámara 3 Retire la empuñadura Ajuste de la empuñadura ESPAÑOL Preparación ENGLISH 24 24 Preparation It is very important to ensure that the Hand Grip has been correctly adjusted before you begin your recording The hand grip enables you to Hold the camcorder in a stable comfortable position Press the Zoom and START STOP button without having to change the position of your hand Attaching the Hand Gri...

Page 25: ...e Asegúrese de poner el filtro horizontalmente en la videocámara Sujeción del filtro de luz parásita ESPAÑOL Preparation Preparación ENGLISH 25 25 Ejecting the tape when the Hand Grip is attached 1 Turn the Grip Cover down 2 Press the holder lever down to release the holder 3 Stand the screw lever for the unlocking and loose the screw a little 4 Turn the camcorder in the direction of the arrow 5 S...

Page 26: ...eocámara agarrándola por la correa del mando a distancia Utilización del mando a distancia ENGLISH ESPAÑOL Preparation Preparación 26 26 Battery Installation for the Remote Control You need to insert or replace the lithium battery when You purchase the camcorder The remote control doesn t work Ensure that you insert the lithium cell correctly following the and markings Be careful not to reverse th...

Page 27: ...lse de nuevo el botón START STOP Aparece en la pantalla la señal STBY Primera grabación Basic Recording ESPAÑOL Grabación básica ENGLISH 27 27 1 Connect a Power source to the camcorder see page 19 A battery pack or a AC power adapter Insert a cassette see page 23 2 Remove the LENS COVER and hook it onto the hand grip 3 Set the power switch to the CAMERA position Open the LCD monitor and make sure ...

Page 28: ...Nota En la modalidad de búsqueda de grabación es posible que la imagen se distorsione y forme una especie de mosaico 28 28 ENGLISH ESPAÑOL Basic Recording Grabación básica When a cassette is loaded and the camcorder is left in the STBY mode for more than 5 minutes without being used it will switch off automatically To use it again push the START STOP button or set the Power switch to OFF and then ...

Page 29: ...iempre que sea posible emplee un trípode Consejos para la grabación estable de imágenes 29 29 ESPAÑOL Basic Recording Grabación básica ENGLISH While recording it is very important to hold the camcorder correctly Fix the LENS cover firmly by clipping it to the hand grip refer to the figure Recording with the LCD monitor 1 Hold the camcorder firmly using the hand grip 2 Place your right elbow agains...

Page 30: ...abación básica Your camcorder is equipped with a 2 5 inch color Liquid Crystal Display LCD screen which enables you to view what you are recording or playing back directly Depending on the conditions under which you are using the camcorder indoors or outdoors for example you can adjust BRIGHT SELECT BRIGHT ADJUST COLOR ADJUST 1 Set the POWER switch to CAMERA position In the PLAYER mode you may onl...

Page 31: ...imagen emplee el botón de ajuste de foco del VISOR ver figura Uso del VISOR 31 31 ESPAÑOL Basic Recording Grabación básica ENGLISH 8 Push the MENU SELECTOR again You may select NORMAL SUPER or BACK LIGHT SCD530 D590 only in the BRIGHT SELECT feature and push the MENU SELECTOR to save the setting When you use the LCD BACK LIGHT mode in a dark place or indoor it s difficult for you to view the image...

Page 32: ...dad de reproducción dispone de diversas funciones ver pág 74 Reproducción en la LCD de una cinta grabada 32 32 ENGLISH ESPAÑOL Basic Recording Grabación básica You can monitor the playback picture on the LCD monitor Make sure that the battery pack is in place 1 Hold down the Power switch tab and turn it to the PLAYER position The Function button indicator light up blue The confirmation sound beeps...

Page 33: ...a cuando se conectan unos auriculares Control del sonido desde el altavoz 33 33 ESPAÑOL Basic Recording Grabación básica ENGLISH Adjusting the LCD during PLAY You can adjust the LCD during playback The adjustment method is the same procedure as used in CAMERA mode see page 30 The Speaker works in PLAYER mode only When you use the LCD screen for playback you can hear the recorded sound from the bui...

Page 34: ...g the MENU button Use of various Functions SUBMENÚ MODALIDAD MENÚ AJUSTE DEL RELOJ MANDO A DISTANCIA PILOTO DE GRABACIÓN SEÑAL ACÚSTICA SONIDO DEL OBTURADOR DEMOSTRACIÓN PROGRAMA AE EQUILIBRIO DEL BLANCO ZOOM DIGITAL EIS SELECCIÓN DSE SELECCIÓN FLASH PERSONALIZAR Q MODALIDAD GRABACIÓN SELECCIÓN DE ENTRADA BÚSQUEDA DE FOTO COPIA DE FOTO MODALIDAD AUDIO SELECCIÓN AUDIO ELIM RUIDO VIENTO CALIDAD MARC...

Page 35: ...O O O O O O O O O O O q NITE PIX Digital special effects EIS D ZOOM FOTO Efectos especiales digitales GRABACIÓN NOCTURNA Funciones digitales Modalidad Requerida Modalidad de funcionamiento EIS D ZOOM FOTO O O O O O O O O O O O O O O O q GRABAC IÓN NOC TURNA Efectos especiales digitales O La modalidad requerida estará activa en esta modalidad de funcionamiento No es posible modificar la modalidad r...

Page 36: ... ESPAÑOL Advanced Recording Grabación avanzada CLOCK SET CLOCK setup works in CAMERA PLAYER M REC and M PLAY modes The DATE TIME is automatically recorded onto a tape Before recording please set the DATE TIME 1 Press the MENU button The menu list will appear 2 Move the MENU SELECTOR to highlight INITIAL and push the MENU SELECTOR 3 Use the MENU SELECTOR to select CLOCK SET from the submenu 4 Push ...

Page 37: ...y desaparecerá de la pantalla LCD 37 37 ESPAÑOL Advanced Recording Grabación avanzada ENGLISH REMOCON The REMOCON function works in CAMERA PLAYER M REC M PLAY modes The REMOCON option allows you to enable or disable the remote control for use with the camcorder 1 Press the MENU button The menu list will appear 2 Move the MENU SELECTOR to highlight INITIAL and push the MENU SELECTOR 3 Use the MENU ...

Page 38: ... opción REC LAMP OFF 5 Para salir pulse el botón MENÚ 38 38 ENGLISH ESPAÑOL Advanced Recording Grabación avanzada REC LAMP The REC LAMP function works in CAMERA mode only The REC LAMP lets you know that the camcorder is recording or counting down for the self timer You can turn the REC indicator on or off during recording 1 Press the MENU button The menu list will appear 2 Move the MENU SELECTOR t...

Page 39: ...te 5 Para salir pulse el botón MENÚ 39 39 ESPAÑOL Advanced Recording Grabación avanzada ENGLISH BEEP SOUND The BEEP SOUND function works in CAMERA PLAYER M REC M PLAY modes Use the MENU to setup the BEEP SOUND function Select whether or not you want to hear a beep sound whenever you change a setup value 1 Press the MENU button The menu list will appear 2 Move the MENU SELECTOR to highlight INITIAL...

Page 40: ...opción cambiará alternativamente entre activada desactivada ON OFF 7 Para salir pulse el botón MENÚ 40 40 ENGLISH ESPAÑOL Advanced Recording Grabación avanzada SHUTTER SOUND SCD590 D590T only You can hear SHUTTER SOUND only when the PHOTO function is working Determines whether or not you wish to hear a SHUTTER SOUND when using the DSC feature 1 Set the mode switch to MEMORY STICK 2 Set the power s...

Page 41: ...a la función de demostración no opera 41 41 ESPAÑOL Advanced Recording Grabación avanzada ENGLISH DEMONSTRATION Demonstration automatically shows you the major functions that are included with your camcorder so that you may use them more easily The DEMONSTRATION function may only be used in the CAMERA mode without a tape inserted in the camcorder The demonstration operates repeatedly until the DEM...
Page 42: ... PROGRAMA AE La función PROGRAM AE sólo opera en las modalidades CAMERA o M REC Esta función permite ajustar la velocidad y la apertura del obturador para que se acomoden a las condiciones de filmación Con ella se puede controlar de manera creativa la profundidad de campo Modalidad AUTO Equilibrio automático entre el objeto y el fondo Se usa en condiciones normales La velocidad del obturador se aj...

Page 43: ... Pulse el botón MENÚ Aparece la lista del menú 2 Desplace el SELECTOR MENÚ hasta resaltar CAMERA y después púlselo 3 Elija la opción PROGRAM AE en el submenú 4 Pulse el SELECTOR MENÚ para acceder al submenú 5 Elija la modalidad PROGRAM AE mediante el SELECTOR MENÚ Pulse el SELECTOR MENÚ para confirmar la modalidad PROGRAM AE 6 Para salir pulse el botón MENÚ Notas Si la función NITE PIX está activa...

Page 44: ...OM 400x EIS DSE SELECT CAMERA A V MEMORY VIEWER FLASH SELECT CUSTOM CAM MODE AUTO HOLD WHT BALANCE INDOOR OUTDOOR CAMERA SET EQUILIBRIO DEL BLANCO La función de equilibrio del blanco WHT BALANCE sólo opera en las modalidades CAMERA o M REC Ésta es una función de grabación que conserva los colores particulares de los objetos independientemente de las condiciones de grabación Se debe elegir la modal...

Page 45: ...ocar un objeto que esté a menos de un metro 3 2 pies del objetivo y en la posición de GRAN ANGULAR el objeto puede estar a 10mm unas 0 5 pulgadas 45 45 ESPAÑOL Advanced Recording Grabación avanzada ENGLISH Zooming In and Out with DIGITAL ZOOM Zoom works in CAMERA M REC mode only Zooming In and Out Zooming is a recording technique that lets you change the size of the subject in a scene For more pro...

Page 46: ... botón MENÚ 46 46 ENGLISH ESPAÑOL Advanced Recording Grabación avanzada Digital Zoom More than 10x zoom is achieved digitally The picture quality may deteriorate depending on how much you zoom in on the subject We recommend that you use the EIS feature with DIGITAL ZOOM for picture stability see page 47 1 Set the camcorder to CAMERA or M REC mode 2 Press the MENU button The menu list will appear 3...

Page 47: ...vanzada ENGLISH EIS Electronic Image Stabilizer The EIS function works in CAMERA M REC mode only EIS Electronic Image Stabilizer is a function that compensates for any shaking or hand movement while holding the camcorder within reasonable limits It provides more stable pictures when Recording a small object close up Recording and walking at the same time Recording through the window of a vehicle 1...

Page 48: ...a conseguir una imagen de aspecto cinematográfico i Modalidad MAKE UP maquillaje Esta modalidad permite colorear las imágenes con los colores rojo verde azul o amarillo 48 48 ENGLISH ESPAÑOL Advanced Recording Grabación avanzada DSE Digital Special Effects SELECT The DSE function works in CAMERA and M REC mode only The digital effects enable you to give a creative look to your recording by adding ...

Page 49: ...rding Grabación avanzada ENGLISH Selecting an effect 1 Set the camcorder to CAMERA mode 2 Press the MENU button The menu list will appear 3 Move the MENU SELECTOR to highlight CAMERA and push the MENU SELECTOR 4 Select DSE SELECT from the submenu 5 Push the MENU SELECTOR to enter the sub menu 6 Using MENU SELECTOR select the DSE mode Push the MENU SELECTOR to confirm the DSE mode 7 To exit press t...

Page 50: ...RAM AE WHT BALANCE D ZOOM 400x EIS DSE SELECT CAMERA A V MEMORY VIEWER FLASH SELECT CUSTOM CAM MODE PROGRAM AE WHT BALANCE D ZOOM EIS DSE SELECT CAMERA SET CUSTOM FLASH SELECT 400x FLASH La función FLASH SELECT selección del flash opera en las modalidades CAMERA y M REC Para usar la función FLASH SELECT coloque la lámpara de vídeo flash VL S1FL opcional en la zapata inteligente de la videocámara y...

Page 51: ...ding Grabación avanzada ENGLISH CUSTOM Q You can customize settings and save them for future use The CUSTOM Q function operates in the CAMERA and M REC mode If you want to use the CUSTOM Q function see page 62 correctly set the status of each item as desired before using the CUSTOM Q function You can set and store the following items PROGRAM AE WHT BALANCE D ZOOM EIS DSE SELECT 1 Set the power swi...

Page 52: ...modalidad SP la calidad de las imágenes y el sonido será mejor 52 52 ENGLISH ESPAÑOL Advanced Recording Grabación avanzada REC MODE The REC MODE function works in both CAMERA and PLAYER modes This camcorder records and plays back in SP standard play mode and in LP long play mode SP standard play This mode permits 60 minutes of recording time with a DVM60 tape LP long play This mode permits 90 minu...

Page 53: ...ulse el botón MENÚ 53 53 ESPAÑOL Advanced Recording Grabación avanzada ENGLISH LINE IN SELECT The LINE IN SELECT function works in PLAYER mode You can select the input signal VIDEO or S VIDEO when you want to record in PLAYER mode see page 77 1 Set the camcorder to PLAYER mode 2 Press the MENU button The menu list will appear 3 Move the MENU SELECTOR to highlight A V and push the MENU SELECTOR 4 S...

Page 54: ... MENÚ 54 54 ENGLISH ESPAÑOL Advanced Recording Grabación avanzada AUDIO MODE The AUDIO MODE function works in CAMERA and PLAYER modes This camcorder can record sound on a tape in two audio modes 12bit You can record two 12bit stereo sound tracks The original stereo sound can be recorded onto the MAIN SOUND1 track Additional stereo sound can be dubbed onto the SUB SOUND2 track 16bit You can record ...

Page 55: ... con viento por ejemplo en la playa o cerca de edificios 55 55 ESPAÑOL Advanced Recording Grabación avanzada ENGLISH WIND CUT The WIND CUT function works in CAMERA and PLAYER modes The WIND CUT function minimizes wind noise or other noise while recording When the wind cut is on some low sounds are eliminated along with the sound of the wind 1 Set the camcorder to CAMERA mode 2 Press the MENU butto...

Page 56: ...deberá ajustar el reloj Consulte la sección AJUSTE DEL RELOJ en la página 36 56 56 ENGLISH ESPAÑOL Advanced Recording Grabación avanzada DATE TIME The DATE TIME function works in CAMERA PLAYER M REC and M PLAY modes The date and time are automatically recorded on a special data area of the tape 1 Press the MENU button The menu list will appear 2 Move the MENU SELECTOR to highlight VIEWER and push ...

Page 57: ...el SELECTOR MENÚ la opción cambiará alternativamente entre ON y OFF 5 Para salir pulse el botón MENÚ MONITOR 57 57 ESPAÑOL Advanced Recording Grabación avanzada ENGLISH The DISPLAY function works in CAMERA PLAYER M REC M PLAY modes You can select the output path of the OSD On Screen Display OFF The OSD appears in the LCD screen CVF only In CAMERA mode The STBY REC EASY Q and CUSTOM Q appear even w...

Page 58: ...002 MIRROR El menú rápido opera en las modalidades CAMERA y M REC Esta función se emplea para hacer los ajustes de la videocámara usando simplemente el botón SELECTOR MENÚ Esta función resulta muy útil cuando hay que hacer ajustes sencillos ya que no se tiene que acceder a los menús ni a los submenús FECHA HORA Al seleccionar la opción FECHA HORA y pulsar el SELECTOR MENÚ aparecerá la secuencia FE...

Page 59: ...o Si desea usar la función de menú rápido tendrá que salir de la modalidad M FOCUS 59 59 ESPAÑOL Advanced Recording Grabación avanzada ENGLISH FOCUS see page 63 Each time you select FOCUS and press the MENU SELECTOR it will be displayed in the order of M FOCUS AUTO SHUTTER SPEED EXPOSURE You can set values for SHUTTER SPEED and EXPOSURE by selecting icon and pressing the MENU SELECTOR For more inf...

Page 60: ...TER SPEED y exposición EXPOSURE se pueden activar en las modalidades CAMERA y M REC Los valores de estas funciones sólo se pueden ajustar en el menú rápido Las funciones VELOCIDAD DEL OBTURADOR y EXPOSICIÓN se activan y se desactivan automáticamente 1 Ajuste la videocámara en la modalidad CAMERA 2 Desplace el SELECTOR MENÚ hasta que se active el icono y después púlselo Aparecerá una pantalla en la...

Page 61: ...eocámara y por lo tanto deberán ajustarse de nuevo al reemplazarla Modalidad SENCILLA para principiantes 61 61 ESPAÑOL Advanced Recording Grabación avanzada ENGLISH The EASY mode allows a beginner to make good recordings easily The EASY mode operates in CAMERA and M REC mode 1 Set the power switch to CAMERA mode 2 By pressing the EASY Q button all functions on the camera will be set to off and the...

Page 62: ...tivar la función de grabación nocturna la función de personalización no opera Modalidad de PERSONALIZACIÓN 62 62 ENGLISH ESPAÑOL Advanced Recording Grabación avanzada You can customize settings and save them for future use The CUSTOM SET function operates in CAMERA and M REC mode only Please set the custom settings before using this function see page 51 1 Set the power switch to CAMERA mode 2 To a...

Page 63: ... aleje un poco la imagen por medio del zoom 4 Para regresar a la función AF enfoque automático pulse de nuevo el SELECTOR MENÚ MF AF Enfoque manual enfoque automático 63 63 ESPAÑOL Advanced Recording Grabación avanzada ENGLISH The MF AF function works in CAMERA and M REC mode In most situations it is better to use the automatic focus feature as it enables you to concentrate on the creative side of...

Page 64: ...ación nocturna la función BLC no opera La función BLC no opera en la modalidad EASY BLC Compensación de la luz de fondo 64 64 ENGLISH ESPAÑOL Advanced Recording Grabación avanzada BLC works in CAMERA M REC mode Back lighting exists when the subject is darker than the background The subject is in front of a window The person to be recorded is wearing white or shiny clothes and is placed against a b...

Page 65: ...ición y desaparición gradual de la imagen Fundido 65 65 ESPAÑOL Advanced Recording Grabación avanzada ENGLISH The FADE function works in CAMERA mode only You can give your recordings a professional look by using special effects such as fading in at the beginning of a sequence or fading out at the end of a sequence To Start Recording 1 Before recording hold down the FADE button The picture and soun...

Page 66: ...ecorded in LP mode or 16 bit mode Mezcla de audio La función de MEZCLA DE AUDIO AUDIO DUBBING sólo opera en la modalidad de PLAYER Se puede añadir un sonido al sonido original de una cinta grabada en la modalidad SP de 12 bits de sonido Puede usar el micrófono incorporado o uno externo u otro equipo de audio El sonido original no se borrará Grabación de sonido adicional 1 Ajuste la videocámara en ...

Page 67: ...ta con audio mezclado 1 Inserte la cinta mezclada y pulse el botón MENÚ 2 Desplace el SELECTOR MENÚ hasta resaltar A V 3 Pulse el SELECTOR MENÚ para acceder al submenú 4 Seleccione AUDIO SELECT en el submenú mediante el SELECTOR MENÚ 5 Pulse el SELECTOR MENÚ para acceder al submenú 6 Seleccione el canal de reproducción de audio mediante el SELECTOR MENÚ Pulse el SELECTOR MENÚ para confirmar el can...

Page 68: ...rding Grabación avanzada PHOTO Image Recording 1 Press the PHOTO button and hold it The still picture appears on the LCD monitor If you do not wish to record release the button and wait for more than 2 seconds 2 Press the PHOTO button once again within 2 seconds after releasing the button The still picture will be recorded for about 6 7 seconds 3 After the PHOTO has been recorded the camcorder ret...

Page 69: ...n manualmente Las siguientes funciones no operan cuando se usa la función NITE PIX PROGRAM AE WHITE BALANCE DSE Exposure Shutter BLC y CUSTOM 69 69 ESPAÑOL Advanced Recording Grabación avanzada ENGLISH NITE PIX The NITE PIX function works in CAMERA or M REC mode The NITE PIX function enables you to record a subject in a dark place 1 Set the power switch to CAMERA mode 2 Slide the NITE PIX switch t...

Page 70: ...es de que empiece a grabar pulse el botón SELF TIMER 4 Cuando desee detener la grabación pulse de nuevo el botón START STOP 70 70 ENGLISH ESPAÑOL Advanced Recording Grabación avanzada Setting the Self Timer Self Record using the Remote Control When you use the Self Timer function on the remote control the recording begins automatically in 10 seconds 1 Set the camcorder to CAMERA mode 2 Press the S...

Page 71: ...esulta muy útil Técnicas diversas de grabación 71 71 ESPAÑOL Advanced Recording Grabación avanzada ENGLISH In some situations different recording techniques may be required for more dramatic results Note Please rotate the LCD screen carefully as excessive rotation may cause damage to the inside of the hinge that connects the LCD screen to the Camcorder 1 General recording 2 Downward recording Maki...

Page 72: ...r o del videograbador 4 Reproduzca la cinta Nota Para obtener una calidad mejor de las imágenes y si dispone de un conector S VÍDEO puede usar el cable S VÍDEO Reproducción de una cinta 72 72 ENGLISH ESPAÑOL Playing back a Tape Reproducción de cintas The playback function works in PLAYER mode only Playback on the LCD It is practical to view a tape using the LCD in a car or outdoors Playback on a T...

Page 73: ... conectada a un televisor La modalidad de reproducción SP LP se selecciona de manera automática Conexión a un videograbador 73 73 ESPAÑOL Playing back a Tape Reproducción de cintas ENGLISH You can connect your camcorder to a TV which has no Audio and Video input jacks through a VCR 1 Connect the camcorder and VCR with the Multi AV cable The yellow plug Video The white plug Audio L The red plug Aud...

Page 74: ...en cámara lenta hacia delante Para continuar con la reproducción en cámara lenta hacia delante pulse el botón Para continuar con la reproducción normal pulse el botón PLAY STILL Diferentes funciones de la modalidad PLAYER 74 74 ENGLISH ESPAÑOL Playing back a Tape Reproducción de cintas The PLAY STILL STOP FF REW buttons are located on the camcorder and the Remote Control The F ADV Frame advance SL...

Page 75: ...as en LP que contengan distintas funciones de reproducción El sonido sólo está activo durnate la reproducción normal de cintas Reproducción hacia atrás 75 75 ESPAÑOL Playing back a Tape Reproducción de cintas ENGLISH Frame advance To play back frame by frame Press the F ADV button on the Remote control while in Still mode The F ADV function works in still mode only To resume normal playback press ...

Page 76: ...ordings on the tape The ZERO MEMORY will not operate in DV IN mode ZERO MEMORY La función MEMORIA MEMORY opera en las modalidades CAMERA o PLAYER Esta función permite marcar un punto de la cinta al que quiera regresar después para ver la grabación 1 Durante la grabación o la reproducción de una cinta pulse el botón ZERO MEMORY MEMORIA CERO del mando a distancia en el punto al que quiera regresar E...

Page 77: ...de nuevo el botón START STOP 8 Para detener la grabación pulse el botón STOP Grabación en la modalidad PLAYER 77 77 ESPAÑOL Recording in PLAYER mode Grabación en la modalidad PLAYER ENGLISH You can use this camcorder as a recorder You can record a tape from VCR or TV if the TV or other device has audio video outputs 1 Connect the camcorder and VCR or TV with the Multi AV cable 2 Set the power swit...

Page 78: ...ing IEEE1394 i LINK DV standard data connections Conexión a un aparato DV Conexión a otros productos DV estándar Una conexión estándar DV es muy sencilla Si el aparato dispone de un puerto DV es posible transmitir datos conectando la videocámara al puerto DV del aparato por medio de un cable apropiado Atención existen dos tipos de puertos DV de 4 y de 6 patillas El terminal de esta videocámara es ...

Page 79: ...osible que las imágenes que aparecen en el monitor se vean irregulares No obstante esto no afecta las imágenes que se graben 79 79 ESPAÑOL IEEE 1394 Data Transfer Transferencia de datos IEEE 1394 ENGLISH System requirements CPU faster Intel Pentium III 450MHz compatible Operating system Windows 98SE ME Mac OS Main memory more than 64 MB RAM IEEE1394 add on card or built in IEEE1394 card Recording ...

Page 80: ...oration Windows es una marca registrada de Microsoft Corporation Todas las demás marcas y nombres pertenecen a sus respectivos propietarios 80 80 ENGLISH ESPAÑOL USB interface Interfaz USB Transferring a Digital Image through a USB Connection You can easily transfer a still image from a camera tape memory to a PC without additional add on cards via a USB connection You can transfer an image to a P...

Page 81: ...as instrucciones de instalación Instalación del programa DVC Media 3 0 81 81 ESPAÑOL USB interface SCD530 D530T only Interfaz USB sólo modelos SCD530 D530T ENGLISH Do not connect the camcorder to PC before installing the program If another camera or scanner is connected please disconnect it in advance This explanation is based on Windows 98SE OS How to install the program 1 The install program aut...

Page 82: ... Reader que también se incluye en el CD El Acrobat Reader es un producto de uso gratuito de Adobe Systems Inc 82 82 ENGLISH ESPAÑOL USB interface SCD530 D530T only Interfaz USB sólo modelos SCD530 D530T 4 The window below displays the folder to install the program The program is installed in the following folder C Programfiles Samsung DVC Media 3 0 Click to change the folder 5 Connect the camcorde...

Page 83: ...de edición Instalación del controlador DVC 4 En la ventana Start haga clic en DVC Driver para continuar con la instalación 83 83 ESPAÑOL USB interface SCD590 D590T only Interfaz USB sólo modelos SCD590 D590T ENGLISH Installing DVC Media 4 0 Program Do not connect the camcorder to PC before installing the program If another camera or scanner is connected please disconnect it in advance This explana...

Page 84: ...ndo el software Acrobat Reader que también se incluye en el CD El Acrobat Reader es un producto de uso gratuito de Adobe Systems Inc 84 84 ENGLISH ESPAÑOL USB interface SCD590 D590T only Interfaz USB sólo modelos SCD590 D590T Install the USB Software DVC media 4 0 4 Repeat steps 1 3 5 When you see the Start window click DVC media 4 0 to continue installation 6 Select a language and click OK 7 When...

Page 85: ...so desconecte del ordenador los otros aparatos USB y vuelva a conectar la videocámara 85 85 ESPAÑOL USB interface Interfaz USB ENGLISH Connecting to a PC 1 Connect a USB cable to the USB port on the PC 2 Connect the other end of the USB cable into the proper terminal on the camcorder USB jack 3 Connect the audio cable to the Line input jack of the PC If the PC has no Line input jack connect the au...

Page 86: ...ivas empresas Además las marcas y no se mencionan en todos los casos en este manual 86 86 ENGLISH ESPAÑOL Digital Still Camera mode SCD590 D590T only Modalidad de cámara fotográfica digital sólo modelos SCD590 D590T Memory Stick The Memory Stick stores and manages still images recorded by the camera Memory Stick Functions Recording still images Viewing still images 3 ways Single Slide show Multi s...

Page 87: ... botones DELETE S SHOW FWD y REV no funcionan en la modalidad M PLAY 87 87 ESPAÑOL Digital Still Camera mode SCD590 D590T only ENGLISH Inserting and removing the Memory Stick Inserting Memory Stick 1 Turn the Power switch to OFF 2 Insert the Memory Stick into the Memory Stick slot located on the camcorder in the direction of the arrow Removing the Memory Stick 1 Turn the Power switch to OFF 2 Remo...

Page 88: ...ruptor de modalidad en MEMORY STICK 2 Ajuste el interruptor de la videocámara en la posición PLAYER 88 88 ENGLISH ESPAÑOL Digital Still Camera mode SCD590 D590T only Structure of folders and files on the Memory Stick The still images that you recorded are saved in JPEG file format on the Memory Stick Each file has a file number and all files are assigned to a folder A file number from DCAM0001 to ...

Page 89: ... Select the image quality 1 Set the mode switch to MEMORY STICK 2 Set the power switch to the CAMERA mode 3 Press the MENU button The menu list will appear 4 Move the MENU SELECTOR to highlight MEMORY 5 Push the MENU SELECTOR to enter the sub menu 6 Move the MENU SELECTOR to highlight QUALITY in the submenu 7 Push the MENU SELECTOR 8 Using the MENU SELECTOR select the image quality Push the MENU S...

Page 90: ...la modalidad M REC 90 90 ENGLISH ESPAÑOL Digital Still Camera mode SCD590 D590T only You cannot record moving pictures onto a Memory Stick Audio cannot be recorded onto the Memory Stick Recording images to a Memory Stick 1 Set the mode switch to MEMORY STICK 2 Set the power switch to CAMERA 3 Press the PHOTO button and hold it If you do not wish to record after releasing the pressure from the butt...

Page 91: ...magen aparece en la pantalla la señal 91 91 ESPAÑOL Digital Still Camera mode SCD590 D590T only ENGLISH Recording an image from a cassette as a still image You can record still image from a cassette onto a Memory Stick If you want to recorded multiple still images from a cassette to a Memory Stick use the COPY function 1 Set the mode switch to TAPE 2 Set the power switch to PLAYER mode 3 Play back...

Page 92: ...ad de cámara fotográfica digital sólo modelos SCD590 D590T Visionado de imágenes fijas Es posible ver las imágenes grabadas en el Memory Stick Hay tres maneras de ver las imágenes Una a una se ven las imágenes cuadro a cuadro Proyección de diapositivas las imágenes pasan automáticamente y en orden consecutivo Visionado simultáneo de varias imágenes se ven seis imágenes a la vez Visionado de imágen...

Page 93: ...e eliminar la imagen marcada pulsando DELETE en los botones de funciones ver pág 97 93 93 ESPAÑOL Digital Still Camera mode SCD590 D590T only ENGLISH To view the Multi Screen 1 Set the mode switch to MEMORY STICK 2 Set the power switch to PLAYER The last recorded image appears 3 Press the PHOTO button to view 6 images on a single screen A selection mark appears under the image Move the MENU SELECT...

Page 94: ...90 D590T only You can copy still images with PHOTO function on a cassette onto a Memory Stick 1 Set the power switch to the PLAYER mode 2 Press the MENU button 3 Move the MENU SELECTOR to highlight A V and push the MENU SELECTOR The submenu will appear 4 Move the MENU SELECTOR to highlight PHOTO COPY and push the MENU SELECTOR All still images that recorded on a cassette will be copied to a Memory...

Page 95: ... número de imágenes guardadas Marcado de imágenes para imprimir 95 95 ESPAÑOL Digital Still Camera mode SCD590 D590T only ENGLISH This camcorder supports the DPOF Digital Print Order Format print format You can automatically print images recorded on a Memory Stick with a printer supporting DPOF There are 2 ways to make a PRINT MARK THIS FILE You can set a print mark on the photo image displayed on...

Page 96: ...l menú pulse el botón MENÚ Protección contra el borrado accidental 96 96 ENGLISH ESPAÑOL Digital Still Camera mode SCD590 D590T only You can protect important images from accidental erasure If you execute FORMAT all images including protected images will be erased 1 Set the mode switch to MEMORY STICK 2 Set the power switch to PLAYER mode The last recorded image appears If there are no recorded im...

Page 97: ...ent image Deleting Still images Modalidad de cámara fotográfica digital sólo modelos SCD590 D590T Es posible borrar imágenes fijas grabadas en el Memory Stick Si desea borrar imágenes protegidas primero tendrá que desactivar la protección de imágenes Una imagen que se ha borrado no se puede recuperar 1 Ajuste el interruptor de modalidad en MEMORY STICK 2 Ajuste el interruptor de la videocámara en ...

Page 98: ...matting the Memory Stick Modalidad de cámara fotográfica digital sólo modelos SCD590 D590T Para eliminar por completo las imágenes y las opciones del Memory Stick se pueden emplear las funciones MEMORY FORMAT formato de memoria La función Formato restablece el Memory Stick a su estado original El Memory Stick que se suministra junto con la videocámara ya está formateado Atención Si ejecuta la func...

Page 99: ...a página 19 Mantenga pulsado el botón BATTERY RELEASE y deslice la batería en la dirección que indica la flecha Después de haber finalizado una grabación At the end of a recording you must remove the power source When recording with a Lithium Ion Battery Pack leaving the pack on the camcorder can reduce the life span of the battery Hence it should be removed from the camcorder After completing a r...

Page 100: ...con un centro de servicio autorizado Limpie los cabezales de vídeo con una cinta limpiadora del tipo seco Limpieza y mantenimiento de la videocámara 100 100 ENGLISH ESPAÑOL Maintenance Mantenimiento Cleaning the VIEWFINDER 1 Pull the VIEWFINDER out 2 As shown in the illustration press the fix button located on the left side of the camcorder section adjacent to the VIEWFINDER with a sharp object an...

Page 101: ...Nota Usted puede hacer grabaciones con su videocámara y ver las imágenes en la pantalla LCD en cualquier lugar del mundo Uso de la videocámara en el extranjero 101 101 ESPAÑOL Maintenance Mantenimiento ENGLISH Each country or region has its own electric and color systems Before using your camcorder abroad check the following items Power sources You can use your camcorder in any country or area wit...

Page 102: ...pata 2 Ajuste la videocámara en la modalidad CAMERA o en la M REC 3 Ajuste el interruptor de la lámpara de vídeo en AUTO o en ON 102 102 ENGLISH ESPAÑOL Smart Shoe Zapata inteligente Using the Smart Shoe You can use to attach an optional accessory to the camcorder s Smart Shoe The accessory is powered by the camcorder s power supply Turn the camcorder s power off before attaching removing the acce...

Page 103: ...fono de gran sensibilidad y puede funcionar como micrófono direccional modalidad gun o como micrófono variable modalidad zoom 103 103 ESPAÑOL Smart Shoe Zapata inteligente ENGLISH VL S1IR Video IR Light Attach the Video Light IR Light to the camcorder when recording in dark rooms or places When on its automatic setting the Video Light turns ON OFF automatically according to the brightness level of...

Page 104: ...ve TAPE END TAPE END TAPE PROTECTION D L C R Display Blinking Informs that Action Troubleshooting Problemas y soluciones Antes de ponerse en contacto con el centro de servicio haga las siguientes comprobaciones Es posible que le ahorren el tiempo y el coste de una llamada innecesaria Pantalla de Autodiagnósticos Condensación de humedad Si se lleva la videocámara directamente de un lugar frío a uno...

Page 105: ...Wait until the end of copying NOW COPY Display Blinking Informs that Action Pantalla de autodiagnósticos en las modalidades M REC y M PLAY sólo modelos SCD590 D590T MEMORY STICK MEMORY FULL NO STORED IMAGE WRITE PROTECT PROTECT READ ERROR WRITE ERROR NOT FORMAT NOW DELETE NOW FORMAT NOW COPY Lento Lento Lento Lento Lento Lento Lento Lento Lento Lento Lento No hay Memory Stick en Inserte un Memory ...

Page 106: ...ee a broken block image during the REC SEARCH This is normal operation and is not a failure or defect Explanation Solution Symptom Si las siguientes instrucciones no le permiten solucionar el problema póngase en contacto con un centro de servicio autorizado No es posible encender Compruebe la batería o el adaptador la videocámara de corriente CA El botón START STOP Compruebe que el interruptor est...

Page 107: ...6 4ft 5m straight line Model name SCD530 D530T D590 D590T Modelos SCD530 D530T D590 D590T Estas especificaciones técnicas y el diseño están sujetos a cambios sin previo aviso Sistema Señal de vídeo Sistema de grabación de vídeo Sistema de grabación de audio Tipo de cinta Velocidad de la cinta Tiempo de grabación Tiempo de FWD REW Dispositivo de imagen Objetivo Diámetro del filtro Pantalla LCD Viso...

Page 108: ...el reloj 36 Altavoz 33 Avance cuadro a cuadro 75 Batería 20 Borrado 96 Botones de funciones 15 Búsqueda de fotografías PHOTO SEARCH 68 Búsqueda de grabación 28 Cable CA 19 Casete 23 Compensación de la luz de fondo BLC 64 Conexión 73 Empuñadura 24 DEMOSTRACIÓN 41 DV 78 79 Efectos especiales digitales DSE 48 ELIMINACIÓN DEL RUIDO DEL VIENTO 55 Enfoque manual automático MF AF 63 EQUILIBRIO DEL BLANCO...

Page 109: ...n http www samsung es Canada http www samsungcanada com Panama http www samsung panama com Samsung Electronics Internet Home Page United Kingdom http www samsungelectronics co uk France http www samsung fr Australia http www samsung com au Germany http www samsung de Sweden http www samsung se Poland http www samsung com pl Italia http www samsung it Spain http www samsung es Canada http www samsu...

Reviews: