background image

92

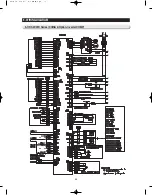
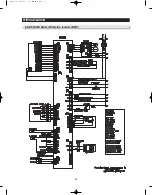
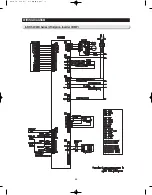
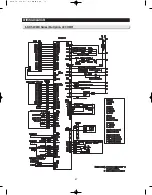
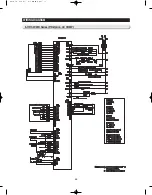
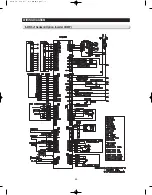
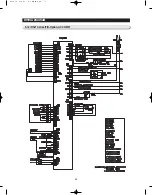
WIRING DIAGRAM

6-11) RSJ1 Series (K/J-Option, AC COMP)

Summary of Contents for RSJ1K Series

Page 1: ...rtal com Latin America http latin samsungportal com CIS http cis samsungportal com Europe http europe samsungportal com China http china samsungportal com Asia http asia samsungportal com Mideast Afri...

Page 2: ......

Page 3: ...may result in personal injury and property damage The manufacturer or dealer cannot be responsible for the interpretation of this information SAMSUNG ELECTRONICS AMERICA INC Technical Service Guide C...

Page 4: ...ntents 1 PRECAUTIONS SAFETY WARNINGS 5 2 PRODUCT SPECIFICATIONS 8 3 DISASSEMBLY REASSEMBLY 20 4 TROUBLE SHOOTING 46 5 PCB DIAGRAM 78 6 WIRING DIAGRAM 82 7 SCHEMATIC DIAGRAM 94 8 REFERENCE INFORMATION...

Page 5: ...embled state of parts It should be the same as the previous state Check out the surrounding conditions Change the location if the fridge is located at humid wet places or the installed state is unstab...

Page 6: ...ution Earth Unplug Use the rated components on the replacement Check the correct model rated voltage rated current operating temperature and so on On repair make sure that the wires such as harness ar...

Page 7: ...or closing the door may cause things to fall down with may inflict a wound Prohibition Prohibition Prohibition Prohibition Warning Caution Do not allow users to disassemble repair or alter It may caus...

Page 8: ...fication RS21H CHINA Inverter Model 13 2 3 3 Electric Parts Specification RS21 23H RSJ1 Series Inverter Model 14 2 3 4 Electric Parts Specification RS21 23H RSJ1 R600a Model 15 2 3 5 Electric Parts Sp...

Page 9: ...gn Soft touch type Home Bar Changed Part Door HomeBar New design Display Door Display Description Basic Current New design Convertible Insert Convertible New Option Ice Water Type Touch Button Adapted...

Page 10: ...life with much freshness CoolSelect Zone Drawer RSJ1Z K J RS21 23HZ J K Y With this state of the art feature you can select Quick Cool Thaw or Select buttons to quickly chill thaw and cool items just...

Page 11: ...30W 1 Moist Balance Crisper TM Lighting 40W 1 1 323 520L Superiority Superiority Superiority Superiority Superiority Superiority Superiority Equality Equality Equality Equality Superiority Inferiorit...

Page 12: ...2V DREP5020LB DC12V DREP5020LB DC12V DRCP5030LA AC220 240V 40W x 1 200V DC 0 5A 10W 20V DC 0 5A 10W AC 250V 10A BSBN BRASS SCREW Inverter NO R600a J531Q35E330M385 2 R134a J531Q35E330M350 2 Inverter 4T...

Page 13: ...Refrigerator Refrigerant Refrigerant Amount Freezer Performance Product Weight Model Z T K Disp H B Cool select zone 230V 50Hz INDIRECT COOLING METHOD REFRIGERATOR R600a 88g 4 STAR V T K Home Bar S T...

Page 14: ...wer Kind of Refrigerator Refrigerant Refrigerant Amount Freezer Performance Product Weight Model Z Disp H B Cool select zone 230V 50Hz INDIRECT COOLING METHOD REFRIGERATOR R600a 88g 4 STAR Y Dispenser...

Page 15: ...ind of Refrigerator Refrigerant Refrigerant Amount Freezer Performance Product Weight Model K Disp H B Cool select zone 230V 50Hz INDIRECT COOLING METHOD REFRIGERATOR R600a 88g 4 STAR J Dispenser Cool...

Page 16: ...ind of Refrigerator Refrigerant Refrigerant Amount Freezer Performance Product Weight Model K Disp H B Cool select zone 230V 50Hz INDIRECT COOLING METHOD REFRIGERATOR R134a 190g 4 STAR J Dispenser Coo...

Page 17: ...0 OFF 26 24 18 OFF 1 0 1 0 5 0 4 STAR Inverter EU4A5Q L2XA R600a MK190G L2U R134a MK4A5Q R1U Models Freezing Capacity Condenser Dryer Capillary tube Refrigerant Model Starting type Oil Charge Freezer...

Page 18: ...18 511 9 385 9 30 35 83 55 6 1663 5 1779 1702 908 D E F PRODUCT SPECIFICATIONS 2 4 Dimensions mm PRODUCT SIZE...

Page 19: ...PRODUCT SPECIFICATIONS 2 5 Optional Material Specification 19 Photograph Part Name Part Code Quantity Remark...

Page 20: ...ezer Display RS21 L TRIMKIT 23 3 3 Freezer Micro Switch 24 3 4 Freezer Door 25 3 5 Freezer Compartments 26 3 6 Fridge Door 33 3 7 Fridge Compartments 35 3 8 Main PBA INVERTER PBA 40 3 9 1 GLASSES on t...

Page 21: ...verloading house wiring circuits which could cause a fire hazard from overheated wires Do not install the refrigerator in a damp place or place where it may come in contact with water Deteriorated ins...

Page 22: ...ing 1 screw to counterclockwise at bottom Be careful not to scratch Be careful of injury Take care so that hand may not be injured Be careful not to be damaged on the wire and the connector 3 Pull out...

Page 23: ...turning 1 screw to counterclockwise at bottom Be careful not to scratch Be careful of injury Take care so that hand may not be injured Be careful not to be damaged on the wire and the connector 3 Pull...

Page 24: ...sembling Freezer Display remove 1 screw PART NAME FIGURE Freezer Micro S W DESCRIPTION 2 Unlock the hook using flat head screwdriver 3 Pull out Lever Assembly 4 Disconnect Micro S W as shown 24 DISASS...

Page 25: ...onnect Valve Fitting with pushing Fixer Valves on both side 3 With door closed remove 1 screw on fixing Hinge Cover on the top place 4 Disconnect Micro S W as shown 5 Remove Reed S W using flat head s...

Page 26: ...ake out 26 DISASSEMBLY REASSEMBLY 3 5 Freezer Compartments 1 Lift up Tray Dispenser with grabbing PART NAME FIGURE Tray Dispenser Door Bins DESCRIPTION 1 The door bins allow storage of perishable item...

Page 27: ...tables and deli items The drawers are located in the lower portion of the refrigerator 1 Pull out the drawer as far as it goes 2 Tilt the drawer up and pull it out until it is removed PART NAME FIGURE...

Page 28: ...ion Push down the Hook on Support Ice Maker and disassemble Ice Maker Kit 28 DISASSEMBLY REASSEMBLY Be careful not to scratch Be careful not to scratch Remove 2 screws and pull the Ice Maker Assembldy...

Page 29: ...wise and take out Remove 2 screws and take out the Auger Motor Disconnect the connector with pulling out After removing the Cover Auger Motor unlock the Lamp Socket with pushing down Remove the Cover...

Page 30: ...er Part DESCRIPTION Remove the Cover Evap as shown Disconnect the connector and take out the Cover Evap Disassemble the Fixer Housing with grabbing and take out Disconnect the connector and cut the Ca...

Page 31: ...shown Take out the Cover multi with pulling in 31 DISASSEMBLY REASSEMBLY 31 Home Bar Latch Oil Damper Remove screw fixing Home Bar Latch With the Door closed open Home Bar with pushing as shown Take t...

Page 32: ...flat head screwdriver Remove Grommet located at bottom inner place After taking out Home Bar remove the shaft Remove Home Bar Damper Cover using flat head screwdriver 32 DISASSEMBLY REASSEMBLY Take ou...

Page 33: ...ESCRIPTION With door closed remove 1 screw on fixing Hinge Cover on the top place Disconnect 3 connectors on the top place Remove Reed S W using flat head screwdriver Remove Earth screw and 3 bolts as...

Page 34: ...RE Fridge Door DESCRIPTION Lift up Fridge Door and take out Remove Upper Hinge with handing Wires Lift up Lower Hinge with grabbing Remove 4 bolts to counter clockwise 34 DISASSEMBLY REASSEMBLY Be car...

Page 35: ...dorizers as indicated with grabbing Remove the Cover Evap with 2 hands Disconnect the indicated wires as shown Unfold the Fixer Sensor with flat head driver Disassemble the Fixer Housing with grabbing...

Page 36: ...DESCRIPTION Remove the Trim Sensor using flat head Driver Disassemble 3 Bulbs turnning to counter clock wise Remove 2 screws as indicated Disconnect the connector and pull out the Cover Multi Assembl...

Page 37: ...D Lamp cover using a flat head screwdriver PART NAME FIGURE Fridge Room Lamp Cover Multi DESCRIPTION Remove 2 screws as indicated Disconnect the connector and pull out the Cover Multi Assembly Be care...

Page 38: ...e Tray DESCRIPTION This Movable Shelf is designed for moving with foods easily Lift it up and pull the Movable Shelf out to the front This Z Shelf is designed for all kinds of wines and bottles Lift i...

Page 39: ...the lower portion of the refrigerator 1 Pull out the drawer as far as it goes 2 Tilt the drawer up and pull it out until it is removed PART NAME FIGURE Fridge Drawers Fridge Dairy Door Bins DESCRIPTI...

Page 40: ...the Tray Convertible Assembly with pulling out to the front Remove the Case Room Lamp located at inner place of CoolSelect Zone Push the 4 Hooks to the another side with flat head driver and take it...

Page 41: ...splay Room Lamp 3 8 Main PBA INVERTER PBA Main PBA INVERTER PBA is located on the top of the refrigerator PART NAME FIGURE PBA MAIN INVERTER PBA DESCRIPTION Unscrew 3 screws right and left side as sho...

Page 42: ...d PART NAME FIGURE PBA MAIN INVERTER PBA DESCRIPTION Pull the 4 hooks out and disassemble the Main PBA Disconnect 2 connectors as indicated Unscrew 1 screw to disassemble the Power Supply Pull the 2 h...

Page 43: ...pport handle and Support handle Pull the Support handle out using hex wrench as shown or flat head driver pushing the back side Insert the small flat head driver to the hole at the bottom of Cap suppo...

Page 44: ...places using a Phillips head driver as shown 4 Disassemble the upper door sash with unscrewing 4 places using a Phillips head driver as shown 5 Detach Glasses from the door as shown 6 After replacing...

Page 45: ...places using a Phillips head driver as shown 4 Disassemble the upper door sash with unscrewing 5 places using a Phillips head driver as shown 5 Detach Glasses from the door as shown 6 After replacing...

Page 46: ...GROMMET SUPT HANDLE BRACKET HANDLE JM ABS T3 SC 00477R I BLACK LONG JM ABS T3 SC 05010S PLATINUM SILVER LONG JM ABS T3 SC 06036S MANHATTAN SILVER LONG JM ABS T3 SC 05061S VERSAILLES STS LONG HERMES S...

Page 47: ...Defrost 48 4 1 2 Communication Error Display Function 50 4 1 3 Load Status Display Function 53 4 1 4 Restoration of Previous Settings Upon Power Failure 55 4 1 5 Exhibition 56 4 1 6 Option Setting Fun...

Page 48: ...reezer Defrost Fd With the TDM Cycle Model when you press the Test button the Test function will be selected in the following order Forced Operation FF Forced Operation OF r Forced Fridge rd Force Fri...

Page 49: ...eration is selected the Freezer temperature will be set to 25 C and the Fridge temperature will be set to 1 C automatically 1 6 During the Forced Operation the Power Freeze and the Quick Cool function...

Page 50: ...OM and Load MICOM 1 1 When there is no response in 10 seconds after the Main MICOM sends a communication signal to the Load MICOM LC Er will blink on the Display Panel until the communication error is...

Page 51: ...t Open Short Open Short Open Short Open Short Open Short Open Short Open Short Freezer Fan Trouble Fridge Fan Trouble Condenser Fan Trouble Defrost Trouble Overheating Defrost Trouble Overheating Ice...

Page 52: ...rt Ohm Wire Cut or Blown Thermistor Disconnect MAIN PCB CN70 CN71 from PCB and read the resistance between Orange and White wire terminals Refer to the Wire Diagram for the resistance value 0 Ohm Heat...

Page 53: ...tus Display mode shows the loads which MICOM sends out operational signals to It only means that there are operational signals from MICOM So it does not indicate that those signalled loads are in oper...

Page 54: ...Water Tank Heater On FREEZER VALVE F Valve On FRIDGE VALVE R Valve On DAMPER Damper Open NORMAL CONDITIONS All Off 22 33 Fridge second digit a Fridge second digit b Fridge second digit c Fridge second...

Page 55: ...the initial power on it checks its Freezer temperature When it is lower than 5 it is to be considered as an instant power failure and it brings back all its previous operation functions Power Freeze...

Page 56: ...the compressor and the Condenser Fan remain off 3 To deactivate the Exhibition Mode do the Exhibition entering mode again or turn off the power 4 When the Freezer or the Fridge temperature becomes ov...

Page 57: ...2 seconds at the same time Then the Display Panel will be shifted to the Option Setting mode 4 1 6 Option Setting Function Press the Freezer and the Vacation or Power Cool buttons for 12 seconds at th...

Page 58: ...on Option Item Increase Option Item Decrease Option Value Increase Option Value Decrease 58 RS21 23H Series Option Value Increase Option Item Decrease Option Item Increase Option Value Increase Option...

Page 59: ...se temperature is to be lowered by 3 Refer to the Freezer temperature setting image In 15 seconds after completing the adjustment MICOM is to store the setting value in EEPROM and it goes back to the...

Page 60: ...PLAY 1 Value Freezer Value 0 1 2 3 4 5 6 7 8 9 10 11 12 13 14 15 TEMP VALUE 0 0 5 1 0 1 5 2 0 2 5 3 0 3 5 0 5 1 0 1 5 2 0 2 5 3 0 3 5 4 0 2 Fridge Temp Shifting Value Value Freezer Value 0 1 2 3 4 5 6...

Page 61: ...PM As this option is applied Comp RPM will be rise It will help reducing continual Comp operation ITEM Ice Maker Water Supply Qty Control OPTION ITEM 2 Water Supply Quantity 85cc 95cc Option Value Fre...

Page 62: ...models with Ice Maker or Cool Select Zone Basic models do not have the following functions 7 Ice Maker Sensor Temp Shifting It is an option shifting the ice ejecting base temperature Item Ice MakerSe...

Page 63: ...ate INVERTER COMP model 67 4 2 3 Unable to Defrost 69 4 2 4 Self Diagnosis Error Defective Sensor 70 4 2 5 When Alarm Sound continues Buzzer Sound 71 4 2 6 When PANEL PCB operates abnormally 73 4 2 7...

Page 64: ...heck LEAD WIRE contact NO Replace MAIN PCB NO NO YES NO YES YES YES YES YES YES YES TROUBLE SHOOTING 4 2 1 1 When there is no power AC COMP model Is the 230V AC fuse blown Is 230V applied at the both...

Page 65: ...E contact NO Replace MAIN PCB NO NO YES NO YES YES YES YES YES YES YES TROUBLE SHOOTING 4 2 1 2 When there is no power INVERTER COMP model Is the 230V AC fuse blown Is 230V applied at the both of the...

Page 66: ...output of Load MICOM 34 is HIGH 5V The CI 73 14 is LOW 0 7V The COMP RELAY is good ThecontactofCONNECTOR CN70isgood COMP ASS Y is good TROUBLE SHOOTING 4 2 2 1 When the Comp does not operate AC COMP...

Page 67: ...ration Check the connector contacts NO Insert the connector properly NO Replace COMP ASS Y NO YES NO YES YES YES YES YES It passed 5 minutes after COMP goes off Comp operates when it is the Forced Ope...

Page 68: ...TROUBLE SHOOTING SPM FREEWHEELING DIODE Voltage 68...

Page 69: ...2nd Test mode Defrost Sensor Voltage is lower than 3 1V Start Forced F R Defrost Check all the sensors Normal Check Thermistor Heater and their contacts Replace the sensor NO Repair the connectors NO...

Page 70: ...tor CN30 is inserted properly Replace Thermistor NO YES Ambient Temp Sensor is ok Ambient SEN Read Resistance between CN30 11 and 12 PCB Thermistor are ok Check the contact of the connector again Refe...

Page 71: ...onnector or insert the connector properly NO The Connector CN30 is inserted properly YES Replace REED S W NO Door S W is good MAIN PCB DOOR S W are good Remove the Door S W and check if it switches an...

Page 72: ...anel is pressed Normal YES Door Alarm goes off when any one of Fridge Freezer doors remains being open over 2 minutes NO BUZZER Breakage Replacement YES Any breakage or kink in MAIN PCB BUZZER NO YES...

Page 73: ...inserted properly NO Defective PANEL PCB YES It lights up when PANEL PCB is being replaced Check F R Door Wiring Short or Open Wire Check F R CABI Wiring Short or Open Wire Check Short Open at MAIN P...

Page 74: ...74 3 NO It reads DC8 12V between MAIN PCB GND and CN74 2 NO ItrepeatsDC7 12V andDC2VorlowerbetweenMAINPCBGND andCN74PIN 4 Replace MAIN PCB Reading with Door closed OPEN 5V CLOSE 0V NO YES Pulsesignals...

Page 75: ...en After that when 5V is input for more than 2 minutes it will send out Door Open alarm for 10 seconds at an interval of 1 minute it s the same for the R Door and the R F H B Door So when the Door S W...

Page 76: ...Maker wires Check Ice Maker Kit Cancel Ice Off Select Cubed Crushed Normal Operation MAIN PCB Defect Replace it MAINPCBDefect Replaceit IC74Defect MAIN PCB Defect Replace it RY7A RELAY Defect Normal O...

Page 77: ...NO Replace RY79 Relay NO Ifitis0 checkifHeaterisshort Ifitis checkifthereiswire cut Heaterisopenortheconnectoris slippedout Ifitis0 checkifHeaterisshort Ifitis checkifthereiswire cut Heaterisopenorthe...

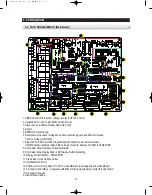
Page 78: ...PCD Circuit PLC Input Output PLC Power Line communication In HM09 Dispenser Model Case CN01 provide Touch IC Source 5V GND to PANEL PBA 8 Cool Select Zone Damper and its Heater LED 9 Cool Select Zone...

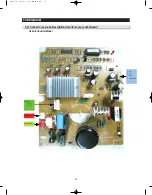
Page 79: ...tering their noises it sends them to MICOM 3 Comp Signaling It receives comp operation signals from MAIN PCB 4 Option Setting 5 Surge Detecting It protects IPM form voltage surge 6 Comp Controlling IP...

Page 80: ...ORIZONTAL S W ICE FULL S W GND NC NC NC 12V STEP VALVE A COIL STEP VALVE A COIL STEP VALVE B COIL STEP VALVE B COIL I M MOTOR Reed s w GND PANEL WIRE C S ZONE WIRE BUTTON INPUT 1 BUTTON INPUT 2 GND UV...

Page 81: ...Used for Inverter Model 81 PCB DIAGRAM 5 4 Connector Layout Description Inverter comp control Board COMP U V W COMP OLP OLP POWER 220V 12V 5V GND COMP RPM...

Page 82: ...82 6 WIRING DIAGRAM 6 1 RS21 23H Series CHINA Z Option Inverter COMP...

Page 83: ...83 WIRING DIAGRAM 6 2 RS21 23H Series CHINA V S Option Inverter COMP...

Page 84: ...84 WIRING DIAGRAM 6 3 RS21 23H Series Z Y Option Inverter COMP...

Page 85: ...85 WIRING DIAGRAM 6 4 RS21 23H Series P U Option Inverter COMP...

Page 86: ...86 WIRING DIAGRAM 6 5 RS21 23H Series V S Option Inverter COMP...

Page 87: ...87 WIRING DIAGRAM 6 6 RS21 23H Series K J Option AC COMP...

Page 88: ...88 WIRING DIAGRAM 6 7 RS21 23H Series F D Option AC COMP...

Page 89: ...89 WIRING DIAGRAM 6 8 RS21 23H Series B N Option AC COMP...

Page 90: ...90 WIRING DIAGRAM 6 9 RSJ1 Series Z Option Inverter COMP...

Page 91: ...91 WIRING DIAGRAM 6 10 RSJ1 Series P Option Inverter COMP...

Page 92: ...92 WIRING DIAGRAM 6 11 RSJ1 Series K J Option AC COMP...

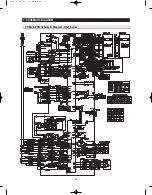
Page 93: ...93 WIRING DIAGRAM 6 12 RSJ1 Series F D Option AC COMP...

Page 94: ...94 94 7 SCHEMATIC DIAGRAM 7 1 Main PCB Schematic Diagram RSJ1 Series...

Page 95: ...95 95 SCHEMATIC DIAGRAM 7 2 Main PCB Schematic Diagram RS21 23H Series...

Page 96: ...96 SCHEMATIC DIAGRAM 7 3 Inverter PCB Schematic Diagram RSJ1 RS21 23H Series...

Page 97: ...97 SCHEMATIC DIAGRAM 7 3 1 BLOCK DIAGRAM RS21 23H Series All...

Page 98: ...98 SCHEMATIC DIAGRAM 7 3 2 BLOCK DIAGRAM RS21 23H Series Inverter COMP...

Page 99: ...99 SCHEMATIC DIAGRAM 7 3 3 BLOCK DIAGRAM RS21 23H Series AC COMP...

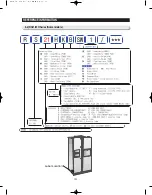
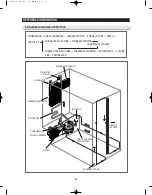
Page 100: ...8 REFERENCE INFORMATION Label Location 8 1 RSJ1 Series Nomenclature 100...

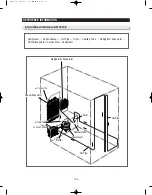
Page 101: ...101 REFERENCE INFORMATION Label Location 8 2 RS21 23H Series Nomenclature...

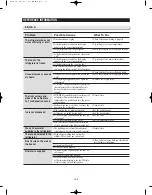
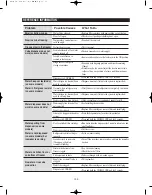
Page 102: ...ator That makes refrigerator s temperature low quickly and save the power consumption Condensation can occur when you leave the door open for a long time Did you stop the ice making function Is there...

Page 103: ...om of the freezer clogged Cubes jammed in chute Supply line or shutoff valve is clogged Water filter clogged Dispenser is LOCKED Replace filter cartridge with new cartridge or with plug Check to see i...

Page 104: ...CYCLE FRIDGE EVAPORATOR CONNECTED CAPILLARY FRIDGE FREEZER CAPILLARY TUBE ACCUMULATOR FREEZER EVAPORATOR SUCTION PIPE DRYER 3WAY VALVE SPIRAL CONDENSER FREEZER HOT PIPE FREDGE HOT PIPE COMPRESSOR FRI...

Page 105: ...rigerator Evaporator Freezer Evaporator Suction Pipe Compressor Refrigerator Evaporator Capillary Tube ACCUMULATOR Freezer Evaporator SUCTION PIPE Dryer Muffler SUB CONDENSER Hot Pipe Hot Pipe Compres...

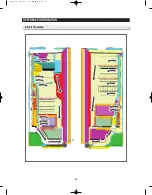
Page 106: ...106 REFERENCE INFORMATION 8 6 Air Circulation...

Page 107: ...950 6193 6896 FAX 82 62 950 6829 Samsung Electronics Co Ltd Refrigerator Division 2009 03 Printed in Korea This Service Manual is a property of Samsung Electronics Co Ltd Any unauthorized use of Manua...

Reviews: