


44
DISASSEMBLY AND REASSEMBLY
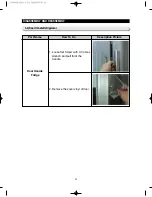
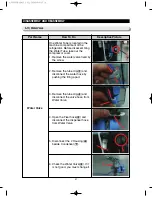
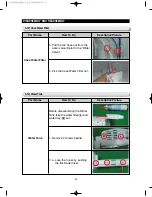
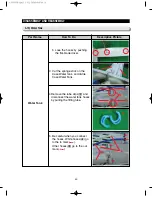
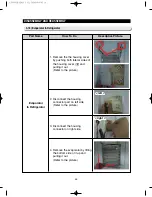
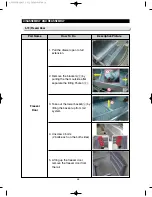
3-17) Evaporator Cover In Refrigerator
Evaporator Cover
In Refrigerator
Part Name
How To Do
Descriptive Picture
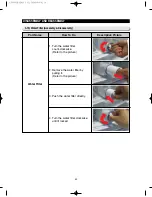
1. Remove the angle cap with a
flat-blade screwdriver.
(Refer to the picture)
2. Unscrew 4 screws.
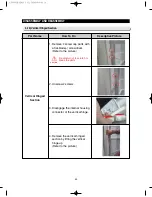
3. Remove the the lower part of
angle mid by pulling it out and
pushing it down.
(Refer to the picture)
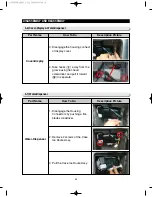
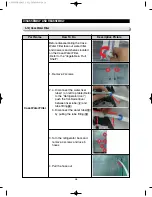
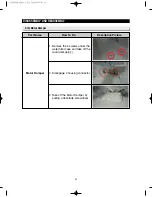
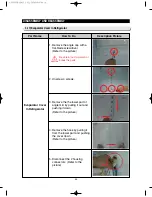
4. Remove the hook by pulling it
from the lower part and pushing
the cover down.
(Refer to the picture)
5. Disconnect the 2 housing
connectors. (Refer to the
picture)
Be careful not to scratch or
break the parts
CAUTION
1⃞
2⃞
AW3 SM-EN 2011.3.31 2:54 PM 페이지44 in
Summary of Contents for RF4287HARS
Page 17: ...18 PRODUCT SPECIFICATIONS 2 5 Dimensions of Refrigerator Inches AW3SM EN2011 3 312 52PM 18 in...
Page 86: ...87 TROUBLESHOOTING IPM FREEWHEELING DIODE VOLTAGE VALUE AW3SM EN2011 3 312 56PM 87 in...
Page 96: ...97 TROUBLESHOOTING SPM Internal DIODE Voltage AW3SM EN2011 3 312 56PM 97 in...
Page 98: ...99 TROUBLESHOOTING INVERTER PCB Circuit Diagram AW3SM EN2011 3 312 56PM 99 in...
Page 124: ...125 7 1 Model RFG295AA BETTER 7 WIRING DIAGRAM BLU BLU AW3SM EN2011 3 312 57PM 125 in...
Page 125: ...126 7 2 Model RF4287AA BEST 7 WIRING DIAGRAM AW3SM EN2011 3 312 57PM 126 in...
Page 126: ...127 7 3 Model RFG299AA 7 LCD 7 WIRING DIAGRAM BLU BLU AW3SM EN2011 3 312 57PM 127 in...
Page 127: ...128 7 4 Model RFG294AA SEARS 7 WIRING DIAGRAM AW3SM EN2011 3 312 57PM 128 in...
Page 129: ...130 8 SCHEMATIC DIAGRAM 8 1 2 INVERTER BLOCK RF4287 AW3SM EN2011 3 312 58PM 130 in...
Page 130: ...131 8 2 CIRCUIT DIAGRAM SCHEMATIC DIAGRAM 8 2 1 MAIN AW3SM EN2011 3 312 58PM 131 in...
Page 131: ...132 SCHEMATIC DIAGRAM 8 2 2 INVERTER AW3SM EN2011 3 312 58PM 132 in...


