background image

Español  19

Funcionamient

o

Configuraciones comunes

Tiempo de cocción

Siga estos pasos para configurar o cambiar el tiempo de cocción. Por defecto, el nivel de 
potencia se programa en Alto.

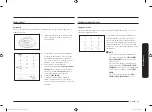
Use los botones numéricos para programar el 
tiempo de cocción (máx.: 99 min 99 seg). El 
área del tiempo consiste en los elementos de 
los minutos y los segundos. Para configurar un 
tiempo de cocción de 25 minutos, por ejemplo, 
presione 2 y 5 para los minutos, luego 0 y 0 para 
los segundos.

NOTA

• 

Para cambiar el tiempo de cocción durante 
el funcionamiento, presione 

STOP/CANCEL 

(PAUSA/CANCELAR)

 dos veces y repita los 

pasos de arriba.

• 

Para detener la cocción, simplemente abra 
la puerta o presione 

STOP/CANCEL (PAUSA/

CANCELAR)

. Para reanudar el funcionamiento, 

cierre la puerta y presione el botón 

START 

(INICIO)

.

• 

Para cancelar la cocción, presione 

STOP/

CANCEL (PAUSA/CANCELAR)

 dos veces.

Modo manual

Microondas

Esta es la función básica de este horno de microondas. Por defecto, el nivel de potencia se 
programa en Alto.

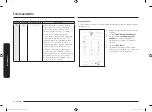
1. 

Coloque los alimentos en un recipiente apto 
para microondas y, luego, el recipiente en el 
plato giratorio.

04

02 03

03

2. 

Use los botones numéricos para programar 
el tiempo de cocción (máx.: 99 min 99 seg). 
Por ejemplo, para programar el tiempo en 
10 minutos, presione 1 y 0 para los minutos, 
luego 0 y 0 para los segundos (10:00).

3. 

Para cambiar el nivel de potencia 
predeterminado, presione 

Power Level (Nivel 

de Potencia)

 y seleccione un nivel diferente. 

Consulte la sección 

Nivel de potencia

 en la 

página 

20

 para obtener más detalles.

4. 

Presione 

START (INICIO)

.

5. 

Cuando haya transcurrido el tiempo de 
cocción, el horno emitirá una señal sonora 
4 veces. Use guantes para horno al retirar los 
alimentos.

MS19N7000AS_AA_DE68-04464B-02_EN+MES.indb   19

7/11/2018   11:41:40 AM

Summary of Contents for MS19N7000 Series

Page 1: ...Microwave Oven User manual MS19N7000 MS19N7000AS_AA_DE68 04464B 02_EN MES indb 1 7 11 2018 11 41 20 AM...

Page 2: ...tchen timer 15 About microwave energy 15 Cookware for microwaving 16 Operations 17 Feature panel 17 Simple steps to start 18 Manual mode 19 Common settings 19 Sensor mode 21 Auto mode 23 Convenience 2...

Page 3: ...due to accumulate on the sealing surface C Do not operate the oven if it is damaged It is particularly important that the oven door close properly and that there is no damage to the 1 Door bent 2 Hing...

Page 4: ...re may spread D Do not use the cavity for storage purposes Do not leave paper products cooking utensils or food in the cavity when not in use WARNING Cancer and Reproductive Harm www P65Warnings ca go...

Page 5: ...on if you do not understand the grounding instructions or if you are not sure if the appliance is properly grounded 18 Liquids such as water milk coffee or tea can be overheated beyond the boiling poi...

Page 6: ...ansformer to power the microwave It may result in electric shock or fire Ensure that the voltage frequency and current provided match the product s specifications Failing to do so may result in electr...

Page 7: ...ounding instructions found in the beginning of this Section Do not ground the appliance to a gas pipe plastic water pipe or telephone line This may result in electric shock fire an explosion or proble...

Page 8: ...ave unplug it and contact your nearest Samsung service center Failing to do so may result in electric shock or fire Do not touch the power plug with wet hands This may result in electric shock Do not...

Page 9: ...such as a sink or glass object This may result in damage to the sink or glass object Do not put your face or body close to the appliance while cooking or when opening the door just after cooking Take...

Page 10: ...corrosion Keep the inside of the oven clean Food particles or spattered oils stuck to the oven walls or floor can cause paint damage and reduce the efficiency of the oven INSTALLING YOUR MICROWAVE OVE...

Page 11: ...odically and wash the turntable as required You can wash the turntable safely in your dishwasher STORING AND REPAIRING YOUR MICROWAVE OVEN If you need to store your microwave oven for a short or exten...

Page 12: ...erent accessories that help you prepare different types of food Roller Turntable Roller Insert the shaft of the roller into the coupler on the floor of the microwave The roller supports the turntable...

Page 13: ...urntable and roller applicable models only If the door won t open or close smoothly first check if the door seals have built up debris Use a soft cloth and soapy water to clean both the inner and oute...

Page 14: ...or 3 seconds to activate Hold down Child Lock 3sec again for 3 seconds to deactivate Before you start Before you use the microwave for the first time there is some basic information you should know Th...

Page 15: ...the food Quantity and density Moisture content Initial temperature especially when frozen NOTE The cooked food retains heat in its core after cooking is complete This is why you must observe the stand...

Page 16: ...ss through and penetrate food Metals such as stainless steel aluminum and copper reflect microwaves Therefore do not use cookware made of metallic materials Cookware marked microwave safe is always sa...

Page 17: ...vent spattering Microwave Safe Use Caution Microwave Unsafe Operations Feature panel The front panel comes in a wide range of materials and colors For improved quality the actual appearance of the ove...

Page 18: ...NOTE When cooking is complete the oven beeps 4 times Use oven gloves to take out the food To defrost frozen food 04 03 02 1 Put the frozen food in a microwave safe container and then put the containe...

Page 19: ...e the door and press START To cancel cooking press STOP CANCEL twice Manual mode Microwave This is the basic function of this microwave oven The power level is set to High by default 1 Put food in a m...

Page 20: ...edium 6 PL 60 Simmer 7 PL 70 Medium high 8 PL 80 Reheat 9 PL 90 Saut 10 PL Hi High NOTE To check the current power level while cooking is in progress press Power Level Time increment You might want to...

Page 21: ...ves to take out the food Sensor mode Sensor Cook For inexperienced cooks the oven offers a total of 9 Sensor Cook programs in 6 different categories Take advantage of this feature to save time or shor...

Page 22: ...and appropriate recommendations Cooking modes and times have been pre programmed for your convenience Code Food Serving size Instructions 1 Popcorn 3 0 to 3 5 oz 1 package Use only one microwave popco...

Page 23: ...oked refrigerated foods Cover the plate with vented plastic wrap or waxed paper tucked under the plate If the food is not as hot as you would like after using the Sensor Cook function continue heating...

Page 24: ...heating For the best texture the buns should be added to the hot dogs when the oven beeps Snack Kids Meals guide The following table lists auto programs for heating snack foods The table contains food...

Page 25: ...safe plate Turn the poultry over when the oven beeps 3 Fish 0 1 3 5 Shield the tail of a whole fish with aluminium foil Turn the fish over when the oven beeps This program is suitable for whole fish...

Page 26: ...0 Put bread on a piece of kitchen paper and turn over as soon as the oven beeps Place cake on a ceramic plate and if possible turn over as soon as the oven beeps The oven keeps operating and stops whe...

Page 27: ...ntains food quantities weight ranges and appropriate recommendations Code Food Serving size oz Instructions 1 Melting Butter 1 75 50 g Cut butter into 3 or 4 pieces and then put them in a small glass...

Page 28: ...ice Let stand for 3 minutes Cooking Smart We provide these cooking guides to help you make the most out of this oven Experience our cooking know how to add convenience and richness to your life Microw...

Page 29: ...a lid Note that rice doubles in volume during cooking Pasta Use a large sized glass Pyrex container Cook uncovered Add boiling water a little salt and then stir well Stir several times during and aft...

Page 30: ...3 minutes Stew Chilled 12 3 oz 350 g 60 4 5 Put stew in a deep ceramic plate Cover with plastic lid Stir occasionally during reheating and again before standing and serving Let stand for 2 3 minutes...

Page 31: ...he following standard That frozen food has an internal temperature between 0 F and 4 F 18 C and 20 C The standing time varies depending on the food type meat or vegetables and serving size thinner or...

Page 32: ...250 ml cold water Cook uncovered in a glass pyrex bowl for 3 to 4 minutes at 90 power until glaze icing is transparent Stir twice during cooking Cooking jam Put 21 1 oz 600 g fruit for example mixed...

Page 33: ...tainer with a lid may causes popping sounds Do not use sealed containers as they may burst during cooking due to expansion of the contents Troubleshooting If you encounter a problem with your oven fir...

Page 34: ...ng cooked or improper cookware is being used To test the oven put one cup of water in a microwave safe container put the container in the oven and then run the microwave for 1 2 minutes to check wheth...

Page 35: ...roperly grounded There is water dripping Water or steam may be generated by the cooking or defrosting process depending on the food This is not an oven malfunction Let the oven cool and then wipe with...

Page 36: ...em then contact your local SAMSUNG customer service center Please have the following information ready The model and serial numbers normally printed on the rear of the oven Your warranty details A cle...

Page 37: ...ovided below for problem determination and service procedures Warranty service can only be performed by a SAMSUNG authorized service center The original dated bill of sale must be presented upon reque...

Page 38: ...lation and uses for which this product was not intended damage caused by unauthorized modification or alteration of the product product where the original factory serial numbers have been removed defa...

Page 39: ...Memo MS19N7000AS_AA_DE68 04464B 02_EN MES indb 39 7 11 2018 11 41 30 AM...

Page 40: ...S ONLINE AT U S A Consumer Electronics 1 800 SAMSUNG 726 7864 www samsung com us support CANADA 1 800 SAMSUNG 726 7864 www samsung com ca support English www samsung com ca_fr support French DE68 0446...

Page 41: ...Horno de microondas Manual del usuario MS19N7000 MS19N7000AS_AA_DE68 04464B 02_EN MES indb 1 7 11 2018 11 41 32 AM...

Page 42: ...energ a de microondas 15 Utensilios de cocina para microondas 16 Funcionamiento 17 Panel de funciones 17 Pasos simples para comenzar 18 Modo manual 19 Configuraciones comunes 19 Modo con sensor 21 Mo...

Page 43: ...sellado C No haga funcionar el horno si est da ado Es de especial importancia que la puerta del horno cierre correctamente y que no haya da os en 1 La puerta doblada 2 Las bisagras y los pestillos rot...

Page 44: ...alambre de las bolsas de papel o pl stico antes de colocar las bolsas en el horno C Si los materiales en el interior del horno se prenden fuego mantenga la puerta cerrada apague el horno y desconecte...

Page 45: ...con conexi n a tierra Consulte a un electricista o t cnico calificado si no entiende las instrucciones de conexi n a tierra o si no est seguro de si el electrodom stico est bien conectado a tierra 18...

Page 46: ...ctrico para alimentar el horno de microondas Se puede producir una descarga el ctrica o un incendio Aseg rese de que el voltaje la frecuencia y la corriente provistas coincidan con las especificacion...

Page 47: ...una tuber a de gas una tuber a pl stica de agua o un cable de tel fono Esto puede provocar descarga el ctrica incendio explosi n o problemas con el producto No enchufe el cable de alimentaci n en una...

Page 48: ...omo por ejemplo agua ingresa en el horno de microondas desench felo y comun quese con el centro de servicio t cnico Samsung m s cercano No hacerlo puede provocar descarga el ctrica o incendio No toque...

Page 49: ...en el producto No coloque el electrodom stico sobre un objeto fr gil como un fregadero o un objeto de vidrio Hacerlo puede provocar da os al fregadero o al objeto de vidrio No acerque el rostro ni el...

Page 50: ...nga limpia la parte interna del horno Las part culas de alimentos o los aceites salpicados que se adhieren a las paredes o al piso pueden causar da os en la pintura y reducir la eficiencia del horno I...

Page 51: ...ario El plato giratorio puede lavarse perfectamente en el lavavajillas ALMACENAMIENTO Y REPARACI N DE SU HORNO DE MICROONDAS Si debe guardar su horno de microondas durante un per odo corto o prolongad...

Page 52: ...le ayudan a preparar diferentes tipos de alimentos Rodillo Plato giratorio Rodillo Inserte el eje del rodillo en el manguito de acoplamiento sobre el piso del horno de microondas El rodillo es el sop...

Page 53: ...que sea aplicable Si la puerta no se abre o cierra con suavidad revise si se acumul suciedad en los burletes de la puerta Use un pa o suave y agua jabonosa para limpiar las superficies interiores y ex...

Page 54: ...enga presionado Child Lock 3sec Bloqueo para ni os 3 s nuevamente durante 3 segundos para desactivarlo Antes de comenzar Antes de usar el horno de microondas por primera vez hay cierta informaci n b s...

Page 55: ...ad Contenido de humedad Temperatura inicial sobre todo si est congelado NOTA Los alimentos cocinados retienen el calor en su n cleo despu s de terminar la cocci n Es por eso que debe respetar los tiem...

Page 56: ...ermitir que las microondas los atraviesen y penetren en los alimentos Los metales como el acero inoxidable el aluminio y el cobre reflejan las microondas Por consiguiente no utilice utensilios de coci...

Page 57: ...n para retener la humedad y evitar las salpicaduras Apto para microondas Tenga cuidado No apto para microondas Funcionamiento Panel de funciones El panel frontal viene en una amplia gama de materiales...

Page 58: ...cocci n el horno emitir una se al sonora 4 veces Use guantes para horno al retirar los alimentos Para descongelar alimentos congelados 04 03 02 1 Coloque los alimentos congelados en un recipiente apt...

Page 59: ...START INICIO Para cancelar la cocci n presione STOP CANCEL PAUSA CANCELAR dos veces Modo manual Microondas Esta es la funci n b sica de este horno de microondas Por defecto el nivel de potencia se pro...

Page 60: ...r a fuego lento 7 NP 70 Mediano alto 8 NP 80 Recalentar 9 NP 90 Saltear 10 NP Hi Alto NOTA Para verificar el nivel de potencia actual cuando la cocci n est en curso presione Power Level Nivel de Poten...

Page 61: ...onora 4 veces Use guantes para horno al retirar los alimentos Modo con sensor Cocci n con sensor Para cocineros sin experiencia el horno ofrece un total de 9 programas de cocci n con sensor en 6 categ...

Page 62: ...peso y las recomendaciones correspondientes de los alimentos Los modos y los tiempos de cocci n se han preprogramado para su comodidad C digo Alimento Tama o porci n Instrucciones 1 Palomitas 3 0 a 3...

Page 63: ...alentar 1 Plato preparado 1 porci n Utilizar solo alimentos precocidos refrigerados Cubrir el plato con un envoltorio de pl stico ventilado o papel encerado debajo del plato Si la comida no est tan ca...

Page 64: ...e 1 minuto despu s de calentar Para obtener una mejor textura los panes deben agregarse a la salchichas cuando el horno emita una se al sonora Gu a de botanas comidas para ni os La siguiente tabla pre...

Page 65: ...s sonoras 3 Pescado 0 1 3 5 Proteger la cola de un pescado entero con papel de aluminio Dar la vuelta al pescado cuando el horno emita se ales sonoras Este programa es apropiado para pescados enteros...

Page 66: ...b Instrucciones 4 Pan 0 1 2 0 Colocar el pan sobre un trozo de papel de cocina y darle la vuelta cuando el horno emita se ales sonoras Colocar el pastel sobre un plato de cer mica y si es posible darl...

Page 67: ...pos de alimentos espec ficos La tabla contiene las cantidades los rangos de peso y las recomendaciones correspondientes de los alimentos C digo Alimento Tama o porci n oz Instrucciones 1 Derretir mant...

Page 68: ...lim n Dejar reposar durante 3 minutos Cocci n inteligente Ofrecemos estas gu as de cocci n para ayudarle a sacar el m ximo provecho de este horno Experimente nuestros conocimientos de cocina para a ad...

Page 69: ...que el arroz duplica su volumen durante la cocci n Pasta Utilizar un recipiente de vidrio Pyrex grande Cocinar destapado Agregar agua hirviendo una pizca de sal y revolver bien Revolver varias veces d...

Page 70: ...en un plato hondo de cer mica Cubrir con una tapa de pl stico Revolver ocasionalmente mientras recalienta y una vez m s antes de dejarlo reposar y servir Dejar reposar durante 2 3 minutos Alimento Ta...

Page 71: ...do Esta gu a de descongelado se basa en la siguiente condici n que la temperatura interna de los alimentos congelados est entre 0 F y 4 F 18 C y 20 C El tiempo de reposo var a dependiendo del tipo de...

Page 72: ...te 5 oz 14 g con 1 5 oz 40 g de az car y 8 5 oz 250 ml de agua fr a Cocine destapado en un bol de vidrio Pyrex durante 3 a 4 minutos al 90 de potencia hasta que el glaseado o ba o est transparente Rev...

Page 73: ...ci n de problemas Si encuentra alg n problema con el horno verifique primero las siguientes tablas e intente poner en pr ctica las sugerencias Si el problema persiste o si alg n c digo de informaci n...

Page 74: ...Utilice un recipiente de cocci n apto para microondas con la base plana Problema Causa Acci n Calienta poco o muy despacio El horno no funciona se est n cocinando demasiados alimentos o el recipiente...

Page 75: ...est cerrada completamente Cierre la puerta y vuelva a intentarlo Sale electricidad del horno El cable de alimentaci n o el tomacorriente no tienen una conexi n a tierra adecuada Conecte adecuadamente...

Page 76: ...eltas Hay restos de comida adheridos en la parte inferior del horno Retire los restos de comida adheridos en la parte inferior del horno NOTA Si las gu as anteriores no le permiten resolver el problem...

Page 77: ...stalados operados y mantenidos de acuerdo a las instrucciones que se adjuntaron o proporcionaron con el producto Para recibir el servicio t cnico de la garant a el comprador debe comunicarse con SAMSU...

Page 78: ...riginal que resta o noventa 90 d as el per odo que sea el m s prolongado Todas las piezas y los productos reemplazados son propiedad de SAMSUNG y deben ser devueltos a SAMSUNG Esta garant a limitada c...

Page 79: ...Notas MS19N7000AS_AA_DE68 04464B 02_EN MES indb 39 7 11 2018 11 41 44 AM...

Page 80: ...S TENOS EN L NEA EN U S A Consumer Electronics 1 800 SAMSUNG 726 7864 www samsung com us support CANADA 1 800 SAMSUNG 726 7864 www samsung com ca support English www samsung com ca_fr support French D...

Reviews: