1 Precautions
1-3
1-4 Installation Precautions
1. For safety reasons, more than two people are
required for carrying the product.
2. Keep the power cord away from any heat emitting
devices, as a melted covering may cause fire or
electric shock.
3. Do not place the product in areas with poor
ventilation such as a bookshelf or closet. The
increased internal temperature may cause fire.
4. Bend lest rainwater should flow to member that outdoor
antenna line enters indoor downward. This is a measure to
protect it from being exposed to moisture. Otherwise, it
may cause a fire or electric shock.
5. Make sure to turn the power off and unplug the
power cord from the outlet before repositioning
the product. Also check the antenna cable or the
external connectors if they are fully unplugged.
Damage to the cord may cause fire or electric
shock.
6. Keep the antenna far away from any high-voltage
cables and install it firmly. Contact with the highvoltage
cable or the antenna falling over may
cause fire or electric shock.
7. When installing the product, leave enough space
(10cm) between the product and the wall for
ventilation purposes.
A rise in temperature within the product may cause fire.
Summary of Contents for LN-T4065F
Page 17: ...7 Block Diagrams 7 2 7 2 Audio Block Diagram ...
Page 18: ...13 Circuit Descriptions 13 1 13 Circuit Descriptions 13 1 Main Board Block Description ...
Page 19: ...13 Circuit Descriptions 13 2 13 2 Video Signal Path ...
Page 20: ...13 Circuit Descriptions 13 3 13 3 Audio Signal Path 13 3 Side AV Signal Path ...
Page 21: ...13 Circuit Descriptions 13 4 Menu ...
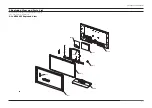
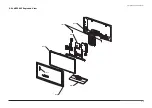
Page 112: ...5 Exploded View Parts List 5 3 M0014 M0013 M0013 T0003 M0215 T0175 5 3 LNT4665F Exploded View ...
Page 118: ...10 Operating Instructions and Installation 10 3 10 3 Remote Control ...
Page 121: ...12 PCB Diagram 12 2 12 2 IP BOARD Diagram 46 ...
Page 125: ...1 Precautions 1 4 Memo ...
Page 131: ...2 Product Specifications 2 6 Memo ...
Page 133: ...14 Reference Infomation 14 2 14 1 2 Supported Mode 1 ...
Page 158: ...4 Troubleshooting 4 3 WAVEFORMS 1 2 PC Input V Sync H Sync 3 LVDS Out CLK ...
Page 166: ...4 Troubleshooting 4 11 WAVEFORMS 6 Tuner CVBS Out Pattern Grey Bar 7 TS DATA Out Clk Data 0 ...
Page 173: ...4 Troubleshooting 4 18 Memo ...
Page 174: ...8 Wiring Diagrams 8 1 8 Wiring Diagram ...
Page 175: ...8 Wiring Diagrams 8 2 Memo ...

