background image

GB

68

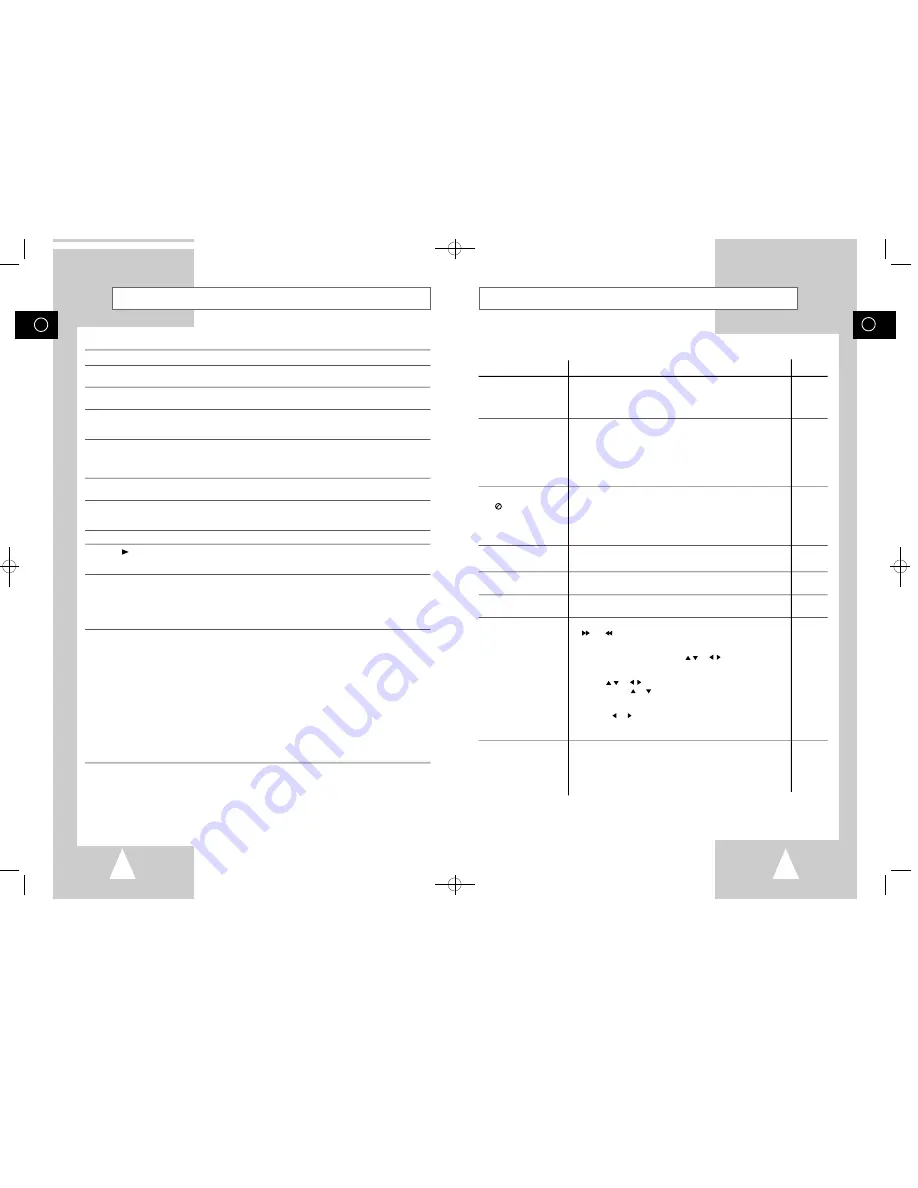
Problems and Solutions (VCR)

Before contacting the Samsung after-sales service, perform the following simple checks.

Problem

Explanation/Solution

No power

Check that the power plug is connected to a wall outlet.

Have you pressed the STANDBY/ON button?

You cannot insert a video cassette

A video cassette can only be inserted with the window 
side up and the safety tab facing you.

The television programme was not recorded

Check the DVD-VCR aerial connections.

Is the DVD-VCR tuner properly set?

Check if the safety tab is intact on the cassette.

Timer recording was unsuccessful

Was the STANDBY/ON button pressed to activate the timer?

Re-check the recording start/stop time settings.

If there was a power failure or interruption during timer 
recording, the recording will have been cancelled.

No playback picture or the picture 

Check to see if you are using a prerecorded tape. 

is distorted

You cannot see normal broadcasts

Check the TUNER/EXTERNAL setting. It should be on 
TUNER.

Check the TV/VCR aerial connections.

Noise bars or streaks on playback

Press the TRK (+or -) buttons to minimize this effect.

When the 

II button is pressed

A still picture may have “noise bars”, depending on the 

during playback, the still picture

condition of the tape. Press the TRK (+or -) buttonsduring  

has severe “noise bars” streaks

SLOW motion to minimize this effect.

Video Head Cleaning 

If poor pictures appear on a variety of cassettes, the video 
heads may need cleaning. This is not a common problem 
and unless it appears, the heads should not be cleaned. 
When cleaning the video heads, read all instructions 
provided with the head cleaning cassette. Incorrect head 
cleaning can permanently damage the video heads.

If when tuning in your TV to the DVD-VCR   

1. Remove the aerial input plug from the socket marked (aerial  

TV does not find the Screen  

symbol) on the rear of the DVD-VCR. 

or the pattern when found suffers  

2. Carry out the instructions “Tuning Your Television for the DVD-

from interference, it may be due to the

VCR” (see page 14).

DVD-VCR output channel clashing with 

3. Carry out the instructions “Setting the DVD-VCR output 

the normal TV transmissions in your area.

Channel” (see page 24), move the channel number

To prevent this you will need to change the   

several channels down from the original setting.

DVD-VCR output channel in the following 

(example:from 14 to 57). 

way

4. Replace the aerial plug into the socket marked (aerial symbol) 

on the rear of the DVD-VCR. 

5. Re-tune your TV to the DVD-VCR again by following 

instructions “Tuning Your Television for the DVD-VCR” 
(page 14). 

6. If the problem still exists repeat steps 1 to 5 moving several 

more channels away from the original setting.

If you are unable to solve the problem after reading the above instructions, note:

The model and serial number on the rear of your DVD-VCR

The warranty information

A clear description of the problem

Then contact your nearest SAMSUNG after-sales service.

GB

69

Troubleshooting Guide (DVD)

Disc does not play.

5.1 channel sound is not
being reproduced.

The        icon appears on
screen.

Playback mode differs from 
the Setup Menu selection.

The screen ratio cannot be
changed.

No audio.

Forgot password

If you experience other
problems.

Ensure that the disc is installed with the label side facing up.

Check the region number of the DVD.

This player cannot play CD-ROMs, DVD-ROMs, etc. Insert a DVD, a
VIDEO-CD or a CD.

5.1 channel sound is reproduced only when the following conditions
are met. : 
1)The DVD-VCR player is connected with the proper amplifier
2) The disc is recorded with 5.1 channel sound.

Check whether the disc being played has the “Dolby 5.1 ch” mark on
the outside.

Check if your audio system is connected and working properly.

The features or action cannot be completed at this time because:
1. The DVD’s software restricts it.
2. The DVD’s software doesn’t support the feature (e.g., angles).
3. The feature is not available at the moment.
4. You’ve requested a title or chapter number or search time that is

out of range.

Some of the functions selected in the Setup Menu may not work 
properly if the disc is not encoded with the corresponding function.

The Screen Ratio is fixed on your DVDs.

Make sure you have selected the correct Digital Output in the Audio 
Options Menu.

Press power on from a cold start with no disc in the unit. Press the 

and 

buttons simultaneously on the front panel for five 

seconds. 

Turn off the power, and then back on.
Press the SETUP button. Use the  ,

or  , buttons to select 

angage option. Press the ENTER button. Move the selection bar to 
your desired language, then press ENTER button. 
Use the ,

or  , buttons to select DVD option. Press the ENTER 

button. Use the 

or 

buttons to select parental mode. 

Press the ENTER button. 

The Parental Mode is now unlocked as indicated on the display. 
Press the 

or  button to select Parental. The Create Password 

display will appear. You can now set your rating level and change 
your password to a new number.

Go to the contents and find the section of the instruction book that
contains the explanations regarding the current problem, and follow
the procedure once again.

If the problem still cannot be solved, please contact your nearest
authorized service center.

Problem

Action

Page

Before requesting service (troubleshooting)

P6

P48

P51-61

P44-49

P49

P48

P19

P47

00046B DVD-V85K/XSH-GB4  11/9/02 9:31 AM  Page 68

Summary of Contents for DVD-V85K

Page 1: ...DVD VCR DVD V85K Instruction Manual www samsungvcr com PAL NTSC 00046B DVD V85K XSH GB1 11 9 02 9 29 AM Page 1 ...

Page 2: ...isc Requirements 63 KARAOKE FUNCTIONS DVD Beginning Karaoke Functions 64 Key Control 64 Reserving a Song 65 Cancellation of reservation 65 Vocal Fader 66 Guide Melody 66 Score Function 66 Types of Karaoke disc 66 FOREWORD Safety Instructions 5 Disc Type and Characteristics 6 DVD VCR OVERVIEWS Front View of the DVD VCR 7 Rear View of the DVD VCR 7 Infrared Remote Control 8 Display Indicators 9 Acce...

Page 3: ...e mains socket and aerial If the remote control is not used for a long period of time remove the batteries and store it in a cool dry place SOLVING PROBLEMS Technical Specifications 67 Problems and Solutions VCR 68 Troubleshooting Guide DVD 69 Note Important Hold down Press push Symbols 1 1 1 Step number This product incorporates copyright protection technology that is protected by method claims o...

Page 4: ...this player is described on the rear panel of the player Playback Region Number PAL 12 Cm 8 Cm Single sided 240 min Double sided 480 min Single sided 80 min Double sided 160 min Audio Video Audio Video Audio DVD contains excellent sound and video due to Dolby Digital and MPEG 2 system Various screen and audio functions can be easily selected through the on screen menu Video with CD sound VHS quali...

Page 5: ... number to the right of the CHAP symbol is the current chapter number 11 The Hi Fi track of a VHS tape is playing The current TV show or video is broadcast in Stereo 12 A Timer Recording is programmed or in progress If blinking there is an error 13 DVD to VHS copy is in progress 1 2 3 4 5 6 7 8 9 10 11 12 13 14 15 16 17 18 19 20 21 22 23 24 25 26 27 28 29 30 31 32 33 34 35 36 1 STANDBY ON 2 AUTO T...

Page 6: ...eceiver Make sure that both the television and the DVD VCR are switched off before connecting the cables 1 Remove the aerial or network input cable from the television 2 Connect this cable to the 75Ω coaxial socket marked IN PROM ANT on the rear of your DVD VCR 3 Plug the coaxial cable supplied into the socket marked OUT TO TV on your DVD VCR 4 Plug the other end of the coaxial cable into the conn...

Page 7: ...d by the DVD VCR depends on the number of stations that it has found 8 On completion press RETURN twice to exit the menu Auto preset can be performed by pressing STOP on the DVD VCR continuously for 5 seconds or more with no tape inserted Connecting Other Equipment to Your DVD VCR You can connect other audio and or video equipment to your DVD VCR in different ways The following illustrations give ...

Page 8: ... watch DVD 1 1 2 3 4 You must tune your television for the DVD VCR only if you are not using a RCA cable To view pictures from your DVD VCR when a RCA cable is used the television must be set to the audio video mode AV 1 Switch on the television 2 Switch on the DVD VCR by pressing STANDBY ON on the front of the DVD VCR or STANDBY ON on the remote control 3 Select a programme position on the televi...

Page 9: ...nto Record mode 4 Stop the Copy Process When the DVD is finished playing press the VCR button on the remote control and then press the STOP button to end the copy You must stop the Copy process manually when the DVD movie ends or the DVD may replay and record over and over again For NTSC DVD or VCD copy Before starting the copy process set the Quasi PAL to Off in Display options of SETUP MENU see ...

Page 10: ...VD VCR 1 Press SETUP on the remote control Result The MAIN MENU is displayed 2 Press the corresponding or buttons to select the CLOCK option 3 Press the ENTER button to select this option Result The CLOCK SET menu is displayed 4 Press or to select the hour minutes day month and year Result The option selected flashes 5 Press the or buttons to increase or decrease the value Result The day of the we...

Page 11: ... SETUP button on the remote control Result The MAIN MENU is displayed 2 Press the corresponding or buttons to select the Install option 3 Press the ENTER button to select this option Result The INSTALLATION menu is displayed 4 Press the corresponding or buttons until the AUTO SET UP option is selected And then press the ENTER button to select this option Result The SYSTEM SELECT menu is displayed ...

Page 12: ... CH SYSTEM 1 003 B G 2 3 4 5 SWAPPING ENTER RETURN DELETE CLEAR TV STATION TABLE PR CH SYSTEM 1 2 3 003 B G 4 5 SWAPPING ENTER RETURN DELETE CLEAR MAIN MENU INSTALLATION RETURN ENTER INSTALLATION AUTO SET UP MANUAL SET UP TV SYSTEM G VCR OUTPUT CH CH36 RETURN ENTER Clearing a Preset Station GB 22 If you have stored a TV station That you do not require At the wrong programme position you can cancel...

Page 13: ...playing back a cassette the system standard is automatically selected by the DVD VCR B W Black and White 6 On completion press RETURN twice to exit the menu MAIN MENU USER SET RETURN ENTER USER SET COLOUR SYSTEM AUTO NICAM ON IPC ON AUTO POWER OFF OFF RETURN MAIN MENU USER SET RETURN ENTER AUTO PAL MESECAM B W USER SET COLOUR SYSTEM AUTO NICAM ON IPC ON AUTO POWER OFF OFF RETURN ON OFF Selecting t...

Page 14: ...arpness of the image automatically according to your own preferences 1 During playback press the SETUP button on the remote control Result The MAIN MENU is displayed 2 Press the corresponding or buttons to select the Option option 3 Press the ENTER button to select this option Result The USER SET menu is displayed 4 Press the corresponding or buttons until the cursor is placed on the IPC option 5 ...

Page 15: ...eck to make sure that the cassette s safety tab is intact or that the opening created by a broken safety tab is covered with adhesive tape If you reach the end of the tape while recording the cassette rewinds automatically Displaying Hiding On Screen Information Selecting the Recording Speed Your DVD VCR displays most information both on the DVD VCR and the television You can choose to display or ...

Page 16: ...e Timer Programming feature allows you to preset the DVD VCR to record a programme up to one month before that programme is to be broadcast Up to six programmes can be preset Before presetting a recording check that the date and time are correct 1 Insert the cassette and press TIMER on the remote control Result The timer programme is displayed 2 Press to select the input source 3 Select the requir...

Page 17: ... or streaks appear during playback adjust alignment manually by pressing the TRK or buttons until the picture is clear and stable Result The tracking bar appears The image is adjusted The tracking bar disappears when you release the button 3 2 3 VCR VCR VCR Checking a Preset Recording Cancelling a Preset Programme You can check your preset recordings When you have finished presetting the DVD VCR I...

Page 18: ...Y STILL MOTION MOTION PLAY X3 X5 X9 X9 X5 X3 X1 10 X1 5 1 1 Selecting the Audio Output Mode You can select the mode in which the sound is reproduced on the loudspeakers and AV outputs The following options are available Option Description L Used to listen to the sound on the left Hi Fi channel R Used to listen to the sound on the right Hi Fi channel MIX Used to listen to the mixed sound of the Hi ...

Page 19: ...nding on the direction where your desired programme is located 3 When an Index mark is found the VCR will playback the tape for 5 seconds after which it will continue searching for the next Index mark 4 If you want to watch the tape from a particular Index simply press II Index Skip Search This feature will enable you to fast forward rewind to a specific point on a tape E g if you have recorded 3 ...

Page 20: ...2 2 Insert a blank cassette in your DVD VCR 3 Insert the pre recorded cassette in the other video source VCR or camcorder 4 Press the INPUT SEL button to select the appropriate input on your DVD VCR LINE IN for the RCA input 5 Start playing back the cassette to be copied 6 Hold REC down for a while to start recording on your DVD VCR 7 When you have finished recording press on bothVCR and DVD VCR I...

Page 21: ... the Audio Dubbing ending point using the or and set the counter to 0 00 00 by pressing CLOCK COUNTER and CLEAR 5 Search back slightly beyond the Audio Dub start point using the button 6 Press the ll button Press the ll button one more time to make STILL mode 7 Press A DUB Result Your VCR is now in the Audio dubbing Pause mode 8 Press the INPUT SEL button to select Audio dubbing source ex If you w...

Page 22: ...ess the KARAOKE button on the remote control 2 Press the corresponding or buttons to select the SCORE mode 3 Press the or buttons to select the SCORE mode ON 4 Score will pop up whenever a song is completed Using the KARAOKE Function SCORE Function 1 Press the STANDBY ON button and insert KARAOKE tape 2 Press the KARAOKE button to turn the KARAOKE mode ON 3 Press ll to start playing the cassette 4...

Page 23: ... Input Jack Dolby Digital Decoder TV S Video Jack RCA Jack Digital Audio out Jack LINE Audio out Jack Analog Audio Input Jack The following show examples of connections commonly used to connect the DVD VCR player with a TV and other components It is only available for DVD The VCR out can not watch by this connection or or DVD ...

Page 24: ...U is displayed 2 Press the corresponding or buttons to select the DVD option 3 Press the ENTER button to select this option Result The DVD SETUP menu is displayed Disc Menu Setup of the Menu Language Use the Menu preference menu to select the language you want a DVD s disc menu to be displayed in Audio Setup of the Audio Language Use the Audio preference menu to select the soundtrack language Subt...

Page 25: ...UP Disc Menu English Audio Enghish Subtitle Automatic Parental Unlocked Audio Options Display Options RETURN ENTER MAIN MENU DVD SETUP RETURN ENTER Program Clock Install Exit DVD VCR Option Language DVD RETURN ENTER AUDIO LANGUAGE Chinese English Korean Japanese Français Original Others RETURN ENTER SUBTITLE LANGUAGE Automatic Chinese English Korean Japanese Français Others DVD SETUP Disc Menu Eng...

Page 26: ... Option Language DVD RETURN ENTER DISPLAY OPTIONS TV Aspect Wide Black Level Low Quasi PAL Off DVD Out Component Setting Up the Audio Options 1 With the unit in Stop mode press the SETUP button on the remote Result The MAIN MENU is displayed 2 Press the corresponding or buttons to select the DVD option 3 Press the ENTER button to select this option Result The DVD SETUP menu is displayed 4 Use the ...

Page 27: ... to Still the image Then use the Search Forward to play in slow motion at variable speeds Each press increases the slow motion speed playback to 1 8 1 4 or 1 2 normal speed Audio is muted during slow motion playback Press the ll Play Still button to resume normal playback 5 Stop Resume Press the Stop button once to stop playback To resume the DVD CD from the point where the disc stopped press the ...

Page 28: ...number elapsed time audio and subtitle will be displayed Use the or NUMBER buttons to enter a different title then press the ENTER button Use the or or NUMBER buttons to enter a chapter number then press the ENTER button To enter the time from which you want to start use the or buttons to select then use the NUMBER buttons to enter the time Then press the ENTER button Use the or buttons to change ...

Page 29: ...e the or buttons to select PROGRAM Press the ENTER button 3 Use the or buttons to select the first chapter or track to add to the program Press the ENTER button The selection numbers appear in the Program Order box 4 Press the PLAY STILL button The disc will be played in programmed order 1 With the stop mode press the MODE button 2 Use the or buttons to select RANDOM Press the ENTER button The dis...

Page 30: ...A disc must have at least two titles for the TITLE MENU function to work When pressing the TITLE button with a CD the unit enters the INTRO mode INTRO lets you listen to the beginning of each track for about 10 seconds Track View VCD Index View VCD Digest Play 1 During play press the DIGEST button You ll see the 9 individual windows representing each of the chapters on the TV screen When each wind...

Page 31: ... subtitle languages are represented by abbreviations This function depends on what languages are encoded on the disc and may not work with all DVDs A DVD disc can contain up to 32 subtitle languages How to have the same subtitle language come up whenever you play a DVD Refer to Setting Up the Language Features on page 46 Selecting the Audio Language You can select a desired language quickly and ea...

Page 32: ...some of these discs do not contain rear channel sound signals Depending on the disc the Zoom and 3D Sound function may not work 3D Sound Functions DVD DVD Using the Bookmark Function The Bookmark function lets you select parts of a DVD or VCD MENU OFF mode so that you can quickly find the section at a later time 1 During play press the MARK button on the remote The Bookmark icons will be displayed...

Page 33: ...ion You cannot copy such files Your DVD player only accepts one level of file directory Consequently you must choose either to save all your MP3 recording files at the root of the disc and or create folders in the directory for each artist or music type e g classical rock jazz etc Important The above recommendations cannot be taken as a guarantee that the DVD player will play MP3 recordings or as ...

Page 34: ...de is ON When using I button it can not work at the last song When using Request function the REPEAT function does not work If the CLEAR button is pressed when the Request message is not shown on the screen all the songs on your playlist will be cleared KARAOKE on KEYCON REQUEST REQUEST 03 02 GB 64 1 Pressing the KARAOKE button makes the karaoke ON mode 2 Select the KEYCON using the or buttons 3 B...

Page 35: ... to OFF to play a movie disc or play in a general mode If you play a movie disc with the KARAOKE ON a score will show up every time when a chapter is over Vocal Fader Guide Melody Score Function Types of Karaoke disc VOCAL FADER off GUIDE MELODY on SCORE MODE off Technical Specifications Rated voltage 110 240V 50 60Hz Power consumption 25 Watts Weight 4 5 Kg General Size 430mm X 330mm X 100mm Oper...

Page 36: ... If the problem still exists repeat steps 1 to 5 moving several more channels away from the original setting If you are unable to solve the problem after reading the above instructions note The model and serial number on the rear of your DVD VCR The warranty information A clear description of the problem Then contact your nearest SAMSUNG after sales service GB 69 Troubleshooting Guide DVD Disc doe...

Page 37: ...THIS APPLIANCE IS DISTRIBUTED BY www samsung com AK68 00046B 00046B DVD V85K XSH GB4 11 9 02 9 31 AM Page 70 ...

Reviews: