background image

7

ENGLISH

ENGLISH

6

Table of Contents

Table of Contents

Features  . . . . . . . . . . . . . . . . . . . . . . . . . . . . . . . . . . . . . . . . . . . . . . . . . . . . . . . . . . . . . . . . . . . . . . . . . . . . . . . . . . .  8
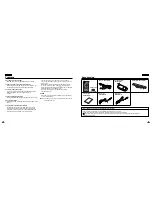
Accessories  . . . . . . . . . . . . . . . . . . . . . . . . . . . . . . . . . . . . . . . . . . . . . . . . . . . . . . . . . . . . . . . . . . . . . . . . . . . . . . . . .  9
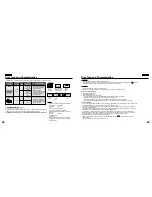
Disc Type and Characteristics . . . . . . . . . . . . . . . . . . . . . . . . . . . . . . . . . . . . . . . . . . . . . . . . . . . . . . . . . . . . . . . . . . .  10
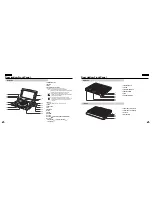
Description-Front Panel . . . . . . . . . . . . . . . . . . . . . . . . . . . . . . . . . . . . . . . . . . . . . . . . . . . . . . . . . . . . . . . . . . . . . . . .  12
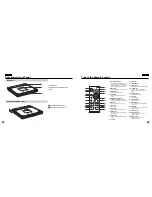
Tour of the Remote Control . . . . . . . . . . . . . . . . . . . . . . . . . . . . . . . . . . . . . . . . . . . . . . . . . . . . . . . . . . . . . . . . . . . . .  15
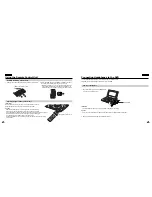
Using the Remote Control Unit  . . . . . . . . . . . . . . . . . . . . . . . . . . . . . . . . . . . . . . . . . . . . . . . . . . . . . . . . . . . . . . . . . .  16

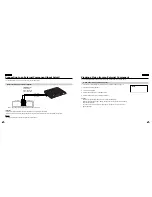
Connecting Headphones to the DVD . . . . . . . . . . . . . . . . . . . . . . . . . . . . . . . . . . . . . . . . . . . . . . . . . . . . . . . . . . . . . .  17
Connecting to an External Component (Input Select)  . . . . . . . . . . . . . . . . . . . . . . . . . . . . . . . . . . . . . . . . . . . . . . . . . .  18
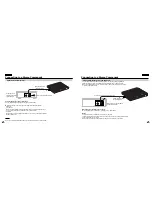
Viewing a Video from an External Component  . . . . . . . . . . . . . . . . . . . . . . . . . . . . . . . . . . . . . . . . . . . . . . . . . . . . . . .  19
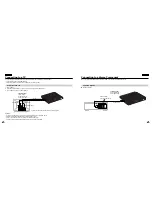
Connecting to a TV . . . . . . . . . . . . . . . . . . . . . . . . . . . . . . . . . . . . . . . . . . . . . . . . . . . . . . . . . . . . . . . . . . . . . . . . . . .  20
Connecting to a Stereo Component  . . . . . . . . . . . . . . . . . . . . . . . . . . . . . . . . . . . . . . . . . . . . . . . . . . . . . . . . . . . . . . .  21

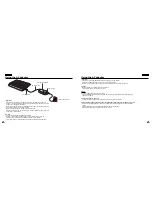
Using the AC adapter  . . . . . . . . . . . . . . . . . . . . . . . . . . . . . . . . . . . . . . . . . . . . . . . . . . . . . . . . . . . . . . . . . . . . . . . . .  24
Using the battery pack . . . . . . . . . . . . . . . . . . . . . . . . . . . . . . . . . . . . . . . . . . . . . . . . . . . . . . . . . . . . . . . . . . . . . . . . .  26
Battery level display . . . . . . . . . . . . . . . . . . . . . . . . . . . . . . . . . . . . . . . . . . . . . . . . . . . . . . . . . . . . . . . . . . . . . . . . . . .  27

Playing a Disc  . . . . . . . . . . . . . . . . . . . . . . . . . . . . . . . . . . . . . . . . . . . . . . . . . . . . . . . . . . . . . . . . . . . . . . . . . . . . . . .  28
Using the Search & Skip Functions  . . . . . . . . . . . . . . . . . . . . . . . . . . . . . . . . . . . . . . . . . . . . . . . . . . . . . . . . . . . . . . .  30 
Using the Display Function . . . . . . . . . . . . . . . . . . . . . . . . . . . . . . . . . . . . . . . . . . . . . . . . . . . . . . . . . . . . . . . . . . . . .  31
Using the Disc and Title Menu  . . . . . . . . . . . . . . . . . . . . . . . . . . . . . . . . . . . . . . . . . . . . . . . . . . . . . . . . . . . . . . . . . . .  32
Using the Function Menu

. . . . . . . . . . . . . . . . . . . . . . . . . . . . . . . . . . . . . . . . . . . . . . . . . . . . . . . . . . . . . . . . . . . . . .  33

Repeat Play . . . . . . . . . . . . . . . . . . . . . . . . . . . . . . . . . . . . . . . . . . . . . . . . . . . . . . . . . . . . . . . . . . . . . . . . . . . . . . . . .  34

Slow Repeat Play . . . . . . . . . . . . . . . . . . . . . . . . . . . . . . . . . . . . . . . . . . . . . . . . . . . . . . . . . . . . . . . . . . . . . . . . . . . . .  35
Adjusting the Aspect Ratio (EZ View)  . . . . . . . . . . . . . . . . . . . . . . . . . . . . . . . . . . . . . . . . . . . . . . . . . . . . . . . . . . . . . .  36
Selecting the Audio Language . . . . . . . . . . . . . . . . . . . . . . . . . . . . . . . . . . . . . . . . . . . . . . . . . . . . . . . . . . . . . . . . . . .  38
Selecting the Subtitle Language . . . . . . . . . . . . . . . . . . . . . . . . . . . . . . . . . . . . . . . . . . . . . . . . . . . . . . . . . . . . . . . . . .  39
Changing the Camera Angle . . . . . . . . . . . . . . . . . . . . . . . . . . . . . . . . . . . . . . . . . . . . . . . . . . . . . . . . . . . . . . . . . . . .  40
Using the Bookmark Function . . . . . . . . . . . . . . . . . . . . . . . . . . . . . . . . . . . . . . . . . . . . . . . . . . . . . . . . . . . . . . . . . . .  41
Using the Zoom & 3D Sound Functions . . . . . . . . . . . . . . . . . . . . . . . . . . . . . . . . . . . . . . . . . . . . . . . . . . . . . . . . . . . .  42
Clips Menu for MP3/WMA/JPEG. . . . . . . . . . . . . . . . . . . . . . . . . . . . . . . . . . . . . . . . . . . . . . . . . . . . . . . . . . . . . . . . . .  43
Folder Selection . . . . . . . . . . . . . . . . . . . . . . . . . . . . . . . . . . . . . . . . . . . . . . . . . . . . . . . . . . . . . . . . . . . . . . . . . . . . . .  44
MP3/WMA Play . . . . . . . . . . . . . . . . . . . . . . . . . . . . . . . . . . . . . . . . . . . . . . . . . . . . . . . . . . . . . . . . . . . . . . . . . . . . . .  45
Picture CD Playback . . . . . . . . . . . . . . . . . . . . . . . . . . . . . . . . . . . . . . . . . . . . . . . . . . . . . . . . . . . . . . . . . . . . . . . . . .  47

Using the Setup Menu . . . . . . . . . . . . . . . . . . . . . . . . . . . . . . . . . . . . . . . . . . . . . . . . . . . . . . . . . . . . . . . . . . . . . . . . .  49
Setting Up the Language Features . . . . . . . . . . . . . . . . . . . . . . . . . . . . . . . . . . . . . . . . . . . . . . . . . . . . . . . . . . . . . . . .  50
Setting Up the Audio Options . . . . . . . . . . . . . . . . . . . . . . . . . . . . . . . . . . . . . . . . . . . . . . . . . . . . . . . . . . . . . . . . . . . .  52
Setting Up the Display Options  . . . . . . . . . . . . . . . . . . . . . . . . . . . . . . . . . . . . . . . . . . . . . . . . . . . . . . . . . . . . . . . . . .  53
Setting Up the Parental Control  . . . . . . . . . . . . . . . . . . . . . . . . . . . . . . . . . . . . . . . . . . . . . . . . . . . . . . . . . . . . . . . . . .  54

Cautionary Notes . . . . . . . . . . . . . . . . . . . . . . . . . . . . . . . . . . . . . . . . . . . . . . . . . . . . . . . . . . . . . . . . . . . . . . . . . . . . .  55
Troubleshooting  . . . . . . . . . . . . . . . . . . . . . . . . . . . . . . . . . . . . . . . . . . . . . . . . . . . . . . . . . . . . . . . . . . . . . . . . . . . . . .  60
Specifications  . . . . . . . . . . . . . . . . . . . . . . . . . . . . . . . . . . . . . . . . . . . . . . . . . . . . . . . . . . . . . . . . . . . . . . . . . . . . . . .  63
Warranty  . . . . . . . . . . . . . . . . . . . . . . . . . . . . . . . . . . . . . . . . . . . . . . . . . . . . . . . . . . . . . . . . . . . . . . . . . . . . . . . . . . .  64

Setup

Advanced Functions

Changing Setup menu

Reference

Connections

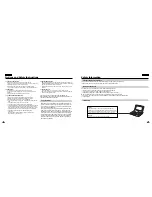
Adapter directions

Basic Functions

Summary of Contents for DVD-L300

Page 1: ...VD L300 US HEADQUARTERS 105 Challenger Road Ridgefield Park N J 07660 0511 TEL 1 800 SAMSUNG SERVICE DIVISION 400 Valley Road Suite 201 Mount Arlington NJ 07856 1 800 SAMSUNG 1 800 726 7864 www samsun...

Page 2: ...to lightning and power line surges 15 POWER LINES An outside antenna system should not be located in the vicinity of overhead power lines or other electric light or power circuits where it can fall i...

Page 3: ...or plug is damaged b If any liquid has been spilled onto or objects have fallen into the DVD c If the DVD has been exposed to rain or water d If the DVD does not operate normally by following the ope...

Page 4: ...splay Function 31 Using the Disc and Title Menu 32 Using the Function Menu 33 Repeat Play 34 Slow Repeat Play 35 Adjusting the Aspect Ratio EZ View 36 Selecting the Audio Language 38 Selecting the Sub...

Page 5: ...creen with 384 000 pixels provides a clear picture AV input output optical digital output jack 1 Dolby Digital 5 1 CH audio and 2 DTS digital audio can be output through the optical digital output jac...

Page 6: ...blic performance broadcasting renting copying and making transmittable of the content of discs is strictly prohibited by law This product is equipped with anti copy protection device and connecting to...

Page 7: ...for low light viewing situations If the viewing environment is very dark use this mode to decrease brightness and increase contrast and edge sharpness 5 POWER Press the POWER button for 1 second to po...

Page 8: ...disc mode 7 STOP Button Stops disc play 8 SKIP Buttons Use to skip the title chapter or track 9 CLEAR Button Use to remove menus or status displays from the screen 10 ANGLE Button Use to access variou...

Page 9: ...thium battery in the battery compartment and put the battery compartment cover back on the remote Match the polarities and on the battery with the marks in the battery compartment If the battery is in...

Page 10: ...her component equipped with external output connectors ENGLISH 18 Viewing a Video from an External Component Use the procedure below to view a video from a VCR or Camcorder on your DVD player 1 Connec...

Page 11: ...the TV 2 Press the TV VIDEO button on your TV to select the input from the DVD player 3 Turn on the DVD player and start playback Caution If you wish to view video on your TV only close the display pa...

Page 12: ...r amplifier for details on connections Optical Digital Cable Sold Separately Connect to an Optical Digital Input Jack Dolby Digital 5 1 Channel DTS processor or amplifier DIGITAL COAXIAL OPTICAL DIGIT...

Page 13: ...me at average speaker volume The playback time may be shortened depending on the disc surrounding temperature battery pack conditions and speaker volume Using the AC adapter AC adapter included Power...

Page 14: ...battery The battery level display time changes depending on the battery operating time As the battery is completely used the noise screen intermittently can be displayed a b c d ENGLISH Using the bat...

Page 15: ...button on the remote during PAUSE or STEP mode By pressing the button you can select slow motion play for 1 8 1 4 or 1 2 of normal speed Press and hold the button to choose the play speed between 1 8...

Page 16: ...nly two front speakers NOTE NOTE If you want to see the battery level display press the INFO button DVD Title Time Audio Chapter Subtitle 01 02 0 00 13 ENG 5 1CH Off Off ENTER 3DSound DVD CD Track Tim...

Page 17: ...n to access the function NOTE NOTE You can also directly select these functions using their respective buttons on the remote Using the Disc and Title Menu Using the Disc Menu 1 Press the MENU button d...

Page 18: ...as elapsed after point A has been set NOTE NOTE DVD repeats play by chapter or title CD repeats play by disc or track Depending on the disc the Repeat function may not work When playing a DVD CD Slow...

Page 19: ...The screen size changes when the button is pressed repeatedly The screen zoom mode operates differently depending on the screen setting in the initial setup menu To ensure correct operation of the EZ...

Page 20: ...me up whenever you play a DVD Refer to Setting Up the Language Features on page 51 Using the SUBTITLE button ENG SUBTITLE Off SUBTITLE Selecting the Audio Language You can select a desired language qu...

Page 21: ...o delete 3 Press the CLEAR button to delete a bookmark number Press the BOOKMARK button to turn off display NOTE NOTE Up to three scenes may be marked at a time Depending on the disc the Bookmark func...

Page 22: ...hrough the analog outputs Discs which are recorded with LPCM MPEG or DTS will not work 1 During play press the 3D button The 3D SOUND mark will be displayed on screen 2 Press the UP DOWN buttons to tu...

Page 23: ...Peer Folders MP3 WMA Play 1 Open the disc cover 2 Place the disc in the player Place the disc with the labeled side up 3 Close the cover The cover is closed and you should get a screen that looks like...

Page 24: ...taken as a guarantee that the DVD player will play MP3 recordings or as an assur ance of sound quality You should note that certain technologies and methods for MP3 file recording on CD Rs prevent opt...

Page 25: ...Setup Menu selections may not work Setup Disc Menu Title Menu Function Picture CD Playback CD R JPEG Discs Only files with the jpg and JPG extensions can be played If the disc is not closed it will t...

Page 26: ...e selected language is not recorded on the disc the original pre recorded language is selected How to make the Setup menu disappear or return to menu screen during set up Press RETURN or LEFT button U...

Page 27: ...screen shakes in the Auto mode 3 Frame Select this feature when you want to see small letters more clearly in the Auto mode Screen Messages Use to turn on screen messages On or Off 1 With the unit in...

Page 28: ...o scratch the pick up lens during loading unloading of the disc or cleaning Doing so may result in malfunction Cautions on Using the Player The Parental Control function works in conjunction with DVDs...

Page 29: ...ve it and store in a cool place 2 Do not use the AC adapter or battery pack for a prolonged period of time during recharging You might get a low temperature burn 3 Keep the battery pack free from smok...

Page 30: ...ium ion battery Even when not in use power will drain slowly So use a fully charged battery pack Recharge until the charge lamp stays on green A partial charging of the battery pack decreases the over...

Page 31: ...atteries Check that the signal transmission is directed at the remote control sensor on the DVD player Remove the obstacle between the remote control unit and remote control sensor Check that the vide...

Page 32: ...p quickly flashes Green Check that the TV is set to VIDEO or AV Check that the video or audio cable is securely connected Change the Dynamic Compression setting to On This will turn up the comparative...

Page 33: ...the purchaser must contact SAMSUNG for problem determination and service procedures SAMSUNG does not warrant uninterrupted or error free operation of the product All replaced parts and products become...

Reviews: