JVC HR-XVS20AA, Instructions Manual
The JVC HR-XVS20AA is a versatile multimedia device that combines a DVD player and a VCR. To ensure a seamless user experience, it comes with a comprehensive Instructions Manual. You can conveniently download this manual for free from our website, allowing you to make the most of your JVC HR-XVS20AA without any hassle.
Share
Download


Reviews:
No comments
Related manuals for HR-XVS20AA

MediaLounge DSM-520
Brand: D-Link Pages: 127

DivX Connected DSM-330
Brand: D-Link Pages: 38
DP-UB820
Brand: Panasonic Pages: 12
DP-UB420
Brand: Panasonic Pages: 46
UltraHD DP-UB150
Brand: Panasonic Pages: 12
DP-UB154
Brand: Panasonic Pages: 28
DMPBD79
Brand: Panasonic Pages: 40
DMP-DSB100
Brand: Panasonic Pages: 2
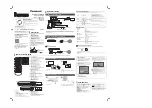
DMP-BDT570
Brand: Panasonic Pages: 44

DMP-MS10
Brand: Panasonic Pages: 12
DMP-BD903
Brand: Panasonic Pages: 2
DMP-BDT370
Brand: Panasonic Pages: 2
DMPBD79
Brand: Panasonic Pages: 68
DMP-BBT01
Brand: Panasonic Pages: 48
DMP-BD84
Brand: Panasonic Pages: 112
DP-UB820
Brand: Panasonic Pages: 4

CS-55CD
Brand: Cayin Pages: 10

XP-770
Brand: Aiwa Pages: 2


