background image

28

ENG

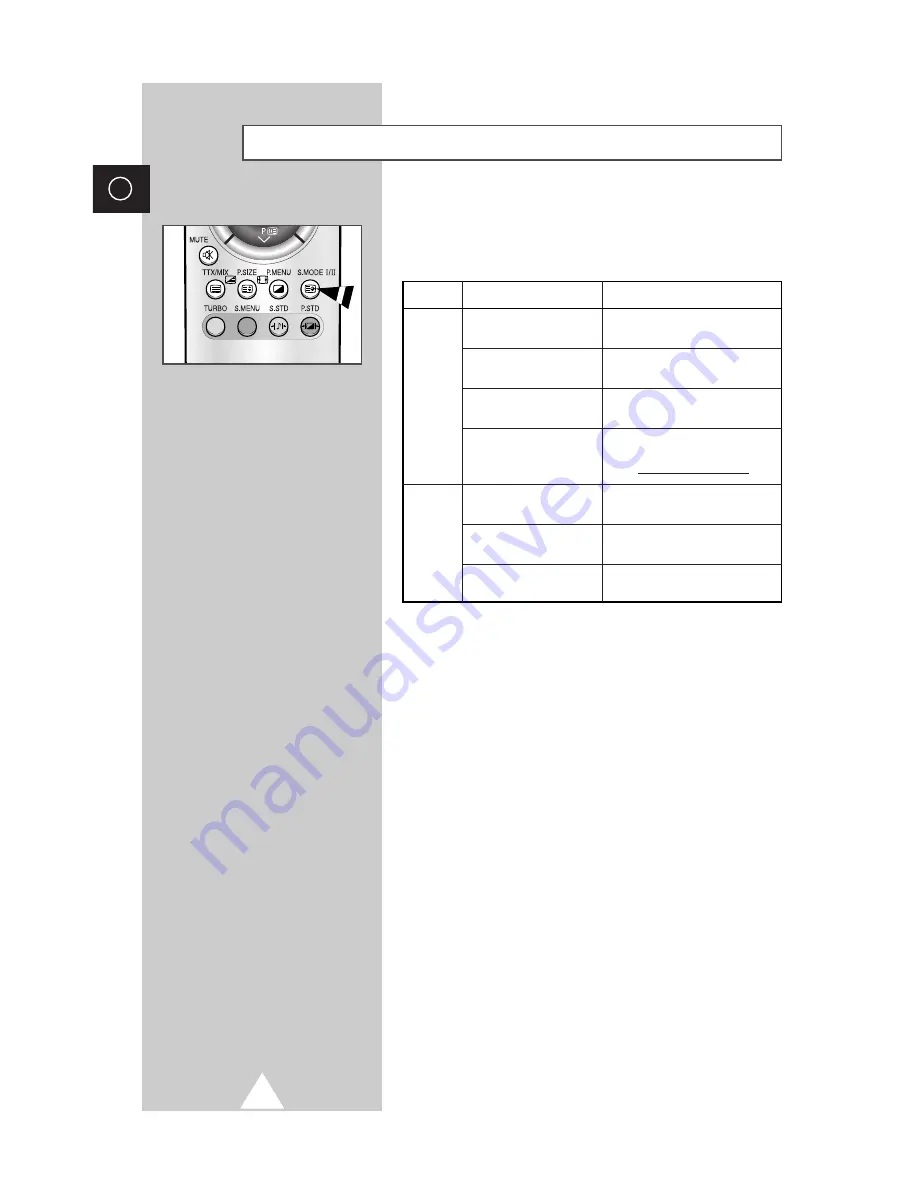
The “S.MODE” button displays/controls the processing and output
of the audio signal. When power is switched on, the mode is
automatically preset to either “Dual-I ” or “Stereo”, depending on
the current transmission.

If the receiving conditions deteriorate, listening will be
easier  if the mode is set to the 

MONO

.

If the stereo signal is weak and an automatic switching
occurs, then switch to the 

MONO

.

When receiving a mono sound in the AV mode, connect
to the “AUDIO-L” input connector on the panel (front or
side). If the mono sound comes out only from left
speaker, press the 

S.MODE

button.

Selecting the Sound Mode

(depending on the model)

Type of broadcast

Regular broadcast

(Standard audio)

R

NICAM Mono

NICAM Stereo

NICAM Dual-

I/II

Regular broadcast

(Standard audio)

Bilingual or Dual-

I/II

Stereo

On-screen indication

MONO

(Normal use)

MONO

MONO

NICAM

(Normal)

STEREO

MONO

NICAM

(Normal)

MONO

(Normal use)

DUAL-

I

↔  

DUAL-

II

STEREO

MONO

(Forced mono)

Dual-

I

Dual-

II

MONO      

NICAM

NICAM

(Normal)

NICAM

Stereo

A2

Stereo

Summary of Contents for 29Z4

Page 1: ... TELEVISION 29Z4 34Z4 29Z6 32Z6 34Z6 29Z7 32Z7 34Z7 Owner s Instructions Before operating the unit please read this manual thoroughly and retain it for future reference ON SCREEN MENUS DIGITAL 100Hz TELETEXT ...

Page 2: ...roken do not try to repair it yourself Contact qualified service personnel If the remote control is not used for a long period of time remove the batteries and store it in a cool dry place Do not drop the remote control This device is not for use in industrial environments Caution WARNING TO PREVENT DAMAGE WHICH MAY RESULT IN FIRE OR SHOCK HAZARD DO NOT EXPOSE THIS APPLIANCE TO RAIN OR MOISTURE CA...

Page 3: ...anguage 13 SETTING THE CHANNELS Storing Channels Automatically 14 Sorting the Stored Channels 15 Storing Channels Manually 16 Assigning Names to Channels 18 Skipping Unwanted Channels 19 Fine Tuning Channel Reception 20 USING YOUR TELEVISION Changing the Picture Standard 21 Adjusting the Picture Settings 22 Extra Picture Settings Scan mode Digital NR Tilt LNA 23 Setting the Blue Screen 24 Selectin...

Page 4: ...by Number 35 Using FLOF to Select a Page 36 Storing Teletext Pages 37 ADDITIONAL INFORMATION ON CONNECTIONS Connecting to the External Input Outputs 38 Connecting to the DVD Player or Digital Set Top Box 39 Connecting to the Audio Output 39 Connecting to the RCA Input 40 Connecting to the S Video Input 40 Connecting Headphones 41 Viewing Pictures From External Sources 41 RECOMMENDATIONS FOR USE Au...

Page 5: ...ou can use controls on the panel of the TV to Switch on the TV when it is in Standby mode and select channels CH Access the menu MENU Adjust the volume VOL Switch among Video input modes TV VIDEO Œ POWER ON OFF REMOTE CONTROL SENSOR ˇ STANDBY INDICATOR INPUT SOURCE SELECTION ˆ MENU DISPLAY Ø VOLUME INCREASE VOLUME DECREASE NEXT CHANNEL PREVIOUS CHANNEL 29Z4 34Z4 29Z6 32Z6 34Z6 ...

Page 6: ...VIDEO MONITOR OUTPUT SUB WOOFER SPEAKER OUTPUT 29Z7 32Z7 34Z7 75Ω COAXIAL CONNECTOR FOR AERIAL CABLE NETWORK AUDIO VIDEO INPUT 2 COMPONENT INPUT 1 Side of the TV ANT IN Rear of the TV Available format for Component Inputs 480i 480p 1080i 60Hz AUDIO VIDEO INPUT 1 AUDIO VIDEO INPUT 3 COMPONENT INPUT 2 ...

Page 7: ...TEXT PREVIOUS PAGE VOLUME INCREASE PICTURE EFFECT SELECTION STILL PICTURE SOUND MODE SELECTION TELETEXT SUB PAGE MENU DISPLAY PROGRAMME SELECTION BY NAME PICTURE MENU DISPLAY SOUND EFFECT SELECTION PIP SOUND MENU DISPLAY EQUALIZER VCR OR DVD FUNCTIONS STOP REWIND PLAY PAUSE FAST FORWARD PIP FUNCTIONS OPTION PIP ON OFF INTERCHANGE THE MAIN AND SUB PICTURE SWAP STILL SIZE SELECTION SIZE LOCATION SEL...

Page 8: ...ol by pressing the symbol downwards and then pulling firmly to remove it 2 Insert two R03 UM4 AAA 1 5V or equivalent batteries taking care to respect the polarities on the battery against on the remote control on the battery against on the remote control 3 Replace the cover by aligning it with the base of the remote control and pressing it back into place 8 Inserting the Batteries in the Remote Co...

Page 9: ...network input cable to the 75Ω coaxial socket on the rear of the television 2 If you are using an indoor aerial you may need to turn it when tuning your television until you obtain a picture that is both sharp and clear For further details refer to Storing Channels Automatically on page 14 Storing Channels Manually on page 16 ENG Rear of the TV Cable Television Network or Connecting to an Aerial o...

Page 10: ...age 16 4 To switch your television off press the button On Off again Placing Your Television in Standby Mode Your television can be placed in Standby mode in order to reduce Power consumption Wear of the cathode ray tube The Standby mode can be useful when you wish to interrupt viewing temporarily during a meal for example 1 Press the POWER button on the remote control Result The screen is turned ...

Page 11: ...e two digit channel number Used to decrease the Used to volume Display a submenu containing selections for the current menu option Search backwards manually for channels Reduce a menu option value Used to increase the Used to volume Display a submenu containing selections for the current menu option Search forwards manually for channels Increase a menu option value MUTE Used to switch the sound of...

Page 12: ...sing the or button and then press the or button Press the MENU button to stop the search Result The Time menu is displayed with Clock is selected Refer to Storing Channels Automatically on page 14 5 Press the or button to move to the hour or minute Set the hour or minute by pressing the or button Refer to Setting and Displaying the Current Time on page 30 6 When you have finished press the MENU bu...

Page 13: ...n on the remote control When you start using your television for the first time you must select the language which will be used for displaying menus and indications 1 Press the MENU button Result The main menu is displayed 2 Press the or button to select Function Result The options available in the Function group are displayed 3 Press the or button Result The Language is selected 4 Select the appr...

Page 14: ...played and then channels are stored in an order which reflects their positions in the frequency range Finally the search will end automatically To stop the search before it has finished press the MENU button 8 When searching and storing are complete the Sort menu is displayed To sort the stored channels into the desired numerical order go to Step 6 of the Sorting the Stored Channels procedure on p...

Page 15: ...Press the or button to select To Select the new channel number which you wish to identify by pressing the or button repeatedly You can also select the channel number directly by pressing the numeric buttons 0 9 8 Press the or button to select Store Select OK to confirm the exchange of channel numbers by pressing the or button Result The selected channel is exchanged with the one previously stored ...

Page 16: ...al store group are displayed with Colour system is selected 6 Indicate the broadcasting standard required by pressing the or button repeatedly Result The colour standards are displayed in the following order Auto PAL SECAM NT4 43 NT3 58 7 Press the or button to select Sound system 8 Select the sound standard required by pressing the or button repeatedly Result The sound standards are displayed in ...

Page 17: ...ect Store by pressing the or button Press the or button to select OK 13 Repeat Steps 9 to 12 for each channel to be stored Channel mode P Programme mode When completing tuning the broadcasting stations in your area have been assigned to position numbers from P00 to max P99 You can select a channel by entering the position number in this mode C Real channel mode You can select a channel by entering...

Page 18: ...e 5 Press the or button Result The current channels are displayed 6 If necessary select the channel to be assigned to a new name by pressing the or button 7 Press the or button 8 Press the or button to select a letter A Z a number 0 9 or a symbol space Move on the previous or next letter by pressing the or button 9 Repeat Steps 6 to 8 for each channel to be assigned to a new name Assigning Names t...

Page 19: ...n the Channel group are displayed 3 Press the or button 4 Press the or button to select Add Erase 5 Press the or button Result The stored channels are displayed 6 Press the or button to select the channel to add or erase If necessary select Added or Erased by pressing the or button 7 Repeat Step 6 for each channel to be added or erased Skipping Unwanted Channels ENG Select Enter Exit Channel Auto ...

Page 20: ...displayed with Tune is selected 6 To obtain a sharp and clear picture and good sound quality press the or button Result The horizontal bar is displayed Move the horizontal bar s cursor left or right by pressing the or button 7 To memorise adjusted picture or sound select Store by pressing the or button Press the or button Result OK is displayed 8 To erase adjusted picture or sound select Erase by ...

Page 21: ...required picture effect by pressing the or button repeatedly Result The following picture effects are available Dynamic Standard Movie Custom You can also set these options simply by pressing the P STD Picture Standard button Changing the Picture Standard Select Adjust Exit Picture Mode Dynamic Adjust Scan mode Natural Digital NR Off Tilt 0 LNA Off Select Adjust Exit Picture Mode Standard Adjust S...

Page 22: ...r button Result The horizontal bar is displayed Move the horizontal bar s cursor left or right by pressing the or button If you make any changes to these settings the picture standard is automatically switched to Custom The television has an automatic degaussing system that is activated if magnetic interference is present To degauss the television screen switch power off by pressing the On Off but...

Page 23: ...noise This feature is working only in a weak signal condition and that is memorized on current channel additional 1 Press the MENU button Result The options available in the Picture group are displayed 2 Press the or button 3 Select the required option Scan mode Digital NR Tilt or LNA by pressing the or button 4 Press the or button to change the setting Scan mode Natural Digital or Progressive Dig...

Page 24: ...button again Freezing the Current Picture If no signal is being received or the signal is very weak a blue screen automatically replaces the noisy picture background If you wish to continue viewing the poor picture you must set the Blue screen mode to Off 1 Press the MENU button Result The main menu is displayed 2 Press the or button to select Function Result The options available in the Function ...

Page 25: ...ired sound effect by pressing the or button repeatedly Result The following sound effects are available Custom Standard Music Movie Speech SVE SVE SAMSUNG Voice Enhancement Technic You can also set these options simply by pressing the S STD Sound Standard button Changing the Sound Standard ENG Select Adjust Exit Sound Mode Custom Equalizer Auto volume Off Melody On Pseudo stereo Off Virtual surrou...

Page 26: ...nu button 6 Select the option to be adjusted by pressing the or button Press the or button to reach the required setting If you make any changes to these settings the sound standard is automatically switched to Custom Adjusting the Sound Settings Select Enter Exit Sound Mode Custom Equalizer Auto volume Off Melody On Pseudo stereo Off Virtual surround Off Equalizer 100 300 1K 3K 10K R L Adjust Mov...

Page 27: ...MENU button Result The main menu is displayed 2 Press the or button to select Sound Result The options available in the Sound group are displayed 3 Press the or button 4 Select the required option Auto volume Melody Pseudo stereo or Virtual surround by pressing the or button 5 To activate each feature select On by pressing the or button Manufactured under license from Dolby Laboratories Dolby and ...

Page 28: ... When receiving a mono sound in the AV mode connect to the AUDIO L input connector on the panel front or side If the mono sound comes out only from left speaker press the S MODE button Selecting the Sound Mode depending on the model Type of broadcast Regular broadcast Standard audio Regular NICAM Mono NICAM Stereo NICAM Dual I II Regular broadcast Standard audio Bilingual or Dual I II Stereo On sc...

Page 29: ...displayed If the sleep timer is already set the screen displays the remaining time and then before the television will be placed in standby mode 2 Press the SLEEP button repeatedly and cycle through the preset time intervals 30 60 90 120 150 180 Result The television automatically switches to standby mode when the timer reaches 0 3 To cancel the sleep timer feature press the SLEEP button repeatedl...

Page 30: ...he or button 4 Press the or button to select Time 5 Press the or button Result The options available in the Time group are displayed with Clock is selected 6 Press the or button to move to the hour or minute Set the hour or minute by pressing the or button 7 When you have finished press the TV button to exit 8 To Press the DISPLAY button display the channel information Once display the current tim...

Page 31: ...played 6 Press the or button to select Timer 7 Press the or button to set On Result The On time and Off time are displayed 8 Press the or button to select On time Set the time at which you wish the television to be switched on automatically Press the or button to move to the hour minute or am pm Set these by pressing the or button 9 Press the or button to select Off time In the same above set the ...

Page 32: ... you are watching TV program select the channel that you want to view through a sub picture by pressing the or button When the source of the sub picture Select is set to TV you can select the channel of the sub picture 6 Press the or button to select Size Select a size of sub picture by pressing the or button Result The sizes are displayed in the following order Double Large Small 16 PIP 16 PIP Yo...

Page 33: ...button after changing the sub picture channel At this time reselect the channel of main picture STILL Used to select the channel of sub picture SIZE Used to select a size of sub picture Double Large Small or 16 PIP P Used to select the channel of sub picture LOCATE Used to move the sub picture counterclockwise SCAN Used to scan every memorized channel in order To stop scanning press it again TV VI...

Page 34: ...page number Selecting a title in a list Selecting a coloured heading FASTEXT system Teletext Feature You can display Teletext information at any time on your television For Teletext information to be displayed correctly channel reception must be stable otherwise Information may be missing Some pages may not be displayed 1 Select the channel providing the Teletext service using the or button 2 Pres...

Page 35: ...isplayed in sequence To freeze the display on a given page press the hold Press the hold again to resume Using the various display options To display Press the Both teletext information and TTX MIX twice the normal broadcast Hidden text reveal answers to quiz games for example The normal screen reveal again A secondary page sub page by entering its 4 digit number The next page page up The previous...

Page 36: ...on corresponding to the topic that you wish to select the available topics are given on the status line Result The page is displayed with other coloured information that can be selected in the same way 3 To display the previous or next page press the corresponding coloured button 4 To display the subpage see the following steps Press the sub page button Result The available subpages appear Select ...

Page 37: ...urs The button is used to switch between the LIST and FLOF modes 2 Press the coloured button corresponding to the page that will be replaced 3 Enter the new page number using the numeric buttons 4 Repeat steps 2 and 3 for each page to be stored using a different coloured button each time 5 Press the store button until the corresponding blocks blink ENG Storing Teletext Pages ...

Page 38: ...at you can redirect the signal from AV 2 INPUT to MONITOR OUT If you have a decoder connect the decoder to the VCR and the VCR to the television When you wish to record a programme connect the receiver to AV 2 INPUT and the VCR to MONITOR OUT so that you can redirect the signal from AV 2 INPUT to MONITOR OUT Whenever you connect an audio or video system to your television ensure that all elements ...

Page 39: ... Component Video Out Y PB PR connectors of the DVD player or Digital Set Top Box If you wish to connect both the DVD player and Digital Set Top Box you should connect the Digital Set Top Box to the Component1 Input and connect the DVD player to the Component2 Input Only black signal is output from a monitor in Componet1 or Componet2 mode DVD Connecting to the Audio Output The MONIOR OUT AUDIO conn...

Page 40: ...ame device Video disc player Connecting to the S Video Input The S VIDEO and RCA AUDIO L R connectors are used for equipment with an S Video output such as a camcorder or VCR Camcorder VCR To play pictures and sound both the S VIDEO and RCA connectors must be used and When both the side and rear connectors are connected to external equipments the side connectors receives priority Side of the TV ...

Page 41: ...nnected up your various audio and video systems you can view different sources by selecting the appropriate input 1 Check that all the necessary connections have been made 2 Switch your television on then press the VIDEO button repeatedly Result The input sources are displayed in the following order AV1 AV2 AV3 S VIDEO Component1 Component2 Depending on the source selected the pictures may appear ...

Page 42: ...Try to identify the electrical appliance that is affecting the television then move it further away Plug your television into a different mains socket Check the direction location and connections of your aerial This interference often occurs due to the use of an indoor aerial Replace the remote control batteries Clean the upper edge of the remote control transmission window Check the battery termi...

Page 43: ...43 ENG Memo ...

Page 44: ...LECTRONICS AA68 02452A 01 ENG AFTER SALES SERVICE Do not hesitate to contact your retailer or service agent if a change in the performance of your product indicates that a faulty condition may be present ...

Reviews: