


Doc.-ID: 210212-PT10BA-ES-RoughCam IPP1275_en_rev.00.docx, Page 14 of 20
When you open the housing, pay attention that you do not damage the GYLON® flat seal
(blue, RAL5012) and do not make it dirty! The flat gasket is loosely attached to the cable
and power supply flange. It is fixed only by the bolted connections!
Pull out the camera carefully and pay attention not to clamp the cables.
6.3
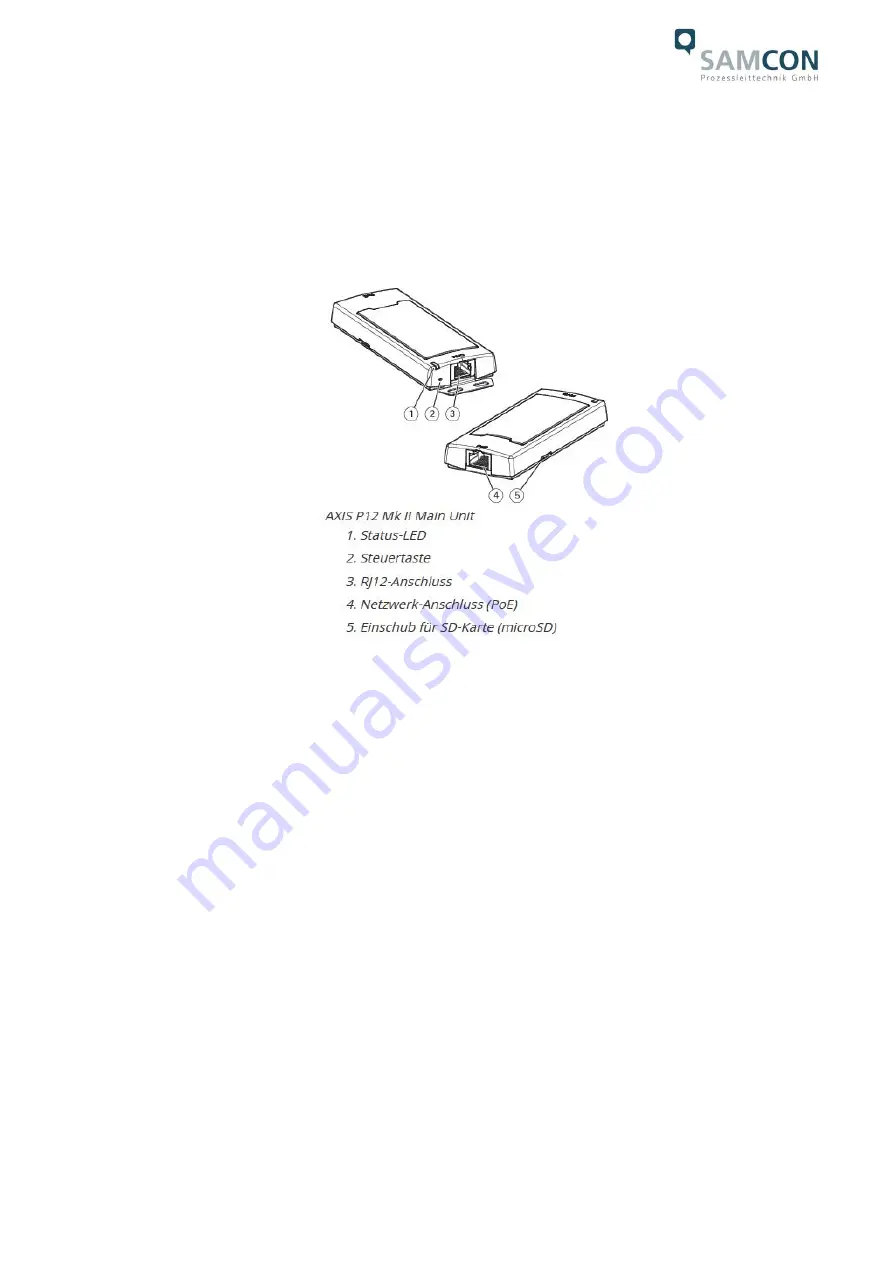
Main unit
Figure 6-2 Structure of the main unit P12 MkII
6.3.1
Hardware Reset
To set all the parameters of the RoughCam IPP1275 (including the IP address) to default
values, you should run a hardware reset.
The parameters can be reset via the web interface or manually. If the camera placed in
the network can no longer be reached or its state is uncontrollable, the reset should be
performed manually. To do so, proceed as follows:
1. Disconnect the camera installation module (Axis P1275) from the power supply.
2. Press and hold the control button and, at the same time, connect the system to the
voltage supply (PoE).
3. Hold the control button pressed for about 30 seconds.
4. Release the control button. After about a minute, the AXIS P1275 will return to fac-
tory defaults. If there is a DHCP server in the network, the IP address will be the
following: 192.168.0.90 (subnet masking 255.255.255.0).
5. IP address and password can be redefined. If the hardware reset is not satisfacto-
ry or the network camera shows serious conflicts or does not work as usual (errors
in the browser visualisation, frozen images, control commands no longer pro-
cessed, slowing down of the system, etc.), it may be necessary to re-install the
current firmware, or to install an update.


