40
Smarty 3X VE / Smarty 3X VE 3.0
www.salda.lt
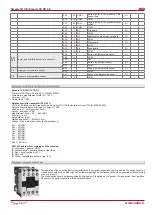
The whole control system can be reset to its default values (factory settings) in the service menu (only by “FLEX” remote
control) Password required:
“Menu” > “Additional” > “Service” > “Vent. Control” > “ResetToFactorySettings”
Press “OK”.
When this item is activated, all settings in the service and user’s environments
are restored, except for the schedule.
EN Air quality parameters control based on the CO2 converter.
1. Connect 0-10V control signal wire of the CO2 converter to the analog input T.SET of the control board (X16
„transmitter2“). Converter power supply (24VDC) wire is connected to the board 24 and neutral (0V)
wire to the COM contact (X16 „transmitter2“).
2. Configure the control board using the FLEX panel:
2.1. On the panel, select Menu → Additional → Service (enter password 4444) → Vent. Control. Change the
value of the parameter „CO2“ to „On“.
2.2. On the panel, select Menu → Additional → Service → CO2. In accordance with parameters of the CO2
converter, select the CO2 level (using ppm units), which will be indicated at 0V threshold (parameter min_0V),
and the level, which will be indicated at 10V (parameter max_10V).
2.3. On the panel, select Menu → Additional → Service → CO2. Select the level above which, when allowable
level of CO2 is exceeded, the fans will operate at maximum speed (parameter PPM_100%).
2.4. On the panel, select Menu → Additional → Add.Func. Set the maximum allowable level of CO2 above
which the supply air flow is increased (parameter CO2).
3. On the panel, in the menu Sensor overview you can see instantaneous exhaust CO2 value.
4. When allowable set CO2 level is exceeded, the information message High CO2 level is displayed at the initial
screen and the speed of fans is increased based on the amount at which allowable level is exceeded.
5. In case of any fault of the CO2 converter, menu Emergency overview shows message CO2 sensor. Check if
CO2 converter is properly connected (only current input).
1. Connect 0-10V control signal wire of the supply air pressure converter to the analog input FAN of the control board, connect 0-10V control signal
wire of the exhaust air pressure converter to the analogous input T.SET of the control board (X16 „Transmitter1“, „Transmitter2“). Converter power
supply (24VDC) wire is connected to the board 24 and neutral (0V) wire to the COM contact (X16 „Transmitter1“, „Transmitter2“).
2. Configure the control board using the FLEX panel:
2.1. On the panel, select Menu → Additional → Service (enter password 4444) → Vent. Control. Change the value of the parameter SAF to Pres-
sure. Change the value of the parameter EAF to Pressure.
2.2. On the panel, select Menu → Additional → Service → PSI. In accordance with the parameters of the pressure converter, select the minimum
threshold 0V (parameter min_0V) and the maximum threshold 10V (parameter max_10V).
2.3. On the panel, select Menu → Additional → SAF Ctrl. Set the supply air fan speeds in accordance with the pressure.
2.4. On the panel, select Menu → Additional → EAF Ctrl. Set the exhaust air fan speed in accordance with the pressure.
3. On the panel, in the menu Sensor overview, you can see instantaneous supply and exhaust air pressure values.
4. In case of any fault of the pressure converter, menu Emergency overview shows message GP sensor. Check if pressure converters are properly
connected (only current input).
System control based on the supply and exhaust air pressure converters


