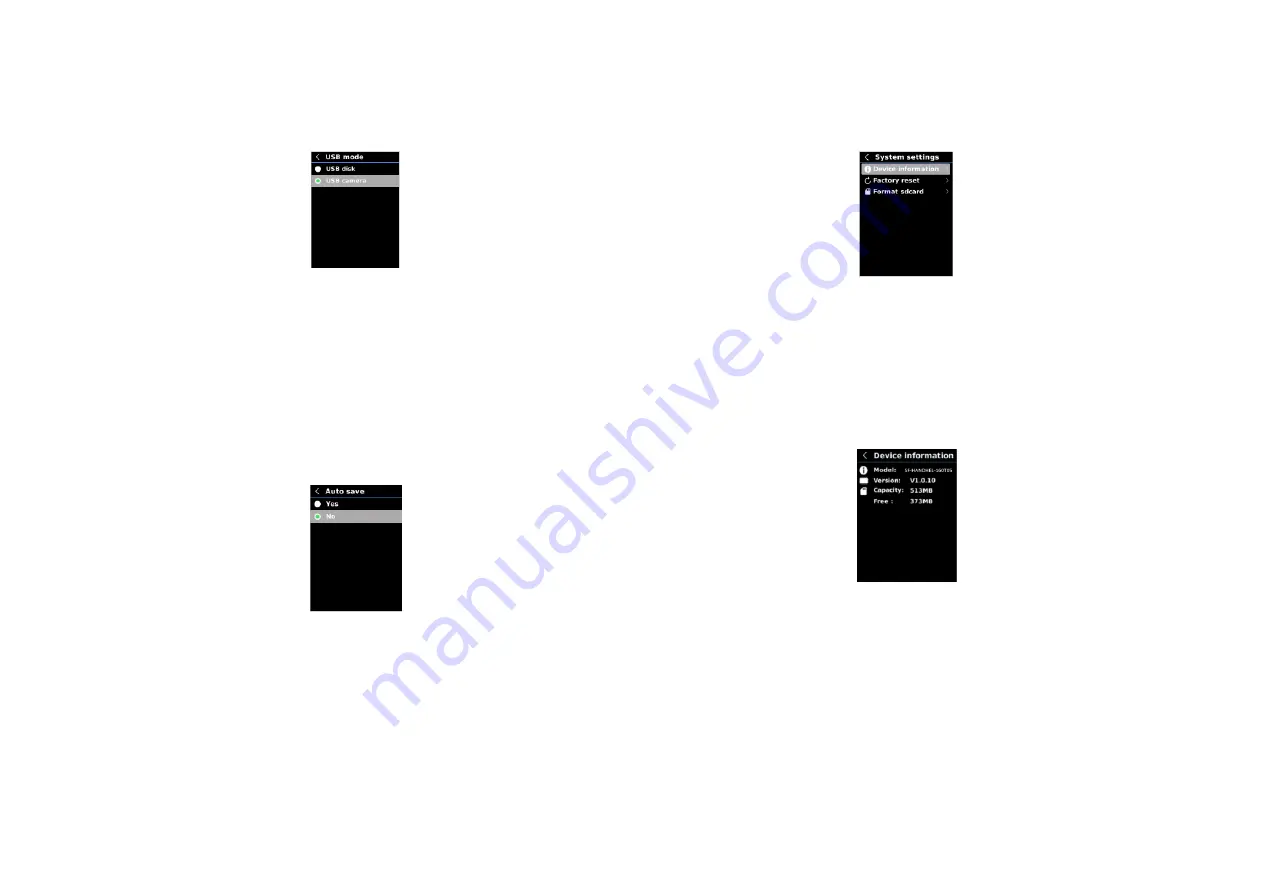
background image


5.5.8.


USB Mode 


To set USB mode: 

1.


Press the up/down button to select the USB mode option in the Settings menú 

2.


Press the SET button to enter the USB mode submenú 

3.


Press the up/down button to select USB disk or USB camera 

4.


Press the SET button to confirm 

5.


Press the back button to exit 

NOTE: USB disk mode allows users to browse pictures and analyze data on a PC, while USB 
camera mode alloows users to realice real-time image projection after connection to a PC. 

Only SF-HANDHELD-160T05 device support this function. 

5.5.9.


Auto Save 


1.


Press the up/down button to select the Auto save option in the Settings menú 

2.


Press the SET button to enter the Auto save submenú 

3.


Press the up/down button to select YES or NO 

4.


Press the SET button to confirm 

5.


Press the back button to exit 

NOTE: Do not remove or insert the SD carda in saving pictures. It is recommended to save no 
more tan 1000 pictures, so as not to affect the response speed of the product. When the number 
of pictures excedes 1000, please clean up the SD card in time. 

5.5.10.


System Settings 


To set System Settings submenu: 

1.


Press  the  up/down  button  to  select  the  System  Settings  option  in  the 
Settings menú 

2.


Press the SET button to enter the System Settings submenú 


Device Information 


To view the device information: 

1.


Press  the  up/down  button  to  select  the  Device  Information  option  in  the 
System Settings submenu 

2.


Press the SET button to view the detail information of the device 

3.


Press the back button to exit 

NOTE: Capacity is the storage capacity of the SD card in use currently. 


Summary of Contents for SF-HANHELD-160T05E

Page 1: ...SF HANHELD 160T05 E Body Tmperature Scanner System User Manual...

Page 2: ...r outlets When the measured objetct comes from a place with a large temperatura difference from the measurement environment keep it in the measurement environment for 10 to 30 minutes before measuring...

Page 3: ...s 15 Right button 7 Trigger 16 Backb button 8 LCD display 17 SET button 9 Power button 18 Tripd mounting hole 3 Display Display size 2 8 Display resolution 320 vertical x 240 horizontal pixels Item De...

Page 4: ...ion 3 Press the SET button to enter the Measurement men 4 Press the up down button to select Center Spot Center point measurement or Hi Lo Spot Maximum and m nimum temperatura measurement 5 Press the...

Page 5: ...s the SET button to turn off the point Press the back button to exit 5 4 Image Mode 1 Press the SET button to open the main men 2 Press the left right button to select the option 3 Press the SET butto...

Page 6: ...utton to selec the Date and Time option in the settings men 2 Press the SET button to enter the Date and Time submen 3 Press the left right button to select the parameter to be adjusted 4 Press the SE...

Page 7: ...re parameter 5 Press the up down button to increase or decrease the value 6 Press the SET button to save the current setting 7 Press the back button to exit NOTE For emissivity values of common materi...

Page 8: ...ss the up down button to select YES or NO 4 Press the SET button to confirm 5 Press the back button to exit NOTE Do not remove or insert the SD carda in saving pictures It is recommended to save no mo...

Page 9: ...rmat SD card option in the System Settings submenu 2 Press the SET button to enter 3 Press the up down button to select YES 4 Press the SET button to confirm 5 Press the back button to exit NOTE Durin...

Page 10: ...athena visiotech s3 eu west 1 amazonaws com nx9xDHEBlrFzs_pSrxzY 2 Connect the USB cable to the PC 3 Set the USB mode to USB disk to browse pictures and analyze data through the PC software set the U...

Page 11: ...added Certifications CE EN 61326 1 2013 EN 61326 2 2 2013 EN 61326 2 3 RoHS Visual Light camera Yes Visual light resolution 640 x 480 pixels Image blending ratio 0 pure visual light image 25 50 75 and...

Page 12: ...Maintenance Use a wet cloth or weak soap solution to clean the outer Shell of the device Do not use abrasives isopropyl alcohol or solvents to clean the outer Shell lens or window 9 Common Emissivity...

Reviews: