


C. Basic Use
29
30
C-10
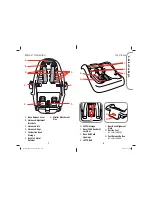
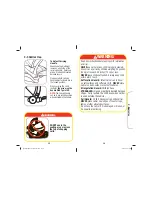
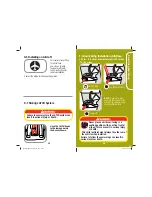
Infant Insert (on select models)
Basic Insert:
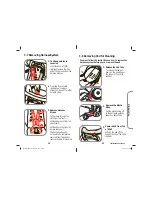
To Remove Infant Insert
Unthread the harness from
the harness adjustment
brackets. Pull harness
through the top slots and
remove the insert. Rethread
the harness straps into
the harness adjustment
brackets. Reverse to install
the infant insert.
NOTE:
Depending on your model, choose the correct method
to remove/install your infant insert if your model has an infant
insert.
When using the infant insert, make sure insert does not cover
your infant’s face in anyway. Remove the insert for older
babies.
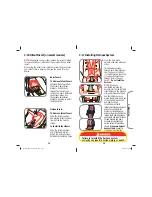
Deluxe Insert:
To Remove Infant Insert
Undo the fastening strips
and pull the infant insert out
from behind the harness
straps.
To Install Infant Insert
Undo the fastening strips
and fit the head/hip roll
behind the harness straps.
Refasten the fastening strips.
C-11
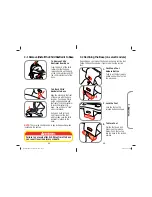
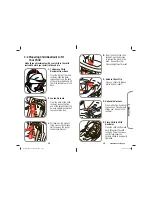
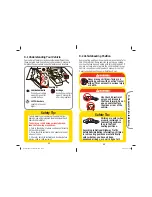
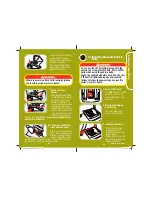
Installing Harness System
NOTE:
If you have
completely removed the
harness, start on the left side,
insert harness in the harness
slot, going through both pad
and shell. Make sure you
weave the harness in and out
of the shell, between shell
and pad, as shown.
From the front, make
harness ends even with each
other.
Thread harness straps
through each buckle tongue
from the back to the front
(1)
, thread through chest clip
(2)
and push harness ends
through slots in the seat
back
(3)
.
Do not twist the
harness.
1.
Failure to reinstall the harness system
correctly can result in serious injury or death.
3
2
1
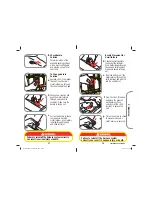
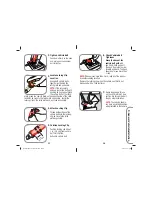
From the back of child
restraint, rethread one harness
end onto one adjustment
bracket by threading loose
end over lower bar, behind the
locking teeth and up between
upper teeth and top of bracket.
Thread harness end down
between locking teeth and
out the bottom of bracket as
shown.
Make sure harness
does not twist.
Repeat for
other adjustment bracket.
4358-6459A SF Onboard 22.indd 31-32
4358-6459A SF Onboard 22.indd 31-32
9/5/14 4:27 PM
9/5/14 4:27 PM