www.safescan.com
7
IP Address
_____ . _____ . _____ . _____
Gateway
_____ . _____ . _____ . _____
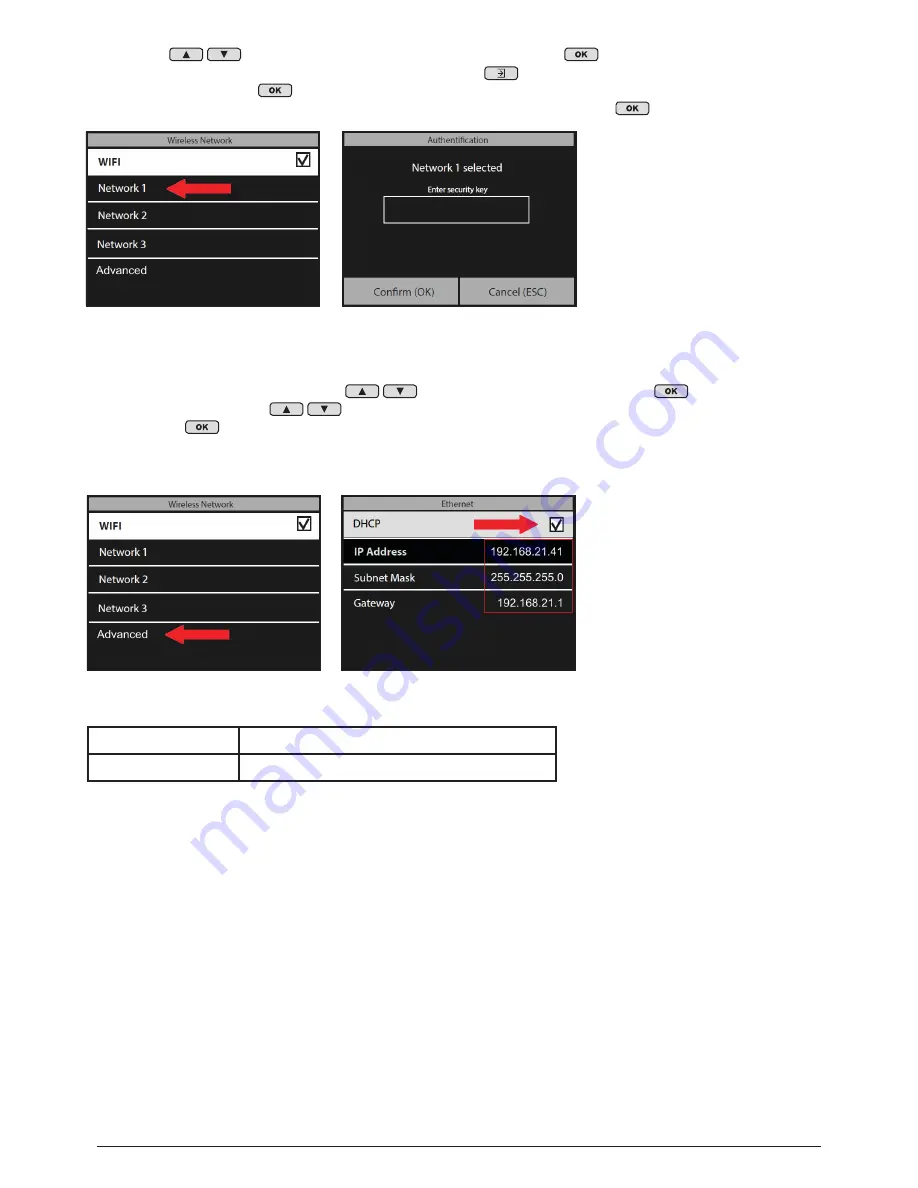
7. Please note down the values of the IP address and gateway.
6. The time clock terminal will now attempt to connect to your WiFi network. This may take a minute or two.
Once the time clock terminal shows “Connected” on its display, it is now connected to your WiFi.
In the “Wireless Network” menu, use the
to navigate to “Advanced” and press
. If “DHCP” is
not already checked, use the
to select “DHCP” and check this box. You can check/uncheck this box
by pressing the
button on the keypad.
The time clock will now automatically be assigned an IP address; this may take a minute or two.
5. Using the
on the keypad, select your WiFi network and press
. You will then be prompted
to enter the password for your WiFi network. By pressing the
button on the time clock’s keypad
(located to the left of the
button), you can choose between upper case letters (A), lower case letters
(Aa), numbers (123) and symbols. Enter the password using the keypad and press
when done.
ENGLISH


