


www.safescan.com
6
USING A WIFI CONNECTION:
4. Use the
to highlight “WIFI” and press the
key to check this box. Checking this box
activates the time clock’s WiFi module.
1. Before setting up the WiFi connection, it will first be necessary to turn off the Ethernet in order to avoid
address conflicts.
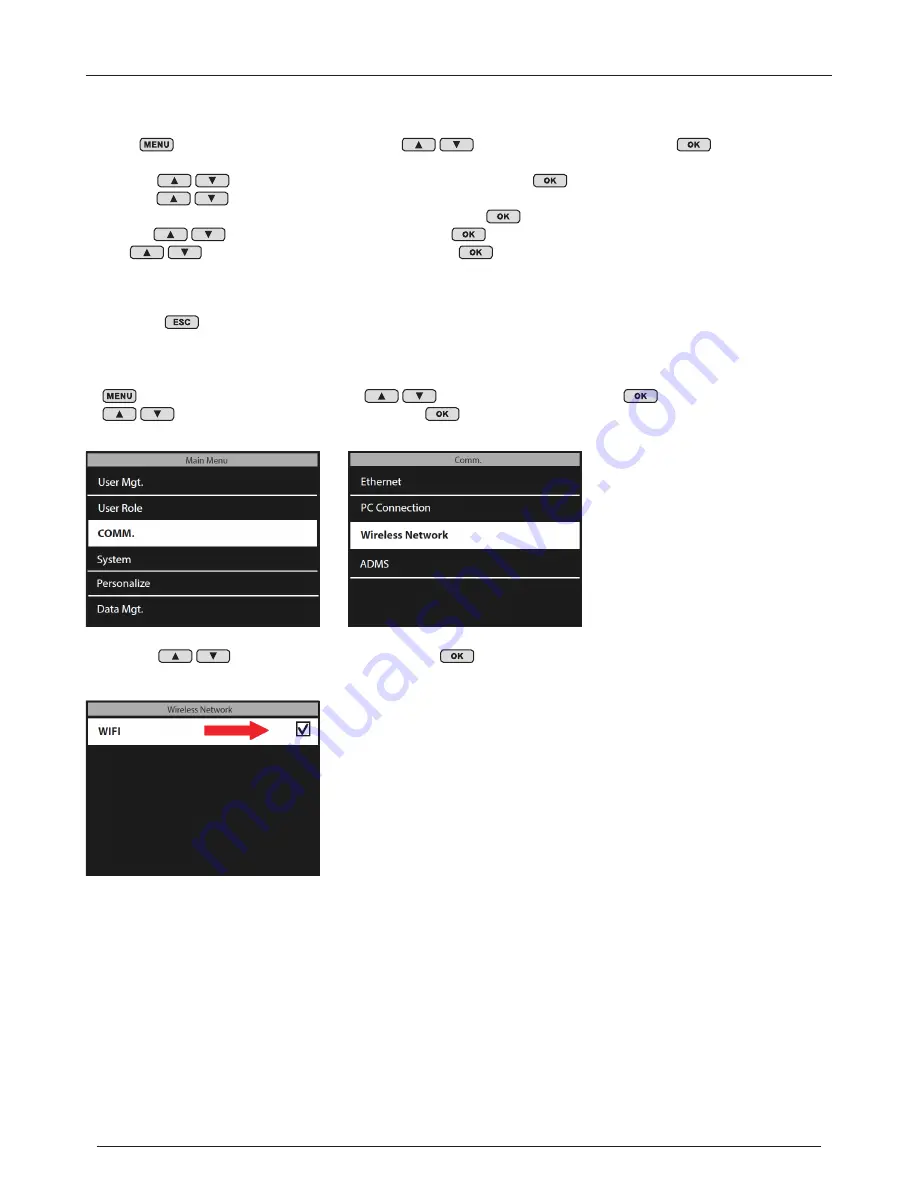
a. Press
on the time clock’s keypad, use the
to highlight “COMM” and press
on the keypad.
b. Use the
on the keypad to highlight “Ethernet” and press
c. Use the
on the keypad to highlight “DHCP”. Make sure that the DHCP box is NOT
checked. You can check/uncheck the DHCP box by pressing
on the time clock’s keypad.
d. Use the
to highlight “IP Address” and press
. Using the time clock’s numeric keypad
and
, change the IP address to 0.0.0.0. Press
on the keypad to confirm the new
address.
e. In the same manner as in step “d” above, enter 0.0.0.0 for “Subnet Mask”, “Gateway” and “DNS”
2. Press the
key on the time clock’s keypad repeatedly until you the date and time are showing on the
time clock’s display.
3. Now that the Ethernet has been turned off, we can continue with setting up the WiFi connection. Press
on the time clock’s keypad, use the
to select “COMM” and press
. Use the
to select “Wireless Network” and press
.
ENGLISH


