background image

24

Delete Function

To Delete a FOLD

1.  Press and hold STOP/DELETE button (for about 3 seconds) during stop

state.

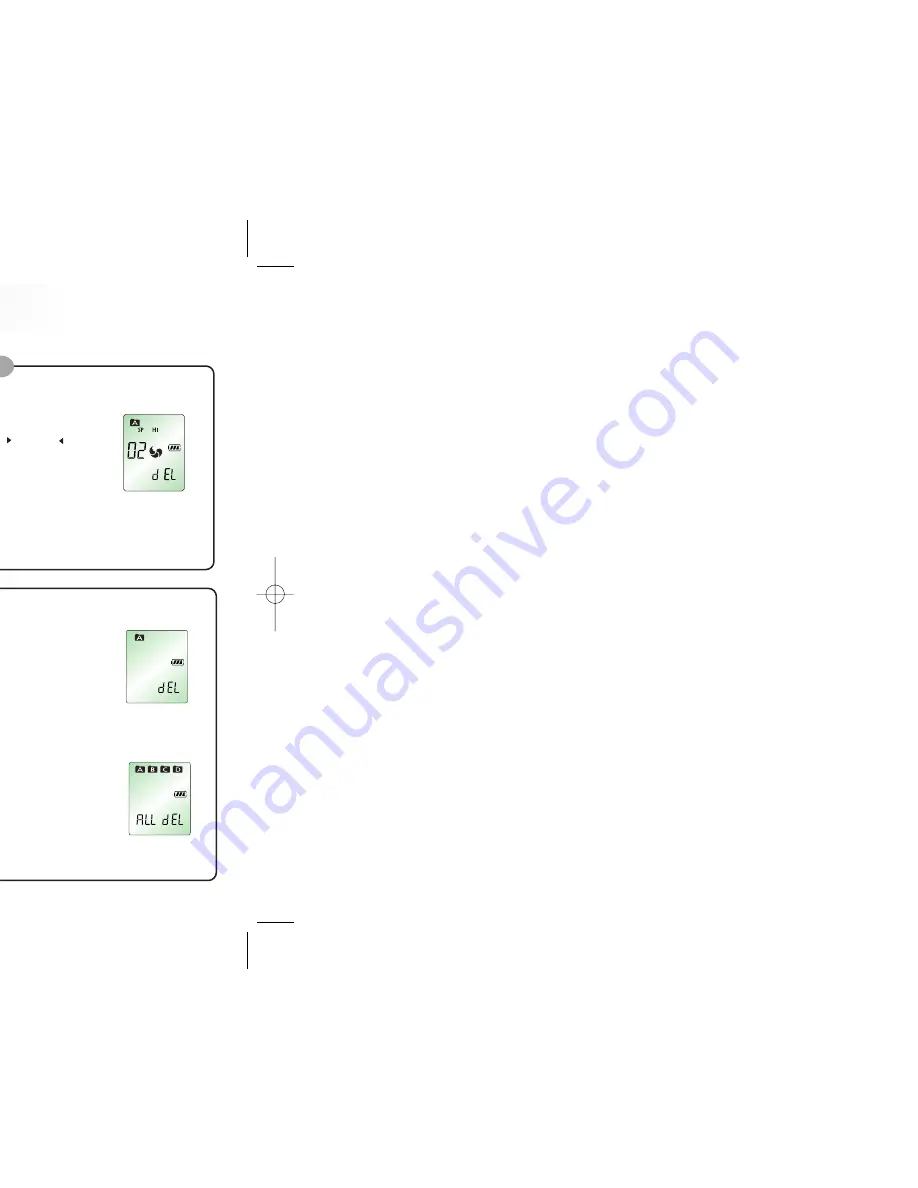
The current file appears and DEL flashes (Figure 9-1).

2.  Press the FOLD button to move to the FOLD you want to delete. 

3.  Press and hold STOP/DELETE button (for about 3 seconds) again to

delete all the indices in the selected FOLD. Your Sound MAP will stop
playing at the FOLD. (Figure 9-1)

4.  If you do not want to delete the file, press STOP/DELETE button briefly.

To delete a particular index

This is to delete indices one by one.

1.  Press STOP/DEL button briefly during playback or stop state.

The index number appears and DEL flashes while your Sound MAP 

still plays the music in delete standby state.

2.  Slide the M(MENU) button toward NEXT(

) or BACK(

) to move

to the index that you want to delete
(Figure 9-3).

3.  Press and hold the STOP/DEL button (for approximately 3 seconds) to

delete the current index (Figure 9-3).

The number of indices after the deleted index will now be decreased by one

automatically.
(i.e. If you delete the index No. 02 among the indices No. 01, 02, 03, 04, and 05,
the number of index No. 01 remains as it is and the numbers of indices No. 03, 04
and 05 become 02, 03, and 04.) 

4.  If you do not want to delete the index, press STOP/DELETE or any

other button briefly.

(figure 9-2)

(figure 9-3)

(figure 9-1)

1. Press and hold the STOP/DELETE button (for approximately 3 seconds)

during stop mode.

The current file appears and DEL flashes (Figure 9-2).

2. Press the FOLD button to select all four FOLDs (A, B, C, D). A, B, C, D,

and "ALL DEL" will appear one after another (Figure 9-2).

3. Press and hold STOP/DELETE button again to delete all the indices in all

the FOLDs. Your Sound MAP will stop playing at the FOLD 'A'.

4.  If you do not want to delete the files, press the STOP/DELETE button

briefly.

To delete all FOLDs 

This is to delete whole memories in the unit.

2

1

To delete a particular FOLD

This is to delete all FOLD indices you select 
among FOLDs of A, B, C, and D.

23

5.  Slide the M(MENU) button toward(

) or (

) to adjust 'hour(H)' you want. Slide the button

toward NEXT(

)once and 'minute(M)' indicator will flash. Slide the button toward(

)or(

)

to adjust 'minute'. ('Second' will be set as '00' automatically when the minute is set.)

6.  Slide the button toward(

)once to exit the clock mode.

If you slide it toward(

)during TIME setting, it will be back the last category.

(i.e. minute 

hour)

(figure 8-1)

(figure 8-2)

(figure 8-3)

(figure 8-4)

Alarm setting

1.  Press MENU(M) button briefly and slide the M(MENU) buttons toward (

) six times during

standby mode (Figure 8-5).

2.  Slide the M(MENU) button toward NEXT(

) or BACK (

) to select 'On ALARM'. Slide the

button toward (

) to select 'HMS' mode. Slide the button toward (

)to adjust 'hour(H)'

you want (Figure 8-3). Slide the button toward NEXT (

)and 'minute(M)' indicator will

flash. Slide the button toward(

) or(

) to adjust 'minute'.

3.  After finishing ALARM setting, slide the button toward(

)once to exit the menu mode. 

ALARM setting is available after CLOCK setting and slide the button toward

(

to enter 

into the set up mode.

(figure 8-5)

(figure 8-6)

This is for setting the alarm to go off at the time set.

Alarm will go off after sounding at the time set.

7

(figure 8-7)

23

Summary of Contents for SR-320

Page 1: ...ser s Manual RECOBOY urchase it...

Page 2: ...ures 1 n and Warnings 4 he components 5 of each part 7 dicator and Symbols 9 ng Batteries 10 k 17 al Playback 17 peed Playback 17 peed Search 1 18 peed Search 2 18 ck on other Indexes 18 tion Playback...

Page 3: ...e t to malfunction direct sunlight or any source of heat o not intend to use this product for any es earphone earmic or audio cables ense of responsibility from damage or using this product bility to...

Page 4: ...6 es Model SR 320SR 160SR Stereoearphone ernalMicrophone Monoearphonefor mobilephone excluded CD ROM ttery AAX2 OYUser s manual Mreceiver Externalspeaker attery AAAX1...

Page 5: ...8 Reset Switch Volume control Earphone connector 20SR 160SR AKER Model SR 320SR 160SR Power On Off Speaker Recording input selection switch Telephone wire connector...

Page 6: ...g Approximately 6 hours nd close the cover ill display all indicators Figure 1 and will switch to recording h the power on Your Sound MAP will be in the standby mode ction is activated for 1 minute 2...

Page 7: ...you do not do activate use your RECOBOY for on HOLD e operation during play or out 2 seconds in the D ON unit is in HOLD ON mode ng the button will not gure 2 1 about 2 seconds in the ing that the loc...

Page 8: ...e source of the sound cording REC will be displayed on LCD ecording for a short moment Figure 4 3 nue the recording USE button during recording or during standby mode to nal microphone uct is in the p...

Page 9: ...conversation Y Audio Cable Connector LINE Connect the adapter ephone conversation recording telephone to the adapter built in microphone See page 11 sed for recording Please test the recording n of i...

Page 10: ...the time indicator will flash If not the and You can adjust the time and minute you the MENU M button to start the playback on the time you BACK button the NEXT button or BACK button during LCD incre...

Page 11: ...utton or wait about 5 seconds to select slide M MENU button toward or BACK VOR OFF DELETE button or wait about 5 e recommended e Put the mic close to the source of the sound figure 7 2 figure 7 3 figu...

Page 12: ...ns toward five times during EXT or BACK to enter into a DATE set up mode or to adjust date you want Slide the button ndicator will flash Slide the button toward or ward NEXT once and day indicator wil...

Page 13: ...ely 3 seconds to ill now be decreased by one dices No 01 02 03 04 and 05 the numbers of indices No 03 04 ess STOP DELETE or any figure 9 2 figure 9 3 figure 9 1 for approximately 3 seconds s Figure 9...

Page 14: ...t side ON n he switch ON there can be inferiority he battery out place and turn the power switch ON e main unit will turn on automatically speaker without batteries in the main unit in MIC position op...

Page 15: ...isten er to listen the received broadcasting FM reception extent it will not receive section saved in the memory after you disconnect the FM er again you should try to receive FM again FM radio discon...

Page 16: ...or the services in Charged Service Guide he country of purchase and keep it at the safe place r when any problem occurs to this product gence ed modification or repair ards such as fire seawater flood...

Reviews: