


21
Display Mode is for switching the system outputting
video resolution. Move highlight on it and press left or
right key, it will switch video resolution circularly by the
sequence "AUTO", "By Native TV","480p", "576P",
"720P_50","720P_60,"1080i_50"," 1080i_60" ,"
1080P_50" and" 1080P_60"This effect is equal to press
V.Format Key under Full Screen and their last setting
saving will be efficient for each others. By Source means
system will set the video output resolution according to
the program it’s playing, different resolution programs
switching perhaps will makes TV screen flickering. By
Native TV means system will be according to the HDMI
TV’s max supported resolution to set its resolution, if
system is not connected to a HMDI TV, it will set
resolution to be default
Aspect Mode is for switching the screen aspect
ratio mode. Now we provide below options: 4:3
PS / 4:3 LB / 16:9/Auto. You can press [Left/Right]
key to select each mode circularly. 16:9 will
provide user pillar box mode it means user use
16:9 TV to display but need to see a 4:3 full display
picture. System will force press wide screen
picture to be narrow and there
’
re black band on
left and right site. Auto means system won
’
t do
any aspect ration translation, 16:9 picture source
will be good display on a 16:9 TV but will be too
narrow on a 4:3 TV, and 4:3 picture source will be
too wide
in a 16:9 TV but will be good
display in a 4:3 TV.
Digital Audio Out is for setting the both SPDIF and
HDMI’s digital audio output mode, it has options
LPCM Out, Auto, You can press [Left/Right] Key to
select each mode circularity. LPCM Out means
system will decode no matter AC3 or PCM audio
track data to be LPCM, digital audio decoder or
HDMI TV will get LPCM digital audio data. Auto
means system will detect which the connected
HDMI TV can decode and then output that data. If
HDMI TV can decode AC3, system just output
RAW data, if HDMI TV can decode LPCM only,
system will just decode AC3 or LPCM to be LPCM
and then output.
Service Switch Mode: Press [left/right] button to
select unblank or blank.
Press [
MENU
] key to draw back from “A/V
Control” menu.
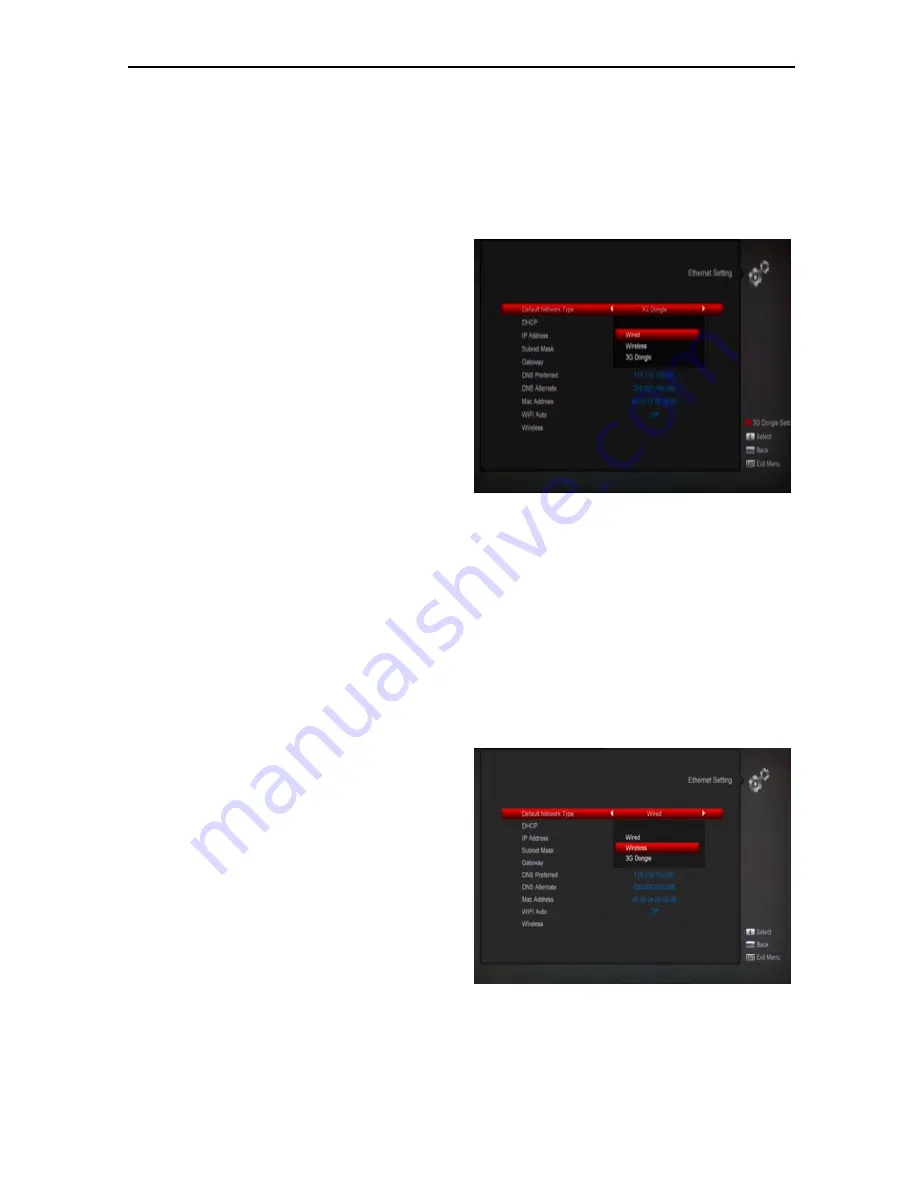
10.3 Ethernet Setting
When you enter to “Ethernet Setting” menu, you will see
the screen like below
Wire Network
1.Select Wire Network on Link Type item
2.You can configure the Ethernet setting options.
a).DHCP: The system will automatically assign a
dynamic IP address to the digital receiver
b). IP Address:The IP Address, Subnet Mask,
Gateway and DNS options become enabled. You have
to set these options according to your IP address by
manual.
3. Press [Menu] key to save and exit
Wi-Fi Nekwork
1.Select Wireless Network on Link Type item
2.Press [red] button the wireless LAN network list will
appear, Select you Wi-Fi network and press [ok]
button, at last input password.