background image

User Manual 


75 


Calibration Kit


Industrial Version 

74CK011-170 


Rosenberger Hochfrequenztechnik GmbH & Co. KG  
P.O.Box 1260       D-84526 Tittmoning       Germany 
www.rosenberger.com


Tel.    : +49 8684 18-0  
 
Email : [email protected]


Page 


14 / 15


D

ie

s

e

s

 D

o

k

u

m

e

n

is

u

rh

e

b

e

rr

e

c

h

tl

ic

h

 g

e

s

c

h

ü

tz

 T

h

is

 d

o

c

u

m

e

n

is

 p

ro

te

c

te

d

 b

y

 c

o

p

y

ri

g

h

 R

o

s

e

n

b

e

rg

e

H

o

c

h

fr

e

q

u

e

n

z

te

c

h

n

ik

 G

m

b

H

 &

 C

o

K

G


6.3 Handling and Storage 


  Install the protective end caps and store the calibration devices in the foam-lined storage case 

when not in use. 

  Never store connectors loose in a box, or in a desk or bench drawer. This is the most common 

cause of connector damage during storage. 

  Keep connectors clean. 


Do not touch mating plane surfaces. Natural skin oils and microscopic particles of dirt are easily 
transferred to a connector interface and are very difficult to remove.


7. Connections 

 
Good  connections  require  a  skilled  operator.  The  most  common  cause  of  measurement  error  is 
bad connections. The following procedures illustrate how to make good connections. 
 

Making a Connection 


The  calibration  kit  comes  with  a  so-called  combi-wrench  which  is  a  useful  tool  to  make 
connections.  This  wrench  helps  you  to  hold  the  device  body  and  prevent  it  from  rotating  while 
making a connection. 
 

Preliminary Connection 


1.  Ground  yourself  and  all  devices.  Always  wear  a  grounded  wrist  strap  and  work  on  a 

grounded, conductive table mat. 

2.  Visually inspect the connectors. 
3.  If necessary, clean the connectors. Refer to 4.1 Connector Care. 
4.  Check connector gage according to 6.2.1 and 6.2.2. 
5.  Carefully align the connectors. The male connector centre pin must slip concentrically into 

the contact finger of the female connector. 

6.  Push the connectors straight together and tighten the connector nut finger tight. 


CAUTION: Do not turn the device body. Only turn the connector nut. Damage to the centre 
conductor can occur if the device body is twisted. 


Do not twist or screw the connectors together. As the centre conductors mate, there is 
usually a slight resistance. 


7.  The preliminary connection is tight enough when the mating plane surfaces make uniform, 

light  contact.  Do  not  overtighten  this  connection.  A  connection  in  which  the  outer 
conductors  make  gentle  contact  at  all  points  on  both  mating  surfaces  is  sufficient.  Very 
light finger pressure is enough to accomplish this. 


8.  Make  sure  the  connectors  are  properly  supported.  Relieve  any  side  pressure  on  the 

connection from long or heavy devices or cables. 


9.  Use  the  combi  wrench  and  the  torque  wrench  included  in  this  calibration  kit  to  make  the 

final connection. Hold the female connector with the combi wrench and position the torque 
wrench at right angle to the axis of the connection and in the indicated working direction. 
Hold the handle in the middle and turn it until the torque wrench “breaks”. 

Summary of Contents for 74CK011-170

Page 1: ...hnik GmbH Co KG P O Box 1260 D 84526 Tittmoning Germany www rosenberger com Tel 49 8684 18 0 Email info rosenberger com Page 1 15 Dieses Dokument ist urheberrechtlich gesch tzt This document is protec...

Page 2: ...4 Calibration Certificate 1 5 2 Specifications Environmental Requirements 2 1 Electrical and mechanical Specifications 2 2 3 Standard Definitions Standard Definitions 3 1 Installation of Standard Defi...

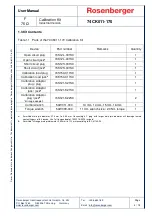
Page 3: ...his calibration kit allow you to perform one port OSL OSM or two port OSLT TOSM and TRM TMR calibrations from DC up to 6 GHz for measurements of Rosenberger components with F 75 connectors Components...

Page 4: ...a 74K12L 001S3 1 Short circuit plug 74S12S 001S3 1 Short circuit jacka 74K12S 001S3 1 Calibration load plug 74S150 C11S3 1 Calibration load jacka 74K150 C11S3 1 Calibration Adaptor plug plug 74S121 S2...

Page 5: ...PNA Keysight Agilent and ZVA Rohde Schwarz Calibration Certificate as PDF file Standard Definitions Cards Printed Standard Definitions that can be used on nearly all Vector Network Analyzers Kit Info...

Page 6: ...ure range for which the specifications are valid is defined in the specific data sheets 2 2 Electrical and mechanical Specifications Electrical and mechanical specifications are defined for all calibr...

Page 7: ...a more complex process Please consult the VNA operating manual Some network analyzers allow a step by step input of the model based standard definitions during the VNA calibration without previously l...

Page 8: ...thmic Sweep range start frequency stop frequency Number of points frequency step size Source power IF bandwidth small IF bandwidth basically increases the dynamic range Sweep time Connect test port ca...

Page 9: ...ilable In cases when the two VNA test ports have different connector systems installed e g RPC N 75 and F 75 UOSM can handle this situation A second calibration kit is needed Calibration Procedure Ada...

Page 10: ...cal Rosenberger sales office Please use the Service Form at the end of this manual if there are any known problems with your calibration kit 5 4 Extent of Rosenberger Re Calibration Services Every cal...

Page 11: ...s will usually also have raised edges around them and will make less than perfect contact further to this raised edges on mating interfaces will make dents in other connectors to which they are mated...

Page 12: ...olvents directly on to the connector surfaces or use contaminated solvents Use the low pressure compressed air once again to remove any remaining small particles and to dry the surfaces of the connect...

Page 13: ...grity non destructive mating and electrical performance of the connector The mechanical gauging of coaxial connectors will detect and prevent the following problems Inner conductor protrusion This may...

Page 14: ...ways wear a grounded wrist strap and work on a grounded conductive table mat 2 Visually inspect the connectors 3 If necessary clean the connectors Refer to 4 1 Connector Care 4 Check connector gage ac...

Page 15: ...onnecting a sliding load leave the centre conductor pullback handle in the locked position Use the combi wrench to prevent the device body from turning Use torque wrench to loosen the connecting nut C...

Reviews: