background image

APPENDICES 

18 

Installation and Operations Manual 


Appendix A – Specifications 


Part Number 

Description 

KVM-4TDDL/A1 

DVI-I Dual Link, USB 2.0, 1x4 KVM switch 

KVM-8TDDL/A1 

DVI-I Dual Link, USB 2.0, 1x8 KVM switch 

 (All models feature    Dual-Link video, USB 2.0, and Audio support) 
  KIT-RCSMDM005 

Sync serial cable 

 RM-VDP14/19           Rackmount kit for 1x4 model 
 KIT-ACC-ATRF/4.0   Serial cable 

 
Dimensions:


Model 

Width 
(in / mm) 

Depth 
(in / mm) 

Height 
(in / mm) 

Weight 
(lbs / kg) 

1 x 4 

9.2 / 233 

4.5 / 115 

1.75 / 44 

1.8 / 0.67 

1 x 8 

19 / 482 

8.5 / 215 

1.8 / 45 

4.6 / 1.2 


Video: 


Dual link  

DVI-I  

Resolution 

2K (2048x1080)  


WQXGA (2560 x 1600) 


Connectors: 

 DVI in / out 

DVI-I female 

Keyboard 

USB Type A        

Mouse 

USB Type A 

Audio 

3.5mm Female audio jack 

 USB2.0 

Type A – Peripherals (2) 


 Type B – To Computer (1) 


 Power  Male barrel jack 


Controls: 


 Front Panel push buttons (Computer / Mode) 


Power: 

 Adapter 

100 – 240 VAC 50/60 Hz /  


+5 VDC / 2A(1x4) - 4A(1x8) 


Operating 

32ºF - 104ºF (0ºC - 40ºC)


Temp. 


Approvals: 

CE, FCC


Summary of Contents for Vista DVI Plus

Page 1: ...Vista DVI Plus KVM Switch with USB Audio 10707 Stancliff Road Phone 281 933 7673 Houston Texas 77099 WWW ROSE COM INSTALLATION AND OPERATIONS MANUAL ...

Page 2: ...HANTABILITY AND FITNESS FOR A PARTICULAR PURPOSE ARE LIMITED IN DURATION TO A PERIOD OF ONE YEAR FROM THE DATE OF PURCHASE AND NO WARRANTIES WHETHER EXPRESS OR IMPLIED WILL APPLY AFTER THIS PERIOD SOME STATES DO NOT ALLOW LIMITATIONS ON HOW LONG AN IMPLIED WARRANTY LASTS SO THE ABOVE LIMITATION MAY NOT APPLY TO YOU IF THIS PRODUCT IS NOT IN GOOD WORKING ORDER AS WARRANTED ABOVE YOUR SOLE REMEDY SH...

Page 3: ...e the receiving antenna b Increase the separation between the equipment and the receiver c Connect the equipment to an outlet on a circuit different from that to which the receiver is connected d Consult the supplier or an experienced radio TV technician for help FCC Compliance Statement United States This equipment generates uses and can radiate radio frequency energy and if not installed and use...

Page 4: ...iguration mode 9 Managing EDID video display information 10 Auto scanning 11 Installing synchronizing multiple units 11 OSD Configuration menus 11 Functions 12 Global Preferences 12 Mouse Switching 12 OSD Color 12 Default Mode 13 Reminder Banner 13 Autoscan Mode 13 Autoscan Period 13 OSD Dwell Period 13 Setup Options 14 Language 14 Hotkeys 14 Default Channel 14 Edit Computer List 15 EDID Options 1...

Page 5: ...otkey switching The Vista DVI Plus also features two independent switchable USB 2 0 ports and an audio port These ports can be switched to different computers Switching is accomplished using local keyboard hotkey sequences the front panel controls serial commands or using a 3 button mouse With these switching options you can quickly reassign the connected peripherals to any of the connected comput...

Page 6: ...le in 2 different configurations All models operate the same and computers and peripherals are switched in the same manor Rear View 1x4 Rear View 1 x 8 User Console Connections Video In 1x4 DVI I 1x8 DVI I Video Out 1x4 DVI I 1x8 DVI D HD15 Keyboard USB Type A Mouse USB Type A USB 2 0 Type A 2 Audio 3 5mm stereo jack Options RS232 DB9 1x8 unit also has VGA video user port Computer Connections Vide...

Page 7: ... are 6 different mode configurations to choose from Each time the mode button is pressed a different combination of peripherals to switch is selected The below table shows the different combinations The bottom row of indicators on the 8 port model are KB Keyboard data being received UPG Unit is in the upgrade mode MS Mouse data being received LCK Not used OSD ON screen display is active PWR Power ...

Page 8: ...and 1x8 models install and operate in the same manner 1 User Console Connections User Console Connections Connect a set of stereo speakers to the audio input jack if needed Connect the USB keyboard and USB mouse to the corresponding USB ports on the rear panel Connect a video monitor to the DVI I female connector on the rear panel or VGA connector 8 port model If you need to extend the monitor pas...

Page 9: ...h computer s audio output to the audio input port on the Vista DVI Plus unit s rear panel 4 Applying power Each unit is supplied with a 110 240 VAC 50 60Hz power adapter that supplies a 5 VDC 4A 20 watts to the Vista DVI Plus unit There is no on off power switch on the unit Operation begins as soon as power is supplied to the unit 1 Connect the power adapter output connector to the 5V power jack o...

Page 10: ...on is press the unit sequences to the next sequential computer number and the video from that computer is displayed on the user console monitor Figure 1 Front panel controls The Mode button shows selects which peripherals are connected to the selected computer Each time the mode button is pressed different peripherals are selected to switch to the selected computer The table below shows the periph...

Page 11: ...herals to a given channel 1 Press and hold Ctrl and Alt key 2 Press and release the command key A K S or U A switch all peripherals K switch only the keyboard monitor and mouse S switch only the speakers U switch only USB1 and USB2 3 Press and release the channel number 1 4 or 1 8 to switch the peripheral choice 4 Release the Ctrl and Alt keys Example To switch all peripherals to channel 2 press a...

Page 12: ...ity None Table 1 Serial Cable With the proper serial cable connected from a computer and the Vista DVI Plus start your computer s serial communication program HyperTerminal TeraTerm etc Set the serial port parameters as designated in Table 1 NOTE The 1x4 unit uses an 8p8c to DB9 cable The 1x8 unit uses a straight through DB9 to DB9 cable To select a channel enter the below code If entering ASCII c...

Page 13: ... configuration change or Press the E key and then press Enter to exit and save the changes Menu Mode Selection Letter Number Description Functions Menu System Functions F 1 Enter Show current firmware version F 2 Enter Refresh EDID information from the connected video display F 8 Enter Reset configuration to factory defaults Hotkey Menu Change hotkey from default setting to H 1 Enter Ctrl Alt Defa...

Page 14: ...ation menu 2 Using the user console keyboard press the H key then the 2 key then enter the hotkey is changed to Ctrl shift 3 Press the E key then Enter to exit and save the changes The hotkey default is now set to Ctrl Shift Managing EDID video display information Whenever a Vista DVI Plus unit is powered on or when the refresh EDID option is selected from the configuration menu it will interrogat...

Page 15: ...rence setting U 7 or U 8 To stop the auto scanning press the COMPUTER button on the front panel or select a specific channel using the hotkey channel number Installing synchronizing multiple units If your system requires video from a dual head PC the Vista DVI Plus unit can be connected to a second unit to handle the second video The main unit is connected to the second unit using a serial synchro...

Page 16: ... press enter Below describes each selection Mouse Switching Selection Enabled Disabled Mouse Type Three button or IntelliMouse Select Mouse Switching from the menu and ENABLE the option You can then switch computer ports by pressing the center button or the wheel and left mouse button together Each press causes the unit to switch to the next available port NOTE When Mouse Switching is ENABLED the ...

Page 17: ... selected during the autoscan mode If SCAN LIST is selected only the computers that have been checked x on the Edit computer list If ALL PCs is selected all computer ports will be scanned including those that have no connected computer If ACTIVE PCs is selected only computer ports that have an active computer connected will be displayed The Autoscan Period setting determines how long each computer...

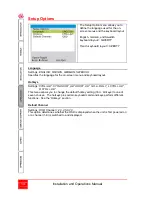
Page 18: ...Ctrl Alt keys to one of seven choices The hotkeys plus certain keyboard command keys perform different functions See the Hotkeys section Default Channel Settings OSD Channel 1 2 3 4 5 6 7 8 This option determines whether the OSD is displayed when the unit is first powered on or a channel 1 8 is switched to and displayed The Setup Option menu allows you to define the language used for the on screen...

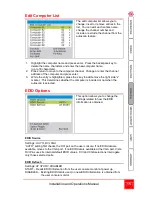
Page 19: ...ss the x key to add remove the right side x marker This determines whether the computer is included or not when the autoscan is selected EDID Options This option allows you to change the settings related to how the EDID information is obtained EDID Source Settings AUTO DVI VGA AUTO setting first checks the DVI port on the user console If no EDID data are available moves to the VGA port If no EDID ...

Page 20: ...insured and shipped to Rose Electronics Attn RA__________ 10707 Stancliff Road Houston Texas 77099 USA Technical Support If you are experiencing problems or need assistance in setting up configuring or operating your Vista DVI Plus consult the appropriate sections of this manual If however you require additional information or assistance please contact the Rose Electronics Technical Support Depart...

Page 21: ...his Unit Always unplug this Unit from its electrical outlet before cleaning Unplug this Unit from the electrical outlet and refer servicing to a qualified service center if any of the following conditions occur The power cord or connection cables are damaged or frayed The Unit has been exposed to any liquids The Unit does not operate normally when all operating instructions have been followed The ...

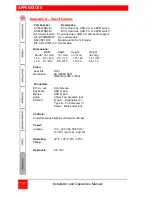
Page 22: ... 0 Serial cable Dimensions Model Width in mm Depth in mm Height in mm Weight lbs kg 1 x 4 9 2 233 4 5 115 1 75 44 1 8 0 67 1 x 8 19 482 8 5 215 1 8 45 4 6 1 2 Video Dual link DVI I Resolution 2K 2048x1080 WQXGA 2560 x 1600 Connectors DVI in out DVI I female Keyboard USB Type A Mouse USB Type A Audio 3 5mm Female audio jack USB2 0 Type A Peripherals 2 Type B To Computer 1 Power Male barrel jack Con...

Page 23: ... 60Hz VESA STD 1280 x 720p at 60Hz VESA STD 1920 x 1080p at 60Hz VESA STD Appendix C Synchronizing multiple units The Vista DVI Plus unit can be connected to another unit to switch four or eight dual video heads simultaneously The units are connected together with a special synchronizing cable connected to the Option port on each unit One video head is connected master unit and the second video he...

Page 24: ...10707 Stancliff Road Phone 281 933 7673 Houston Texas 77099 WWW ROSE COM ...

Reviews: