G A L A X Y N A S L X C O N F I G U R A T I O N A N D S Y S T E M I N T E G R A T I O N G U I D E
36
Section 3 Menu Functions
3.1.1.3
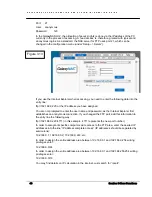
Function: “NFS share access” Figure 3.4
Using this function you activate access to a particular share via NFS. In order to activate NFS
on the NAS server, you must enable usage of NFS in menu: setup>server > Function NFS
settings.
In order to mount this share via NFS, use following syntax:
mount -t nfs IP_addr:/share/share_name /local_mount_point
You fill-in the NFS options fields based on this information:
Allow access IP: Enter an IP or address range that is allowed to access NFS. You can enter
single IP or multiple IP separated with semicolon or an IP address range. IP addresses that
are not added to the ‘allow write’ list will have read only access.
Allow write IP: Enter an IP or address range that is allowed to write to NFS. You can enter a
single or multiple IP separated with semicolon or IP address range.
When you leave ‘allow access IP’ and ‘allow write IP’ fields blank, all computers in the subnet
will have write access to NFS. When you set ‘allow access’ and leave ‘allow write’ IP field
blank, then specified computers will have read only access and none will have write access.
When you set ‘allow write’ IP without ‘allow access’ IP, then specified IPs will have write
access and all computers in the subnet will have read only access.
xxx.xxx.xxx.xxx
Figure 3.3


