Galaxy GHDX4 RAID iSCSI-SAS/SATA InstaHardware Reference Manual
86
subsystem. Do not leave the drive bay open for an
extended period of time or the normalized airflow will
be disrupted and system components will overheat
damaging the system.
Replacing a Hard Drive
To replace a hard drive, please follow these steps:
Step 1.
Identify the location of the drive tray
that contains a
hard drive indicated as faulty. You may use firmware
utility or Galaxy Array Manager software to locate a
faulty drive. The drive tray LED should also light red.
Step 2.
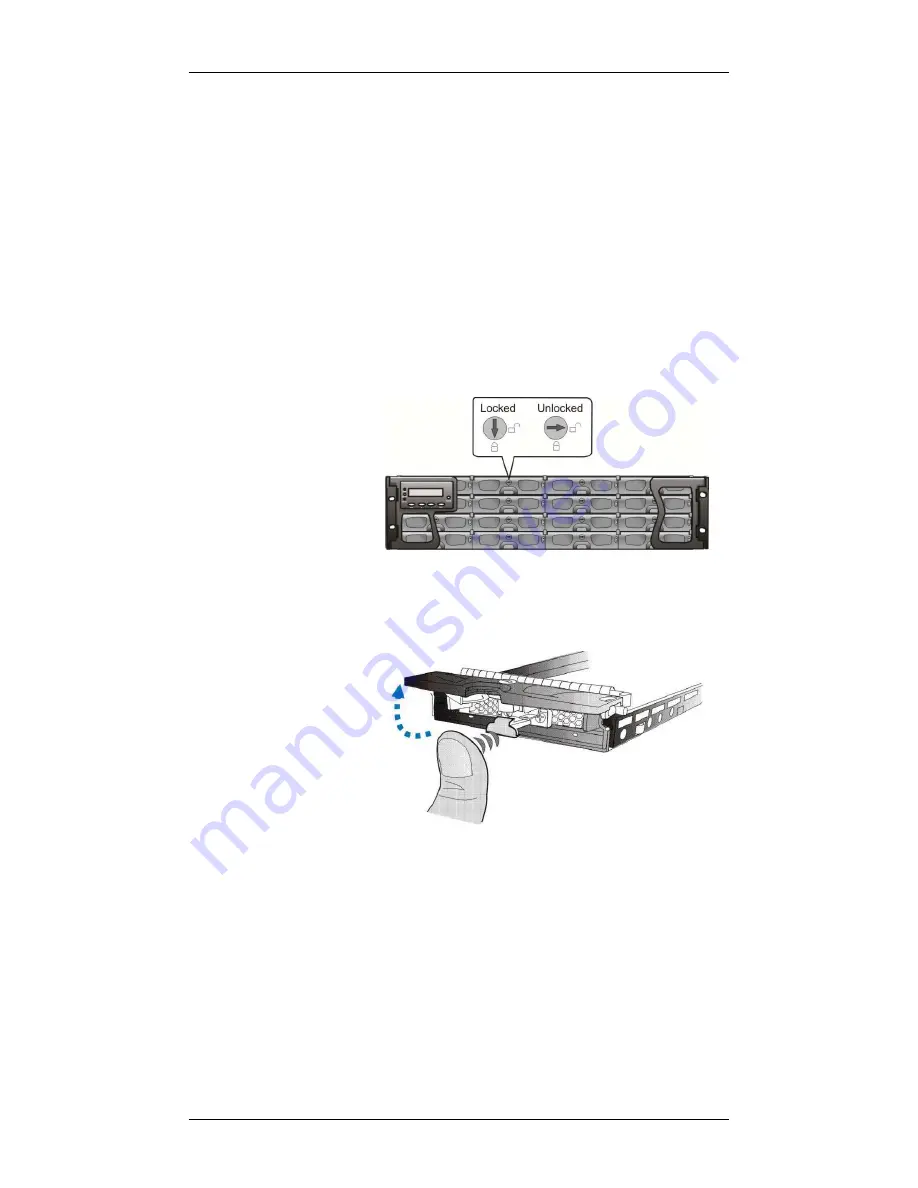
Use a flatblade screwdriver to turn
the rotary bezel
lock to the unlocked position
, i.e., the groove on its
face is in a horizontal orientation.
Opening the Front Flap
Step 3.
Open the tray bezel
by pushing the release button.
The front bezel will automatically swing open.
Opening the Drive Tray Front Bezel
Step 4.
Remove the drive tray by pulling it one inch away
from the drive bay. Wait for at least 30 seconds for
the disk drive to spin down
(if the disk drive is
removed for a different purpose, e.g., cloning the
members of a logical drive or Copy & Replace),
and
then
gently and carefully withdraw the drive tray from
the chassis.
Step 5.
Remove the four (4) retention screws
that secure
the hard drive from the sides of the drive tray (two on
each side.)


