105
Appendix
About Rack Mounting
Attaching the included rack-mount angles lets you install the V-160HD in a 19-inch rack.
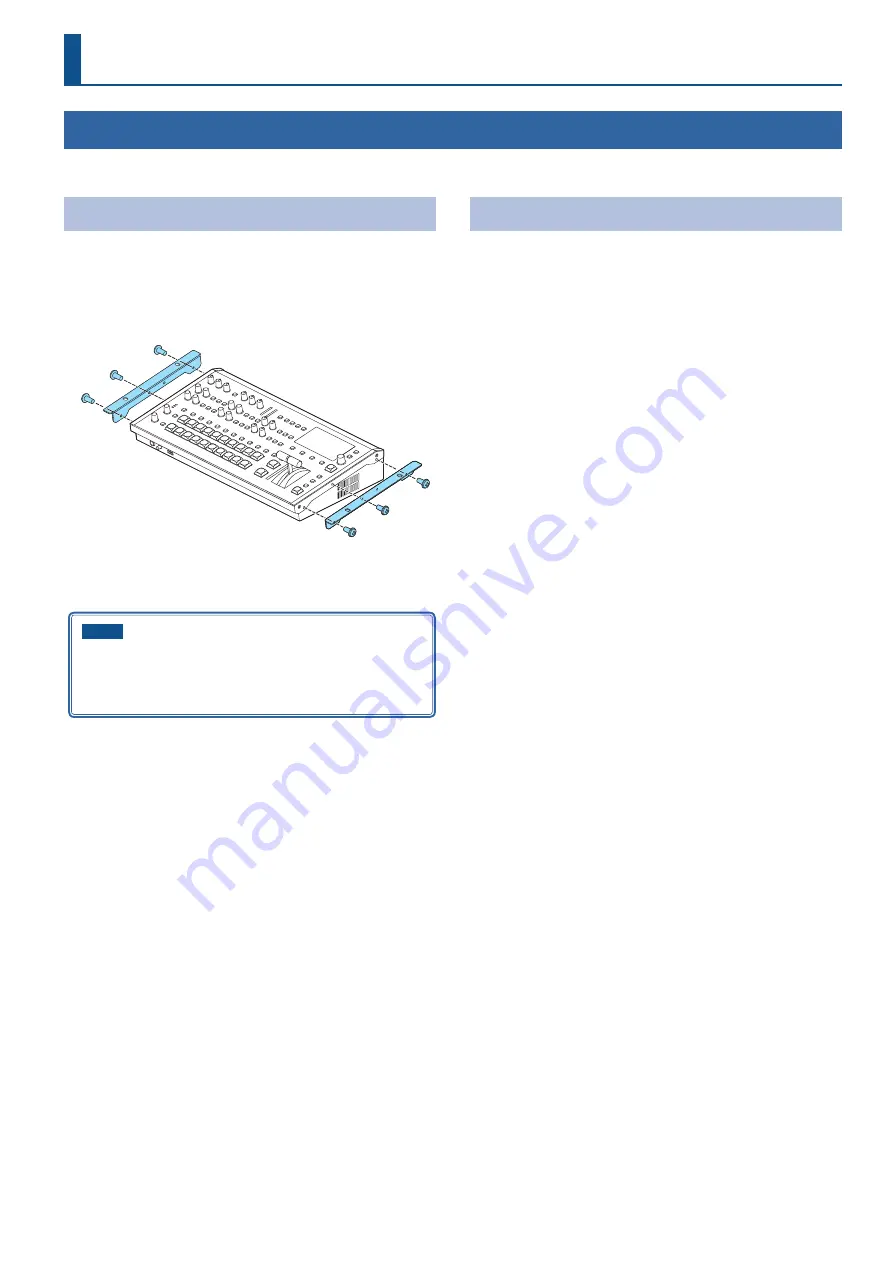
Attaching the Rack-Mount Angles
1 .
Turn off the power to the V-160HD and disconnect the
power cord and all connection cables.
2 .
Use the included mounting screws (three per side) to
attach the rack-mount angles.
* Both of the rack-mount angles have the same shape; there is no
difference between left and right.
NOTE
When uninstalling the rack-mount angles
Before uninstalling the rack-mount angles, turn off the power to
the V-160HD and disconnect the power cord and all connector
cables.
Important Notes on Rack Mounting
¹
Before mounting, turn off the power to the V-160HD and detach
the power cord and all connection cables.
¹
When mounting the unit, take care not to pinch your fingers etc.
¹
To prevent incorrect operation or malfunction, take care not to
subject areas protruding beyond the rack to accidental impact.
¹
To ensure room for connectors and cables, leave 2U of clearance
above the unit.
¹
Use all threaded holes (at 2 locations on each side, for a total
of 4) to secure the unit to the rack using screws. Screws for
rackmounting are not included.
¹
Never transport the rack with the unit installed in it. The impact of
shaking or vibration might deform the rack-mount angles.
¹
When mounting the V-160HD in a rack, pay attention to the
following points to ensure efficient cooling.
– Install in a well-ventilated location.
– Avoid blocking the cooling-fan intake and exhaust ports on the
side panels of the V-160HD.
– Avoid mounting the unit in a sealed-type rack. Warm air within
the rack cannot escape, making efficient cooling impossible.
– If the back of the rack cannot be opened, install an exhaust port
or ventilation fan at the top back surface of the rack where warm
air collects.
¹
Also read the “Placement” (the leaflet “USING THE UNIT SAFELY” and
the “Startup Guide”) under “IMPORTANT NOTES.”


