background image

6

Basic Operation

Turning the Power On/Off

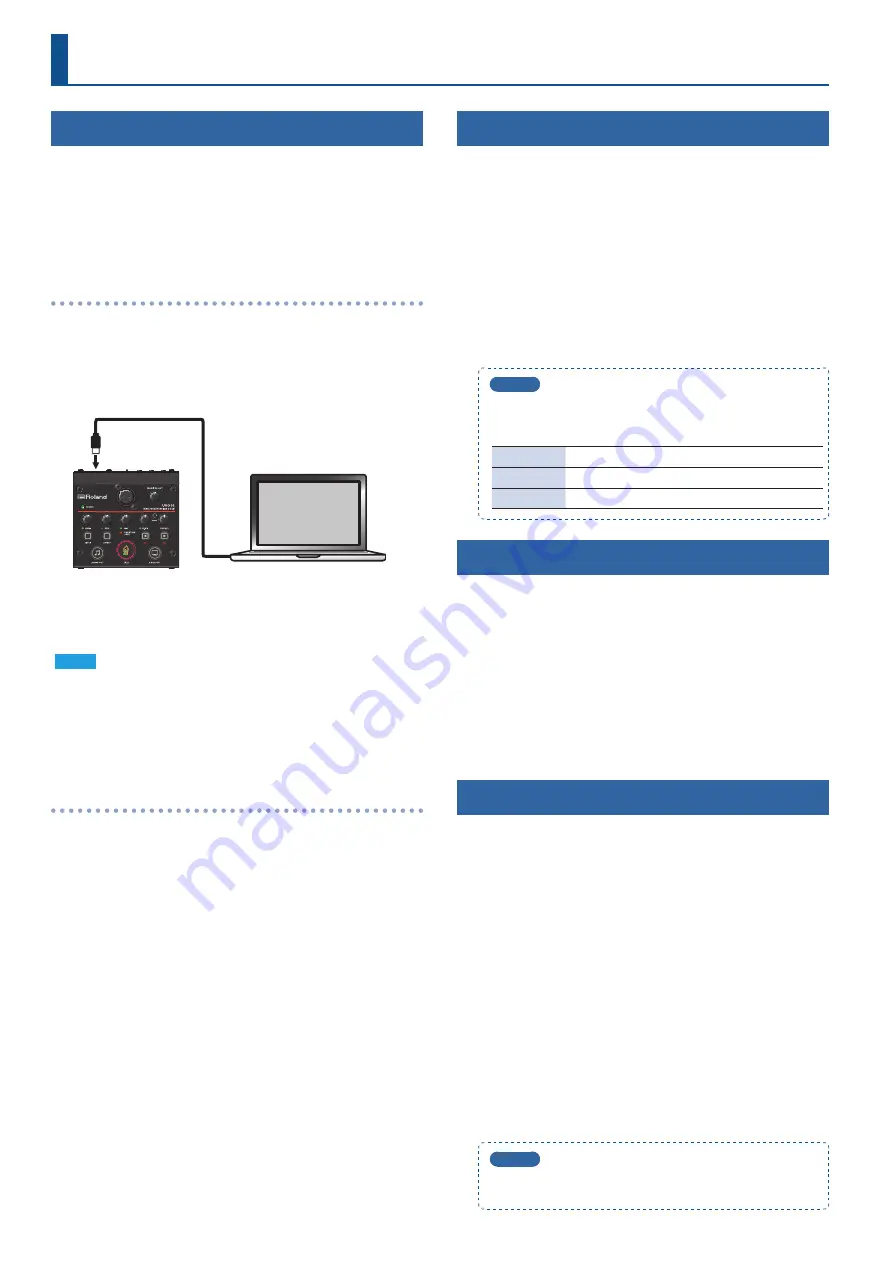
The UVC-02 operates using bus power from the USB port of your 

computer.

*  Before turning the unit on/off, always be sure to turn the volume 

down. Even with the volume turned down, you might hear some 

sound when switching the unit on/off. However, this is normal 

and does not indicate a malfunction.

Turning the Power On

1  

Make sure that all devices are powered off.

2  

Turn on your computer.

3  

Connect your computer to the UVC-02 with the included 

USB cable.

The power to the UVC-02 is turned on.

4  

Turn on the power in the order of source devices 

0


output devices.

NOTE

When a USB 2.0 cable is connected or in other situations where 

the UVC-02 cannot operate properly, the POWER indicator blinks 

red. In this case, the following functions are unavailable.

Phantom power

Video input/output

Turning the Power Off

1  

Turn off the power in the order of output devices 

0


source devices.

2  

Remove the USB cable connecting your computer to the 

UVC-02.

The power to the UVC-02 is turned off.

Adjusting the Input Levels

Adjust the input levels according to the devices that are connected.

1  

Use the [HDMI] knob to adjust the input level of the 

HDMI IN connector.

2  

Use the [AUX] knob to adjust the input level of the AUX 

IN jack.

3  

Use the [MIC] knob to adjust the input level of the MIC 

connector.

4  

Use the [H.MIC] knob to adjust the input level of the 

HEADSET jack.

MEMO

The indicators change color according to the volume of the input 
signal. Use the knobs to adjust the levels so that the indicators do 
not light up red when the signal is at maximum volume.

Unlit

Less than -48 dB

Green

-48–-3 dB

Red

-3 dB or more

Adjusting the Output Levels

Adjust the output levels according to the devices that are connected.

1  

Press the [AUDIO OUT] button or [TALK] button to 

make them light up, according to the devices you’ve 

connected.

2  

Use the [MONITOR OUT] knob to adjust the output level 

of the MONITOR OUT jack.

3  

Use the [PHONES] knob to adjust the output level of the 

HEADSET jack.

Outputting Video

1  

Connect the video source device to the HDMI IN 

connector.

The [VIDEO OUT] button lights when the video source device is 

connected.

*  The [VIDEO OUT] button goes dark when nothing is connected to 

the HDMI IN connector.

2  

Launch the application you use to view the camera’s 

video on your computer, and select “Roland UVC-02” as 

the camera device.

The video from the HDMI IN connector is shown on your 

computer.

*  You can stop the video output by pressing the [VIDEO OUT] 

button to make it go dark.

*  To resume video output, press the [VIDEO OUT] button again to 

make it light up.

*  The picture may be somewhat unstable when you restart the 

video from a stopped state.

MEMO

You can use the UVC-02 Setup Tool to switch between states 
when the video output has been stopped.

Summary of Contents for UVC-02

Page 1: ...ts 9 System Settings 10 Saving Refreshing the UVC 02 Settings 10 Returning to the Factory Settings Factory Reset 11 Updating the UVC 02 System Program 11 Appendix 13 Troubleshooting 13 Intellectual Pr...

Page 2: ...0 PHANTOM 48V indicator This indicator lights when the PHANTOM 48V switch located on the rear panel is on Even when you switch the PHANTOM 48V switch on the indicator doesn t light up when a USB 2 0 c...

Page 3: ...r device with an HDMI output connector here This unit does not support HDCP HDCP copy protected contents can t be inputted This unit does not support interlace formats such as 1080i or 720i Switches p...

Page 4: ...meetings with excellent image quality and sound ProfessionalVideo Streaming By connecting a V 1HD or other video switcher to this unit you can use multiple cameras to send a full fledged video feed to...

Page 5: ...tream the video from a presentation or other documents shown by a presenter even where the presenter is using a different computer from the computer doing the streaming Internet Computer used for stre...

Page 6: ...ust the input level of the MIC connector 4 Use the H MIC knob to adjust the input level of the HEADSET jack MEMO The indicators change color according to the volume of the input signal Use the knobs t...

Page 7: ...is being used as a camera device by an application on your computer In the case of a format that is not supported by this unit it will be displayed in red Check the format Switching the Functions of...

Page 8: ...he Audio Click the AUDIO tab to switch the page Menu Value bold text default value Explanation ROUTING This sets the output destination for the input signals of HDMI AUX MIC H MIC USB IN SFX1 and SFX2...

Page 9: ...d filter HI GAIN 12 3 12dB Gain of the high end filter EXPANDER Reduces the level of sounds even further that are quieter than the specified level SWITCH OFF ON Switches the expander on off THRESHOLD...

Page 10: ...MONITOR PHONES TIME 0 0 100 0 1000 0ms Adjusts the delay time of the audio System Settings Click the SYSTEM tab to switch the page Menu Value bold text default value Explanation LED BRIGHTNESS 0 90 10...

Page 11: ...ate the firmware if the latest version is already installed Updating 1 Download and install the latest version of Setup Tool The latest version can be found on the Roland website as listed below https...

Page 12: ...5 Reconnect the USB cable after a while about five seconds The UVC 02 restarts and a screen like the one below appears in the Setup Tool 6 To revert to the previous settings before updating click YES...

Page 13: ...urn on Power does not stay on and shuts off right away POWER indicator blinks red Are you connecting to a USB 2 0 port Are you using a USB 2 0 cable Are you connected via a USB hub Use the included US...

Page 14: ...TON INPUT LEVEL SFX PLAYER 1 SFX PLAYER 2 LEVEL EFFECT BUTTON EFFECT BUTTON EFFECT BUTTON EFFECT BUTTON EFFECT BUTTON EFFECT BUTTON PHONES VOLUME MONITOR VOLUME OUTPUT LEVEL EFFECT BUTTON LEVEL METER...

Page 15: ...B Nominal Input Level MIC IN 54 to 14 dBu Maximum input level 4 dBu HEADSET 20 dBu Maximum input level 2 dBu AUX IN 10 dBu Maximum input level 8 dBu Nominal Output Level MONITOR OUT 10 dBu HEADSET 9 m...

Reviews: