background image


15


Playback Interface Controls 


Button 

Function 

Button

Function 


Move to the previous frame 


Open a file 


Reverse Playback   


Convert the file into an AVI 
format 


Pause the Playback 


Link the recorded data with map 


Stop Playback 


Access System Set Up Menu 


Playback 


Exit, close the program 


Move to the next frame 

Hide/close the window 


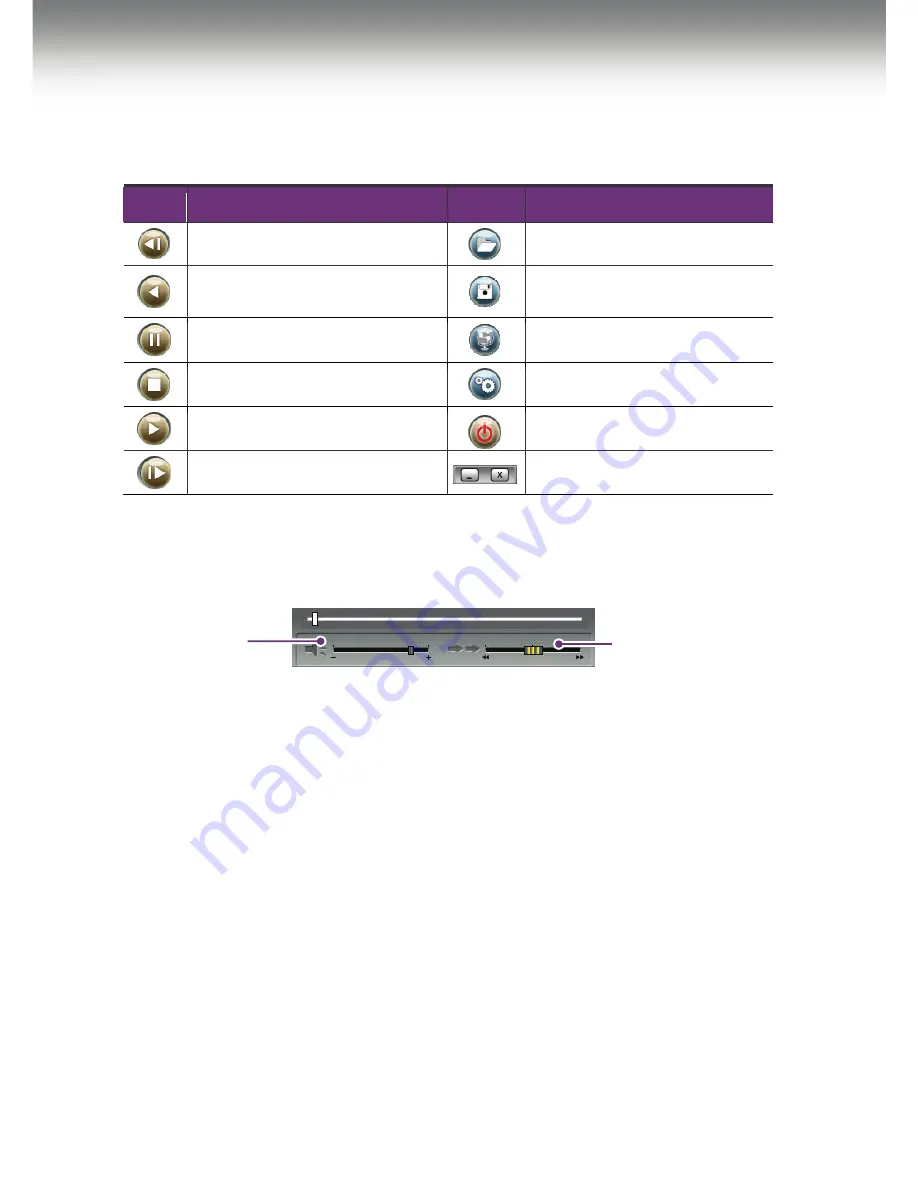
Volume and Playback Speed Control 


Volume Control: Adjusts the volume level while playing back the recorded data. 
Playback speed control: Adjusts the video playback speed. 

To playback video, select the “Open a File” button, explore the SD card or other 
location where the recorded (or saved) data is located, (file called DATA is on 
the SD card), then double click the selected file from the list in order to play. 


Playback speed control 

Volume control 

Summary of Contents for RH?2 Pro

Page 1: ...1...

Page 2: ...ton the recorded video data is locked in and is erased only by an authorized party and by using a PC or laptop accessing the SD card Event data records 1 minute before and 1 minute after Note The User...

Page 3: ...ard related information 12 Functions of each part 13 Using the Player Playback SD card and Initial System Set Up 14 PC Minimum Systems Requirements 14 To Review Video 14 Playback Interface Controls 15...

Page 4: ...we take no responsibility for product damage or problems caused by the user Any excessive window tinting may cause an unclear or distorted image on playback First record and then play back the video t...

Page 5: ...5 Components IR Light Module External Alarm Button SD Card Body Cigarette Lighter Plug for Power Supply Holder Users Guide...

Page 6: ...rd Slot Used to insert the SD card into unit 3 Emergency Record Protection Cancel Button Used to cancel protection of all the emergency recording data 4 Emergency Record Button Used to perform an emer...

Page 7: ...chime and any information 4 Interior Facing Camera Records video from inside your vehicle 5 Power Connection Port Used to connect the power cord with the unit 6 Serial Number Serial number of the unit...

Page 8: ...l ordered typically a 2GB SD card is provided with the unit SD Memory Card specifications Denotes an average time Motion affects recording duration Times reflected see recordings made during the dayti...

Page 9: ...car y The Unit must be installed on the mounted straight both horizontally and vertically Installing the Unit 1 Insert the holder into the mounting connection 2 Insert the IR light module s knob on t...

Page 10: ...passenger seat 4 Insert the power cord into the Cigarette Lighter Plug Installing the Remote External Alarm Button 1 Insert the Jack of the manual alarm input cable into the connection port on the upp...

Page 11: ...unit may still show a series of numbers followed by and GPS FINE will appears This adjusts the unit further for increased accuracy 3 After the chime the Drive Recorder starts continuous recording with...

Page 12: ...ation If you do not configure the settings system initialization may take up to 10 minutes and where the time and time zone may not match In case of formatting the SD card the existing recorded video...

Page 13: ...button for about 3 seconds until you hear a chime from the speaker This is used in the rare case if the SD card is full and was not replaced This function is typically not enabled so to secure all re...

Page 14: ...ert the SD card into a PC or SD card reader and connect it to a computer Explore the SD card Locate the Player exe file that is found in the PLAYER folder Double click on Player exe The following wind...

Page 15: ...ve to the next frame Hide close the window Volume and Playback Speed Control Volume Control Adjusts the volume level while playing back the recorded data Playback speed control Adjusts the video playb...

Page 16: ...2 G Sensor Sensitivity Sets the sensitivity of G Sensor Default Low 3 Audio Recording Enables or Disables the audio record function 4 Pre Event Recording Time Sets the time to record the previous sce...

Page 17: ...terface Open After clicking the folder icon on the lower right corner of the viewer click Change Directory to select the location for the recorded data Typically the first time you do this all the fil...

Page 18: ...onvert the images into the AVI file format The video playback stops and the AVI conversion window appear 2 Set the following options from the window and click Start A AVI storage directory B Selection...

Page 19: ...lower right corner The map window appears for the user to see the vehicle location and travel onto a city map To use this function the system must access the Internet Using Google Earth there are addi...

Page 20: ...When you double click the display window the recorded images are played back at the original size Double clicking the screen returns the view to normal original size You may use your PC s mouse to mov...

Page 21: ...s represented in a graphic format The resulting graph may be used to analysis the driving condition and driver s habits Depending on the type of the vehicle the amplitude of the curve of shown may var...

Page 22: ...S is updating GPS data is now being received and is being downloaded dbUP Event recording One chime Number of events recorded 5 by the system and available Two chimes FULL 5 1 Event recording is not a...

Page 23: ...le copy it to the update directory on the SD card If the update directory folder does not already exist on the SD card create a new folder on the SD card and rename the folder name to update Then copy...

Page 24: ...24...

Reviews: