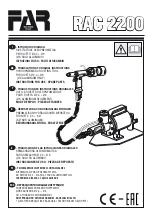
background image


3


S

AFETY


D

O NOT USE OUTSIDE DEISNG INTENT OR WITH EQUIPMENT THAT IS NOT


RECOMMENDED


BY

 THE MANUFACTURER


A

LWAYS DISCONNECT THE AIR SUPPLY BEFORE ATTEMPTING ANY MAINTENANCE OR ADJUSTMENT

/

FITTING OF NOSE EQUIPMENT


D

O NOT OPERATE A TOOL THAT IS DIRECTED TOWARDS ANY PERSON

(

S

)

 OR WITH THE MANDREL CATCHER OFF THE TOOL


A

LL MODIFICATIONS CARRIED OUT ON THE TOOL WITHOUT EXPRESS WRITTEN CONSENT OF THE MANUFACTURER SHALL BE DONE 

SO AT THE CUSTOMERS

 SOLE RESPONSIBILITY


R

EFER TO THIS MANUAL BEFORE ATTEMPTING ANY MAINTENANCE OPERATION

.

  DO NOT DISASSEMBLE THIS TOOL BEFORE 

RFERING TO THIS MANUAL


A

VOID EXCESSIVE CONTACT WITH HYDRAULIC OIL

,

 AS SOON AS POSSIBLE WASH HANDS THOROUGHLY


D

O NOT EXCEED 

7

 BAR 

/


100

 PSI INLET PRESSURE

,

 THE USE OF A PRESSURE REGULATOR IS HIGHLY RECOMMENDED


I

NSPECT THE TOOL USING PREVENTITIVE MAINTENANCE TECHNIQUES AT REUGULARLY SCHEDULED INTERVALS

.

  INSPECT FOR 

DAMAGE AND FUNCTION BY TRAINED COMPETANT PERSONEL

.

  REPLACE THE PNEUMATIC CYLINDER HOUSING OR HYDRAUILIC 

CYLINDER HOUSING WHERNEVER THERE IS EVIDANEC OF IMPACT DAMAGE

,

 CHIPPING

,

 OR CRACKING


WEAR SAFETY GLASSES AND ADOPT FIRM FOOTING DURING OPERATION


S

PECIFICATIONS


The specifications and information contained in this manual are applicable only to the tool with which it was 

supplied. Industrial Rivet & Fastener Co reserve the right to make any changes without notice as part of 

Industrial Rivet & Fastener Co policy of continuous improvement. 


S

PECIFICATIONS FOR 

RK-250


R

IVET 

T

OOL


Air Pressure 

80-90 PSI 

Min/Max 

Traction Power 

4200 lbs 


Stroke .687 Minimum 

Pull Force 

3,400 lbsF 

@90psi 

Cycle Time 

0.9 seconds 

Approximately 

Noise Level 

320mm 

Less than 

Weight 4.3 

lbs  

Vibration 

2.5m/s2


Less than 

Hydraulic Oil 

Mobil DTFE 24 


Rivet Capacity 

3/32, 1/8, 5/32, 3/16, ¼ 

2.4, 3.2, 4.0, 4.8 ,6.4 

All material rivets  

Summary of Contents for RK-250

Page 1: ...FOR SALES SERVICE OR TECH SUPPORT CALL 1800 BUY RIVET or 1 800 289 7483 Instruction Manual Model RK 250 ...

Page 2: ... Cleaning Procedure Jam Remedy Page 5 Maintenance Service Page 6 Oil Change Replacement Procedure Valve Spool Assembly Trigger Preventive Maintenance Page 7 Daily Weekly Monthly Parts Schematic Page 8 Part List Page 9 Material Safety Data Sheet Oil MSDS Page 10 Troubleshooting Page 11 Warranty Page 12 ...

Page 3: ...E TOOL USING PREVENTITIVE MAINTENANCE TECHNIQUES AT REUGULARLY SCHEDULED INTERVALS INSPECT FOR DAMAGE AND FUNCTION BY TRAINED COMPETANT PERSONEL REPLACE THE PNEUMATIC CYLINDER HOUSING OR HYDRAUILIC CYLINDER HOUSING WHERNEVER THERE IS EVIDANEC OF IMPACT DAMAGE CHIPPING OR CRACKING WEAR SAFETY GLASSES AND ADOPT FIRM FOOTING DURING OPERATION SPECIFICATIONS The specifications and information contained...

Page 4: ... 1 1 Inspect for damage 2 2 2 Connect the tool to the air supply 3 3 3 Always bleed air line to clear it of all accumulated dirt or water before connecting air supply to tool 4 4 4 Air supply of 80 90 P S I must be available 5 5 5 Choose and securely install the applicable nose piece for the rivets you wish to apply A flat face nose piece is installed as standard 6 6 6 Bring the tool and the rivet...

Page 5: ...d and contains 2 small jaws 04 a jaw pusher 05 and a spring 06 Do not lose these pieces 5 Once removed if a mandrel has jammed the tool dislodge the mandrel from the jaws discard mandrel 6 Clean Jaws 04 with a mineral spirit then and coat outside of jaws outside only with a light layer of white lithium grease red grease or one drop of hydraulic oil Be sure to coat the outside of the jaws only 7 Re...

Page 6: ...g the tool with oil and actuating it may result in hydraulic body fractures Remove the priming pump and the excessive oil will flow out Then clean out the excessive oil and replace the bleed screw and seal Use a brush or similar to clean all parts IMPORTANT DISCONNECT THE TOOL FROM THE AIR SUPPLY OR SWITCH OFF AT VALVE 55 REMOVE NOSE ASSEMBLY OR SWIVEL HEAD COMPONENTS All operations should be carr...

Page 7: ...ain it Check for proper nose piece use depending on the size of the rivet Remove front jaw nose assembly and inspect for cracks or other damage to front and rear of the nose piece Replace if necessary Insure that rotary valve for the vacuum on the mandrel collection unit is correctly adjusted for fastener retention Weekly Carry out procedures as per daily maintenance instructions above Clean and i...

Page 8: ...8 SCHEMATIC ...

Page 9: ...9 Part List ...

Page 10: ...ek medical attention immediately DO NOT induce vomiting EYES Irrigate immediately with water for several minutes Although NOT a primary irritant minor irritation may occur following contact Fire Flash point 232 C Not classified as flammable Suitable extinguishing media CO2 dry powder foam or water fog DO NOT use water jets Environment WASTE DISPOSAL Through authorized contractor to a licensed site...

Page 11: ...en spring in nose assembly Air or oil leak Low oil level or air present in oil Service nose assembly Tighten nose assembly and adjust if necessary Fit new spring Tighten joints or replace components Prime tool Jammed Gun Cannot feed next fastener Broken stems jammed inside tool Rotary valve incorrectly adjusted Empty mandrel collector Check if jaw pusher is correct Adjust air pressure to within sp...

Page 12: ...d date of installation This warranty is in lieu of all other warranties expressed or implied including merchantability or fitness provided for herein Under no circumstance shall IRF be liable for incidental or consequential damages arising from the defect or failure in its products Seller s sole obligation under the foregoing warranty will be limited to at Seller s option repair or replacement of ...

Reviews: