Chapter 5 Useful Functions
114
8
Touch [Close].
The basic screen is displayed.
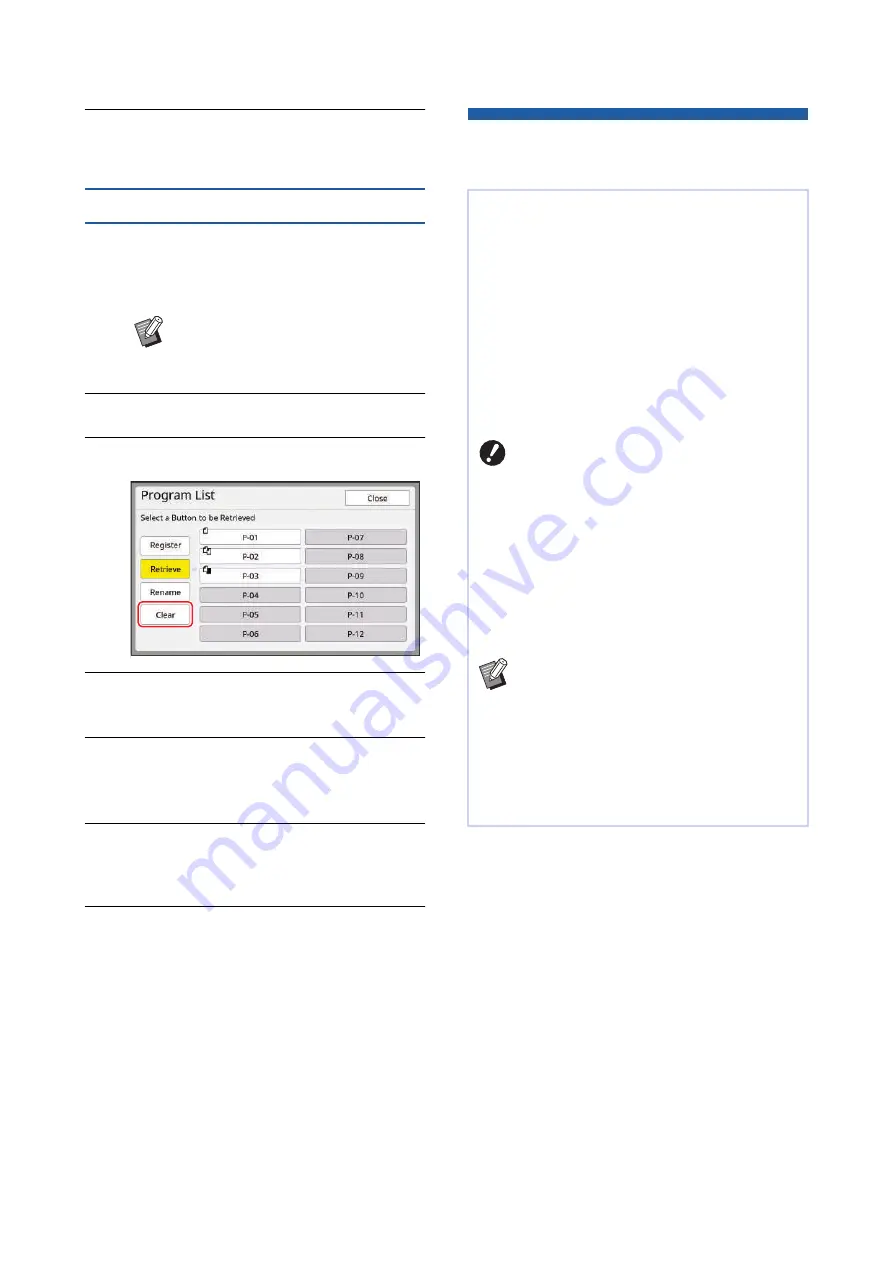
Erasing [Program]
1
Touch [Program] in the [Functions]
tab screen.
The [Program Type] screen is displayed.
2
Touch [Program List].
3
Touch [Clear].
4
Touch the button that you want to
erase.
5
Touch [OK] in the confirmation
screen.
The [Program List] setting screen is displayed.
6
Touch [Close].
The [Program Type] setting screen is dis-
played.
7
Touch [Close].
The basic screen is displayed.
Inserting Slip Sheet
[Slip sheet sorting]
1
Touch [Slip sheet sorting] in the
[Functions] tab screen.
B
You can also display the [Program
Type] screen by pressing the [P]
key.
You can use the paper placed on the paper feed
tray as slip sheets for sorting printed papers.
• When you print with [Auto Process] turned on
after placing originals on the auto document
feeder, turn on [Slip sheet sorting] to insert a slip
sheet (blank sheet) each time the original
changes.
[Slip sheet sorting], a slip sheet (blank sheet) is
inserted between each separation of the printing.
• When used with [Auto Page Renewal] (
slip sheet (blank sheet) is inserted before master
making again.
B
[Slip sheet sorting] can be used when
the following papers are placed on the
paper feed tray:
(Standard sizes)
MH9350: A3
p
, B4
p
, A4
p
, or Foolscap
p
MH9450: Ledger
p
, Legal
p
or Letter
p
(Custom sizes)
210 mm × 315 mm to 320 mm × 432 mm
(8 1/4 inches × 12 13/32 inches to 12
19/32 inches × 17 inches)
B
Slip sheets and printed papers may be
smudged with ink.
B
This function works only when [Program]
(
B
You cannot use this function with the fol-
lowing functions.
C
C
115).
C
B
You can change the default setting in [Slip
sheet sort set.] (
Summary of Contents for MH 9350
Page 21: ...Chapter 1 19 1 About This Machine ...
Page 31: ...29 2 Chapter 2 Basic Operations ...
Page 53: ...51 3 Chapter 3 Functions for Master Making ...
Page 97: ...95 4 Chapter 4 Functions for Printing ...
Page 109: ...107 5 Chapter 5 Useful Functions ...
Page 130: ...Chapter 5 Useful Functions 128 ...
Page 131: ...129 6 Chapter 6 Functions for Scanning ...
Page 137: ...135 7 Chapter 7 Setting the Operation Conditions ...
Page 159: ...157 8 Chapter 8 RISO Console ...
Page 165: ...163 9 Chapter 9 Replacing Consumables ...
Page 177: ...175 10 Chapter 10 Maintenance ...
Page 181: ...179 11 Chapter 11 Troubleshooting ...
Page 205: ...203 12 Chapter 12 Appendix ...
Page 215: ...Chapter 12 Appendix 213 12 V View edit 48 W WAKE UP key 23 Z Zoom 71 ...


