


Pressing “ ” key sets the selected value and advances to “Screen
Number Selection” screen (see Section 3.2.9.1.2.1).
Note: 1.The value 0 should be chosen if the user wants all the screens
to be shown
.
2
.
If User Screen feature is ON and System type is changed, then the
Userscreen is disabled.
Note : The default setting is ‘0’ ,i.e., all screens are shown.
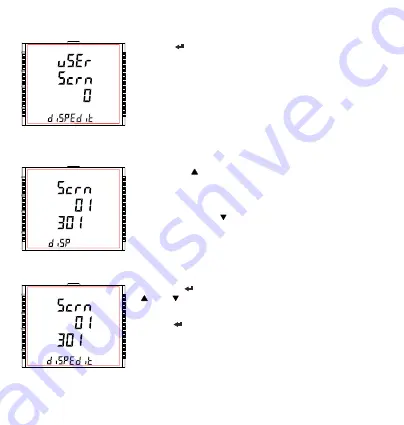
User Screen Edit Mode
3.2.9.1.2.2 User Screens Selection
Pressing the “ ” key confirms the selection and allows the user to
proceed for setting the next userscreen until the last userscreen is set
which is followed by the “Quit UserScreens” menu (see Section
3.2.9.1.2.3).
Whereas pressing the “ ” key confirms the selection and take to the
previous userscreen set until the first userscreen is reached which is
followed by the “Screen Number Selection” screen (see Section
3.2.9.1.2.1).
Pressing the “ ” key advances the User Screen Edit mode and pressing
“ ” and “ ” keys scroll the value as per
TABLE 1.1, TABLE 1.3, TABLE
1.4
Pressing “ ” key sets the displayed value & advance to User Screen
Selection (see Section 3.2.9.1.2.2) for the corresponding screen number.
User Screen Selection Edit Mode
Note
: User needs to put the combination of key number and screen number at this screen. Refer TABLE 1 for
screen number. For example, to select screen number 3 of ‘V/A key’ (key number 1), assign 103 to the
corresponding screen number. Similarly, ‘P key’ and ‘Sys key’ have key number 2 and 3, respectively.
75
Summary of Contents for RISH LM 1340
Page 1: ...RISH LM 1340 Operating Manual...
Page 2: ......
Page 98: ...9 Optional Pluggable Module Optional Pluggable Module 96...
Page 106: ...104...


