19
The function of the jointer is to surface plane flat, one side
or edge of a board/work piece.
To use the jointer:
1. The chip ejection hood should be positioned under the
jointer’s outfeed table, inside of the planer’s cavity.
2. Connect your Dust Collector Hose to the Dust Port,
then raise the planer bed to secure the chip ejection hood
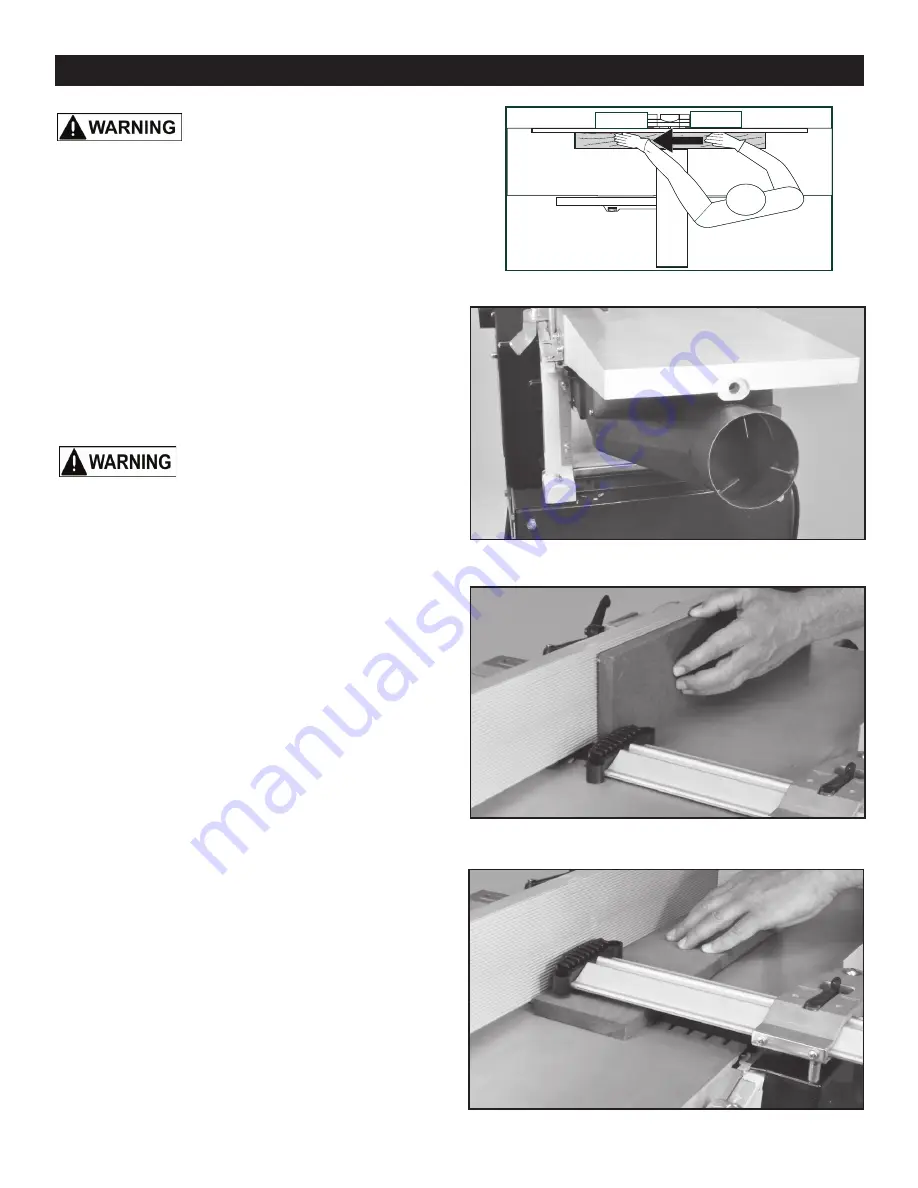
in position for jointing. FIG. 39.
It is extremely important that a dust
collection system is used with this planer to eliminate
harmful airborne dust, prevent the build-up of chips that
may jam the roller system in the cutterhead, and to keep
the working area clean of debris.
NOTE:
Work piece dimensions for jointing:
- Length: use a push stick to feed boards shorter
than 12” ; for lumber over 60” use support rollers.
- Width: maximum 10”.
- Thickness: minimum 1/4”. The use of push blocks is
necessary when face planing thin material.
- Depth of Cut: maximum 1/8”. Multiple cuts of 1/16”
or less, produce better finish results
Place the work piece on top of the right, infeed table.
- The work piece will be cut on its underside by the
rotating cutterhead knives.
- When jointing, the feeding direction of the work piece is
right-to-left over the cutterhead. FIG. 38.
1. Assume the proper operating position: stand to the
side of the infeed table with feet apart for stability
through the whole cutting process. FIG. 38.
2. Set the jointer fence position and angle as required.
3. Set the depth of cut / thickness.
4. Place the work piece against the jointer fence for
support through the cutting action. FIGs. 40, 41.
5. Adjust the cutterhead guard for user protection.
FIG. 38
FIG. 39
OPERATION
JOINTER OPERATION
Before turning on the machine, review
the safety precautions listed on pages 3 to 6. Make sure
that you fully understand the features, adjustments and
capabilities of the machine that are outlined throughout this
manual.
FIG. 40
FIG. 41
Continued on page 20
NOTE:
For jointing the edge of a board, set the blade
guard to the width of work piece. The plastic spring on the
end of the blade guard should exert a slight pressure
Summary of Contents for 25-010
Page 31: ...31 WARRANTY...


