background image

20081753

72 

GB

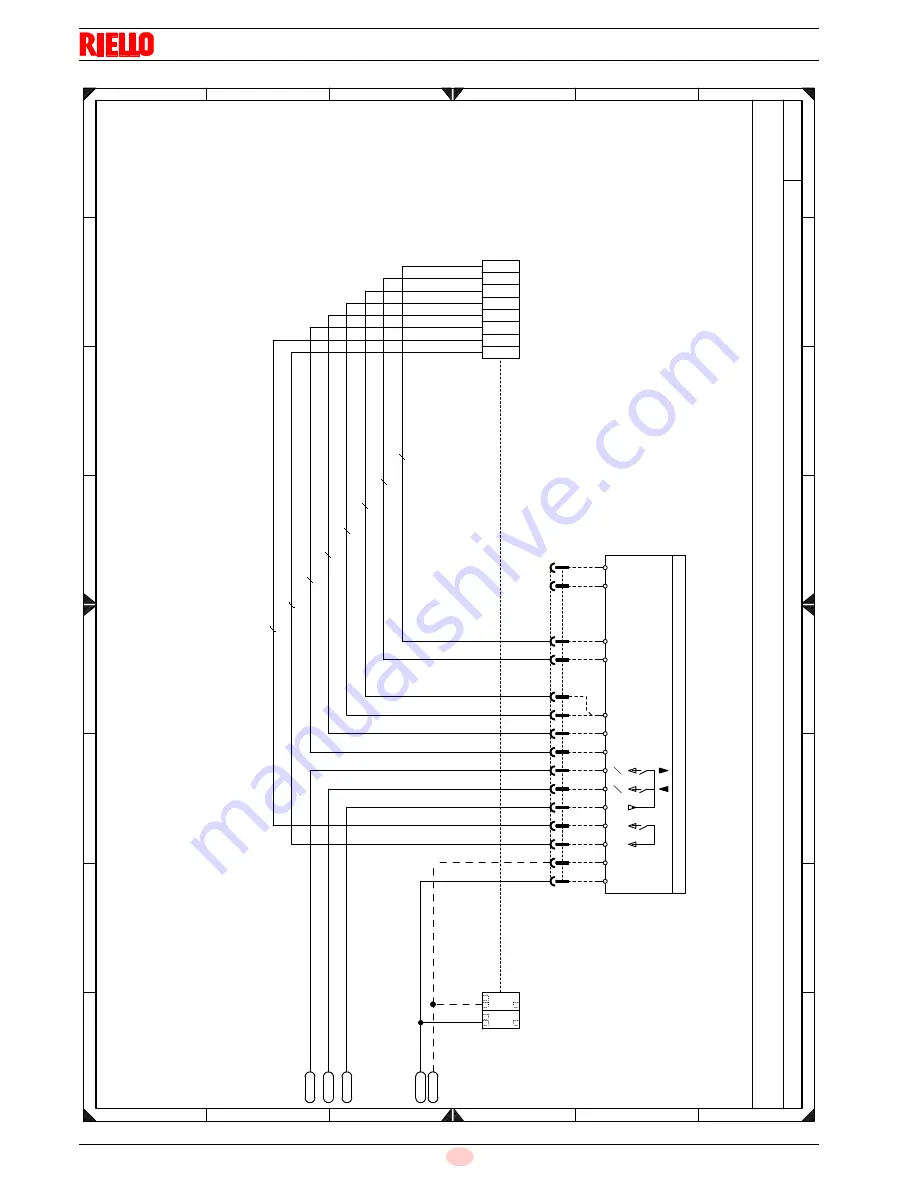
Appendix - Electrical panel layout


!"##$%%&

'()

'(*)

'+)

)

,

-

.

/

0

1


)

,

-

.

/

0

1


2

+

3

4

5

6

2

+

3

4

5

6

789%:5;<=29<:5%48%*<95>?2%:@6/AB,

:@6/AB,%<C9*C9%*<@5:%:5;C=29<:%789

789%=58!9C>;!:5;=5:%:@6/AB,

789%:5;C=295C:%45%*C8!!2>35%:@6/AB,

0A-

D0B3 

0A,

D0B3 

0AA

D0B4 

)=

D0B4 

>

D0B4 

)=

>

)

'E+

:@6%/ABBB

,

-

.

/

0

1


F

)A

))

),

)-

 A.

 A-

).

 A 

)/

 AF

 )A

 ))

 ),

 )-

G)-

G).

8)

E)

;)H

C)

;H

;'

+C%I%+=C%D%+=C5%D%+=5C%D%+=2C

+7%I%>5:<%D%+=237%D%><8:%D%!3J@2:?

K5%I%;82==<%D%K5==<@%D%L2C>5%D%;5=+

;>%I%M5:45%D%;:55>%D%M5:9%D%;:N>

:4%I%:<!!<%D%:54%D%:<C;5%D%:<9

@J%I%+82>3<%D%@J895%D%+=2>3%D%@58!!

<;I%2:2>38<%D%<:2>;5%D%<:2>;5%D%<:2>;5

M9I%M8<=599<%D%M8<=59%D%M8<=59%D%M8<=599

;KI%;:8;8<%D%;:5K%D%;:8!%D%;:2C

*7I%:<!2%D%*8>7%D%:<!5%D%:<!2

;4I%<:<%D%;<=4%D%<:%D%;<=4

9GI%9C:3J5!5%D%9C:GC<8!5%D%9C:GC<8!5%D%9C:78!+=2C

!:I%2:;5>9<%D%!8=M5:%D%2:;5>9%D%!8=+5:

;>K5I%;82==<DM5:45%D%K5==<@D;:55>%D%

L2C>5DM5:9%D%;5=+D;:C>

+>%I%E2::<>5%D%+:<@>%D%E2::<>%D%+:2C>

=)

>

)>

7G

)*

7,

7-

),

)-

))

;H

;'

4)

4;

2'

2H

Summary of Contents for RS 310/EV BLU FS1

Page 1: ...753 2 02 2015 Forced draught gas burners Modulating operation CODE MODEL TYPE 20074268 20074269 RS 310 EV BLU FS1 FS2 1138T2 20074270 20074271 RS 410 EV BLU FS1 FS2 1135T2 20074272 RS 510 EV BLU FS1 F...

Page 2: ...Translation of the original instructions...

Page 3: ...cal panel description 14 4 13 Control box for the air fuel ratio REC37 15 4 14 Operation sequence of the burner 17 4 14 1 List of phases 18 4 15 Operator panel operation 18 4 15 1 Description of the s...

Page 4: ...Parameter modification procedure 38 6 8 1 Modify acceleration deceleration train parameter 40 6 8 2 Modify the parameter for continuous intermittent operation FS2 FS1 40 6 9 Start up procedure 41 6 10...

Page 5: ...ed as follows In progress RS 310 EV BLU Class 3 EN 676 In progress RS 410 EV BLU Class 3 EN 676 In progress RS 510 EV BLU Class 3 EN 676 In progress RS 610 EV BLU Class 3 EN 676 The quality is guarant...

Page 6: ...ma chine and or injury to people DANGER DANGER LIVE COMPONENTS This symbol indicates operations which if not car ried out correctly lead to electric shocks with le thal consequences DANGER FLAMMABLE...

Page 7: ...vent of damage to things or injury to people if such damage injury was due to any of the following causes incorrect installation start up use and maintenance of the burner improper incorrect or unreas...

Page 8: ...intenance Only those parts envisaged by the manufacturer can be replaced 3 2 Personnel training The user is the person body or company that has acquired the machine and intends to use it for the speci...

Page 9: ...0 BASIC DESIGNATION EXTENDED DESIGNATION BLU 3N 400V 50Hz 3 230V 50Hz 230V 50 60Hz 110V 50 60Hz Heavy oil E Electronic cam EV Electronic cam with variable speed with Inverter P Proportional air gas va...

Page 10: ...310 EV BLU FS1 FS2 3 230 50 Inverter 20074268 3 400 50 Inverter 20074269 RS 410 EV BLU FS1 FS2 3 230 50 Inverter 20074270 3 400 50 Inverter 20074271 RS 510 EV BLU FS1 FS2 3 400 50 Inverter 20074272 RS...

Page 11: ...rmittent min 1 stop in 24 hours FS2 Continuous min 1 stop in 72 hours Standard applications Boilers water steam diathermic oil Ambient temperature C 0 50 Combustion air temperature C max 60 Noise leve...

Page 12: ...sition is reference for the refractory thickness of the boiler door Tab F Maximum position for the extraction of the servomotor cover Model kg RS 310 EV BLU 250 RS 410 EV BLU 250 RS 510 EV BLU 250 RS...

Page 13: ...EV BLU 680 RS 610 EV BLU 1000 WARNING The firing rate value Fig 3 has been obtained considering an ambient temperature of 20 C an atmospheric pressure of 1013 mbar approx 0 m a s l and with the combu...

Page 14: ...pecial test boilers accord ing to EN 676 regulations In Fig 4 you can see the diameter and length of the test combus tion chamber Example RS 510 EV BLU Output 7000 kW diameter 120 cm length 6m 4 10 Bu...

Page 15: ...scale 18 Air pressure switch 19 Combustion head air pressure test point 20 Maximum gas pressure switch with pressure test point 21 Flame sensor probe 22 Hinge for opening the burner 23 Pressure test...

Page 16: ...ing the kits 7 Main terminal supply board 8 Relay with clean contacts for signalling the burner is in lock out 9 Relay with clean contacts for signalling the burner is operat ing 10 Auxiliary circuits...

Page 17: ...rve the quality of the combustion process for example using a gas analyser and in the event of inadequate combustion values or dangerous conditions should take appropriate action for example shut ting...

Page 18: ...ol load TL1 TL2 External reset button RS Load exit DC 0 2 10V Fuel valve Other lines Max 100 m 100 pF m Max 20 m 100 pF m Max 20 m 100 pF m Max 10 m 100 pF m Max 3 m 100 pF m Max 3 m 100 pF m Environm...

Page 19: ...ignal indicator TL SERVOMOTORS Air Fuel 90 Nominal load Pos of post purging Ignition load Low flame Pos without load 0 S9024 Fig 8 Checking of seal Switching off Start up Timer 1 parameters Timer 2 pa...

Page 20: ...h42 Ignition TA OFF Ph44 t44 interval time 1 Ph60 Operation Ph62 The burner moves to the switching off position Ph70 t13 post combustion time Ph72 The burner moves to the post purging position Ph74 t8...

Page 21: ...a lockout Access to a lower level of the menu To navigate in Mode Info or Service and permits the selection of the parameter flashing symbol press for 1 s access to a lower level of the menu press fr...

Page 22: ...ons can negatively affect the safety functions In this case the servomotor must not be operated even if it displays no evident damage WARNING Assembly notes The connection between the actuator command...

Page 23: ...ler must be free from hazardous mixes e g chloride fluoride halo gen if present it is highly recommended to carry out cleaning and maintenance more frequently WARNING The handling operations for the b...

Page 24: ...lining 2 5 Fig 15 is not necessary unless expressly requested by the boiler manufacturer Tab K 5 6 Securing the burner to the boiler Fit the heat insulation supplied onto the blast tube 4 Fig 15 Fit...

Page 25: ...around the hinge and release the cables of the probe 5 and electrode 11 D fully open the burner as in Fig 16 E undo the screw 4 with pressure test point F release the head by lifting it from its hous...

Page 26: ...lace the gas butterfly valve The correct position is shown in Fig 18 WARNING Check that the probe and the electrode are placed as in Fig 17 according to the dimensions indicat ed Fig 17 20071251 RS 41...

Page 27: ...with central air gas adjust ment The factory setting is the following AIR notch 9 GAS notch 0 Only for specific cases to change the central gas setting do as follows loosen the screws 1 and rotate the...

Page 28: ...r 1200 kW 9 Gasket for flanged versions only 10 Pressure adjuster 11 Train Burner adaptor supplied separately P2 Upstream pressure of valves adjuster P3 Upstream pressure of the filter L Gas train sup...

Page 29: ...er gas train combination manual 5 11 3 Gas train installation DANGER Disconnect the electrical power using the main switch Check that there are no gas leaks Pay attention when handling the train dang...

Page 30: ...burner operation find the nearest output value in the table Tab L for the burner in question read on the right column 1 the pressure at the test point P1 Fig 26 Add this value to the estimated pressur...

Page 31: ...h wet or damp body parts and or in bare feet Do not pull the electric cables Check the electric wiring inside the boiler complies with the national and local safety regulations Live and neutral should...

Page 32: ...ts and safety devices Bore for M20 3 Minimum gas pressure switch Bore for M20 4 VPS gas valve leak detection control kit Bore for M20 5 Gas train Bore for M20 6 Available Bore for M20 7 Available Bore...

Page 33: ...disconnecting switch on the boiler panel Close the thermostats pressure switches and set the switch of Fig 29 to 1 ON As the burner is not fitted with a device to check the sequence of the phases it...

Page 34: ...MIN output 4 Intermediate outputs between Min and Max 5 Air pressure switch 6 Maximum gas pressure switch 7 Minimum gas pressure switch 6 4 4 Output upon ignition Ignition must occur at a lower outpu...

Page 35: ...the pressure switch shown by the white mark on a blue background between the two arrows Now check the correct start up of the burner If the burner locks out again turn the knob anti clockwise a littl...

Page 36: ...cks out again turn the knob clockwise again by 1 mbar 6 6 2 Minimum gas pressure switch Adjust the minimum gas pressure switch Fig 32 after perform ing all the other burner adjustments with the pressu...

Page 37: ...es of the start up ignition and switch off of the burner In the example the display indicates that the burner is in Phase 30 see diagram Fig 34 and there are 12 seconds until the next phase 6 7 1 3 Di...

Page 38: ...is working in Manual mode any outside adjustment is excluded and only the safety devices are active Keep the F key pressed and with the keys or increase or decrease the load percentage To exit manual...

Page 39: ...ogramme the parameters list on page 46 The factory set parameters are not visible To access this level it is necessary to follow the Access proce dure with password 6 7 4 1 Access procedure with passw...

Page 40: ...erstood in seconds Press the key and increase the value to 25 seconds flash ing Press the key i reset to confirm and store To return to the list of parameters press the keys and ESC simultaneously WAR...

Page 41: ...value For the air servomotor keep the key A pressed the position in degrees flashes and press the keys or to increase or de crease the value To adjust the speed of the inverter expressed in and that...

Page 42: ...y the parameter for continuous intermittent operation FS2 FS1 The burner leaves the factory with parameter 239 set at 1 This means that the burner is ready for intermittent operation FS1 In the event...

Page 43: ...83 These phases relate to the valve seal test Phase 30 The count of the pre purging time pre set in the factory begins Phase 36 The burner goes to its switch on position point P0 defined in Tab P on...

Page 44: ...y through the procedure i e around point P4 or P5 you are advised to measure gas delivery and check that the output is about 50 of the maximum output If this is not the case work also on the gas valve...

Page 45: ...ameter bAC_UP appears on the display screen confirm with the key i reset The display screen shows the following value Use the button The value will be set to 1 Value 1 is flashing confirm with the but...

Page 46: ...The parameter bAC_UP appears on the display screen With the key select the rEStorE parameter Confirm with the key i reset The display shows the following value Use the button The value will be set to...

Page 47: ...Err C information 136 D 1 restore process initialised is displayed for a brief moment NOTE If an error occurs during the backup process the display screen shows a negative value Refer to diagnostic c...

Page 48: ...ed automatic operation 1 Modification zero setting 0 100 0 1 Not defined Info mode 123 Minimum output step position Index 0 BACS output Index 1 output of the external load regulator analogue Index 2 o...

Page 49: ...es 1 Gmod 2 Gp1 mod 3 Gp2 mod 4 Lo mod 5 Lo 2 stage 6 Lo 3 stage 7 Gmod pneu 8 Gp1 mod pneu 9 Gp2 mod pneu 10 LoGp mod 11 LoGp 2 stage 12 Lo mod 2 fuel valves 13 LoGp mod 2 fuel valves 14 G mod pneu w...

Page 50: ...ion of flame sensor 0 QRB QRC 1 ION QRA 1 Modification 0 1 1 0 Service Mode 265 Oil pre purging time 1 s Modification 15s 60 min 0 2s 15s Service Mode 266 Oil pre ignition time 1 s Modification 0 6s 6...

Page 51: ...diagnostics see error code 82 0 standardisation deactivated 1 Standardisation active 1 Modification 25 1 1 0 Service Mode 642 Standardised speed Index 0 speed 1 Index 1 speed 2 2 Reading only 650 650...

Page 52: ...imum pressure switch Bit 0 1 2 Maximum pressure switch Bit 0 2 4 Pressure switch control valves Bit 0 3 8 Air pressure switch Bit 0 4 16 Open load check Bit 0 5 32 ON load check Bit 0 6 64 Closed load...

Page 53: ...ro cedure on page 35 using the switch 0 1 of Fig 28 on page 31 6 15 Final checks with burner operating Tab R Open the thermostat pressure switch TL Open the thermostat pressure switch TS The burner mu...

Page 54: ...t especially the flue gas temperature and combustion cham ber pressure Gas leaks Make sure that there are no gas leaks on the pipe between the gas meter and the burner Gas filter Change the gas filter...

Page 55: ...le of 100 A as shown in Fig 36 7 2 5 Checking the air and gas pressure on the combustion head To carry out this operation it is necessary to use a pressure gauge to measure the air and gas pressure at...

Page 56: ...the same procedure set out in Access to head internal part on page 23 7 5 Closing the burner Refit following the steps described but in reverse order refit all burner components as they were originall...

Page 57: ...afety time 2 TSA2 4 No flame at the end of safety time 1 TSA1 software version V02 00 3 Air pressure error 0 Air pressure switch off 1 Air pressure switch on 4 Air pressure on Lockout alarm at start 2...

Page 58: ...ions 21 Pmax POC 0 Pmax Max gas oil pressure exceeded POC POC open software version V02 00 Check the wiring POC check whether the closure contact of the valve is closed 1 POC closed software version V...

Page 59: ...data different target positions 16 Check synchronisation data different positions reached May be caused by different standardisation speeds for example following the resetting of the data set when the...

Page 60: ...at the standardisation and check the air fuel ratio 20 Incorrect phase of the phase controller The standardisation was performed in the wrong phase The only phases allowed are 12 controller OFF restar...

Page 61: ...points of the modulation curve Bit 2 Valence 4 7 Air servomotor Curve too steep in terms of train ratio The slope of the curve can correspond to a maximum position variation of 31 between 2 points of...

Page 62: ...t must be without voltage 2 Disconnect the power supply Disconnect the fan The resistive connection between the fan output and the neutral wire is not allowed If one of the 2 tests fails replace the c...

Page 63: ...If the error arises repeatedly replace the control box 131 EEPROM access internal error page interrupted Carry out a reset repeat and check the last setting of the parameters If the error arises repea...

Page 64: ...munication between REC 37 400A2 and RDI21 has been interrupted 9 Manual lockout from PC interface Communication interrupted During an adjustment of the curve via the PC interface the communication bet...

Page 65: ...ises repeatedly replace the control box 245 Internal error Carry out a reset if the error arises repeatedly replace the control box 250 Internal error Carry out a reset if the error arises repeatedly...

Page 66: ...dels 4 20 mA pressure 0 16 bar 3010214 Burner Line voltage Motor Output kW Inverter Output kW Code RS 310 EV 230V 7 5 7 5 20083590 RS 310 EV 400V 7 5 7 5 20028307 RS 410 EV 230V 9 2 11 20083611 RS 410...

Page 67: ...ories Modbus interface kit PVP kit Seal control function See gas train booklet Gas trains in compliance with EN 676 Please refer to manual Burner Model Code All models OCI412 3010437 Burner Ramp type...

Page 68: ...Single wire output layout 5 Functional layout REC 37 6 Functional layout REC 37 7 Functional layout REC 37 8 RWF50 2 output power regulator kit 9 Electrical wiring that the installer is responsible fo...

Page 69: ...0 4 E E GC GC E 8 0 0 L O 2 E L3OB L2OB 6 M M 4 6 Z E L E C L EC L E0 7 Z CFH L E0A7 L HDF L A9 0FJ KC Z D0EEH L KCEEH L 0 C L CE Z 5CFBC L FCC L 5CFI L F FB Z FH H L FCB L FH C L FHI 9 Z D0 AH L 9DIC...

Page 70: ...48 C 1 08 1 E 94 C 1 02 C 9 C 26F0 A4 E B 0 C A4 F C G0894 C B4 1 B9 E H4 34 C B 449 C H4 C B I9 3 E C 43 C 8B4 C F6 E 1 092 C F6 4 C 1 092 C F4 BE 0 092 C 09B4 C 09B4 C 09B4 H E H 4 C H 4 C H 4 C H 4...

Page 71: ...BD L I0D Q EB H L I0 L EHG L R0 F KB Q 3G0IIH L KBIIHR L S0DEB L 3BI 3E Q 9B AB L 3 BBE L 9B 1 L 3 TE A Q H H L BA L HD3B L H1 R Q G0E H L R G1B L I0E L RBG H3Q 0 0E GH L H 0E3B L H 0E3B L H 0E3B 91Q...

Page 72: ...C J 2C F 2C F 2 C F 2 C J 5 69 F 2 8 F 5946 F 8AK 6D J L4 229 F 229K F M C5 F L 2 L5 J H 6 F L6 5 F H 61 F L6N5 6 J 69 9 F 6 F 69CL F 691 KA J 4 589 F KA41 F 2 58 F K 4 9LJ 6 5849 F 96 5L F 96 5L F 96...

Page 73: ...3 5 N 75 L 756 L 765 L 7 5 K N G6 L 7 EK L G L EFO H 6 N C 77 L 677 O L P 5G6 L C67 CG N Q6 96 L C 66G L Q6 L C RG 9 N L 69 L 5C6 L OF N GE L OF 6 L 7 GE L O6 CN GE L GC6 L GC6 L GC6 Q N Q 76 L Q 76...

Page 74: ...F A G G 8 E H C H C I C D C5 D 5C D 2C 7 I 5 D 237 D 8 D 3J 2 K5 I 82 D K5 D L2C 5 D 5 I M5 45 D 55 D M5 9 D N 4 I D 54 D C 5 D 9 J I 82 3 D J895 D 2 3 D 58 I 2 2 38 D 2 5 D 2 5 D 2 5 M9I M8 599 D M8...

Page 75: ...F1 P FD Z 21 E1 0 F 11D 0 21 0 F RD E Z B B 0 1E 0 B F1 0 B 69 Z P D B 0 69 1 0 P D 0 61 BFZ D B 0 B DF1 0 B DF1 0 B DF1 2 Z 2 B 1 B 0 2 B 1 0 2 B 1 0 2 B 1 FCZ F F B 0 F 1C 0 F 0 F AHZ B 0 A DH 0 B...

Page 76: ...7 N 7 O A A P A 7 N 7 O 8A R 8 A S 8 A S 8 A S 8 7A 8 R S 8 79 S S 9DP7 G C R 7 S C P S T7A S 8 R F S S F S E R S S A S PD R 8 7 9 S PD S 8 7 9 S P R 7 7 9 S 7 S 7 S 7 F R F S F S F S F CR S C S S 7A...

Page 77: ...3 G 2 9 1A 5BBBBB G9 AH A 4 Z6978 36 23DDBB G 41 14 1 G 5 1 5 CBBBB1AY 5 AA 2 2 0 0 1 AZC 1AY 0 Z6978 36 23DDBB 14 G G 11 AZ D A A 0 14 7 H 7 H 7 H 7 9 6 H 7 0 H 96 H 0 2 I 8 G 776 H 8 7762 H 9 H G 7...

Page 78: ...manual stop electric switch ION Ionisation probe K1 Clean contacts output relay burner switched on K2 Clean contacts output relay burner lockout K3 Clean contacts output relay VSD alarm K4 Clean cont...

Page 79: ......

Page 80: ...Subject to modifications RIELLO S p A I 37045 Legnago VR Tel 39 0442 630111 http www riello it http www riello com...

Reviews: