


English - 13
TM
1
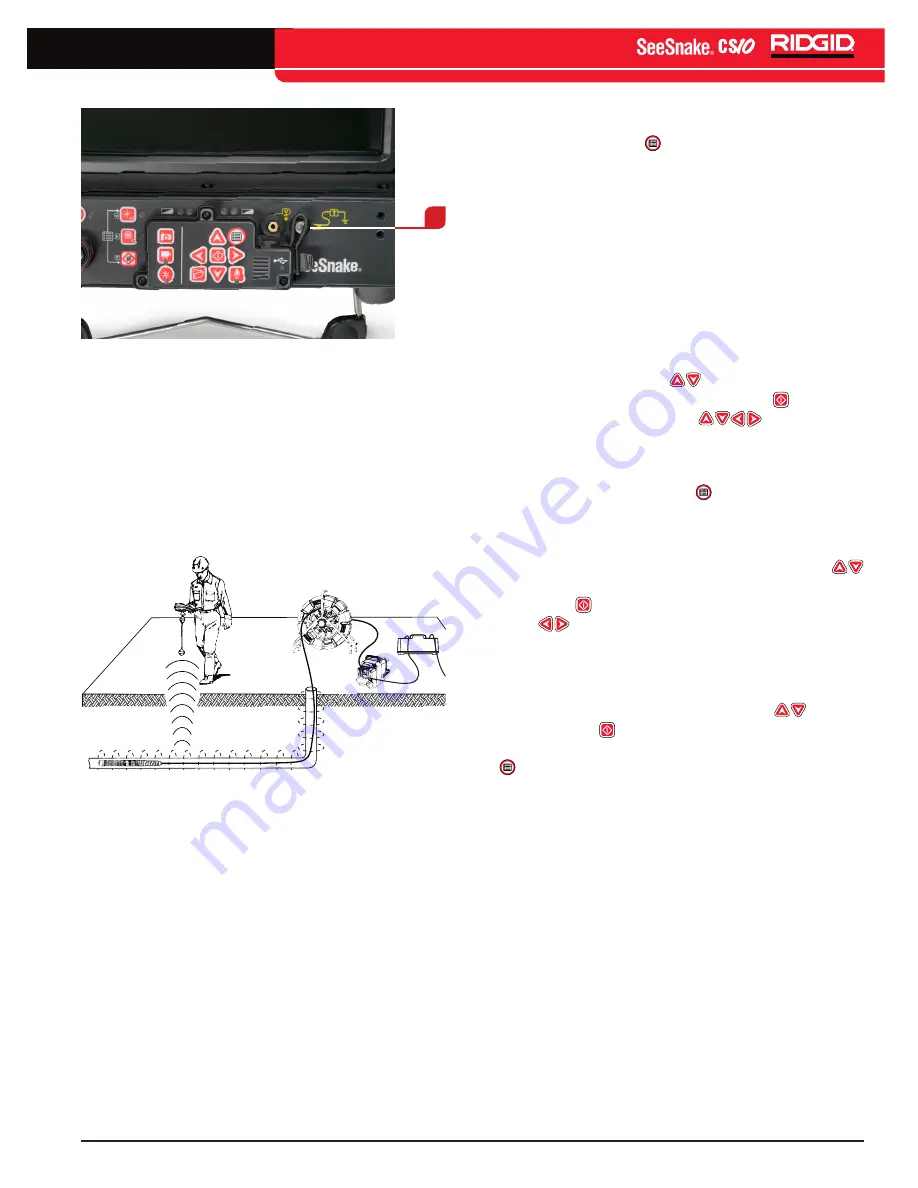
Figure 13 – CS10 Transmitter Clip-on Terminal
Set the line transmitter and the locator to the same
frequency and use the locator to trace the line (
See
Figure 13).
The camera’s built-in Sonde may be on at
the same time and, if equipped with SimulTrace™ dual-
frequency capability, you can use the locator to follow
the push cable to the camera’s location and then detect
the Sonde in the camera as you approach it above
ground�
Figure 14 – Line Tracing the Push Cable
If using a line transmitter that is not equipped with
the SimulTrace™ feature, use a line transmitter and a
locator to line-trace the SeeSnake push cable� When
the signal fades, switch the locator to Sonde mode
at the frequency of the in-line Sonde, usually 512 Hz�
Pick the signal up from where the line-trace frequency
started to weaken and zero in on the in-line Sonde�
Because locating frequencies from transmitters can
distort the image on the monitor, turn the Sonde and
the line transmitters OFF during the inspection of line
interior and only turn ON the Sonde and line transmitter
when ready to locate�
Adjusting Settings
Press the Menu Key to access the Settings Menu,
the Display Menu, the Language Menu, and the Media
Menu to make changes to the following:
•
Monitor color, contrast and brightness,
•
Time/date,
•
Unit of measurement,
•
Video format,
•
Language preference, and
•
Report creating preferences�
Adjusting Monitor Settings
From the Display Menu make changes to the monitor
color, monitor contrast, and monitor brightness� Use the
Up and Down Arrow Keys
to navigate to the setting
you want to adjust and the Select Key to choose
it� Then use the Arrow Keys
to increase or
decrease the selected settings preference levels� View
the increasing and decreasing settings on the slider bar
below the menu� To exit the menu after changing the
settings, press the Menu Key �
Adjusting Time and Date Format
From the Settings Menu change the format of the time/
date display� Use the up and down Arrow Keys
to navigate to “time/date” from the Main menu and the
Select Key to choose it� Use the left and right Arrow
Keys
to scroll between the various fields� Fields
that can be edited will have a blinking red outline�
To change the time and date format between 12 hour to
24 hour and between MM/DD/YYYY to DD/MM/YYYY,
either use the up and down Arrow Keys
or push
the Select Key within the highlighted field� To exit the
menu after changing the settings, press the Menu Key
�
Adjusting Measurement Units
If connected to a SeeSnake Reel that contains the
Count
Plus
cable-measurement system, the CS10 will
display the cable measurement in the bottom right-hand
side of the screen� If connected to a SeeSnake Reel that
does not contain the Count
Plus
cable-measurement
system, the CS10 will display four dash marks “-----” in
the bottom right-hand side of the screen to indicate that
cable measurements cannot be read�
The CS10 can display Count
Plus
cable-measurement
units in either feet or meters� The CS10 can also
automatically set the measurement units based on
the camera type� If set to “auto” and if using a NTSC
camera type, the CS10 will display Count
Plus
cable
measurement units in feet� If set to “auto” and if using a
PAL camera type, the CS10 will display measurement
units in meters� Either use the left and right Arrow Keys
Summary of Contents for SeeSnake CS10
Page 21: ...English 19 TM Notes ...


