background image

134

4

Pl

ay

in

g Bac

k

 an
d Del

e

ting
 I

m

ages

1

Press the 

Q

 button after taking a picture.

The image appears on the display.

2

Use the four-way controller (

2345

) to select 

s

(Image 

Rotation) from the Playback Mode Palette.

3

Press the 

4

 button.

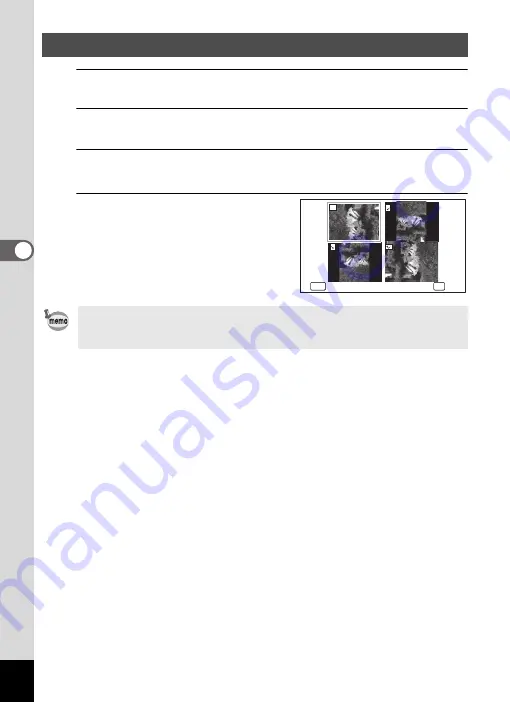
The rotation selection screen (0°, Right 90°, Left 90°, or 180°) appears.

4

Use the four-way controller 
(

2345

) to choose the rotation 

direction and press the 

4


button.

The rotated image is saved.

Rotating the Image

• Movies cannot be rotated.
• Protected images can be rotated, but they cannot be saved in a rotated 

state.

OK

MENU

OK

Cancel

Summary of Contents for WG-5 GPS

Page 1: ...GPS Connecting to a Computer Settings Editing and Printing Taking Pictures Common Operations 1 3 2 6 7 8 Appendix 9 5 4 Playing Back and Deleting Images To ensure the best performance from your camera...

Page 2: ...ates and or other countries Eye Fi the Eye Fi logo and Eye Fi connected are trademarks of Eye Fi Inc Intel Intel Core and Pentium are trademarks of Intel Corporation in the U S and or other countries...

Page 3: ...when they should not However this has no effect on the recorded image There is a possibility that the illustrations and the screen display in this manual are different from the actual ones In this ma...

Page 4: ...e AC adapter and contact your nearest service center Continued use can cause a fire or electric shock Caution Do not place your finger on the flash when it is discharging as there is a risk of burns D...

Page 5: ...uct fire or electric shock Wipe off the AC plug if it becomes covered with dust Accumulated dust may cause a fire Caution Do not place or drop heavy objects on or forcefully bend the USB cable or AC p...

Page 6: ...he battery or dispose of the battery in fire This can cause an explosion or fire If any leakage from the battery should come in contact with skin or clothes it may cause irritation to the skin Wash th...

Page 7: ...ter D PA135 Do not use it with other devices Hot and humid places should be avoided Particular care should be taken regarding vehicles which can become very hot inside Ensure that the camera is not su...

Page 8: ...reful not to overtighten the screw in the tripod socket on the camera Do not clean the camera with organic solvents such as thinner alcohol or benzine Use a lens brush to remove dust accumulated on th...

Page 9: ...ollowing circumstances We do not accept any liability for data that is deleted 1 when the SD Memory Card is mishandled by the user 2 when the SD Memory Card is exposed to static electricity or electri...

Page 10: ...it will remain free of trouble or damages Waterproof performance is not guaranteed if the camera is exposed to impact such as being dropped or hit Make sure that there are no cracks or scratches on th...

Page 11: ...o not apply excessive force to the camera for example diving into water with it Doing so may compromise the waterproof performance of the camera or cause the cover to open Do not leave the camera on t...

Page 12: ...r dents on the seal or the contact surface If there is any such damage contact your nearest service center If the camera becomes very dirty or after it has been used in the sea make sure that it is tu...

Page 13: ...Indications 21 Display in A Mode 21 Display in Q Mode 25 Guide Display 27 Histogram 28 Electronic Level 29 Sub display Indicator 30 Attaching the Carabiner Strap 31 Powering the Camera 32 Installing t...

Page 14: ...ash Mode 83 Selecting the Focus Mode 84 Setting the Image Tone 88 Selecting the Number of Recorded Pixels 89 Selecting the Quality Level of Still Pictures 90 Adjusting the White Balance 91 Setting the...

Page 15: ...he Time Lapse Movie Function 120 Using the High Speed Movie Function 121 Using the 1cm Macro Movie Function 122 Saving the Settings Memory 123 Playing Back and Deleting Images 125 Playing Back Images...

Page 16: ...9 Setting the Alarm 170 Setting the World Time 172 Setting the Text Size on the Menu 174 Changing the Display Language 174 Changing the Naming System of the Folder 175 Changing the Naming System of th...

Page 17: ...e GPS 197 GPS Function on the RICOH WG 5 GPS 197 Precautions for Using the GPS 198 Using the GPS 200 Preparation for Using the GPS Function 200 Recording GPS Information on Captured Images 201 Recordi...

Page 18: ...es below The meanings of the symbols used in this Operating Manual are explained below 1 Indicates the reference page number for an explanation of the related operation Indicates information that is u...

Page 19: ...ous ways of capturing images and how to set the relevant functions 4 Playing Back and Deleting Images This chapter explains how to view still pictures and movies on the camera or on a TV and how to de...

Page 20: ...ies 2 The AC plug adapter is attached to the power adapter Camera RICOH WG 5 GPS Carabiner strap O ST161 1 USB cable I USB7 1 Rechargeable lithium ion battery D LI92 1 Power adapter D PA135 AC plug ad...

Page 21: ...n Power lamp green Flash Remote control receiver LED Macro Lights Microphones Sub display Strap lug Self timer lamp Focus assist light Display Tripod socket USB AV terminal Battery lock lever Battery...

Page 22: ...in Digital Microscope or 1cm Macro Movie mode p 75 p 122 Insert two clips into the slits in upper and lower sides of the LED Macro Lights part When attaching and detaching the macro stand do not hold...

Page 23: ...mera buttons function as normal even when the LCD is off Press the shutter release button to take pictures as normal The display cannot be changed in some shooting modes AWB WB 12 12M 38 38 38 IS ISO...

Page 24: ...Level p 29 6 Shutter speed 20 Date and time p 46 7 Aperture 21 World Time setting p 172 8 Shake Reduction icon p 97 22 D Range Setting p 96 9 Memory status p 41 A1 Focus frame p 61 10 Remaining image...

Page 25: ...ings in WSetting menu No icon is displayed on the screen when GPS On Off is set to Off 18 appears when recording the GPS log 20 appears for two seconds after the camera is turned on 22 changes dependi...

Page 26: ...the lens direction is as follows The normal display appears if you press the shutter release button halfway Press the 4 button twice to display the Electronic Compass Display again 1 GPS latitude 5 G...

Page 27: ...a movie 10 100 003 0038 100 0038 F3 F3 5 1 25 1 250 F3 5 1 250 IS ISO 20 200 AWB WB ISO 200 AWB 12M 12M Edit Edit Edit Edit Edit Edit 10 100 003 0038 100 0038 04 04 2015 04 04 2015 04 04 2015 14 25 1...

Page 28: ...layback of movies p 126 When Normal Display is selected the current date and time appears for two seconds in the B4 to B8 positions If there are overexposed highlight areas in the image they will blin...

Page 29: ...n the camera p 202 A guide indicator for each available button or key operation appears as follows on the display during operation 1 Face Detection icon 9 Folder number 2 Playback mode 10 Memory statu...

Page 30: ...the left side and if it is overexposed the peak is on the right side When the image is underexposed the part to the left is cut off dark portions and when the image is overexposed the part to the righ...

Page 31: ...tilt upward or downward vertical tilt The number of increments on the scales and the color of bar scale show the camera angle Display examples Electronic Level Horizontally and vertically level green...

Page 32: ...d as follows each time the zoom button right is pressed Current time current time height current time air pressure Press the zoom button left to change the items in the opposite order Nothing is displ...

Page 33: ...on the camera 2 Fix the end of the strap to the stopper Protective rubber ring The carabiner has rubber rings to prevent damage to the display These rubber rings cushion the impact when the carabiner...

Page 34: ...to push the battery lock lever in the direction of 4 insert the battery with the PENTAX logo pointing toward the lens Push the battery in until it is locked in place 4 Close the battery cover and slid...

Page 35: ...ype of battery may damage the camera and cause malfunction Insert the battery correctly If the battery is incorrectly oriented malfunction may result Do not remove the battery while the camera is turn...

Page 36: ...USB cable to the camera 4 Plug the power adapter into the power outlet The power lamp blinks while charging When charging is finished the power lamp turns off The battery cover will not close while c...

Page 37: ...o not use excessive force when sliding the battery cover open and closed because the waterproof seal may peel off If the seal is not in the correct position the camera will not be waterproof The time...

Page 38: ...battery level by the indicator on the display Screen Display Battery Status green Adequate power remains green Battery is running low yellow Battery is running very low red Battery is exhausted Batter...

Page 39: ...open the battery cover and remove the battery 3 Insert the DC coupler Using the side of the DC coupler to push the battery lock lever insert the DC coupler Confirm that the DC coupler is locked in pl...

Page 40: ...due care to avoid fire or electric shock Be sure to read About the Power Adapter and the AC Adapter p 3 before using the AC adapter Be sure to read the operation manual accompanying the AC adapter kit...

Page 41: ...ry completely before changing the SD Memory Card Avoid changing the card where the camera is likely to get wet or dirty and make sure that your hands are dry Do not use excessive force when sliding th...

Page 42: ...release latch in the opposite direction indicated by 2 5 Slide the battery cover lock in the opposite direction indicated by 1 Make sure that the lever clicks and the cover is locked If the battery co...

Page 43: ...button again The camera turns off and both the power lamp and display turn off The SD Memory Card is checked when the camera turns on and the memory status is displayed Taking Still Pictures 1p 61 Ch...

Page 44: ...d the camera starts up in playback mode Starting up in Playback Mode To switch from playback mode to capture mode press the Q button or press the shutter release button halfway In order to set the cam...

Page 45: ...tting screen appears in the selected language If the desired settings for W Hometown and DST Daylight Saving Time appear proceed to step 9 The language date and time can be changed later Refer to the...

Page 46: ...e frame moves to DST Daylight Saving Time 7 Use the four way controller 45 to select O On or P Off 8 Press the 4 button The Initial Setting screen reappears 9 Press the four way controller 3 to select...

Page 47: ...nguage 5 Press the four way controller 5 The Language screen appears 6 Use the four way controller 2345 to select the desired language 7 Press the 4 button The W Setting menu appears in the selected l...

Page 48: ...e moves to Date 7 Press the four way controller 5 The frame moves to the month 8 Use the four way controller 23 to change the month Change the day and year in the same manner Next change the time If y...

Page 49: ...will appear next time you turn the camera on Language Date Time Hometown and DST can be changed Refer to the pages below for instructions To change the language follow the steps in Changing the Displ...

Page 50: ...set to 3 s and p 62 Takes a still picture when pressed down fully p 62 Pressing down fully starts and stops movie recording in C Movie Underwater Movie High Speed Movie c Time Lapse Movie and 1cm Macr...

Page 51: ...h mode p 83 5 Changes the focus mode p 84 23 Adjusts the focus when the focus mode is set to p 85 7 Green button Switches to 9 Green mode p 71 Calls up the assigned function p 102 8 3 button In Still...

Page 52: ...display Pressing f again switches to 12 image display p 127 Press y to return to the previous display In single image display pressing y magnifies the image Press f to return to the previous display p...

Page 53: ...image display to the Delete screen p 136 Switches from 6 or 12 image display to the Select Delete screen p 137 Switches from folder display to the calendar display screen p 128 Switches from calendar...

Page 54: ...low the procedure below to switch between A mode and Q mode 1 Press the Q button The camera switches to Q mode 1 Press the Q button or the shutter release button halfway The camera switches to A mode...

Page 55: ...de to display the W Setting menu Use the four way controller 45 to move between menus Operating the Menus SHUTTER SHUTTER MENU MENU MENU 14 2 14 25 14 25 10 02 0 10 02 02 10 02 02 38 P 07 34 07 34 07...

Page 56: ...on The 3 button function varies depending on the screen Refer to the guide indications Exit Exits the menu and returns to the original screen Returns to the previous screen with the current settings C...

Page 57: ...sing Area p 86 Auto Macro For choosing whether or not to use the auto macro function p 87 Focus Assist For setting whether or not to use the focus assist light p 87 AE Metering For choosing the area o...

Page 58: ...s selected the item changes to Tone Adjustment p 105 Contrast For setting the image contrast level p 106 Date Imprint For choosing whether to imprint the date and or time when taking still pictures p...

Page 59: ...right AE Metering AF Setting White Balance Quality Level A Rec Mode Menu 1 A Rec Mode Menu 2 A Rec Mode Menu 3 A Rec Mode Menu 4 MENU Exit Shake Reduction Sensitivity Face Detection D Range Setting EV...

Page 60: ...lume and playback volume and setting the start up sound shutter sound key operation sound and self timer sound p 168 Date Adjustment For adjusting the date and time p 169 Alarm For setting the alarm p...

Page 61: ...r correcting defective pixels on the image sensor p 184 Startup Shortcut Playback Mode For setting whether to start up the camera in playback mode p 186 LED Lighting For setting whether to turn the LE...

Page 62: ...DMI Out Folder Name File Name Date Auto NTSC USB Connection MSC Setting 2 5 Language English RIMG MENU Exit Quick Zoom Guide Display 5sec Auto Power Off 3min Power Saving Brightness Level Setting 3 5...

Page 63: ...to take still pictures In this manual this is called Still Picture Capture Mode 2 Check the subject and shooting information on the display The focus frame in the middle of the display indicates the...

Page 64: ...en the camera focuses on the subject 4 Press the shutter release button fully The picture is taken The flash discharges automatically depending on the light conditions The image appears on the display...

Page 65: ...utter Release Button Poor focusing conditions The camera may not be able to focus under the following conditions In these cases lock the focus on an object the same distance away as the subject by pre...

Page 66: ...Zoom and stops at the point where the zoom switches to digital zoom Once the button is released and pressed again the camera switches to digital zoom If the digital zoom is set to off in the menu the...

Page 67: ...l Approx 18x Equivalent to approx 28 8x m Approx 28 8x same as digital zoom We recommend you use a tripod to prevent camera shake when taking pictures at high zoom ratios Pictures taken in the digital...

Page 68: ...se the four way controller 23 to select Digital Zoom 3 Use the four way controller 45 to switch between O On or P Off O On Uses the digital zoom P Off Uses only the optical zoom and Intelligent Zoom T...

Page 69: ...controller 3 in A mode The Capture Mode Palette appears 2 Use the four way controller 2345 to choose a shooting mode The guide of the selected shooting mode is displayed in the lower part of the disp...

Page 70: ...es images with your desired shutter speed p 72 E USER Captures images with the settings saved as E p 73 HDR Combines 3 images into a single image delivering a wider dynamic range image Handheld Night...

Page 71: ...pturing movie clips at close distances p 122 c Digital SR Higher sensitivity reduces blur Q Surf Snow For bright images such as sand or snow Accurately meters for bright scenes R Kids For capturing mo...

Page 72: ...ht Snap C Movie Digital Microscope Interval Shot Interval Movie High Speed Movie c Time Lapse Movie 1cm Macro Movie c Digital SR and A Night Scene Saturation Contrast Sharpness White Balance etc are a...

Page 73: ...the subject 3 Press the shutter release button fully The picture is taken Taking Pictures in Basic Mode Green Mode Flash Mode Auto Sensitivity AUTO 125 1600 Drive Mode 9 Standard EV Compensation 0 0 F...

Page 74: ...default the 9 mode is assigned When the 3 button is pressed in 9 mode the W Setting menu appears The A Rec Mode menu cannot be displayed When the camera is turned off in 9 mode it turns on in 9 mode n...

Page 75: ...range of Auto Bracketing AF Point Sensitivity Type of information display 1 Set the shooting mode to e or b p 67 2 Set the functions to be saved 3 Use the four way controller 23 to select Save as E in...

Page 76: ...are retrieved Change the settings already in the E mode if necessary 3 Take a picture To Take Pictures in E Mode The settings changed in E mode are valid only when the shooting mode is set to E Chang...

Page 77: ...pecimens of tiny insects etc 1 Use the four way controller 2345 to select Digital Microscope from the Capture Mode Palette 2 Press the 4 button The mode is selected and the camera returns to capture m...

Page 78: ...rval 5 Press the four way controller 3 The frame moves to Number of Shots 6 Set the number of shots 1 Press the four way controller 5 2 Use the four way controller 23 to set Number of Shots then press...

Page 79: ...of shots and shooting interval on the screen The Stop interval shooting message is displayed when the power button and then the 3 button are pressed during standby Pressing the 4 button cancels inter...

Page 80: ...Focusing may be compromised if you move the camera while the self timer lamp is blinking when taking still pictures In C Movie Underwater Movie High Speed Movie c Time Lapse Movie and 1cm Macro Movie...

Page 81: ...before the next image is taken The higher the image quality the longer the interval between shots c Burst Shooting The number of recorded pixels is fixed at f and the interval between shots is shorter...

Page 82: ...e control receiver and press the shutter release button on the remote control unit The focus frame turns green when the subject is in focus and the camera takes a picture at the following timing When...

Page 83: ...rwater Movie High Speed Movie c Time Lapse Movie and 1cm Macro Movie modes pressing the shutter release button again stops the recording The camera takes a picture even if the focus is not achieved If...

Page 84: ...3 button The camera returns to capture mode The setting is saved and the camera returns to the previous screen 3 Press the Q button When the A Rec Mode C Movie or W Setting menu is displayed from A m...

Page 85: ...e to take pictures where flash photography is prohibited b Flash On The flash discharges for each shot regardless of the brightness c Auto Red eye This mode reduces the red eye phenomenon caused by th...

Page 86: ...corrected by the Red eye Edit function p 153 Saving the Flash Mode setting 1p 123 Selecting the Focus Mode Standard This mode is used when the distance to the subject is from 40 cm to The camera is f...

Page 87: ...o indicate the approximate distance to the subject Use the four way controller 23 to adjust the focus using the indicator as a guide 2 for distant focus 3 for closer focus The available modes differ d...

Page 88: ...ea 4 Press the four way controller 5 A pull down menu appears 5 Use the four way controller 23 to change the autofocus area 6 Press the 4 button The setting is saved The shooting mode and drive mode c...

Page 89: ...Auto Macro 4 Use the four way controller 45 to select O On P Off The setting is saved The camera automatically emits the focus assist light in dark shooting situations You can set the light to on or o...

Page 90: ...way controller 5 A pull down menu appears 3 Use the four way controller 23 to select a finishing tone 4 Press the 4 button The setting is saved Setting the Image Tone When Monochrome is selected Tone...

Page 91: ...lowing table for the appropriate setting according to expected usage The default setting is V can be set only when Report mode is set V does not appear in the Recorded Pixels options Selecting the Num...

Page 92: ...y controller 23 to select Quality Level in the A Rec Mode menu 2 Press the four way controller 5 A pull down menu appears 3 Use the four way controller 23 to change the quality level The number of rec...

Page 93: ...when taking pictures outside in sunlight l Shade Use this mode when taking pictures outside in the shade I Tungsten Light Use this mode when taking pictures under tungsten lamps or electric lights oth...

Page 94: ...hite balance is automatically adjusted 4 Press the 4 button The setting is saved Have a blank sheet of white paper or similar material ready 1 In the White Balance screen use the four way controller 2...

Page 95: ...amera takes a reading of the overall brightness of the screen with the center of the screen having more influence on the exposure N Spot AE metering The camera determines the exposure by metering the...

Page 96: ...itivity 125 1600 125 The lower the sensitivity the less noise that affects the image The shutter speed will be slower in low light conditions 200 400 800 1600 Higher sensitivity settings use faster sh...

Page 97: ...is function to take pictures that are intentionally overexposed or underexposed 1 Use the four way controller 23 to select EV Compensation in the A Rec Mode menu 2 Use the four way controller 45 to se...

Page 98: ...adow Correction 4 Press the four way controller 5 A pull down menu appears 5 Use the four way controller 23 to change the setting When a histogram is displayed in Still Picture Capture Mode or playbac...

Page 99: ...ler 23 to change the setting 4 Press the 4 button The setting is saved P When Highlight Correction is set to Auto Q When Shadow Correction is set to Auto O When both Highlight Correction and Shadow Co...

Page 100: ...s taken without pressing the shutter release button halfway when c Digital SR S Fireworks or HDR is selected as the shooting mode For correcting camera shake in C Movie Underwater Movie c Time Lapse M...

Page 101: ...face The position of the blinking LED Macro Light indicates where the detected face is on the screen J Self portrait Assist Smile Capture The LED Macro Lights flash when the camera detects a person s...

Page 102: ...of the blinking LED Macro Light indicates where the detected face is on the screen The position area of the detected face corresponds to the blinking LED Macro Light as follows Example 1 When the came...

Page 103: ...e camera can tell the positions of up to three detected faces by blinking the LED Macro Lights When the camera detects four or five faces four or five LED Macro Lights blink depending on the number of...

Page 104: ...Button in the A Rec Mode menu 2 Press the four way controller 5 A pull down menu appears 3 Use the four way controller 23 to select a function you want to assign 4 Press the 4 button The setting is sa...

Page 105: ...way controller 23 to select a key you want to assign a function to 6 Press the four way controller 5 A pull down menu appears 7 Use the four way controller 23 to select an item you want to assign 8 Pr...

Page 106: ...r 45 four way controller to change the settings You can assign only one function to each key Still Picture Capture Mode Movie mode Default settings 2 EV Compensation 2 Movie SR 3 Recorded Pixels 3 EV...

Page 107: ...ng on the Image Tone selected in the A Rec Mode menu 1 Use the four way controller 23 to select Saturation or Tone Adjustment in the A Rec Mode menu 2 Use the four way controller 45 to select the leve...

Page 108: ...r 23 to select the Date Imprint details Choose from Date Date Time Time or Off 4 Press the 4 button The setting is saved Setting the Image Contrast Contrast Setting the Date Imprint Function The date...

Page 109: ...the LED Macro Lights The setting is saved Setting the IQ Enhancer Processing IQ Enhancer does not function in the following situations When the drive mode is set to c Burst Shooting When the shooting...

Page 110: ...The electronic level is not displayed The setting is saved You can attach the RICOH Wide Conversion Lens DW 5 optional to shoot pictures at a lens magnification of 0 8 equivalent to a 35 mm camera s 2...

Page 111: ...O LA135 for details on how to use the adapter You cannot select O On for Digital Microscope 1cm Macro Movie and 9 Green modes The following restrictions apply when O On is selected Zoom Fixed at the...

Page 112: ...de Underwater Movie Mode Use the Underwater mode to take underwater still pictures that capture the blueness of the sea Use the Underwater Movie mode to record movies underwater Recording Movies 1p 11...

Page 113: ...t may momentarily be subjected to water pressure beyond that covered in the guarantee and water may enter the interior of the camera Jumping into the water while holding the camera Swimming while hold...

Page 114: ...display 1 Movie mode icon 2 Movie Shake Reduction icon 3 Remaining recordable time 4 REC indicator blinks during recording 5 Focus frame does not appear during recording 6 Still picture capture icon a...

Page 115: ...ng stops Playing Back a Movie 1p 126 You can use the optical zoom and autofocus functions while recording movies when Enable Autofocus p 117 and Enable Optical Zoom p 117 are set to O On in the C Movi...

Page 116: ...e recorded movie time reaches 25 minutes 2 Press the Movie button again Recording stops Keeping the Shutter Release Button Pressed Recording a Movie Quickly Using the Movie Button You cannot stop reco...

Page 117: ...ame rate 4 Press the 4 button The setting is saved Selecting the Number of Recorded Pixels and Frame Rate for Movies Setting Recorded Pixels Frame Rate Use 1920 x 1080 30 fps Records images in full HD...

Page 118: ...setting is saved You can reduce wind noises during movie recording The default setting is P Off 1 Use the four way controller 23 to select Wind Suppression in the C Movie menu 2 Use the four way cont...

Page 119: ...movies The default setting is P Off 1 Use the four way controller 23 to select Enable Optical Zoom in the C Movie menu 2 Use the four way controller 45 to select O On P Off O On Optical zoom is availa...

Page 120: ...ller 23 to set the interval then press the 4 button The frame returns to Interval 5 Press the four way controller 3 The frame moves to Total Time Combining Pictures Taken at a Set Interval into a Movi...

Page 121: ...a picture Interval movie recording starts The LCD turns off between shots during standby Press the power button during standby to display the remaining time and shooting interval on the screen The Sto...

Page 122: ...nt time and the start delay you set is displayed in real time The total time you can set differs according to the shooting interval you set as indicated in the table below The Date Imprint function p...

Page 123: ...5 fps when recording The frame rate is 240 fps when playing back Zoom is not available during recording The flash does not discharge in this mode The Blink Detection Enable Autofocus and Enable Optica...

Page 124: ...Intelligent Zoom is included Up to 4 times for the optical zoom W Wide left Widens the area that is captured by the camera T Tele right Enlarges the subject 4 Press the shutter release button fully R...

Page 125: ...default setting for each item is O or P Item Description Default setting Page Face Detection The Face Detection setting in the A Rec Mode menu P p 99 Flash Mode The flash mode set with the four way co...

Page 126: ...he A Rec Mode menu 2 Press the four way controller 5 The Memory screen appears 3 Use the four way controller 23 to choose an item 4 Use the four way controller 45 to select O On or P Off MENU Memory F...

Page 127: ...i button while the image is displayed to display the Delete screen Press the four way controller 2 to select Delete and press the 4 button Playing Back Still Pictures To Play Back the Previous or Next...

Page 128: ...following operations can be performed while playback is paused Four way controller 4 Reverses frames Four way controller 5 Forwards frames Four way controller 2 Resumes playback In frame reverse mode...

Page 129: ...ages at a time page by page Use the four way controller 2345 to move the frame If there are too many images to display on one page pressing the four way controller 24 while the image 1 is selected wil...

Page 130: ...twice in Q mode The screen changes to 12 image display 2 Press the f button The screen changes to folder display or calendar display Folder display The list of folders with recorded images appears Us...

Page 131: ...s 2 Use the four way controller 2345 to choose an icon The guide for the selected function appears below 3 Press the 4 button The playback function is recalled Press the 3 button in folder display or...

Page 132: ...dit Edit Edit OK Cancel Rotates captured images Useful when viewing vertical images on a TV OK Cancel 14 25 14 25 04 04 2015 04 04 2015 14 25 04 04 2015 OK MENU For continuously playing back images Sc...

Page 133: ...riginal Frame Available to make from the kind and color of a frame Available to enter text p 154 Movie Edit Save as Still Image For saving one frame from a movie as a still picture p 158 Divide Movies...

Page 134: ...press the 4 button again 6 Press any button other than the 4 button The slideshow stops You can set the playback interval a screen effect and sound effect for when one image changes to the next 1 Use...

Page 135: ...the four way controller 23 to select Start 8 Press the 4 button The slideshow starts with the selected interval and effects Wipe The next image slides over the previous one from left to right Checker...

Page 136: ...on from the Playback Mode Palette 3 Press the 4 button The rotation selection screen 0 Right 90 Left 90 or 180 appears 4 Use the four way controller 2345 to choose the rotation direction and press the...

Page 137: ...ing y button once magnifies the image to 10x You can use the mark of the guide at the bottom left of the screen to check which portion of the image is magnified The following operations can be perform...

Page 138: ...e and use the four way controller 45 to choose the image you want to delete 2 Press the i button A confirmation screen appears 3 Use the four way controller 2 to select Delete 4 Press the 4 button The...

Page 139: ...n O appears on the selected images Pressing and holding the y button displays the selected image in single image display and you can check whether to delete the image Releasing the button returns to 6...

Page 140: ...r 5 once or twice 2 Use the four way controller 23 to select Delete All 3 Press the four way controller 5 A confirmation dialog appears 4 Use the four way controller 2 to select Delete All 5 Press the...

Page 141: ...this image appears To protect another image use the four way controller 45 to select another image 6 Use the four way controller 2 to select Protect 7 Press the 4 button The selected image is protecte...

Page 142: ...oller 23 to select Cancel and press the 4 button The Playback Mode Palette reappears To Protect All Images Protected images are deleted when the SD Memory Card or the built in memory is formatted p 16...

Page 143: ...p 37 For an AV device with multiple video input terminals check the operating manual of the AV device and select the video input terminal to which the camera is connected You cannot output both compo...

Page 144: ...viewing images on AV device with multiple video input terminals such as a TV refer to the operating manual of the device and select the video input terminal to which to connect the camera 7 Turn the c...

Page 145: ...The camera information is displayed on the screen of the connected AV device Connecting the Camera to an HDMI Terminal The camera has a Type D Micro HDMI terminal Use a commercially available HDMI cab...

Page 146: ...ecorded Pixels and Quality Level Use the four way controller 45 to choose the desired recorded pixels and quality level Use the four way controller 23 to switch between Recorded Pixels and Quality Lev...

Page 147: ...the cropping area The following operations specify the size and position of the cropping frame 5 Press the 4 button The cropped image is saved with a new file name The number of recorded pixels is se...

Page 148: ...e 4 Use the four way controller 2345 to select a face to be processed A green frame indicates the face that is to be processed 5 Press the 4 button 6 Use the four way controller 45 to change the reduc...

Page 149: ...he image using the selected color filter You can choose from six filters red pink purple blue green and yellow Extract Color Processes the image using the selected color extraction filter You can choo...

Page 150: ...appears If the selected image is protected the processed image is saved as a new image and the confirmation dialog does not appear Four way controller 4 Default Setting Four way controller 5 Retro Bl...

Page 151: ...the 4 button A confirmation dialog for overwriting the image appears If the selected image is protected the processed image is saved as a new image and the confirmation dialog does not appear 5 Use th...

Page 152: ...ay controller 23 to select Overwrite or Save as 7 Press the 4 button The image processed with the filter is saved Make a collage image by placing captured images on a selected pattern 1 Use the four w...

Page 153: ...way controller 23 to choose the Layout 8 Press the four way controller 5 A pull down menu appears 9 Use the four way controller 23 to choose the pattern of layout You can choose from 3 patterns of lay...

Page 154: ...ess the 4 button The selected image is placed in the highlighted area in the guide The guide appears on the top left of the display 18 Repeat step 17 to lay out the rest images Selecting the Backgroun...

Page 155: ...es 1 Enter Q mode and use the four way controller 45 to choose the image you want to edit 2 Use the four way controller 2345 to select Z Red eye Edit from the Playback Mode Palette 3 Press the 4 butto...

Page 156: ...so be entered Frame Text Stamp Overlaying Your Original Frame on Still Pictures Type of original frame Blur Edge Composite Frame Type F All sides G Upper and lower sides H Right and left sides I Upper...

Page 157: ...n the same way as in steps 5 and 6 8 Adjust the position of the frame and image For details refer to To Adjust the Position of the Frame and Image p 156 9 Use the four way controller 23 to select Text...

Page 158: ...s 2 Press the Green button The image position adjustment screen appears 3 Press the 4 button The screen returns to the original screen To Adjust the Position of the Frame and Image Four way controller...

Page 159: ...roller 23 to select Color and press the four way controller 5 6 Use the four way controller 23 to select the color and press the four way controller 4 To Set Up Text Stamp Movie button Press to switch...

Page 160: ...t 2 Use the four way controller 2345 to select Movie Edit from the Playback Mode Palette 3 Press the 4 button The edit option selection screen appears 4 Select Save as Still Image on the edit option s...

Page 161: ...the movie 3 Stops the movie and returns to the first frame 4 Reverses the movie frame by frame 5 Advances the movie frame by frame 7 Press the 4 button A confirmation dialog appears 8 Use the four way...

Page 162: ...ntroller 23 to select the position A Adds the title picture to the beginning of the movie B Adds the title picture to the end of the movie 9 Press the 4 button The selected picture is saved as the tit...

Page 163: ...Card When a title picture is added to the beginning of a movie When the movie is played back the added still picture is played back for three seconds and then the movie is played back The added still...

Page 164: ...copied to the built in memory To copy other images repeat steps 3 to 6 Select Cancel to exit the copy operation To Copy Files from the SD Memory Card to the Built in Memory When an image is copied fr...

Page 165: ...ted according to the DPOF settings using a DPOF compatible printer or at a photo processing lab DPOF cannot be set for movies Set the following items for each image 1 Use the four way controller 2345...

Page 166: ...repeat steps 5 and 6 7 Press the 4 button The settings are saved and the screen shown in step 3 reappears Depending on a printer or printing equipment at the photo processing lab the date may not be...

Page 167: ...s 4 Press the 4 button The settings for all the images are saved and the camera returns to the initial screen of the DPOF setting Printing All Images The number of copies specified in the All Images s...

Page 168: ...lfway The setting is saved and the camera returns to capture mode 3 Press the 3 button before you finish the settings The changes are canceled and you can select a menu Using the Setting Menu Items To...

Page 169: ...4 button Formatting starts When formatting is completed the camera returns to A mode or Q mode Formatting the Memory Do not remove the SD Memory Card while it is being formatted This may damage the c...

Page 170: ...and self timer sound 5 Change Playback Volume in the same way as in steps 3 and 4 3 Use the four way controller 23 to select Startup Sound 4 Press the four way controller 5 A pull down menu appears 5...

Page 171: ...d yy dd mm yy or yy mm dd 5 Press the four way controller 5 The frame moves to 24h 6 Use the four way controller 23 to select 24h 24 hour display or 12h 12 hour display 7 Press the four way controller...

Page 172: ...and time settings are saved and the screen returns to the W Setting menu You can set the alarm to ring at a specified time You can choose whether the alarm will ring at the same time every day or only...

Page 173: ...ntroller 3 The frame moves to Settings complete 11 Press the 4 button When the alarm is set to Off the settings are saved and the screen returns to the W Setting menu When the alarm is set to Once or...

Page 174: ...pictures in a different time zone 1 Use the four way controller 23 to select World Time in the W Setting menu 2 Press the four way controller 5 The World Time screen appears 3 Use the four way contro...

Page 175: ...Time screen appears 3 Use the four way controller 23 to select Select Time 4 Press the four way controller 5 A pull down menu appears 5 Use the four way controller 23 to select X Destination or W Hom...

Page 176: ...4 button The setting is saved You can change the language in which the menus error messages etc are displayed 1 Use the four way controller 23 to select Language in the W Setting menu 2 Press the four...

Page 177: ...Up to 9999 images are saved in the same folder DCIM 100_0401 101_0408 102RICOH DCIM 100_0401 101_0408 DCIM 100_0401 100 100 101 100 101 102 DCIM 100_0401 101_0408 102RICOH 100 101 102 Image taken on A...

Page 178: ...after the 3 digit folder number 1 Select _USER in step 3 in Selecting the Rule for Naming Folders 2 Press the four way controller 5 The Folder Name screen appears _USER has already been entered 3 Use...

Page 179: ...les 4 Press the 4 button The setting is saved You can move the cursor by pressing the zoom button The folder name you have set is displayed in the R Setting menu Changing the Naming System of the File...

Page 180: ...econd character 4 Repeat step 3 and enter the remaining characters 5 Press the four way controller 4 while A is selected or press 35 while _ is selected The frame moves to Settings complete 6 Press th...

Page 181: ...e the four way controller 23 to select a video output format Choose the video output format to match the output format of the AV device 4 Press the 4 button The setting is saved Changing the Video Out...

Page 182: ...the output format of an AV device 4 Press the 4 button The setting is saved Selecting the HDMI Output Format The items on the pull down menu vary depending on the selected video output format To chang...

Page 183: ...Eye Fi card P Off Turns off communication using an Eye Fi card 3 Press the 4 button The setting is saved You can adjust the brightness of the display to 7 levels 1 Use the four way controller 23 to se...

Page 184: ...he setting is saved You can set the camera to turn off automatically when no operation is performed for a fixed time 1 Use the four way controller 23 to select Auto Power Off in the W Setting menu 2 P...

Page 185: ...Off The Quick Zoom is not available Set whether to display mode guides for the Capture Mode Palette and Playback Mode Palette 1 Use the four way controller 23 to select Guide Display in the W Setting...

Page 186: ...ected Perform Pixel Mapping Pixel Mapping is only accessible from A mode Pixel Mapping cannot be selected even if the W Setting menu is displayed by pressing the 3 button in Q mode When executing Pixe...

Page 187: ...ble for the start up screen are displayed You can also choose the pre installed screen or guide display start up screen already stored in the camera 4 Press the 4 button The setting is saved Changing...

Page 188: ...amera is off 1 Use the four way controller 23 to select Startup Shortcut in the W Setting menu 2 Press the four way controller 5 The Startup Shortcut screen appears Resetting to Default Settings Reset...

Page 189: ...display the clock on the display 1 Press and hold down the 4 button The camera turns on and the clock appears on the screen The camera turns off automatically after approximately 10 seconds Pressing...

Page 190: ...ay controller 23 to select Auto Image Rotation in the W Setting menu 2 Use the four way controller 45 to select O On P Off O On Images are rotated automatically P Off Images are not rotated automatica...

Page 191: ...screen appears 3 Use the four way controller 23 to select Display Options 4 Press the four way controller 5 A pull down menu appears 5 Use the four way controller 23 to change the setting Off Display...

Page 192: ...way controller 23 to change the setting 6 Press the 4 button If you selected Not underwater Use the four way controller 45 to select a digit and use the four way controller 23 to select the value Ent...

Page 193: ...a standard for controlling USB devices with this driver By simply connecting a device that supports USB Mass Storage Class you can copy read and write files from a computer without installing a dedica...

Page 194: ...inks when the camera is connected to the computer correctly 4 Turn your camera on The power lamp stops blinking and remains lit when the camera is recognized by the computer Connecting the Camera and...

Page 195: ...ice connected The message appears 3 Disconnect the USB cable from the Windows PC and your camera 1 Drag NO NAME on the desktop to the trash If the SD Memory Card has a volume label drag the icon of th...

Page 196: ...ed Memory 512 MB 2 GB or higher recommended HDD volume 300 MB available hard disk space 1 GB or higher recommended Graphics Intel GMA X3100 NVIDIA GeForce MX440 ATI Radeon 9200 with 128 MB video memor...

Page 197: ...t O On for Eye Fi in the W Setting menu The images are transferred automatically For details on how to set up the camera refer to Setting the Eye Fi Communication p 181 One of the following icons will...

Page 198: ...Auto Power Off does not function while transferring images The camera may be turned off automatically to protect the internal components when the inside of the camera reaches a high temperature caused...

Page 199: ...mputer and your route can be displayed on their maps Corrects the camera clock using GPS information The camera corrects its clock automatically using the time data received from GPS satellites Displa...

Page 200: ...the first time after not positioning for a long while or after changing the battery The Geodetic system for this camera s GPS function uses the World Geodetic System 1984 WGS 84 Using the GPS or reco...

Page 201: ...TD declares that this SG761 GPS Module GYSFDMASA P2 is in compliance with the essential requirements and other relevant provisions of Directive 1999 5 EC For a full version of the Declaration of Confo...

Page 202: ...Use the four way controller 23 to select GPS On Off 4 Press the four way controller 5 A pull down menu appears 5 Use the four way controller 23 to select Off or On Off Does not receive GPS informatio...

Page 203: ...icon is displayed Only when is displayed on the capture mode screen GPS information will be recorded onto images However in the following situations GPS information obtained prior to the shooting may...

Page 204: ...information is displayed in GPS time the reference time scale of the GPS system This may be different from the time you have set on the camera Displaying the GPS Information Recorded on Captured Imag...

Page 205: ...four way controller 5 The GPS Logging screen appears 5 Use the four way controller 23 to select Record log and press the four way controller 5 The Record log screen appears 6 Use the four way controll...

Page 206: ...record a new log until the existing log is saved to the SD Memory Card as a log file p 205 or discarded p 206 Record log can be set only when GPS On Off is set to On When the battery level indicator i...

Page 207: ...ing screen appears 5 Use the four way controller 23 to select Save log data and press the 4 button A confirmation screen appears 6 Use the four way controller 23 to select Save and press the 4 button...

Page 208: ...controller 23 to select Discard log data and press the 4 button A confirmation screen appears 6 Use the four way controller 23 to select Discard 7 Press the 4 button The information saved in log files...

Page 209: ...button All the logs are deleted and the camera returns to capture mode Deleting Logs If you select Cancel you can continue shooting still pictures or movies although you cannot save a log file on the...

Page 210: ...of World Time is displayed 5 Use the four way controller 45 to switch between On and Off 6 Press the 4 button Returns to the GPS screen Correcting Time Automatically GPS Time Sync can be set only whe...

Page 211: ...tion again The electronic compass may not show the proper direction due to the passing of time or the change of the camera location We recommend periodically calibrating the camera Calibration can be...

Page 212: ...E e or b Function Shooting Mode b A b C a b K Zoom button Zoom operation 2 3 4 Flash Mode Auto a Flash Off b Flash On c Auto Red eye d Flash On Red eye Flash Off Flash On 2 shots Drive Mode 9 Standard...

Page 213: ...211 9 Appendix c R B c c Q e A S 9 3 37 37 37 4 5 6 39 39 39 39 39...

Page 214: ...28 Date Imprint 12 IQ Enhancer 7 Electronic Level Macro Light 21 Lens Adapter On 7 1 Movie SR is used for movies while Shake Reduction is used for still pictures 2 Flower cannot be detected when usin...

Page 215: ...available 21 Fixed to O On 22 Fixed to L Multi segment metering 23 Fixed to AUTO 24 The sensitivity is fixed at its minimum value 25 Fixed at 125 1600 26 Fixed at 125 6400 27 Fixed at 0 0 28 Fixed at...

Page 216: ...ter or other device and is not compatible with this camera Format the SD Memory Card in the camera p 167 Card is locked The SD Memory Card is write protected p 7 Compression error This message occurs...

Page 217: ...en Image Copy is selected from the Playback Mode Palette and the OK button is pressed Available built in memory is insufficient to copy the images Displayed when there is insufficient built in memory...

Page 218: ...too dark Adjust the brightness level in Brightness Level in the W Setting menu p 181 Power Saving function is on When the Power Saving function is on the display automatically darkens after a certain...

Page 219: ...ing and holding the shutter release button halfway and then move the camera to recompose The flash does not discharge The flash mode is set to a Flash Off Set to Auto or b Flash On p 83 The drive mode...

Page 220: ...aved even after reset N A A Rec Mode Menu Items Item Default Setting Shooting mode A Last Memory Setting Reset Setting Page Image Tone Bright Yes Yes p 88 Recorded Pixels 4608 x 2592 Yes Yes p 89 Qual...

Page 221: ...on Green Mode Yes Yes p 102 Sharpness G Normal Yes Yes p 105 Saturation G Normal Yes Yes p 105 Tone Adjustment G B W Yes Yes p 105 Contrast G Normal Yes Yes p 106 Date Imprint Off Yes Yes p 106 IQ Enh...

Page 222: ...e 00 00 Yes Yes World Time Select Time W Hometown Yes Yes p 172 Destination City According to initial setting Yes No Destination DST P Off Yes No Hometown City According to initial setting Yes No Home...

Page 223: ...log data Cancel p 206 GPS Time Sync Off Yes Yes p 208 Electronic Compass Calibration p 209 Pressure Sensor Display Options Off Yes Yes p 189 Camera Location Not underwater 0000 m Yes Yes p 189 Underw...

Page 224: ...rded Pixels Depending on the picture taken p 144 Quality Level Depending on the picture taken p 144 Cropping Depending on the picture taken p 145 Image Copy Built in memory SD Memory Card p 161 Protec...

Page 225: ...Mode 9 Standard Yes p 77 p 81 3 Shooting Mode b Auto Picture Yes Yes p 67 4 Flash Mode Auto Yes p 83 5 Focus Mode Standard Yes p 84 3 button Menu Display Still Picture Capture Mode A Rec Mode menu Mo...

Page 226: ...C Male PAL New York NTSC Delhi PAL Halifax NTSC Colombo PAL Central and South America Mexico City NTSC Kathmandu PAL Lima NTSC Dacca PAL Santiago NTSC East Asia Yangon NTSC Caracas NTSC Bangkok PAL Bu...

Page 227: ...in Burst Shooting mode Fixed at V 1280 x 960 in Report mode Fixed at f in Original Frame mode Movie 1920 x 1080 30 fps 1280 x 720 60 fps M 1280 x 720 30 fps Sensitivity AUTO Manual ISO 125 200 400 80...

Page 228: ...for a movie is 25 minutes Built in Memory 2 GB SD Memory Card C D E C D E 4608 x 3456 13 23 39 370 653 1078 3456 x 3456 15 31 47 435 853 1307 4608 x 2592 15 31 47 435 853 1307 6 3072 x 2304 23 44 71...

Page 229: ...Single frame 6 frame 12 frame Magnified view max 10x scrollable Folder Display Calendar Display Histogram Display Highlight Shadow Area Alert Select Delete Slideshow Resize Cropping Image Copy Image...

Page 230: ...4 sec Shutter Priority or Night Scene mode Built in Flash Modes Auto Flash Off Flash On Auto Red eye Flash On Red eye Flash Off Flash On 2 shots only when using Underwater mode Flash Range Wide angle...

Page 231: ...ranteed if the camera is exposed to impact such as being dropped or hit The camera is not guaranteed to be free of trouble or damages under every condition Dimensions Approx 125 W x 64 5 H x 32 D mm a...

Page 232: ...he manufacturer If there are no representatives of the manufacturer in your country send the camera to the manufacturer with postage prepaid In this case it will take a considerable length of time bef...

Page 233: ...ty card supplied with your product at the time of purchase or contact our distributor in your country for more information and to receive a copy of the warranty policy Regarding User Registration In o...

Page 234: ...l interference to radio communications However there is no guarantee that interference will not occur in a particular installation If this equipment does cause harmful interference to radio or televis...

Page 235: ...with the standards Records maintained continue to reflect the equipment being produced can be expected to be within the variation accepted due to quantity production and testing on the statistical ba...

Page 236: ...o inappropriate waste handling If a chemical symbol is added beneath the symbol shown above in accordance with the Battery Directive this indicates that a heavy metal Hg Mercury Cd Cadmium Pb Lead is...

Page 237: ...S Fireworks 69 K Food 69 Report 69 u Slideshow 132 s Image Rotation 134 k Small Face Filter 146 Ink Rubbing Filter 149 Collage 150 P Digital Filter 147 HDR Filter 149 E Original Frame 154 Movie Edit...

Page 238: ...209 Electronic Level 29 108 EV Compensation 95 Extract color filter 147 Eye Fi 181 195 F Face Detection 70 99 File Name 177 Filters 147 Fish eye filter 147 Flash Mode 83 Flash Off a Flash 83 Flash On...

Page 239: ...Level 90 Quick Zoom 183 R Rec Mode Menu 55 218 Recorded Pixels 89 115 Recording movies 112 Red eye Edit 153 Red eye reduction cd Flash 83 Regarding waterproof dustproof and shockproof design 8 Remote...

Page 240: ...ustment 105 Toy Camera filter 147 U Underwater Mode 110 Underwater Movie Mode 110 Underwater shooting 110 USB Connection 191 User Mode 73 V Video output format 179 224 W Waterproof 110 White Balance 9...

Page 241: ...Memo...

Page 242: ...Memo...

Page 243: ...Memo...

Page 244: ...tp www ricoh imaging co uk RICOH IMAGING AMERICAS CORPORATION 633 17th Street Suite 2600 Denver Colorado 80202 U S A http www us ricoh imaging com RICOH IMAGING CANADA INC 5520 Explorer Drive Suite 30...

Reviews: