Ishida Uni-7 & Uni-5 Touch Screen Scale and Printer Setup Manual
Rev 4, B0674R / B0664J, March 2014
26
Uni-7+5_Setup_Manual
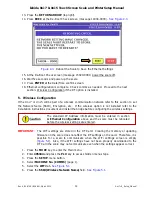
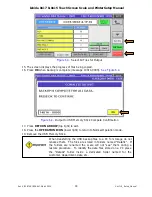
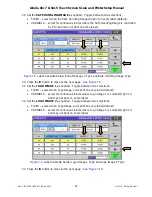
34. Set the
LOGO IMAGE 3
as needed. Toggle between two selections.
•
FIXED – select when Logo Image 3 will print on every label (default)
•
VARIABLE – select for continuous labels where Logo Image 3 is controlled by PLU
and may not print on some labels
35. Enter the
HEIGHT OF SAFE HANDLING IMAGE
as needed and press the Height of SHI
field. This is the height in millimeters that will be compressed when the Safe Handling
Image is not printed.
Figure 7.10
Label Cassette Setup: Logo Image 3 Type and Height of Safe Handling Image
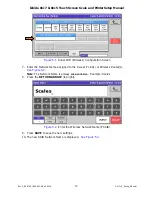
36. Press the
button to move to the next page.
See Figure 7.11
.
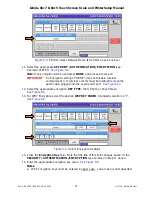
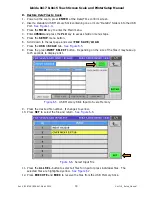
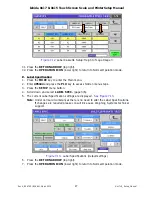
37. Enter the
HEIGHT OF LOGO IMAGE 1
as needed and press the Height of Image 1 field.
This is the height in millimeters that will be compressed when Logo Image 1 is not printed.
38. Enter the
HEIGHT OF LOGO IMAGE 2
as needed and press the Height of Image 2 field.
This is the height in millimeters that will be compressed when the Logo Image 2 is not
printed.
Figure 7.11
Label Cassette Setup: Height of Logo Image 1 Type and Height of Logo Image 2
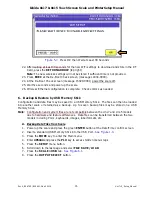
39. Press the
button to move to the next page.
See Figure 7.12
.
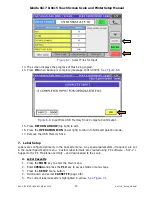
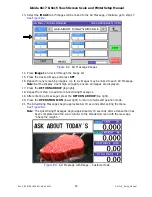
40. Enter the
HEIGHT OF LOGO IMAGE 3
as needed and press the Height of Image 3 field.
This is the height in millimeters that will be compressed when Logo Image 3 is not printed.

