Ishida Uni-7 & Uni-5 Touch Screen Scale and Printer Setup Manual
Rev 4, B0674R / B0664J, March 2014
23
Uni-7+5_Setup_Manual
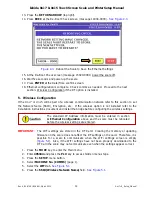
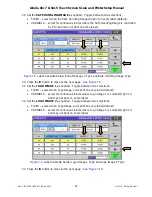
Figure 7.4.
Label Cassette Setup: Overflow Flag and Second Label Format No.
18. Press the
button to move to the next page.
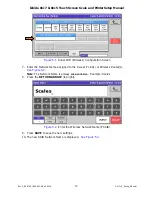
See Figure 7.5.
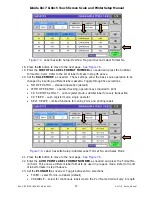
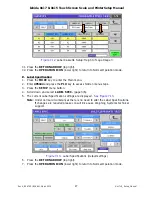
19. Enter the
SUBTOTAL
LABEL FORMAT NUMBER
as needed and press the Subtotal
Format No. field. Refer to the list of label formats in step #6 above.
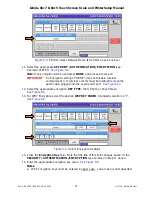
20. Set the
SALES MODE
as needed. These settings allow the basic scale operation to be
changed by inserting a different label cassette. Toggle through five selections.
•
NO OPERATOR – standard operation (default)
•
WITH OPERATOR – operator tracking, operator keys required to print
•
CR SUBTOTAL ONLY – cash register mode, subtotal label for every transaction
•
CR FIXED – cash register mode, single operator
•
SELF SERVE – limited functions for calling PLUs and printing labels
Figure 7.5.
Label Cassette Setup: Subtotal Label Format No. and Sales Mode
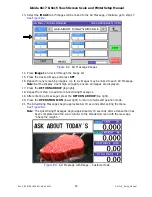
21. Press the
button to move to the next page.
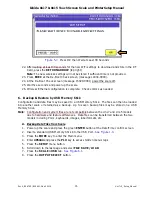
See Figure 7.6
.
22. Enter the
AUTO PRINT
LABEL FORMAT NUMBER
as needed and press the Format No.
(A) field. This allows a different label format to be used in pre-pack mode. Refer to the list
of label formats in step #6 above.
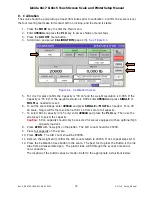
23. Set the
PLU NAME
as needed. Toggle between two selections.
•
FIXED – select for die-cut labels (default)
•
VARIABLE – select for continuous labels where the PLU Name field will vary in length


