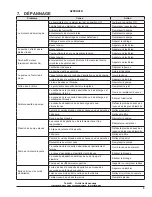
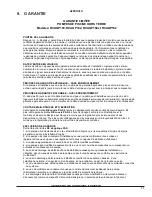
background image

8

Winterizing

A

CAUTION:

  The  pump  must  be  protected  when 

freezing temperatures are expected. Allowing the pump 

to freeze will cause severe damage. Such damage will 

not be covered under warranty.

There are two options when winterizing the pump.

Option 1

1.  Drain all the water from the pump, system equipment, 

and piping.

2.  Remove the drain plugs. Do not put plugs back on. 

Store the plugs in the empty strainer basket for winter.

3.  Keep the motor covered and dry.

Option 2

1.  Drain all the water from the pump, system equipment, 

and piping.

2.  Remove the pump and motor from the plumbing lines 

and store indoors in a warm and dry location.

NOTE:

  When  the  winter  season  is  over  the  pump 

will need to be primed prior to start. Refer to Start-Up 

instructions herein.

A

CAUTION:

 DO NOT run the pump dry. If the pump 

is  run  dry,  the  mechanical  seal  will  be  damaged  and 

the  pump  will  start  to  leak  at  the  seal.  If  this  occurs, 

the mechanical seal will need to be replaced. ALWAYS 

maintain the proper water level in the pool. Continued 

operation  with  low  water  level  could  cause  a  loss  of 

water pressure, resulting in damage to the pump casing, 

impeller, and mechanical seal. Such damage will not be 

covered under warranty.

6.  GENERAL MAINTENANCE

A

WARNING:

 To prevent damage to the pump and for 

proper operation of the system, clean the pump strainer 

and skimmer baskets regularly.

The only routine maintenance needed is inspection and 

cleaning  of  the  trap  basket  (pre-filter  basket).  Debris  or 

trash  that  collects  in  the  basket  will  restrict  water  flow 

through the pump. Follow the instructions below to clean 

the trap.
1.  Stop the pump, close the suction and discharge gate 

valves,  and  release  all  pressure  from  the  system 

before proceeding.

2.  Unscrew the trap lid (pre-filter lid) by turning counter-

clockwise.

3.  Remove  the  strainer  basket  and  clean  it.  Be  sure 

all holes in the basket are unclogged, then flush the 

basket  with  water  and  put  the  trap  (pre-filter)  back 

into position with the large opening facing the pipe 

connection port. If the basket is replaced backwards, 

the cover will not fit on the trap body.

4.  Clean and inspect the lid.
5.  Clean the O-ring and its groove on trap body (pre-

filter) and replace the lid. To help keep the lid from 

sticking, tighten by hand only.

6.  Prime pump (see priming instructions above).

APPROVED 

UNCONTROLLED DOCUMENT IF PRINTED 


Summary of Contents for Raypak RCAGP100

Page 1: ...ed and experienced in the installation and maintenance of this type of equipment and related system components Installation and service personnel are required by some states to be licensed Persons not...

Page 2: ...Up section Added three bullet points to Priming section Replaced Figure 3 with new illustration which contains the speed selector switch Item 11 Added Item 11 to Table C TABLE OF CONTENTS 1 WARNINGS 3...

Page 3: ...as well as disinfectant feed ratios AWARNING DO NOT increase pump size this will increase the flow rate through the system and exceed the maximum flow rate stated on the drain cover AWARNING Before in...

Page 4: ...o avoid dangerous or fatal electrical shock turn OFF power to the pump before working on electrical connections NOTE Always turn off all power to the pool pump before installing the cover or working o...

Page 5: ...system shall be constructed so that it shall not allow for separate or independent shutoff or isolation of each drain More than one pump can be connected to a single suction line as long as the requi...

Page 6: ...erious or fatal electrical shock hazard DO NOT ground to a gas supply pipe line AWARNING The system s centrifugal pump operates with electrical voltage and can generate both vacuum and pressure in the...

Page 7: ...ASE ALL PRESSURE from the pump and the piping system before proceeding NEVER tighten or loosen screws while the pump is operating Do not block pump suction AWARNING Do not block pump suction To do so...

Page 8: ...water pressure resulting in damage to the pump casing impeller and mechanical seal Such damage will not be covered under warranty 6 GENERAL MAINTENANCE AWARNING To prevent damage to the pump and for p...

Page 9: ...eal Low Pump Capacity Valve in suction or discharge line is partly closed Open or replace the valve Suction or discharge line is partly plugged Clear the obstruction Suction or discharge line is too s...

Page 10: ...OVER RCAGP 080337F 2 3 3 KIT O RING FOR LID RCAGP 080338F 4 KIT BASKET WITH HANDLE RCAGP 080339F 5 KIT 1 5 NPT UNION KIT RCAGP 080340F 6 7 7 KIT 1 5 UNION O RING RCAGP 080341F 8 KIT PUMP BASE RCAGP 08...

Page 11: ...tered with Raypak www raypak com warranty then the Applicable Warranty Period is one 1 year from the Effective Date for the PUMP and component parts LABOR AND SHIPPING COSTS This Limited Warranty does...

Page 12: ...TO MAKE ANY OTHER WARRANTIES ON RAYPAK S BEHALF ANY IMPLIED WARRANTIES INCLUDING MERCHANTABILITY OR FITNESS FOR A PARTICULAR PURPOSE SHALL NOT EXTEND BEYOND THE APPLICABLE WARRANTY PERIOD SPECIFIED IN...

Page 13: ...l entretien de ce type d quipement et de ses composantes connexes Dans certaines r gions les techniciens d entretien pour ce type d quipement doivent d tenir une licence Les personnes non qualifi es...

Page 14: ...on D marrage Ajout de trois puces la section Amor age Remplacement de la figure 3 par une nouvelle illustration qui contient le s lecteur de vitesse article 11 Ajout de l article 11 au tableau C TABLE...

Page 15: ...d ajout de produit d sinfectants AAVERTISSEMENT N augmentez PAS la capacit de la pompe cela augmentera le d bit travers le syst me et d passera le d bit maximal indiqu sur le couvercle du drain AAVERT...

Page 16: ...ique dangereux ou mortel coupez l alimentation de la pompe avant de toucher les connexions lectriques NOTE coupez toujours l alimentation de la pompe de piscine avant d installer le couvercle d aspira...

Page 17: ...x convergent dans une seule conduite d aspiration celle ci peut tre quip e d une vanne coupant l alimentation des deux drains la pompe Le syst me doit tre construit de fa on ce qu il ne soit pas possi...

Page 18: ...en courant alternatif Le fait de ne pas mettre le moteur la terre peut entra ner un risque de choc lectrique grave ou mortel NE PAS mettre la terre un tuyau d alimentation en gaz r la masse entra ne...

Page 19: ...ib rez tout l air du filtre et du syst me de tuyauterie voir les instructions relatives au filtre ci dessous Dans un syst me d aspiration inond source d eau sup rieure la pompe la pompe s amorce par e...

Page 20: ...re pour serrer le couvercle Mettez sous tension le disjoncteur de la maison Facultatif R glez l horloge de la piscine l heure correcte D marrez la pompe en basculant son interrupteur d alimentation su...

Page 21: ...uvrir ou remplacer la vanne La vanne dans la conduite d aspiration ou de d charge est partiellement bloqu e liminer l obstruction La conduite d aspiration ou de d charge est sous dimensionn e Refaire...

Page 22: ...COVER RCAGP 080337F 2 3 3 KIT O RING FOR LID RCAGP 080338F 4 KIT BASKET WITH HANDLE RCAGP 080339F 5 KIT 1 5 NPT UNION KIT RCAGP 080340F 6 7 7 KIT 1 5 UNION O RING RCAGP 080341F 8 KIT PUMP BASE RCAGP 0...

Page 23: ...rranty la p riode de garantie applicable est d un an compter de la date d entr e en vigueur pour la pompe et les composants CO TS DE MAIN D UVRE ET D EXP DITION Cette garantie limit e NE couvre PAS le...

Page 24: ...E RAYPAK AUCUNE GARANTIE IMPLICITE NOTAMMENT DE QUALIT MARCHANDE OU D APTITUDE R PONDRE UN USAGE PARTICULIER NE SAURAIT TRE INTERPR T E DANS UN SENS QUI D PASSE LES P RIODES DE GARANTIE APPLICABLES NO...

Reviews: