AS
Mxxxx Series User’s Manual
Asia Pacific | EMEA | Americas
134
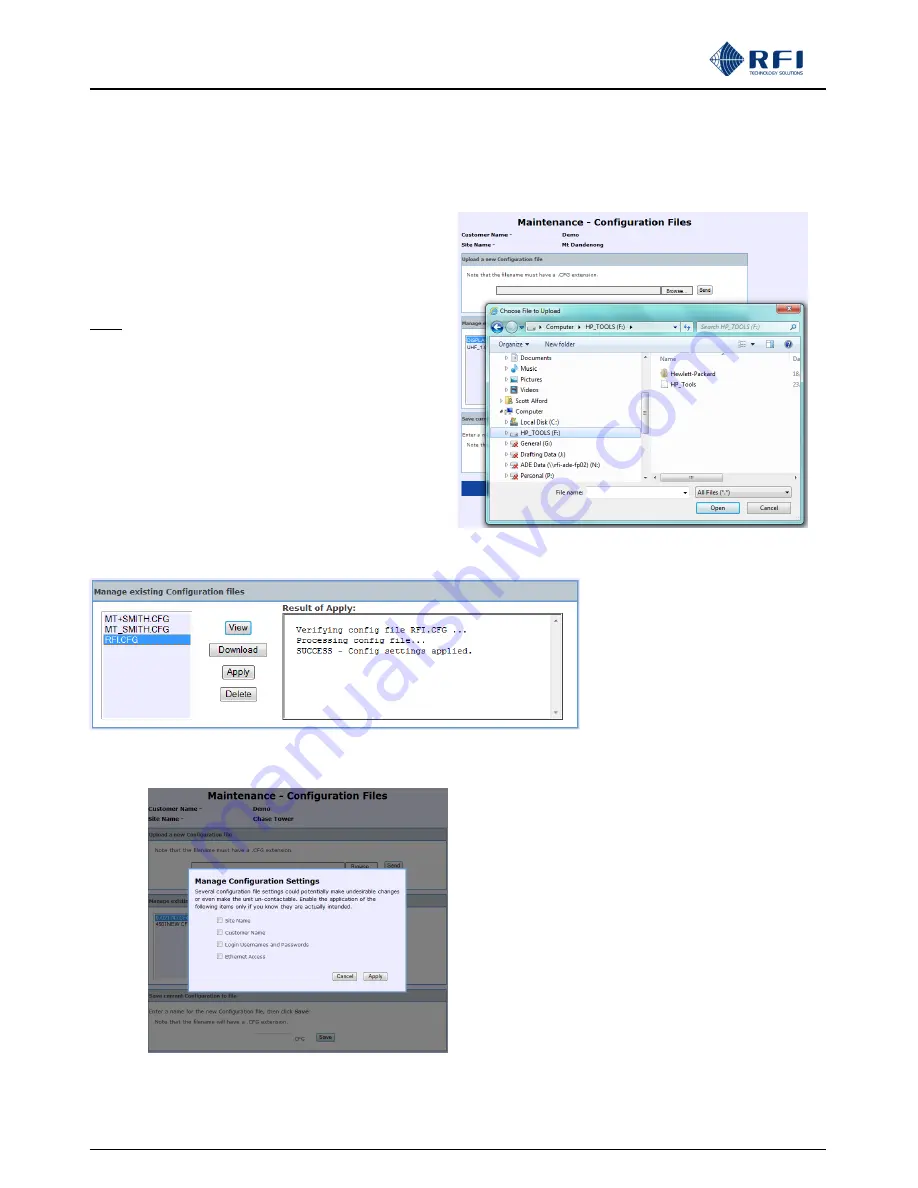
Upload a new Configuration file:
Click “Browse” to locate the desired ASM Configuration file
from a chosen drive/directory location. Once the desired
drive/directory/name has been selected from the popup box,
click “Send” to upload the nominated Configuration file to the
list of existing Configuration files.
Note:
This Configuration file must be highlighted in the
Configuration list and the “Apply” button clicked to
activate this uploaded Configuration in the ASM.
Manage existing Configuration files:
VIEW: To view the text contents of highlighted Configuration
in the web browser.
DOWNLOAD: To save the highlighted Configuration file to a
nominated computer drive/directory.
APPLY: Activates the highlighted Configuration in the ASM.
A progress and completion message will appear in a “Results of Apply” text box (refer above example).
When the
Apply
button is clicked, the screen
at left will appear. Select any of the site-
specific fields from the configuration file that
you do want to have applied to the ASM,
and then click
Apply
.
Follow the prompts and the selected
configuration file, with the selected site-
specific data fields’ contents, will be applied
into the ASM. In this manner, one common
configuration file can be applied to multiple
ASMs, with the site-specific data fields not
used from the configuration file contents, but
then edited individually.
This new feature can save significant
programming configuration time across an
ASM fleet.


