Motion
Scope
â
PCI High Speed Video System
4 RECORDING ON THE
MOTION
SCOPE PCI SYSTEM
This Section describes how to load the
Motion
Scope program and open the camera window. You
can then enter the required record parameters and record a video sequence in the image
memory.
4.1 Load the Motion
Scope
Program and Open the Camera Window
The program was installed in Section 2 of this manual. To load, select Start/Programs and click
on
Motion
Scope. The monitor shows the Initial Menu.
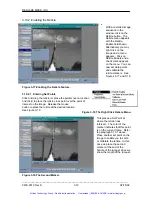
To view live pictures from the camera, click on Open Camera and Select Camera 1. This opens
up a window showing the live view from Camera 1. Go to paragraph 4.2.
4.2 Setting up the Camera to Record
4.2.1 Setting the Camera Parameters
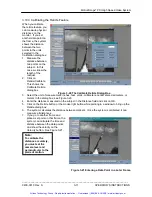
Click on the Setup… button. This brings up the Properties dialog box, General tab.
1. Enter a name for Camera 1. This name will appear on the title bar of the Camera 1 window.
2. Check Save Camera Size and Position. If checked, this saves any changes you make to the
camera window and its position on the screen. If not checked, the system loads default
values each time the camera window is opened.
3. Click
OK.
4.2.2 Set the Record Values.
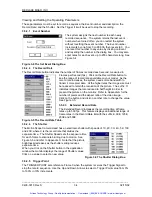
Click on the following buttons at the left of the screen.
4.2.2.1 Event
.
This button displays the current event number.
1. Click on Event/Set to enter a new event number and an event description. The event counter
automatically increments by one each time you record an event.
2. Click on Event. Enter notes up to 255 characters about the event.
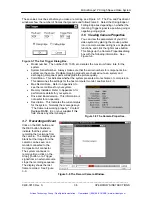
4.2.2.2 Record Rate.
The button shows the current rate set.
1. The default rate is 60 frames per second.
2. Click on this button to set a new record rate. The button displays the record rates available.
Extended record rates have an E suffix.
3. The 8000 fps record rates show either a normal aspect ratio image, (8000) or the Special
wide aspect ratio image (8000S).
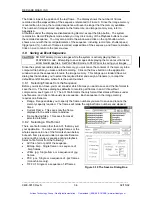
4.2.2.3 Shutter.
This shows the current Shutter Speed.
1. The default rate set is 1X (1/60 seconds).
2. Click on Shutter to set a new speed, refer to paragraph 1.1.1 and 2.8.3 for information on the
Strobe feature.
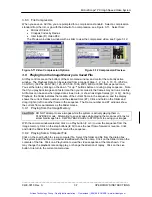
4.2.2.4 Trigger.
This button shows the current Trigger setting.
1. The default Trigger setting is 0%. This puts the Reference Frame 0 as the first frame in the
Image Memory, and the system continues to record to the end of the buffer. The record
sequence shows the images following the event that caused the Trigger to the end of the
image memory.
2. To see the images before the event, set the Trigger to 100%. To see images before and
after the event, set the Trigger to 10% to 90%, depending on the number of before and after
pictures you want. The setting indicates the number of frames preceding the event.
3. Check for a rising or falling Trigger Signal.
_____________________________________________________________________________
9400-0010 Rev. S
4-1
OPERATOR'S INSTRUCTIONS
Artisan Technology Group - Quality Instrumentation ... Guaranteed | (888) 88-SOURCE | www.artisantg.com


