Fig 1
Fig 5
Fig 6
Fig 7
Fig 2
Fig 3
Fig 4
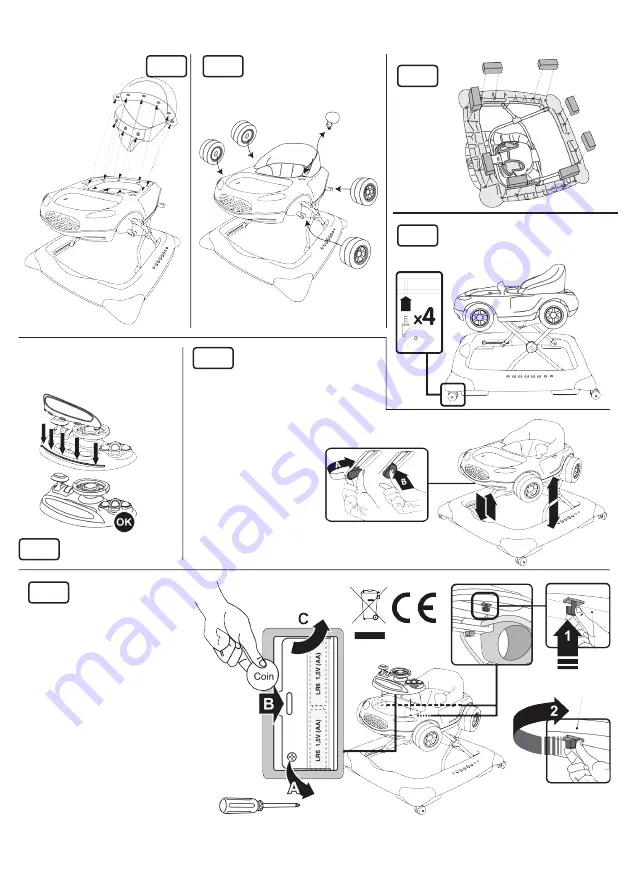
Assembly instructions
Line up the 6 fixings on the
rear of the seat and push
downwards in to the
holes until they click in
place. The fixings on
the front of the seat
need to be pushed
inwards and then
downwards to
Attach the car wheels and the mirror.
Attach the 8
friction blocks
to the base.
Attach the wheels to the base in each
corner by pushing them in to the holes.
Slot the windshield in to the recess
at the front of the toy tray and push
down until it clicks in place.
To open and close the walker, lift the
top section upwards until it locks in
place. NOTE. You may find it easier to
place your knees and the bottom frame
and then lift the top section.
Turn the locking mechanism
button 90 degrees
A
and
press it in
B
. Keep it
pressed in and raise or
lower the walker to the
required position
C
.
To insert the batteries, remove the
screw, slide the cover back using a
screwdriver or coin and then flip the
cover up. Place the toy tray in to the
recess on the top tray, then from
underneath push the fixings upwards
and turn it 90 degrees to lock it in
place.
lock them in place.
Gently pull the seat
after assembly to ensure it is secure.
Windshield
C C


